How to Create a Light Leak Effect In Adobe Photoshop (With Actions)
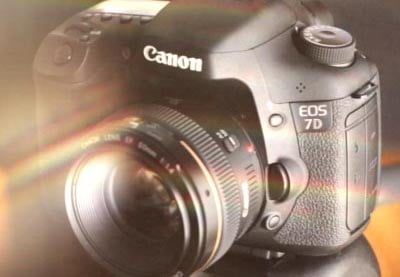
Leaking light into your images might sound like something bad, or a technical mistake, but it can actually really give your images style and impact.
When used properly, light leaks add a new dimension to photographs. Done wrong, however, and you could end up with your main subject obscured by a big blob of light! For this reason, many now chose to insert lighting effect artificially in post-production rather than chancing it in-camera.
Here, we look at five actions from Envato Market to help you add light leaks to your images in Adobe Photoshop, and tutorials to help you make your own.
6 Lomo Actions
With 6 options to choose from, plus an additional vignette option, these actions will add a retro glow to any photograph.


Soft Lomo Action
Lomo… but soft! Get a dreamy, soft light with warm red tones when you download this action.


Slomo - Smart Lomo Actions for Photoshop
This download includes a set of five lomo actions designed to non-destructively add great light-leak effects to your images.


Lomo Leaks Photoshop Action
Lomo Leaks add a gorgeous pop of saturated light to your pictures. Choose from different styles and colours to get your perfect look. We'll take a closer look at this one shortly.


Lomo Image Effect Actions
With two options, Lomo Image Effect Actions lets you add a retro feel and colouring to your images. Adjust the effect intensity to give your images a definitive style.


Hot to Use Light Leak Actions
Let's take a look at Lomo Leaks Photoshop Action, to see how it runs and what exactly it does to your images.


Once you've installed your action, hit play and a box will appear asking you to make a selection. Go to the Light Leaks folder that came with the action download and choose which light leak you’d like to try. This is Light Leak 1:


After running the action, you'll see it’s produced a set of layers.


There’s a Colour Fill layer which adds a matte cast to your image. The Black and White layer puts a little more contrast and punchiness back into your shadows and the darker areas of your image. Layer 1 is a duplicate of the background image, with the Blending Mode set to Screen, which lightens it. You can mask out some of these changes if they don’t look right with your image.
Here's another example of how light leaks can brighten up a shot. This is the original image:


And here it is after adding a light leak:


DIY Post-Production Light Flares
Light flares, lens flares, and color effects are fun and easy to do in Photoshop and Lightroom. Here are a few free tutorials to get you started:
 Quick Tip: Create Light Leaks and Lomo Effects Using Actions in Photoshop
 Mike Moloney07 Sep 2012

 15 Free Photoshop Light Leak Actions and Overlays

 Andrew Childress23 Feb 2024

 How to Make a Light Leak Preset in Lightroom

 Andrew Childress30 Jul 2020

 How to Shoot Your Own Lens Flares

 Charles Yeager

 Lens Flare Trends! What Is Lens Flare and How to Add It?

 Abbey Esparza19 Apr 2023


