
Introduction
Adobe Lightroom is notorious for being a powerful but slow application for post-processing your images. Photographers are always looking for ways to make their post-production more efficient, and the "Loading..." icon is the bane of any Lightroom user's existence, especially with large files. Here are some quick tips to reduce the time spent on waiting for Lightroom to catch up to you when you're ready to work.
1. Boost Your System


Lightroom is a resource-intensive application. You'll want to make sure you have plenty of speed and power to spare while using it. So merely meeting the minimum system requirements is a sure-fire way to get major slowdowns. You'll want to give yourself the best chance of a fast, smooth workflow by providing plenty of speed and power for Lightroom to use.
RAM, GPU, & CPU
You'll want your system to have a fast CPU, powerful GPU and plenty of RAM to spare. The cheapest of these upgrades is the RAM. For Lightroom I suggest at least 8GB of RAM, but maxing out your system's RAM doesn't hurt either, especially if you're running multiple applications. Lightroom also leverages your GPU a lot for rendering your images and adjustments. So have one with plenty of horsepower to spare.
Disk Drives & Connections
Another common data bottleneck is your system's disk drive and your data connections. You'll want to run Lightroom from a Solid-State Drive (SSD) rather than a conventional Hard-Disk Drive (HDD). SSDs are significantly faster than HDDs at everything.
Also, whenever possible, run your image files from an SSD too. So not only will your application run faster, but the writing of adjustments to your files and Catalog will be faster as well. Do these things through a fast connection like USB 3.0 or Thunderbolt, and your workflow will see significant improvements.
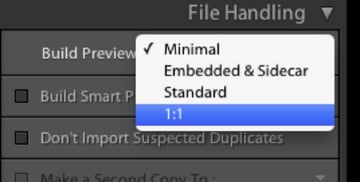
2. Build 1:1 Previews on Import
Whenever you zoom in on your image, make an adjustment, or work on dual monitors, Lightroom has to render the previews on your screen. This can eat up a lot of time when you're trying to work on your files.
Get rid of this lag by having Lightroom build those 1:1 previews as your photos import. Yes, it will add time to this portion of your workflow, but when you're ready to make your adjustments, Lightroom is ready for you.

3. Use Small DNGs as Proxy Files
This technique is similar to the Smart Preview based workflow Andrew outlined last week.
You can use the Import option Copy as DNG which will create DNG copies of your RAW files according to your Lightroom preferences in the File Handling tab.
Think about this: Your monitor cannot display, at once, all the pixels your camera produces at 1:1. This is especially true when Lightroom's interface is already taking up screen real estate. So why work with files so huge?
Although the Copy as DNG option exists, I prefer to use the free Adobe Camera RAW & DNG Converter to set up my files and do a single import rather than two.
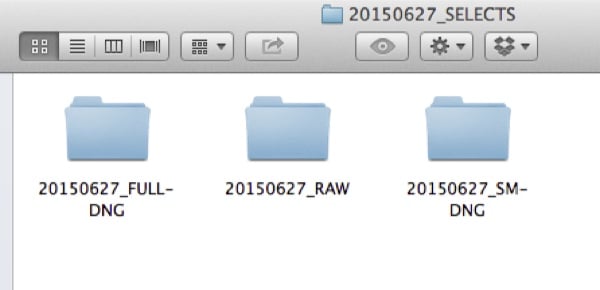
Using Adobe Camera RAW & DNG Converter, convert your RAW files into two versions, stored in their respective folders: small DNGs and full DNGs. The filenames of your DNGs must be exactly the same for both versions. Import the folder containing the smaller DNG files into Lightroom.
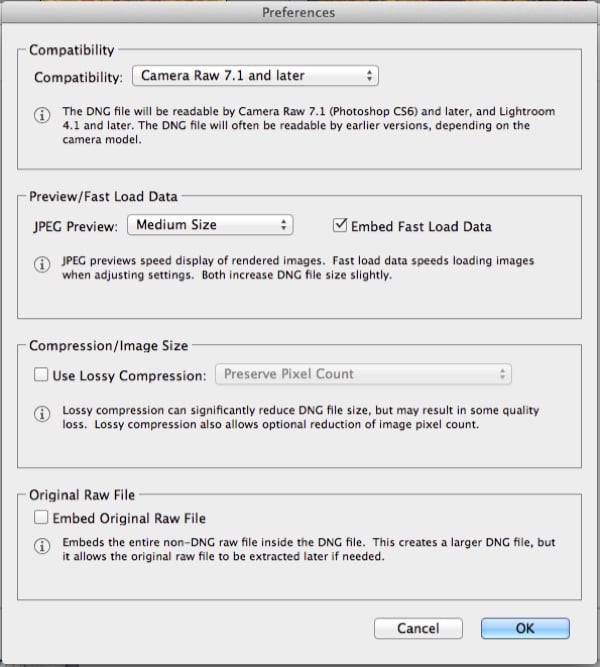
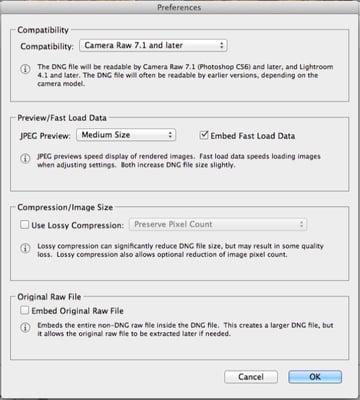
You'll notice that your importing is faster, previews render faster, and your adjustments update faster too. This is because the DNG is physically smaller than your original RAW file, so Lightroom has to process less data. An added benefit is that the DNG compression of your image quality is negligible.
Once you're done making your adjustments, you can delete the folder containing the small DNGs using Finder (Mac) or Explorer (Windows). Don't delete from within Lightroom! This will break the link between Lightroom and your files. You can then relink Lightroom to your "missing" files by pointing it to the folder containing the full-resolution DNGs.


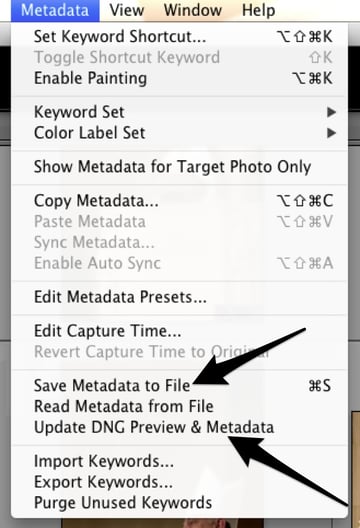
Click Metadata > Save Metadata to File or Metadata > Update DNG Preview & Metadata, and voila! All your Lightroom adjustments will accurately update to the larger files.

Conclusion
Using these tips independently will help you reduce that dreaded "Loading..." notification that Lightroom users are very familiar with. If you use these tips together, you'll see an even greater improvement in Lightroom's performance and will likely not see the "Loading..." icon at all. Overall, you'll have a better Lightroom experience because you'll be able to enjoy its power and versatility without having to wait.
 By
By


