
You’ve recorded an amazing live video. You’re editing it in CapCut, and you’re ready to go viral—but there’s a big problem. The footage is shaky, jerky, and unstable. You can't re-record the clip, so what can you do?


CapCut’s powerful editing suite offers a ready-made fix. With the versatile Stabilize tool, you can instantly correct unstable video clips. Thanks to the slider tools, it’s an effortless and fast process. Shaky videos can be stabilized in seconds. Let's learn how.
Why use CapCut’s stabilizing features in a video edit?
CapCut's video stabilizing features are simple to access and easy to use. But how can they enhance your own video project? The benefits are clear, and they are many.


Imagine this:
- Stabilizing videos dramatically boosts their quality. With CapCut, you’re sharing videos on social media. That means you can’t afford to post low-quality or unstable clips. By using CapCut’s stabilizing tools, you can ensure that your work always looks its best.
- You can remove defects captured in recording. Let’s be real: it is very difficult to capture perfect video footage in the field. All too often, you’ll find shakiness or other defects long after you’ve recorded. With CapCut’s stabilization tool, you can correct these issues in post-production. It makes it easier to salvage damaged footage and make it look great for your audience.
- Your videos will look more professional. In studio videos, even the best videos are stabilized after the fact. It’s an edit that boosts the quality of any clip, even if it didn’t start out shaky. Incorporate this easy change into your workflow to make your videos seem more cinematic and professional.
- CapCut is quick and easy to use. CapCut is a mobile app, available for both iPhone and Android. Desktop versions are available too, if you like to edit videos on your Mac or Windows PC. No matter your chosen platform, video stabilization is easy to do. With an intuitive interface, you need not be an expert video editor.
The lesson is clear: don’t skip stabilizing CapCut videos! Let’s quickly walk through exactly how to do it, step by step.
How to quickly stabilize videos in CapCut step by step
As we walk through our tutorial steps, you’ll see stock video footage in use. Download the clip from Envato to follow along.
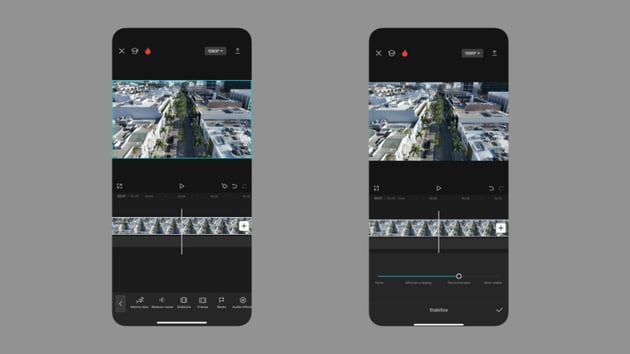
1. Find and launch CapCut’s Stabilize panel
With a CapCut video open, you’re ready to stabilize your footage. In the upper center, you’ll see the video preview panel. Here, you’ll see your clips previewed live in real time. When you make edits, those changes will instantly preview.
Below the preview is the Timeline. On the Timeline, you’re able to change up the timing, duration, and sequence of your CapCut video clips. And at the very bottom of your screen, you’ll see the toolbar.


CapCut’s toolbar is the row of menu buttons at the base of your display. From left to right, you can see Edit, Audio, Text, Effects, and more. Tap Edit.
When you choose Edit, the toolbar options will show CapCut’s editing tools. Scroll to the right with your finger and find Stabilize. Select this menu to remove unstable scenes from your video clips.
2. Apply and manage the Stabilize effect for max impact and minimal change
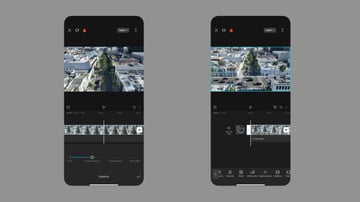
When you open the Stabilize menu in CapCut, the toolbar becomes a slider. With this slider, you can dial in exactly how you want the stabilize effect to handle your video footage. By default, the setting is on the far left of the slider. This simply means that no changes are being made.


Look to the right on the CapCut stabilization slider, and you’ll see three categories: Minimal Cropping, Recommended, and Most Stable. To understand the first, it helps to understand how cropping works. Essentially, CapCut stabilizes videos by cropping frames.
Think about shake in videos: most of the issues lie on the outsides of the frame. Crop them out, and clips become more stable. By selecting Minimal Cropping, your video will look more like it does now, but not all shake will be removed.
Recommended is a smart tool that's tailored to your video. It’s the best choice for most cases. Most Stable applies maximum stabilization, but it can crop and alter your footage dramatically in the process. Try out different settings by moving the slider to decide what works best for your clips.
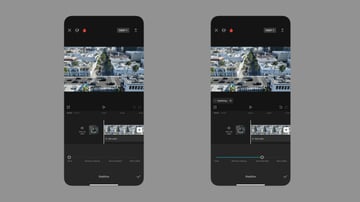
3. Review the results and share with the world
Once your CapCut video is stabilized, you’ll be back on the main Edit view. Play your video through again from start to finish. As you can tell, unstable scenes are mitigated with the powerful Stabilize tools.


Ready to export and share? Tap the Share button in the upper-right corner of your CapCut screen. In moments, you’ll have a saved copy of your corrected video. But if you’re sharing on social media, you’re all set right inside CapCut. With the touch of a button, you can post directly to TikTok, Instagram, Facebook, and more.
Learn more CapCut tips and tricks for amazing edits
Tools like Stabilize in CapCut dramatically enhance any video that you edit. But CapCut doesn’t stop with these corrective edits. It’s a powerful and versatile app with countless features! Are you ready to boost your skills in moments? Here at Envato Tuts+, we’ve got your back.
Check out these trending CapCut tutorials to enhance your CapCut skills in minutes:


 How to quickly apply blur effects to videos in CapCut


 CapCut: How to Quickly Use Green Screen (Chroma Key)


 How to Quickly Use CapCut for Video Editing (Tutorial, 2024)


 How to Quickly Remove a CapCut Watermark


 How safe is it to use CapCut? Is CapCut safe for kids?
Stabilize videos on CapCut today
In this tutorial, you learned how to quickly stabilize videos on CapCut. This simple edit can make all the difference. Unstable or shaky videos can be corrected instantly! Studio pros often rely on edits like this, and so should you.
Test out these features today with your shaky, unstable footage. You might be surprised by just how much you can recover.
 By
By


