

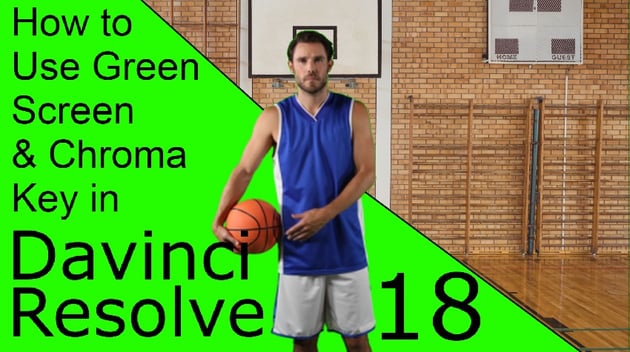

Mastering Green Screen & Chroma Key Techniques in DaVinci Resolve
Ever found yourself captivated by the magic of the movies, where characters can be whisked away to enchanted forests or dropped into the pulsating heart of a high-speed car chase? The secret behind these cinematic marvels often lies in the powerful technique known as chroma keying, or what many refer to as green screening. In this comprehensive guide, we'll dive deeper into the world of green screen and chroma keying within the realms of DaVinci Resolve, a premier video editing software.


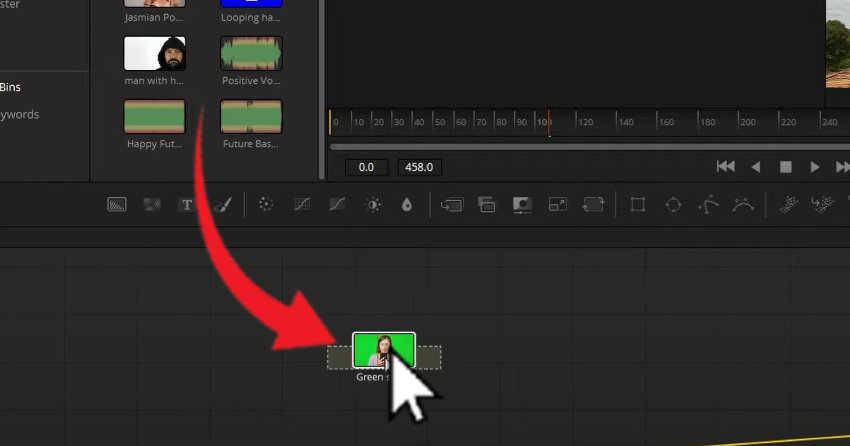
DaVinci Resolve screenshot with green screen image
From the breathtaking visuals of blockbuster movies to the immersive backgrounds of your favorite YouTube channels, green screen and chroma key techniques have revolutionized the way we tell stories. They provide an infinite canvas where creativity knows no bounds. And the best part? You don't need a Hollywood-sized budget to leverage these techniques. All you need is knowledge, practice, and the right tools at your disposal. That's where DaVinci Resolve comes in.
DaVinci Resolve, a leading name in the industry, empowers users with the tools they need to bring their vision to life. With its robust features and user-friendly interface, DaVinci Resolve makes it possible even for beginners to master the art of green screen and chroma keying. Whether you're an aspiring filmmaker looking to create your first short film or a seasoned professional aiming to enhance your production value, understanding how to green screen in DaVinci Resolve is a skill that will take your work to new heights.
But what if you're new to this world and the term 'chroma key' sounds like something from a sci-fi movie? Fear not! This guide is designed to take you from novice to pro, breaking down complex concepts into simple, digestible nuggets of information. We'll explore what green screening and chroma keying are, how they're used in film and video production, and most importantly, how you can master these techniques in DaVinci Resolve.
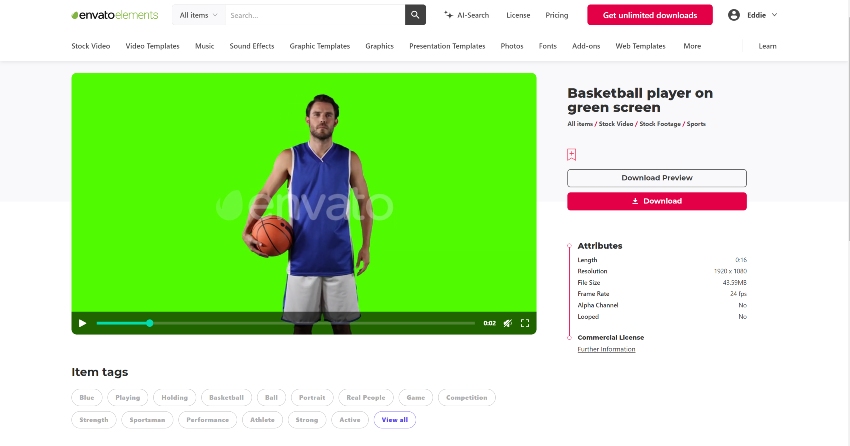
And if you're looking for professional-grade digital content to bring your visions to life, look no further than Envato Elements. With millions of high-quality resources at your fingertips, it's your one-stop shop for all your creative needs. From stunning green screen footage to intricate motion graphics, Envato Elements has got you covered.


Envato Elements website thumbnail
Join us as we embark on this journey of discovery, where we'll unlock the secrets of green screen and chroma key techniques in DaVinci Resolve. By the end of this guide, you'll have a thorough understanding of how to green screen in DaVinci Resolve. Ready to create your cinematic masterpiece?
- Unraveling the Magic: Understanding Green Screen and Chroma Keying
- Harnessing the Power of Chroma Keying in DaVinci Resolve
- Novice Users: Remove Green Screen in DaVinci Resolve | Quick & Easy!
- Experienced Users: Chroma Keying in the Color Page: A Step-by-Step Guide
- Advanced Users: Chroma Keying in the Fusion Page Manually: A Detailed Walkthrough
- Advanced Users: Chroma Keying in the Fusion Page on Semi-Auto.
- Advanced Users: Chroma Keying in the Fusion Page on Full-Auto.
- Switching Backgrounds: A Piece of Cake
- Keying Out Other Colors: Not Just Green
- Wrapping Up
Remember, mastering chroma keying in DaVinci Resolve isn't about learning a few quick tricks. It's about understanding the principles, practicing the techniques, and letting your creativity shine. So, let's get started!
Unraveling the Magic: Understanding Green Screen and Chroma Keying
Before we plunge into the practicalities, let's untangle the enigma that is green screen and chroma keying. These unheralded heroes of video production have been subtly weaving their magic, unfurling realms of possibilities for filmmakers. But what exactly are they?
At its core, green screen technology and chroma keying are special effects techniques that replace a specific color (typically green due to its infrequency in natural human skin tones) in a video with a different background image or video. This might seem straightforward, but the science behind it is quite fascinating.
The reason the color green is often used is due to its contrast with human skin tones and its sensitivity to digital cameras, making it easier to isolate in post-production. This is the wizardry that allows your local weather reporter to appear as if they're standing in front of a swirling storm on a dynamic weather map. It's also the trick up the sleeve of Hollywood directors, enabling actors to battle menacing aliens in otherworldly landscapes while actually performing in front of a simple green cloth.
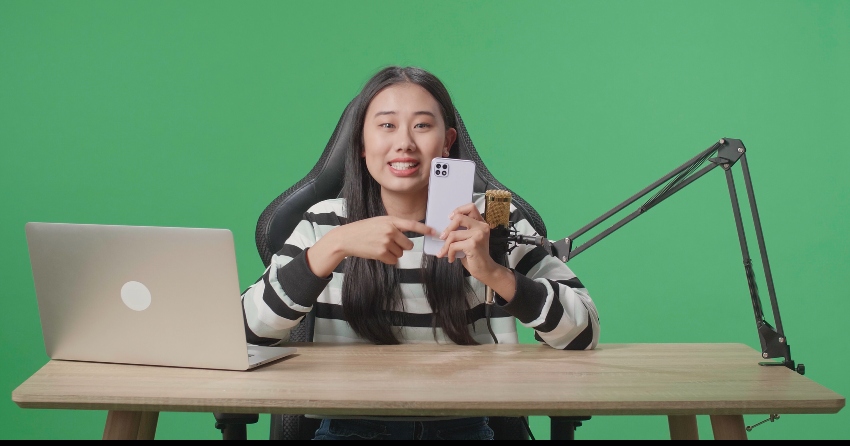


Person holding a phone in front of a green screen.
But green screen and chroma keying aren't exclusive to big-budget studios or TV stations. With tools like DaVinci Resolve, you too can harness the power of green screen and chroma keying right from your home or office. Whether you're creating a vlog, an indie film, or a music video, understanding how to use green screen and chroma key in DaVinci Resolve can elevate your project, transporting your audience into a world limited only by your imagination.
So, are you ready to unravel the magic of green screen and chroma keying in DaVinci Resolve? Let's embark on this journey together, exploring the possibilities, understanding the techniques, and ultimately learning how to green screen in DaVinci Resolve. By the end of this guide, you'll not only comprehend the science behind the magic but also be equipped with the skills to create your very own cinematic marvels.
Harnessing the Power of Chroma Keying in DaVinci Resolve
DaVinci Resolve, a world-renowned tool for video editing and color grading, offers two powerful methods for chroma keying: the color page and the fusion page. Each method has its unique strengths, and the choice between the two depends on your specific needs.

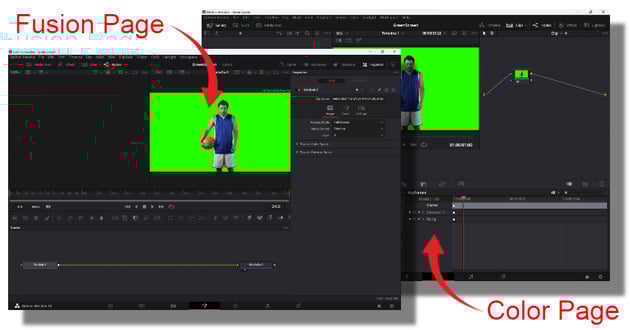

Color page and Fusion page
The color page in DaVinci Resolve is where the magic of color grading happens, but it's also a potent ally when it comes to chroma keying. This feature-rich page allows you to isolate the green screen (or any color) from your footage with precision, giving you control over edge detail and spill suppression. It's quick, efficient, and perfect for simple green screen work.
On the other hand, the fusion page is a full-fledged compositing tool that gives you more advanced options for chroma keying. This includes fine-tuning the keying process, controlling the transparency levels, and even integrating 3D elements into your footage. While this method requires a steeper learning curve, it's well worth the effort if you're aiming for high-quality chroma keying in complex scenes.
Deciding which method to use in DaVinci Resolve largely depends on the complexity of your project and your comfort level with the software. If you're just starting out with green screen work or working on a straightforward project, the color page method is likely to be sufficient. But if you're dealing with intricate details, multiple layers, or 3D effects, the fusion page will be your go-to tool.
And don't worry if you're feeling a bit overwhelmed. The beauty of DaVinci Resolve is its flexibility and user-friendly interface. With a bit of practice and patience, you'll soon be navigating these tools with ease, creating stunning visuals that captivate your audience.
Remember, creating compelling green screen effects isn't just about mastering the tools in DaVinci Resolve. It also involves using high-quality green screen footage and digital assets. That's where Envato Elements comes into play. With millions of professional-grade digital content at your disposal, you can elevate your chroma keying projects to new heights.
In the following sections, we'll dive deeper into the step-by-step process of chroma keying in both the color page and fusion page of DaVinci Resolve. Whether you're a novice filmmaker or a seasoned pro, these guides will help you unravel the magic of green screen and chroma keying in DaVinci Resolve, empowering you to create your cinematic marvels.
Novice Users: Remove Green Screen in DaVinci Resolve | Quick & Easy!
In the past, removing greenscreens used to be a challenging task. However, with the intuitive nature of DaVinci Resolve, we now have efficient methods to achieve this with ease. For those seeking more advanced techniques or not achieving desired results, we provide additional options after this section.

Step 1: Gathering Your Assets
Before we jump in, let's prepare our tools. Here's what you'll need:
- A video filmed against a green screen, where the main action takes place.
- An eye-catching background video to replace the green backdrop.
Pro Tip: If you're wondering where to find these assets, check out Envato Elements. It's an amazing platform overflowing with creative resources, perfect for projects like ours!


Step 2: Preparing the Scene in DaVinci Resolve
Let's kick things off:
- Launch DaVinci Resolve.
- Import both your green screen footage and the background video into the media pool. Consider this as setting the stage for our editing wizardry!

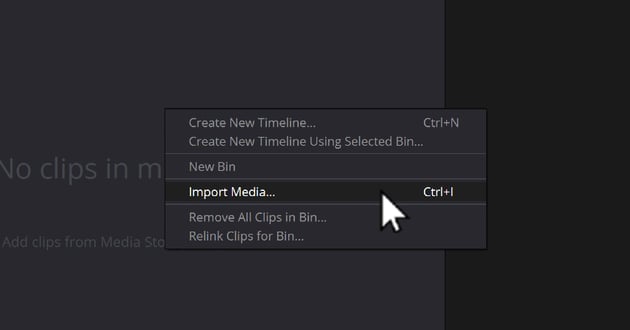
Import media menu
Step 3: The Chroma Keying Dance
Now, onto the exciting part:
- Place your green screen footage onto the timeline.
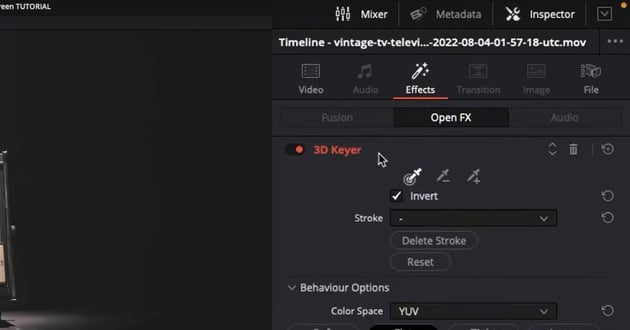
- In the Effects Library, locate the useful tool called "3D Keyer". You can find it under Open FX

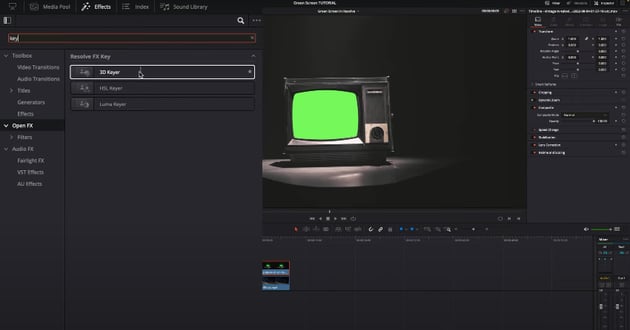

Accessing 3D Keyer menu
- Drag and drop this effect onto your green screen footage.


- Move over to the the Inspector panel on the top right. Look for the settings for the 3D Keyer effect.


Accessing the 3d Keyer Menu via Inspector
- Before making any adjustments, make sure you are in the OpenFX Overlay mode in the viewer. This mode is crucial, as it allows you to unlock a range of powerful features and functionalities.


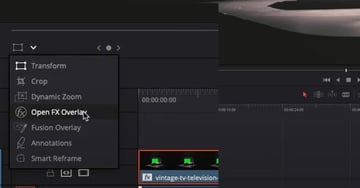
Access FX Overlay menu
Step 4: Making the Green Disappear
With a few clicks:
- Use the eyedropper tool in the 3D Keyer settings. Click on the green screen in your footage. Voila! Most of the green should vanish.


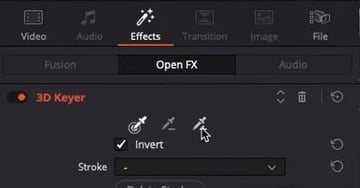
Click on Picker Plus option
- Notice some stubborn green shadows? No worries! The Despill option is your best friend here. Slide it around until all the green is a distant memory.
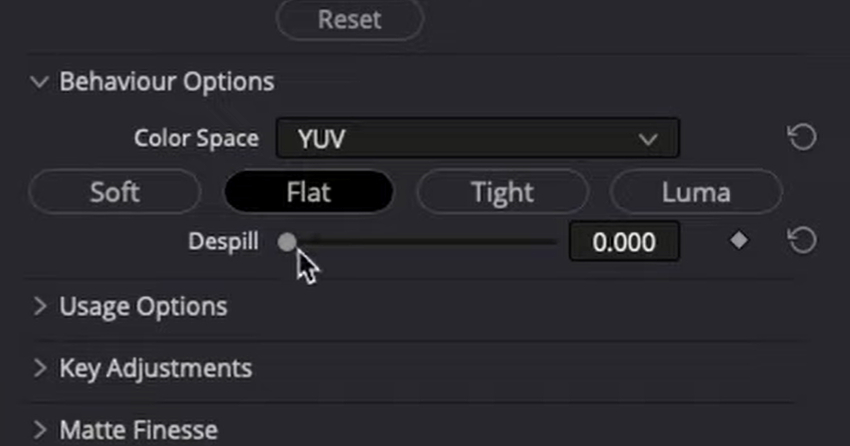

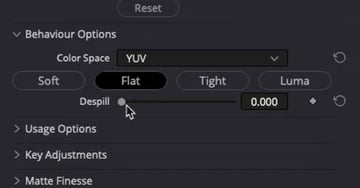
Despill Slider being adjusted
Step 5: Bringing in the New View
Here's where your background footage comes into play:
- Place it on the timeline layer right below your main footage.
- Tweak its size, position, and scale. Your goal is to make it fit snugly where the green screen once was.
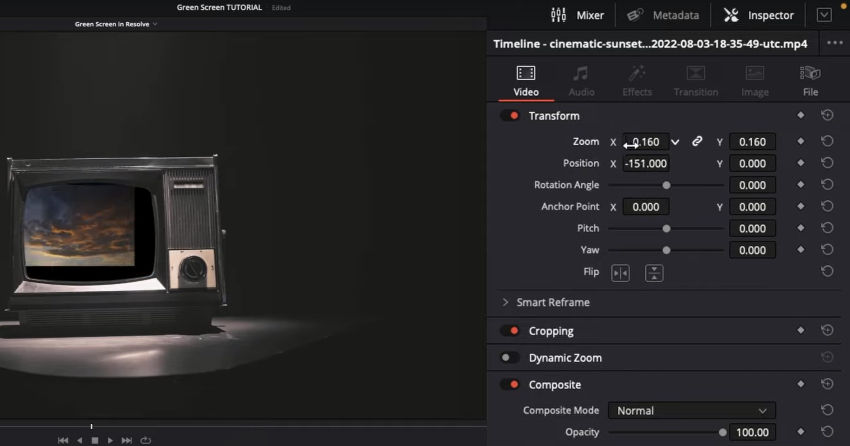
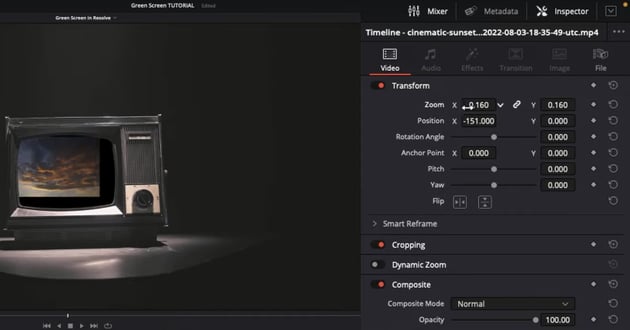
Screenshot showing the background footage adjustment.
Step 6: Example of using effects: Adding Some Vintage Vibes
To demonstrate how you can use effects, let's go for that old-school charm:
- Search for the "Analog Damage" effect in the Effects Library.


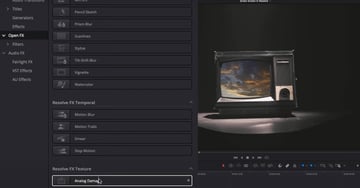
Analog Damage Menu
- Drag it onto your background footage.
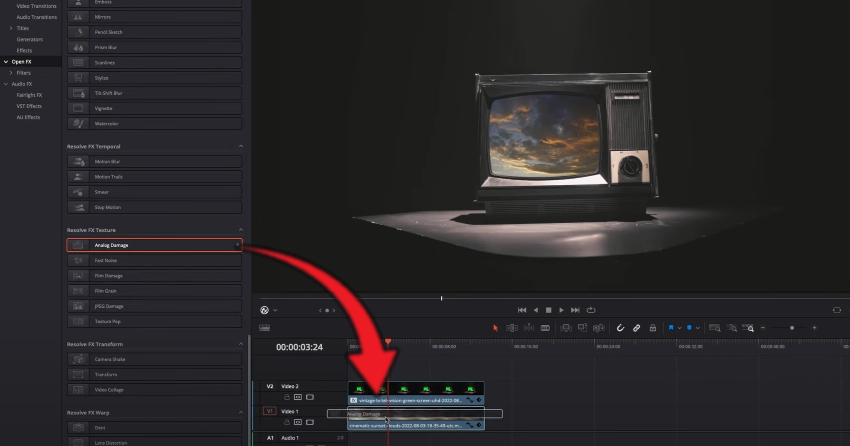
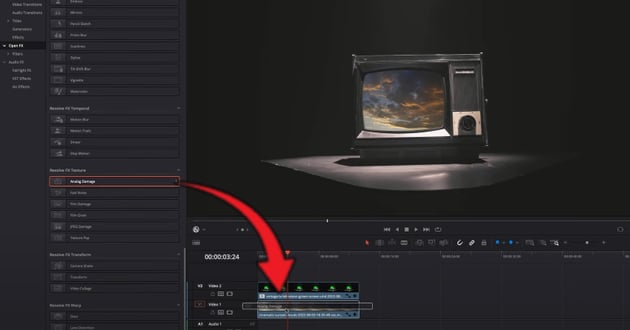
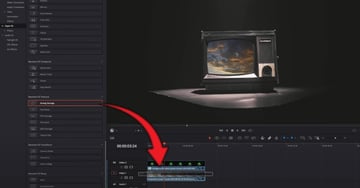
Drag analog Damage onto timeline
- Play with its settings. A great option is the "1990s" preset for that nostalgic VHS feel.
- To mimic those old rounded TV screens, the "Lens Distortion" effect is your go-to. A little bulge here, some RGB tweaks there, and you're golden!
Step 7: The Final Playback
Time to admire your handiwork:
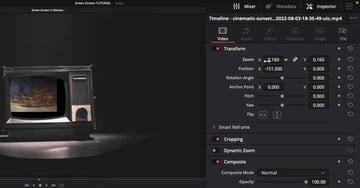
- Play the sequence from start to finish. Marvel at how seamlessly the background blends with your main footage.
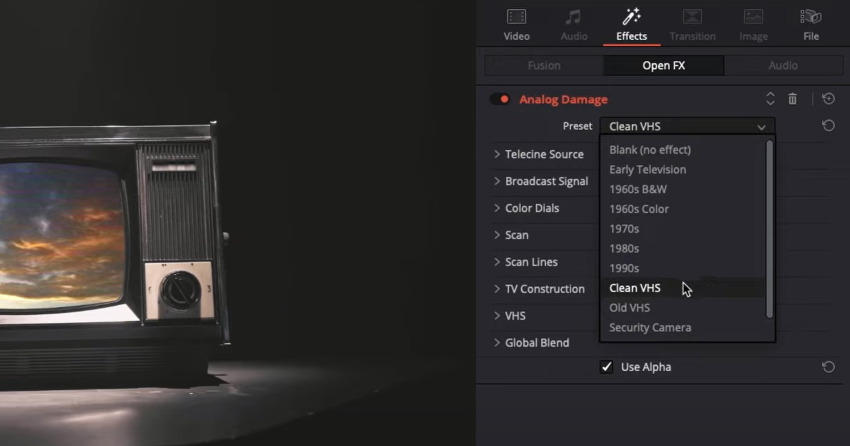
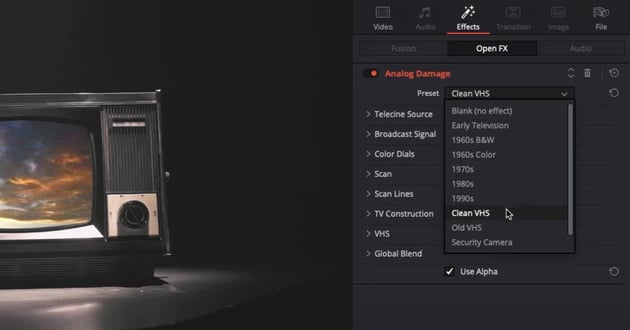
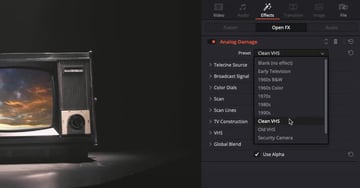
Clean VHS setting
- If something feels off, don't hesitate to dive back in and tweak. After all, perfection lies in the details.
Wrapping Up: And there you have it! A professional chroma key effect, all achieved in DaVinci Resolve. It's amazing what a few clicks and the right tools can do. So, go on, experiment, and let your creativity soar. And hey, if you found this guide helpful, drop a comment or share it with fellow video enthusiasts. Until next time, happy editing! 🌟
Experienced Users: Chroma Keying in the Color Page: A Step-by-Step Guide
The color page in DaVinci Resolve provides a user-friendly way to perform chroma keying. Here's a detailed step-by-step guide:
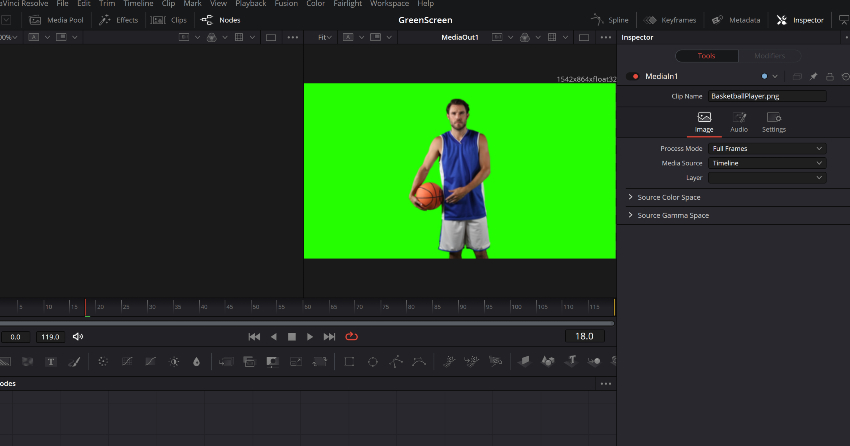
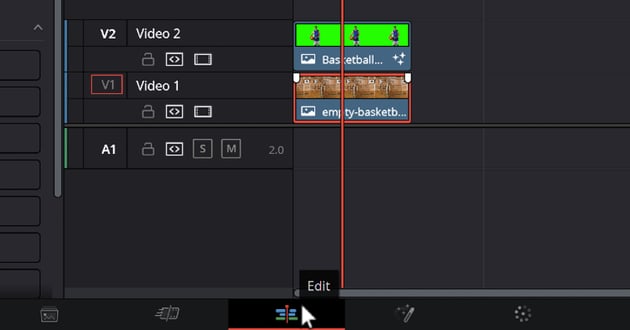
Step 1: Clip Preparation: Start by preparing your clips. For this tutorial, we'll use a clip of a Basketball Court as the background and a clip of a basketball player filmed against a green screen. I'll place the basketball player clip over the Basketball Court Clip on the timeline.
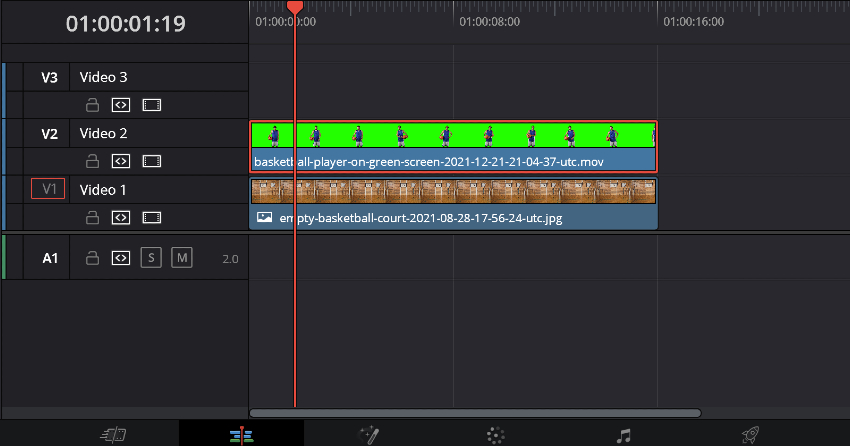

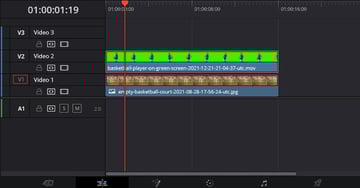
Place basketball player layer on top of basketball court background
Step 2: Navigating to the Color Page: Next, switch to the color page.
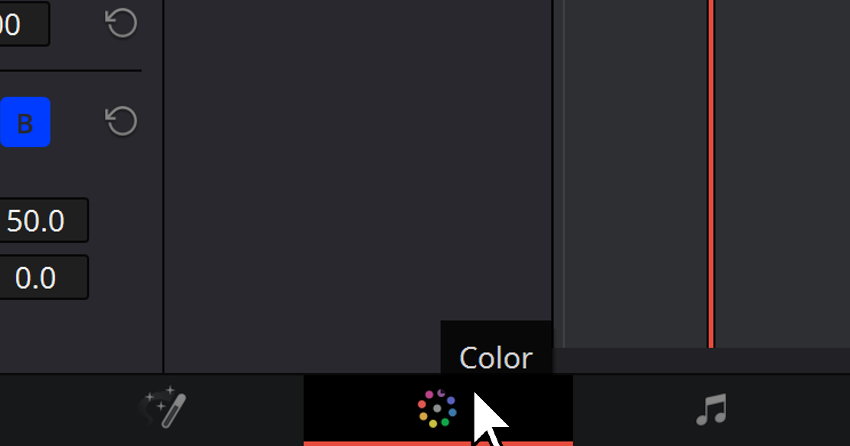
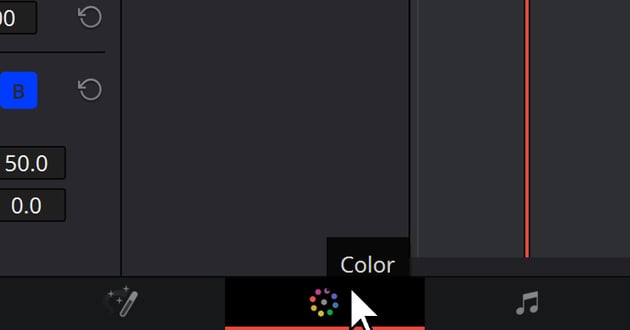

User clicking Color tab
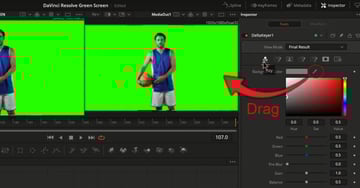
At first, you'll notice you can't see the background through the image. To make the green portion transparent, navigate to the qualifier and select the picker.

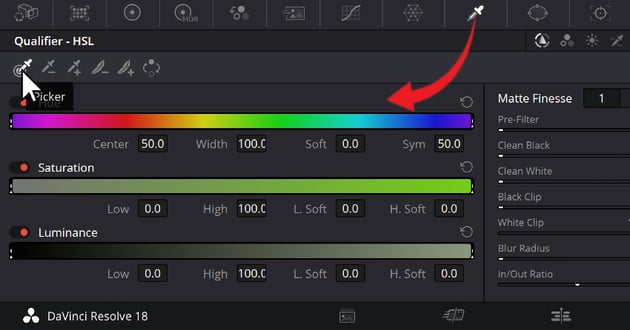
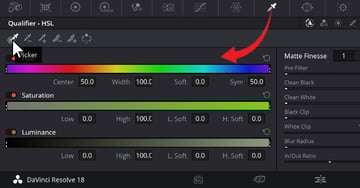
User moving the Picking Tool in Qualifier section
Here I click on the green part of the video clip with the player to select the color. You'll notice an immediate change in the mask on the node.

User selecting green area of video and changing parameters
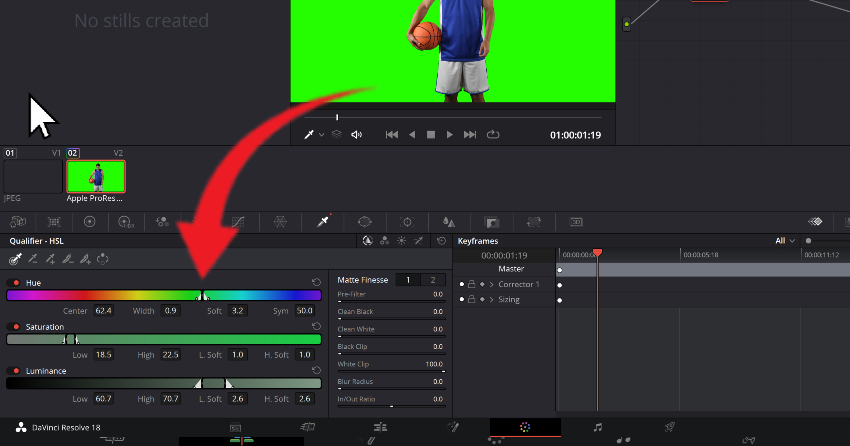
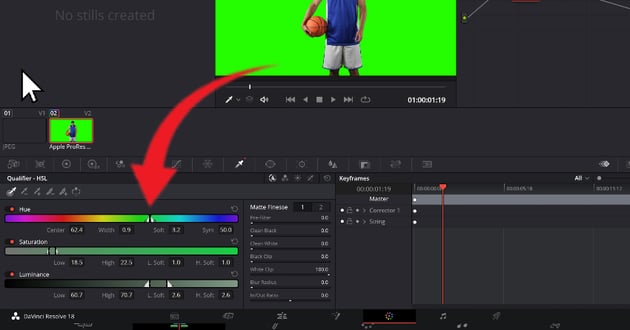
Step 3: Mask Refinement: To refine the mask, you can click and drag to adjust the selection of colors to better encompass the slight differences in in green screen since there is often a slight variance. To see this better, you can activate your overlay. To do this click on the "Highlight" Button.

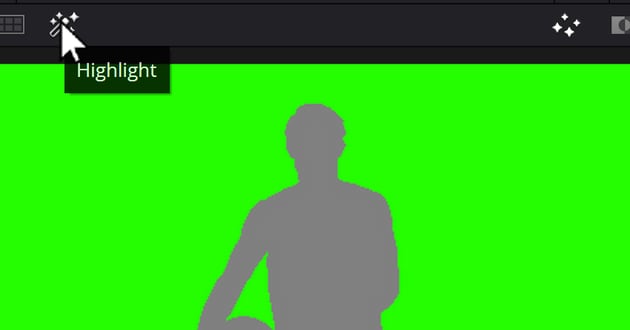
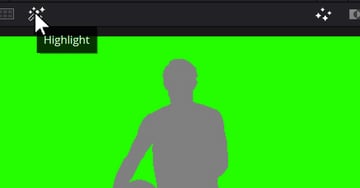
User clicking Highlight overlay
Green screens are often not perfect. Sometimes you will find variance that needs to be accounted for. You can add more green shades using the plus picker or manually adjust the selection. In this example, I'll be clicking on the 'Picker+' or 'Picker Add' Option. Then just pick the various green colors that better represent the variance in tone in the green screen.
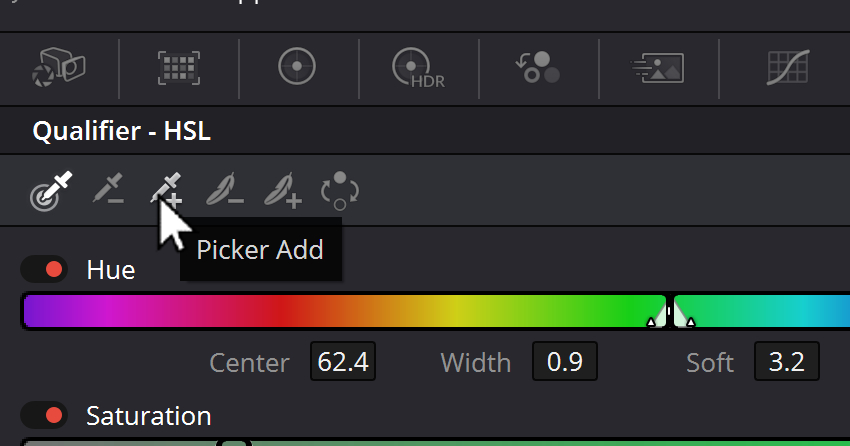

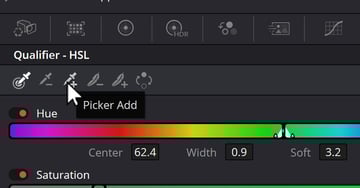
User choosing picker Plus icon
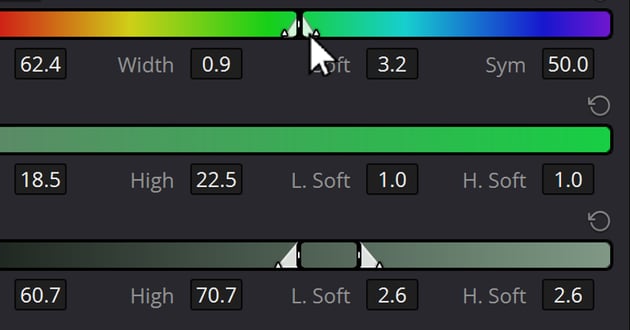
You can also Adjust the range of green by adjusting the width of the color zone selector.


Color variance slider
Once you've completed the green variance selection, let's take a look at our black and white mask to further perfect our variance selection process. To do this click on the 'Black/White Mask Overlay' option.
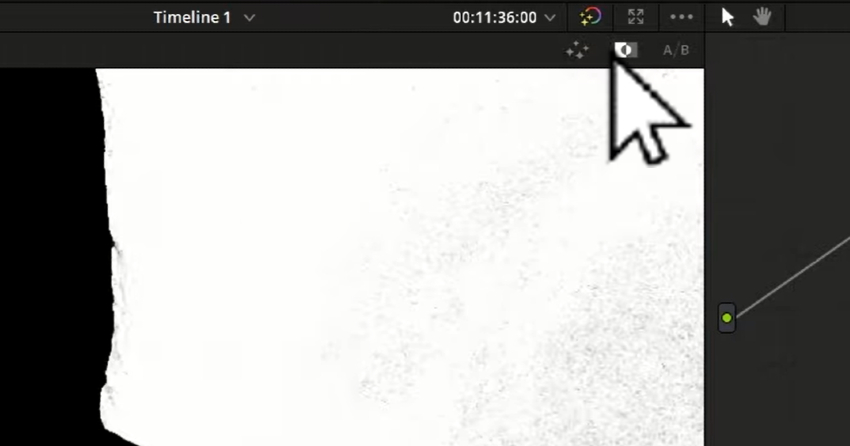
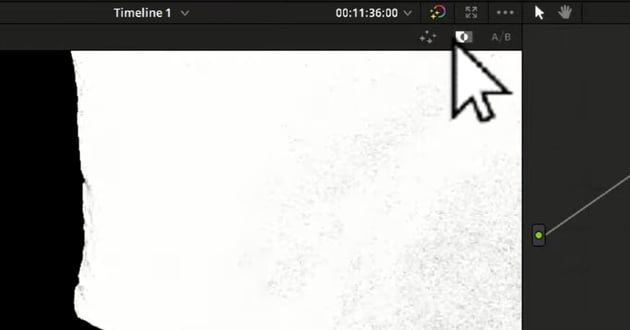

Select black and white mask overlay button
Then adjust the 'Clean White' slider until you remove the darkened areas in your image.


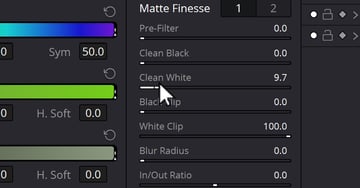
Adjust white clean slider
Once you're satisfied with the mask, deactivate the overlay by deslecting the 'Black and White Mask' Overlay Button, and the 'Highlight' Button.
Step 4: Adding an Alpha Output: To make the girl clip transparent, right-click on the node and add an alpha output.

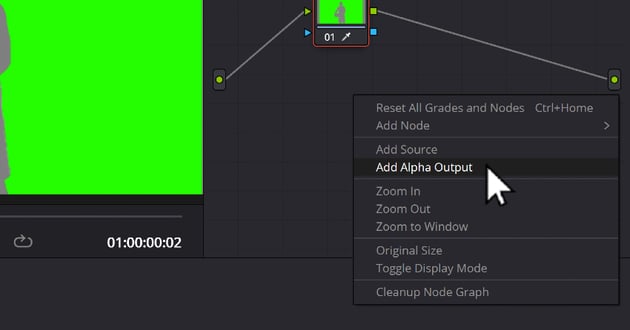
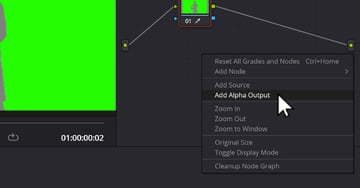
Right click in Node and choose Add Alpha Output
Connect the alpha output to the blue node on the mask.
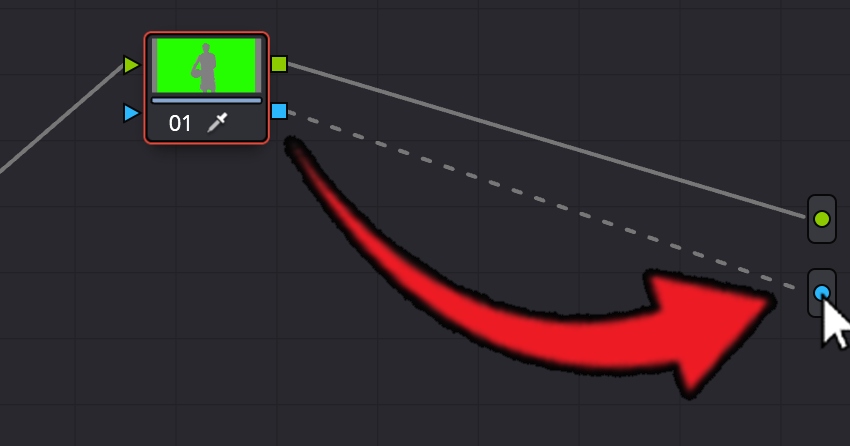
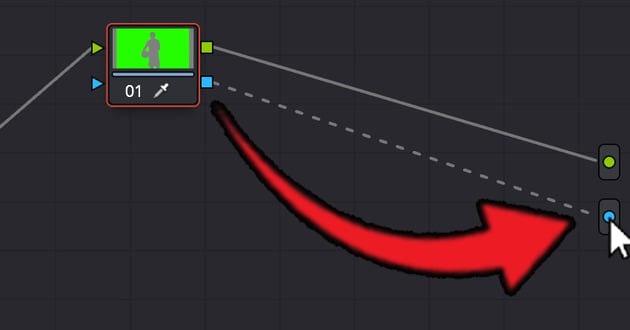

Connect Alpha Output in node area
If the mask appears inverted, simply invert it again. To do this click on the 'Invert' Button.
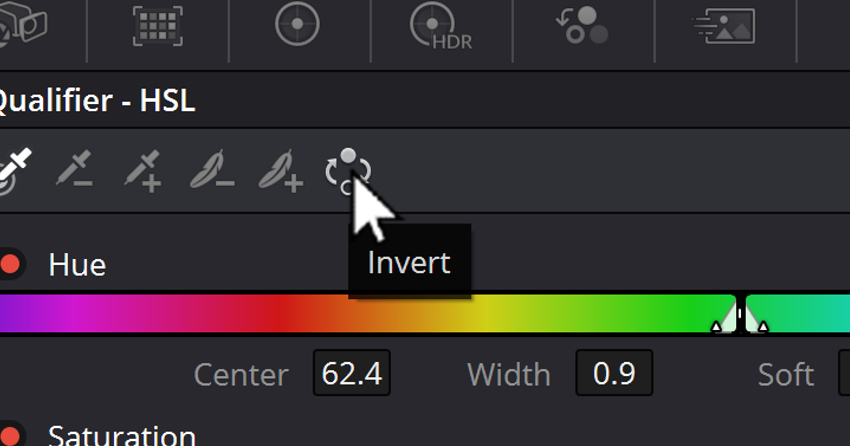

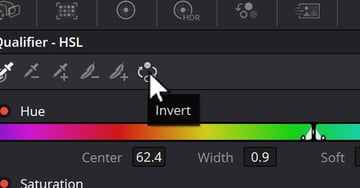
User clicking Invert button to Invert selection
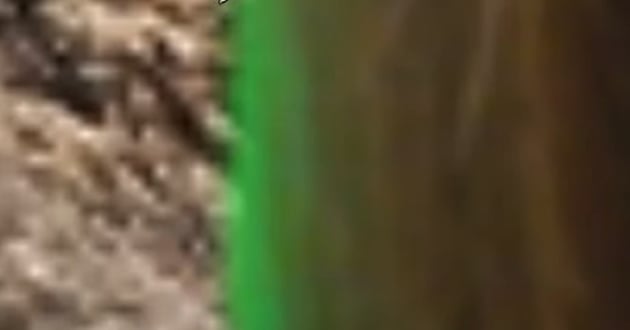
Step 5: Key Clean-Up: At this point, you can see the beach clip through the girl clip. However, you might notice some green fringes around the girl. Clean this up by adjusting the in-out ratio, blurring the radius, or shrinking the mask.
Once you're satisfied with the result, return to the edit page. You'll see that the girl has been seamlessly integrated into the beach background. Remember, you can always return to the color page to make further adjustments if needed.
Optional Final Steps for Refining Your Background Removal:
Sometimes, remnants will be left over, especially at the border of the foreground object in the background.
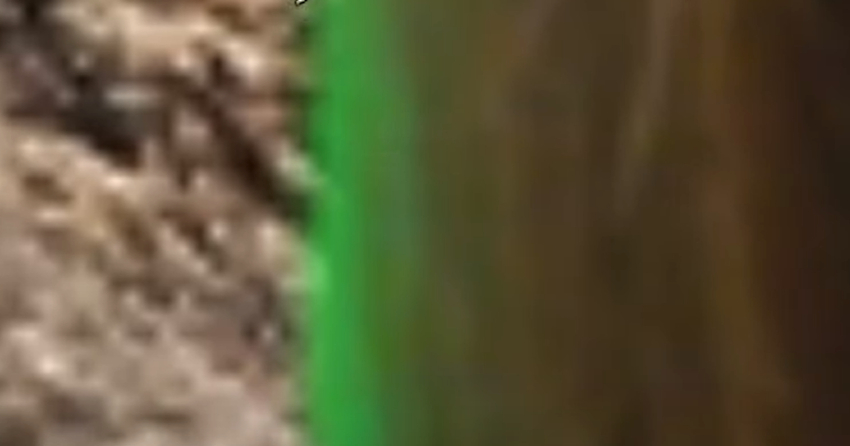

Left over remnants of edit visible on edge of top layer image.
To remove this user your "Picker+" Tool to attempt to select more of the available green.
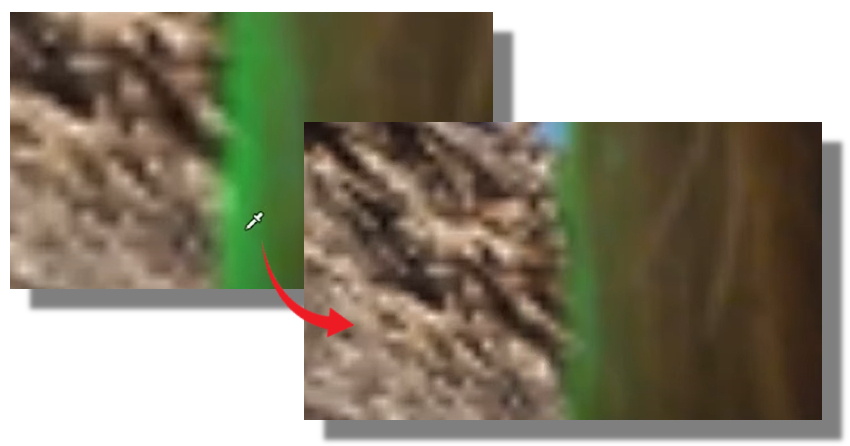

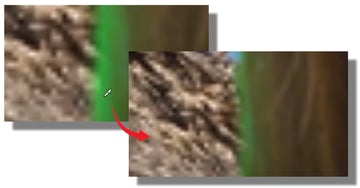
Use Color Picker to eliminate more green.
If it still doesn't look perfect you play around with any of the other settings, like the "In Out Ratio", as an example to see what yields the best results. Every project will work a little differently, so don't be afraid to experiment! Don't forget that there are two pages of adjustments in this menu.
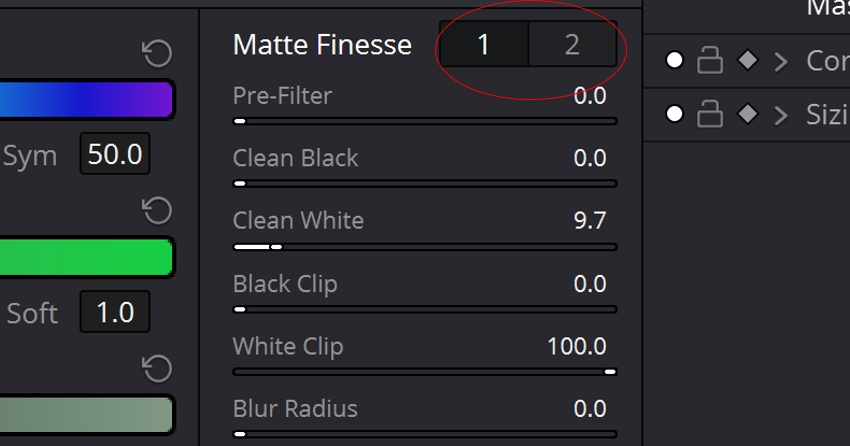
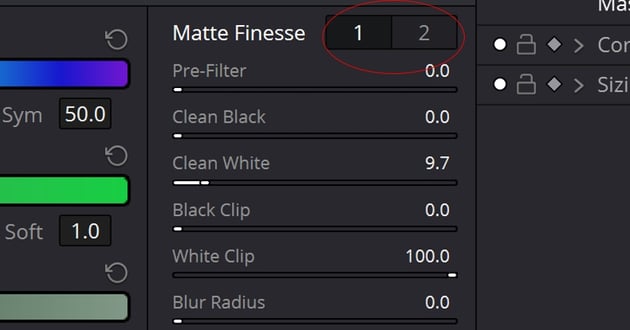

Adjust settings with two pages of adjustments.
Advanced Users: Chroma Keying in the Fusion Page Manually: A Detailed Walkthrough
The fusion page in DaVinci Resolve offers a more advanced way to perform chroma keying, but maybe a little more in-depth. There are at least two ways to do this in Fusion. Here's a detailed walkthrough using the Long way!:
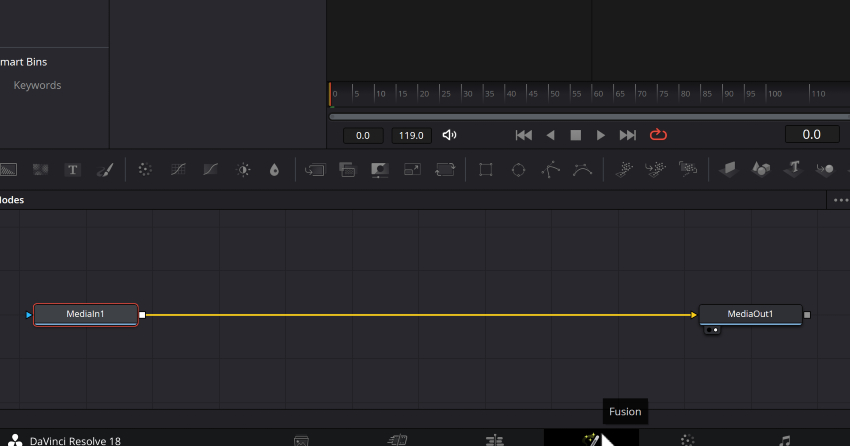
Step 1: Selecting the Background Clip: Begin by selecting the background-clip and heading into the fusion Area by clicking on 'Fusion' Tab.
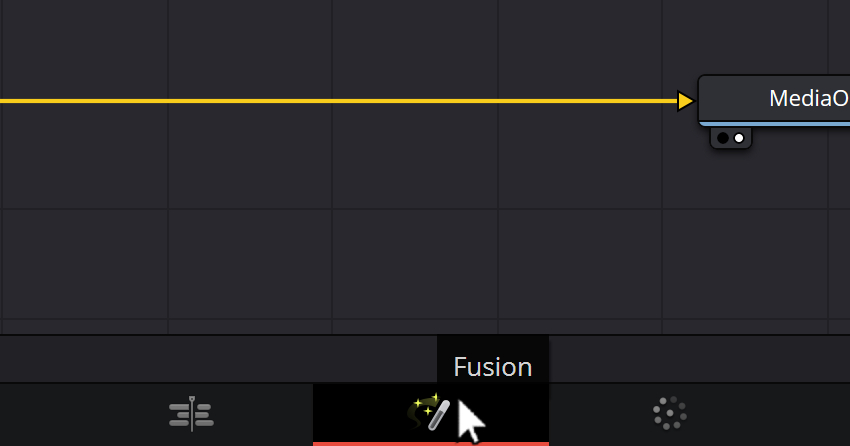
Click on Fusion tab
Once you click on Fusion, you will see a screen that looks something like this:


Fusion Tab display
If you see your background but are missing your foreground image, you'll need to bring it in. To do this, make sure your Media Section is loaded. By clicking on 'Media Pool' Button, you can find your image.


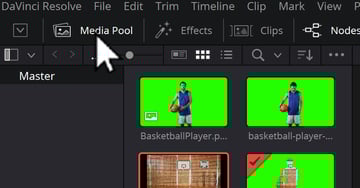
User clicking on Media Pool button to reveal Media Pool
Drag your clip from the 'Media Pool' to the Node Area.


Drag desired clip into Node area
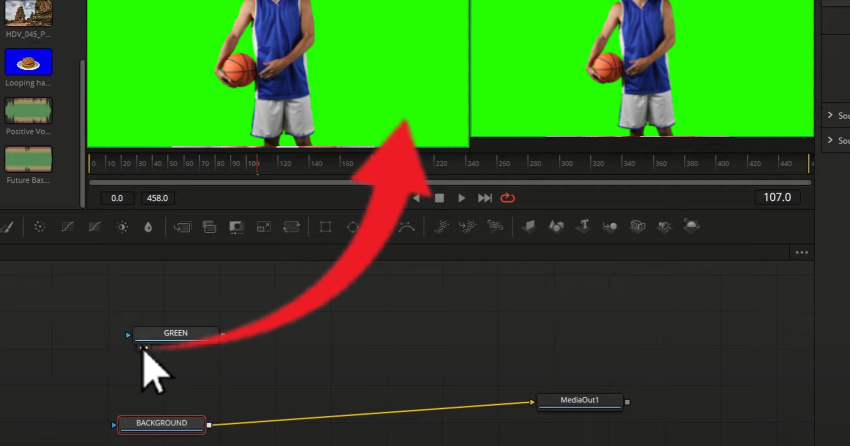
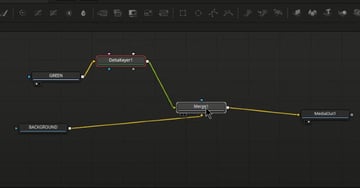
Step 2: Here, you need to connect the background clip and the green screen clip using a merge node. Here's how this process works:
- Firstly, you'll want to get used to toggling the viewports on or off, using the two small dots in the Node section under the specific item you're working with. The left dot toggles the particular image on or off in the left side, and the right dot toggles the image off in the right side.


Toggle view of image on left and right using dots under item
Step 3: You'll want to load your items into their relative viewer positions. The foreground is on the left, and the background is on the right.


Load in images in their respective viewer positions.
Step 4: Next we need to connect the 'Green' node to the 'Background' node in this example. We do this by selecting the 'Merge' node option and dragging it down to the Node Panel.

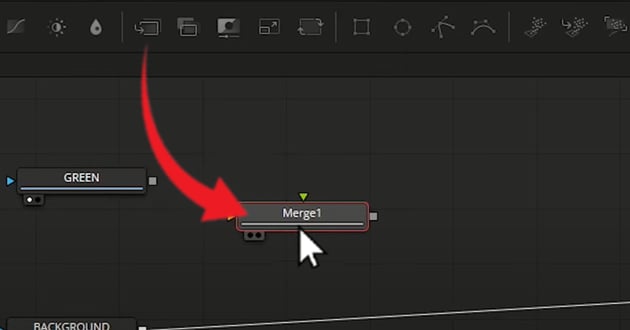
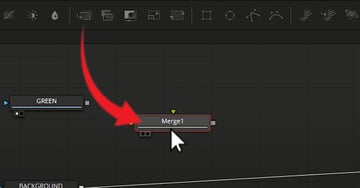
Click merge node option
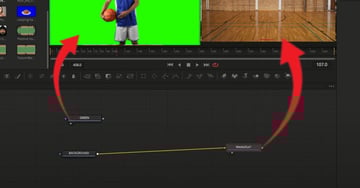
Step 5: Now we need to connect all of our nodes. We will connect the background and foreground (the green screen) to the Merge, and from the merge to our output, which will allow us to see our green screen on top of the background.
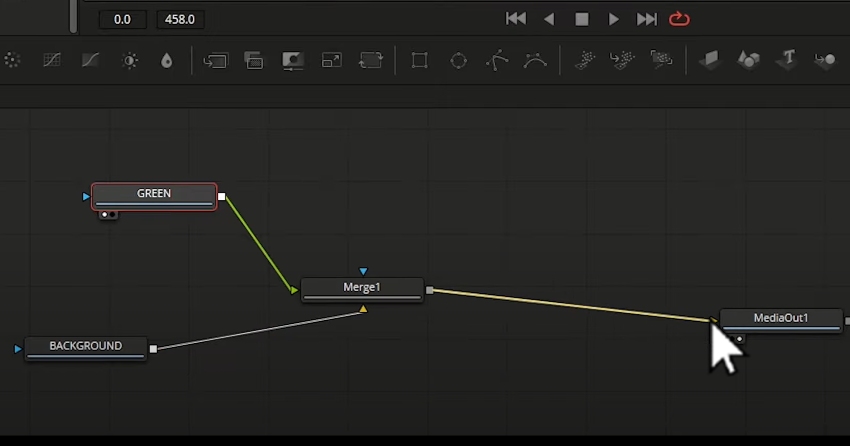
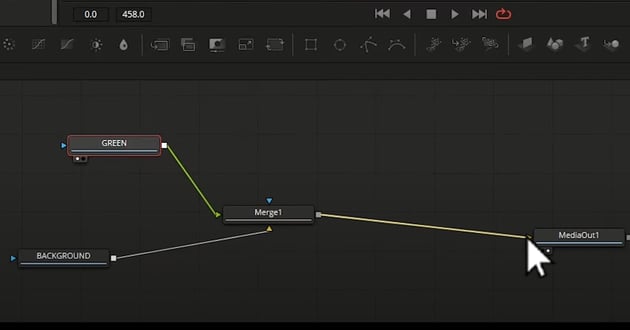
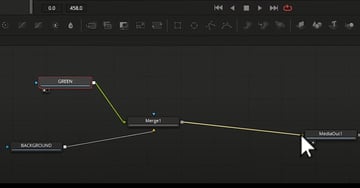
Connect all nodes
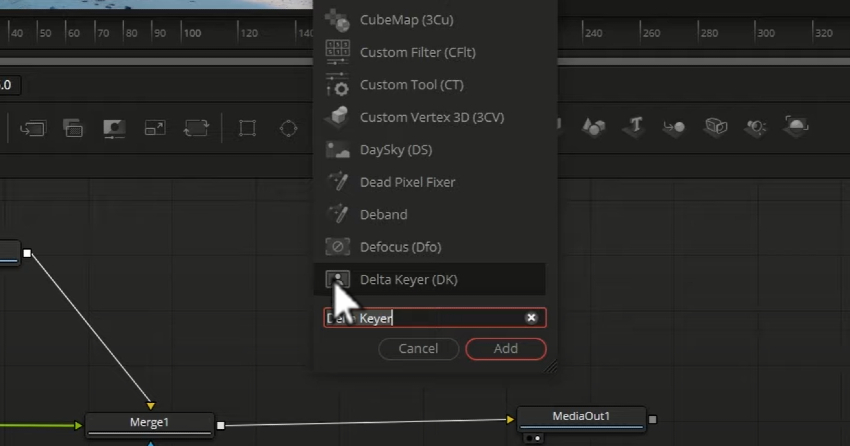
Step 6: Now, select the 'GREEN' node (or whatever you called the foreground node), Click on "Effects Library > Tools > Matte > Delta Keyer". Drag it to the Node section.
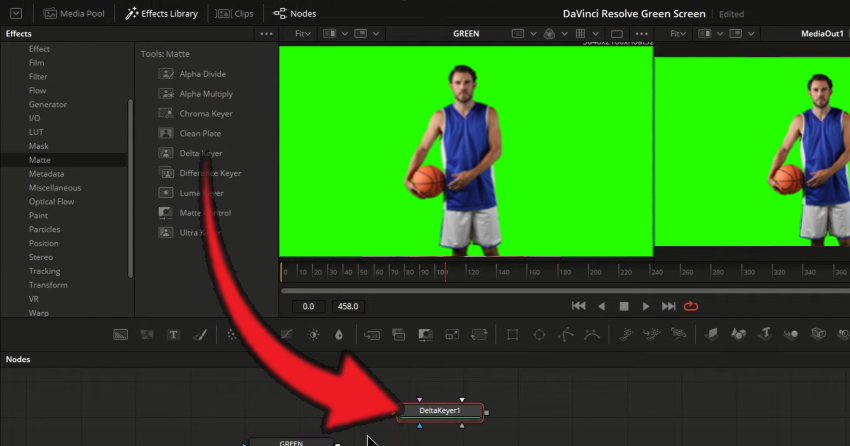
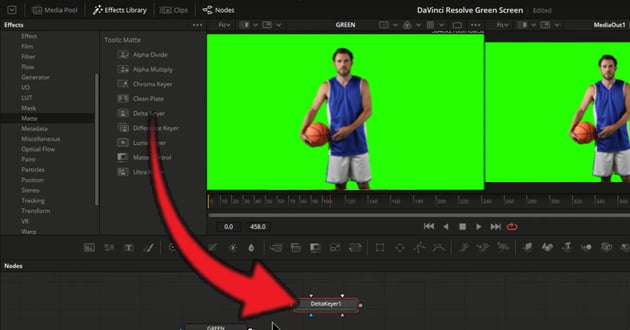
Drag Delta Keyer to Node panel
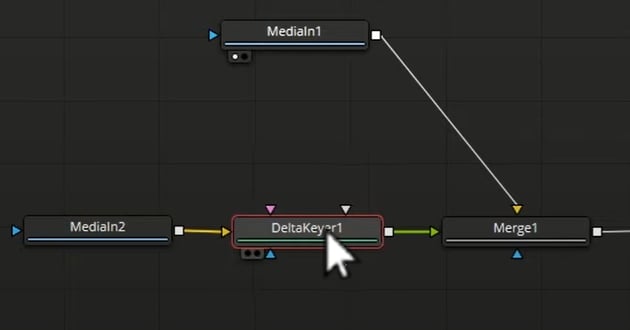
Step 7: Connect the Green Screen to the 'DeltaKeyerNode' and from the Delta Keyer connect to the 'Merge Node'.
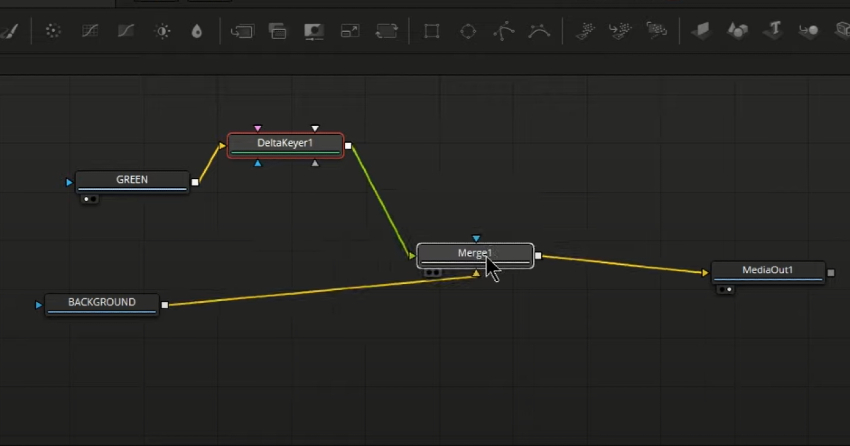

Connect green node to Delta Node to merge node
Step 8: Now, click on 'DeltaKeyer' node, then proceed to the 'Inspector Tab', looking for the 'Key' sub-tab. In this sub tab look for 'Background-Color'. Click+Hold+Drag the picker tool to the desired area that you want to eliminate.


Find Dropper Tool in InspecTab
Step 9: Refining the Key: The Delta Keyer offers a plethora of options for refining the key. You can change the soft range, erode, blur, change the threshold, and much more. Once you're satisfied with the key, return to the edit page.
Advanced Users: Chroma Keying in the Fusion Page on Semi-Auto.
The fusion page in DaVinci Resolve offers an even more advanced way to perform chroma keying, by automating a lot of the processes we just went through. This process accomplishes a very similar outcome without as many keystrokes or mouse clicks. Let's dive into this more automated method here:
Step 1: Access the Fusion tab at the bottom of the workspace.
Access Fusion tab
Step 2: Find the 'Delta Keyer' node in the tool menu. To do this press 'Shift + Spacebar'. Search for "Delta Keyer" in the search bar. Once you find it click 'Add'.
Step 3: Select the new 'Delta Keyer', then head over to the 'Inspector Tab', and drag the dropper tool. Doing this makes the, previously green area, Transparent! If you need to make any adjustments you can easily adjust various settings to find a setting that looks best for your particular project.
Step 4 (option 1): Now that you've made the desired area transparent, let's get our new background into the Node area. To do this, drag your background clip to the node section of the workspace.


Drag background content to node
Step 4 (Option 2): Go back to the 'Timeline' tab, and drag your background below your foreground image on the timeline, and you'll see the magic of Croma Green screening before your very eyes!


Drop backgound directly into timeline
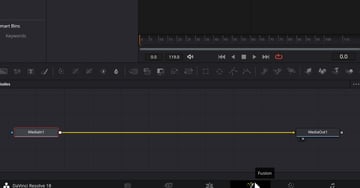
Advanced Users: Chroma Keying in the Fusion Page on Full-Auto.
There is one more way that you accomplish this task of using Green Screen & Chroma Key in Davinci Resolve 18. This time we're going to start with the timeline and move our way to Fusion.
Step 1: Load your two clips into the timeline.
Step 2: Select all both clips, 'Right-Click' on either, and then choose 'New Fusion Clip...".

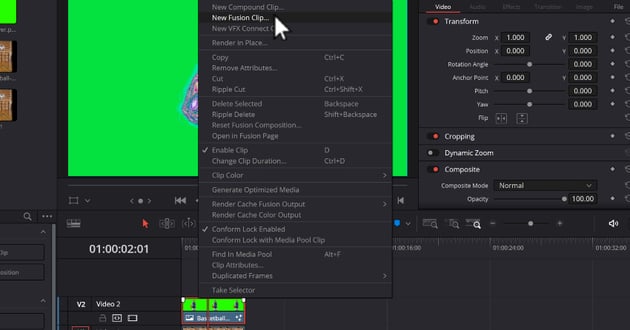

Accessing Fusion option through right clicking on clip
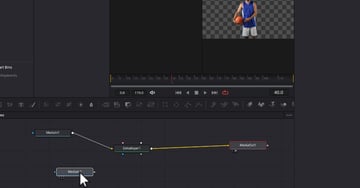
Step 3: From the 'Fusion' Tab, take a look at the available nodes. Feel free to re-organize the nodes, but while you're there click the left circle under, what we have labeled as 'MediaIn1'. This will add the clip to the left side of the preview window.
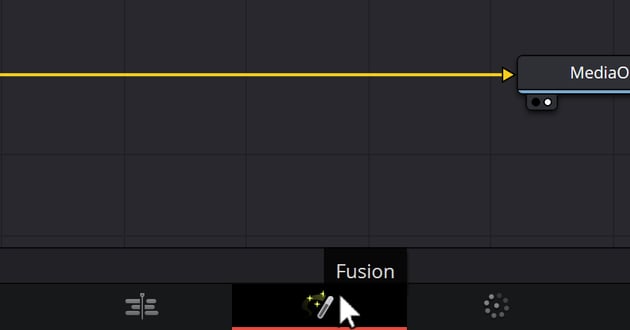
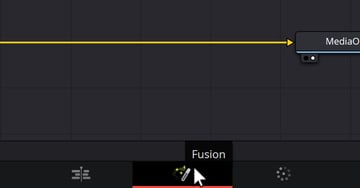
Step 4: Select the second clip, labeled here as 'MediaIn2'. Press 'Shift + Spacebar', and choose 'Delta Keyer'.
User searching for Delta keyer in menu
Step 5: Select Delta Keyer.

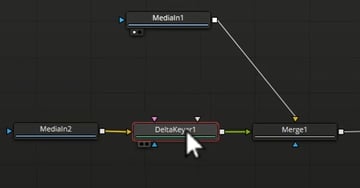
Select Delta keyer
Step 6: Drag picker from 'Inspector > Key' over to selected color.
Switching Backgrounds: A Piece of Cake
The magic of chroma keying in DaVinci Resolve truly shines when it comes to switching out backgrounds. This feature, both in the color page and the fusion page, allows you to transport your subjects into different scenarios seamlessly, opening up a universe of creative possibilities.
Whether you're filming a dreamy music video or an action-packed sci-fi movie, DaVinci Resolve makes swapping backgrounds as easy as a walk in the park. Simply disconnect the current background clip and connect a new one. Voila! Your characters are instantly teleported from a bustling cityscape to a serene beach, or from a sunny day to a starlit night.
This effortless switch not only enhances the visual appeal of your project but also adds depth to your storytelling. With DaVinci Resolve's green screen capabilities, you can create contrasting backdrops, evoke various moods, and even craft symbolic imagery, all contributing to a more immersive and engaging viewer experience.
Keying Out Other Colors: Not Just Green
While green is the go-to color for chroma keying due to its contrast with human skin tones, it's by no means your only option. In fact, DaVinci Resolve empowers you to key out any color, broadening your creative canvas.
Whether you're working with a blue screen, white backdrop, or any other color, the process remains the same. Simply select the color you want to key out using the picker tool in the Delta Keyer. This flexibility allows you to choose the best color for your specific shoot conditions, lighting setup, or costume requirements, ensuring optimal results.


Blue screen back drop behind hand holding controller
Remember, mastering green screen and chroma key techniques in DaVinci Resolve isn't just about learning the software. It's also about using high-quality digital assets to bring your vision to life. That's where Envato Elements comes in. With millions of professional-grade digital content at your fingertips, you can elevate your chroma keying projects to new heights.
In conclusion, with DaVinci Resolve's powerful features and flexible options, switching backgrounds and keying out different colors are no longer daunting tasks. They're opportunities to let your creativity shine, transform your storytelling, and captivate your audience like never before.
Wrapping Up
Chroma keying or green screening in DaVinci Resolve is a straightforward yet powerful process, whether you're using the color page or the fusion page. With a bit of practice, you'll be able to key out any color and replace it with any background you want.
Remember, the key to a good chroma key is a well-lit green screen and careful color selection. So, take your time, experiment with different settings, and have fun with it!
 By
By


