
Refine Edge is an invaluable tool which transforms your hard, approximate selection into a soft, crisp, detailed selection! If you can't key your subject out of the background, as on green screen, this tool can come to the rescue. It works fantastically on white seamless, or against plain walls, but can even work some wonders against detailed backgrounds.
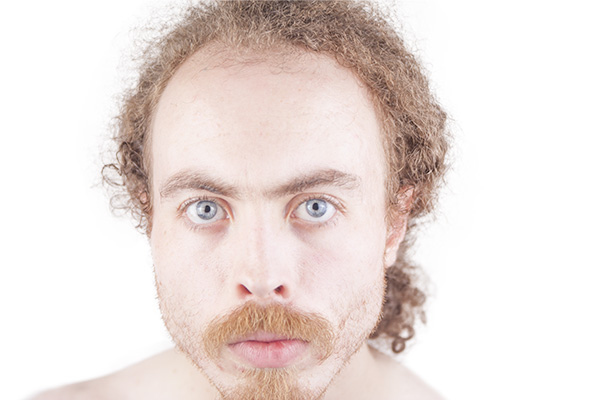
For the purposes of this article, I'm assuming you're trying to select hair, since hair and fur are the most common uses for Refine Edge. I'm going to go through a relatively straightforward use of the tool; to mask a detailed subject off a not-completely-clean background to composite onto a pure white background. When using pure white, the mask must be good, as any areas of apparent white will show up as grey. Let's get started.
1. Select Your View
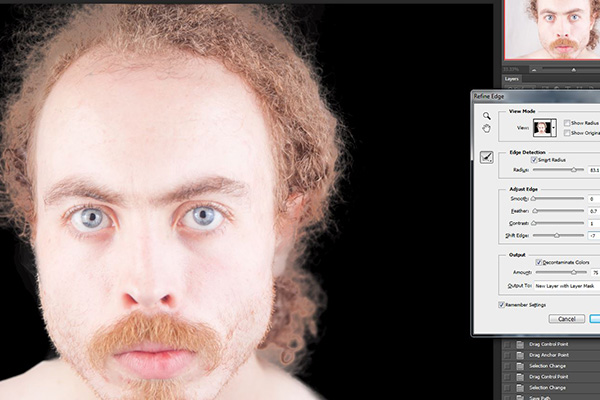
First, make your selection, then hit Refine Edge in the tool properties bar. This is where the magic happens! You'll see a little preview thumbnail in the view panel, and your main image should become just like it. You can click the thumbnail to change the view type.
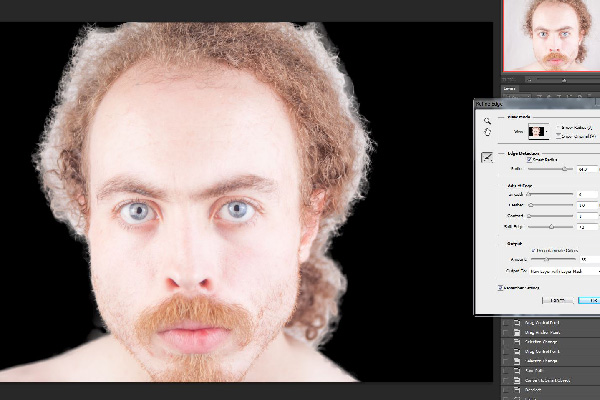
As I recall, the default is view mode is Black & White, but I've found that this, Marching Ants and Overlay aren't very helpful for refining purposes.
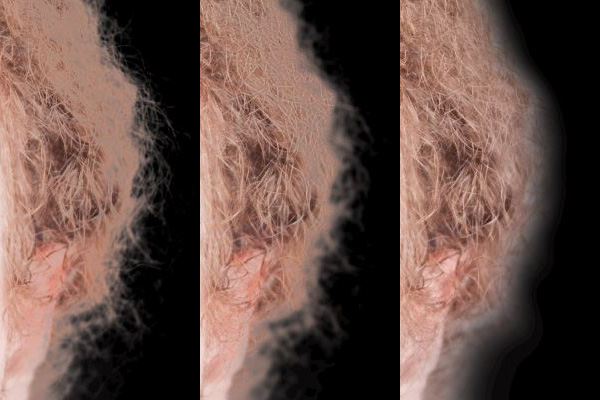
For light subjects, I use On Black, as this will show the edge issues much more clearly. For dark subjects, I use On White. If I'm compositing and already have my replacement background in place, I use Reveal Layer as this shows the true layer stack and I can work to naturalise my subject within the Refine Edge dialog.
The two little checkboxes I very rarely use. Show Radius displays only the width of the edge that you're is working on, and Show Original toggles your original selection.
2. Edge Detecting
Now, on to Edge Detection, the next panel down. First, ensure Smart Radius is checked to make sure the intelligent edge detection algorithm is running, and then play with the radius of the edge detection until the edges of the hair look reasonably detailed and naturally roll off.
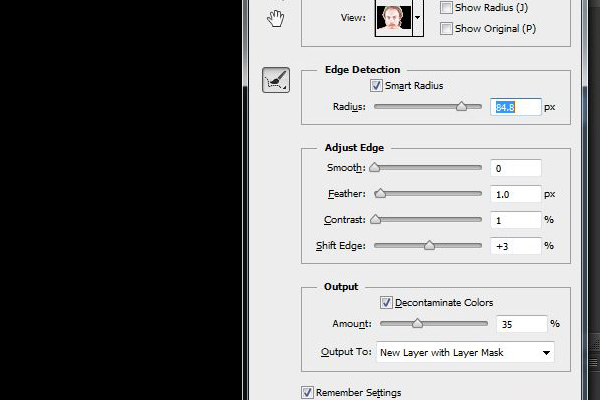
In this case, this is quite a high number as my hair is frizzing all over the place. With fur and more styled hair, the radius should be smaller. Of course, this is also dependent on your shooting resolution.
3. Refine the Edges
Before we move on to the next panels, now is a good time to bring in the Refine Radius Tool, or just the refinement brush as I call it. This allows you to selectively expand your edge detection area, bringing in more details from the subject as Photoshop learns what is and isn't background. It may take you a few tries to figure out how best to use this tool, since it can seem finicky.
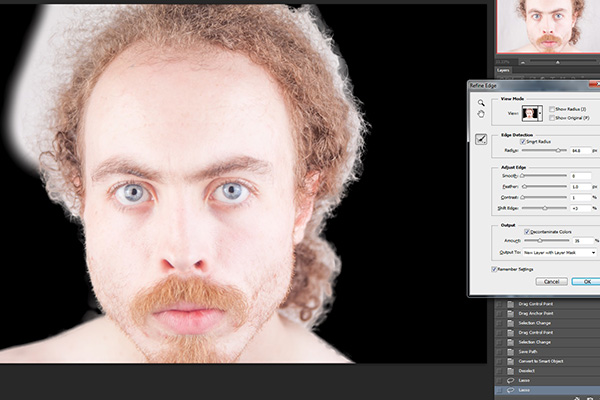
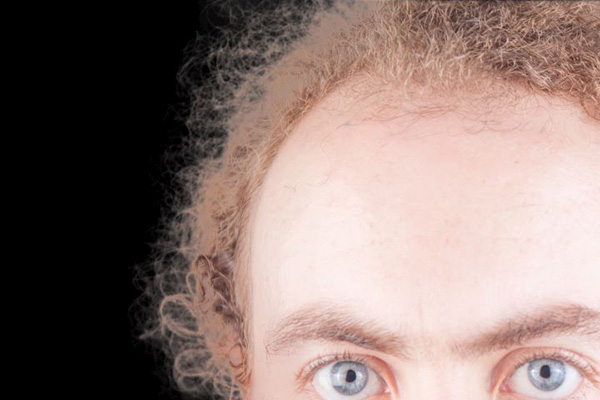
Wherever you have clear areas of background showing after your radius adjustments, just brush over them and the edge detection will look at the areas more closely. You should see it magically eliminate background and retain hair detail before your very eyes!
Anywhere you want the edge detect to stop looking, use the eraser or hold down Alt/Option to brush in the areas that you'll manually clean up later. This is useful where the radius you're using is fading out the hard edges of your subject.
4. Adjust the Edges
Now let's move to Adjust Edge. Smooth will reduce detail around the edges of the selection, trying to smooth out the outer edge. Not really any use for hair, since we want that detail.
Feather of course feathers the selection, but too much softens the edge and looks strange, like you've just brushed around the subject. I use 0.3-0.7px to simulate the slight softness out of camera, and help blend the composite pixels together more naturally.
Contrast reduces the appearance of the radius of the feathering of the edge detection a little to get a crisper edge. It ruins the edge when overdone, so keep it below 10%. I don't usually need to use any.
Shift Edge moves your edge outwards to get more of the background, or inwards to remove it. Adding or subtracting a little here can help, particularly with slightly translucent subjects like hair or leaves. Depending on the subject, "a little" could be around 4%, or as high as about 30%, depending on the width of the backlight edge stroking.
5. Output Your Refined Selection
Output is the final step. If your subject and background are very different in colour, checking Decontaminate Colours should reduce colour spill and nibble at those little coloured lines around the hairs without having to overcook Shift Edge. I've found it to be quite variable though, regardless of the background colour, so try it both with and without Decontaminate and see which looks better.
In this example, it doesn't really do a whole lot, just one or two places where the hair appears less backlit and more reddish-brown. Play with the Amount slider if the results look odd, or just leave it out altogether. Whatever works best for the individual image.
Output To selects your output option. If you're creating a brush mask, outputting back to selection is fine. I almost always do New Layer with Layer Mask though, as anything I can do with a selection I can do with a layer mask, but the mask also allows for compositing and recovery of the selection for other purposes is simple by ctrl-clicking the mask.
Refine Those Edges!
I hope this quick look through the Refine Edge dialog and how it can improve your work was helpful. While it has been around a while, it's not a topic I see very frequently, so I don't think too many people use it. It's certainly helped my work, and I expect to be using it ever-increasingly in the future.
Comments? Questions? Hit up the comments below!
 By
By


