Skip to content

Envato: Get every type of asset for any type of project, and a full stack of AI tools

From $16.50/m
envato-tuts+
envato-tuts+
  • Design
  • Business
  • Photo
  • Video
    Video View all Video
    Start Learning
    • Software
      Software
      • Adobe After Effects
      • Adobe Premiere Pro
      • Davinci Resolve
      • Cinema 4D
      • Blender
      • Final Cut Pro
      • Apple Motion
      • OBS
      • Camtasia
      • Screenflow
      • Kapwing
      • Runway
      • Adobe Rush
      • AI Tools
      • CapCut
      • Spline
    • Equipment
      Equipment View all Equipment
      • Cameras & Lenses
      • Tripods & Supports
      • Drones & Rigs
      • Filters & Accessories
      • Smartphones
      • Lighting
      • Audio Equipment
    • Production & Recording
      Production & Recording View all Production & Recording
      • Lighting
      • Audio
      • Composition
      • Screen Recording
      • Livestreaming
    • Post-Production
      Post-Production View all Post-Production
      • Video Editing
      • Color Grading
      • Motion Graphics
      • Audio
      • Workflow
    • Templates & Presets
      Templates & Presets View all Templates & Presets
      • Intros & Openers
      • Titles
      • Transitions
      • LUTs & Profiles
      • Text Effects
      • Particle Effects
      • Logo Animations
      • Slideshows
      • Presets
      • Scripts & Plug-ins
    • Types of Video
      Types of Video View all Types of Video
      • Instructional
      • Documentary
      • Stock Footage
      • YouTube
      • Social Videos
      • Music Videos
    • Animation
    popular software in Video
    • Adobe After Effects
    • Adobe Premiere Pro
    • Davinci Resolve
  • Web Design
  • Code
  • Music

  • Sign In
  • Tuts+ YouTube
  • Envato
  • Go to Envato
  • |
  • Tuts+ YouTube
  • |
  • Sign In
  • envato-tuts+
  • Design
  • Business
  • Photo
  • Video
    • Software
        • Start Learning
        • Adobe After Effects
        • Adobe Premiere Pro
        • Davinci Resolve
        • Cinema 4D
        • Blender
        • Final Cut Pro
        • Apple Motion
        • OBS
        • Camtasia
        •  
        • Screenflow
        • Kapwing
        • Runway
        • Adobe Rush
        • AI Tools
        • CapCut
        • Spline
    • Equipment
        • Start Learning
        • Cameras & Lenses
        • Tripods & Supports
        • Drones & Rigs
        • Filters & Accessories
        • Smartphones
        • Lighting
        • Audio Equipment
      All Equipment
    • Production & Recording
        • Start Learning
        • Lighting
        • Audio
        • Composition
        • Screen Recording
        • Livestreaming
      All Production & Recording
    • Post-Production
        • Start Learning
        • Video Editing
        • Color Grading
        • Motion Graphics
        • Audio
        • Workflow
      All Post-Production
    • Templates & Presets
        • Start Learning
        • Intros & Openers
        • Titles
        • Transitions
        • LUTs & Profiles
        • Text Effects
        • Particle Effects
        • Logo Animations
        • Slideshows
        • Presets
        •  
        • Scripts & Plug-ins
      All Templates & Presets
    • Types of Video
        • Start Learning
        • Instructional
        • Documentary
        • Stock Footage
        • YouTube
        • Social Videos
        • Music Videos
      All Types of Video
    • Animation
  • Web Design
  • Code
  • Music
  1. envato-tuts+
  2. Home
  3. Video
  4. Animation

After Effects design tutorial | Animate a poster

Jess Riley
Jess Riley Mar 13, 2025
Copied to clipboard!

Lessons

Play lesson (43 sec)
Read Related Content

Play lesson (2 mins)
Read Related Content

Play lesson (7 mins)
Read Related Content

Play lesson (6 mins)
Read Related Content

Play lesson (10 mins)
Read Related Content

Play lesson (6 mins)
Read Related Content

Play lesson (20 mins)
Read Related Content

Play lesson (30 mins)
Read Related Content

Play lesson (7 mins)
Read Related Content

After Effects design tutorial

Using Adobe After Effects for graphic design projects might seem unconventional, but it offers a seamless workflow. It's an awesome tool for animators looking to add motion to their graphics.

In this Adobe After Effects tutorial, we'll learn how to create and animate a retro-style poster from scratch.

Why design in After Effects?

After Effects is a powerful program. It has the best tools from both Photoshop and Illustrator, allowing users to work with masks, effects, and transformations in a single environment.

Even if animation isn't the goal, After Effects is a flexible option to experiment with dynamic layouts and visual effects.

Setting up your project

In this lesson, we'll come up with the concept we want to work on and set up the After Effects composition accordingly.

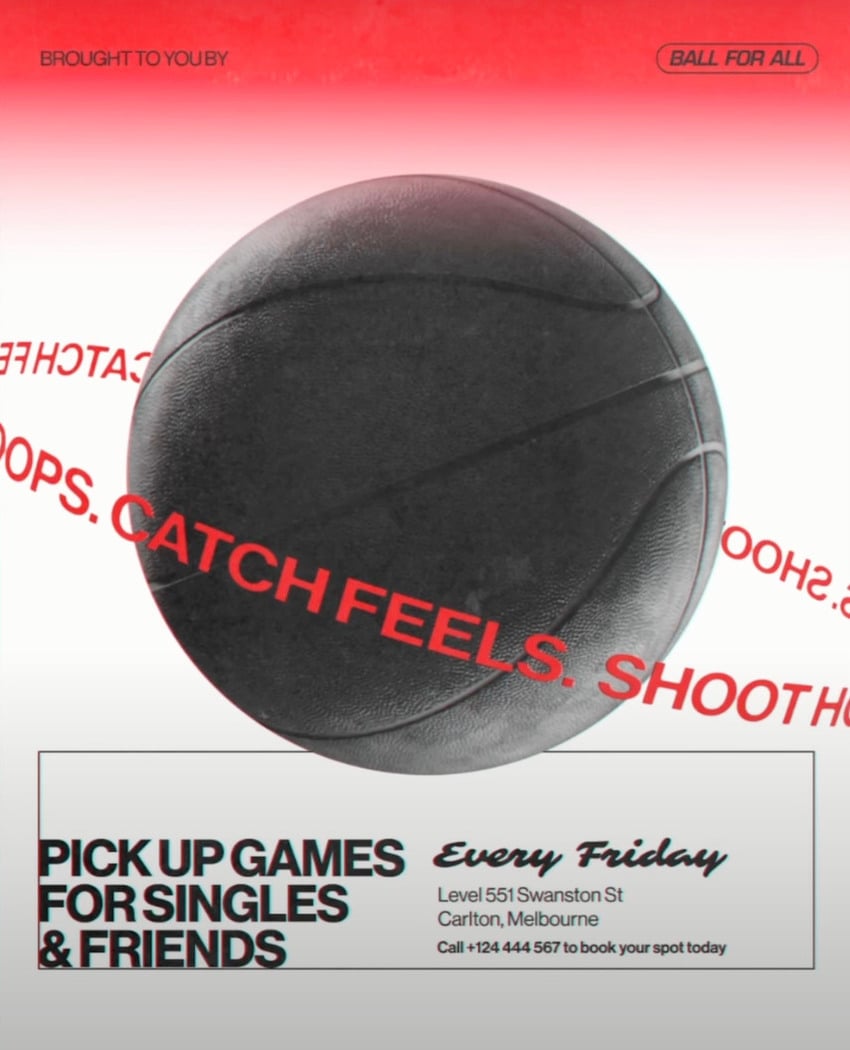
The very first thing we have to do is think of a concept. Here we'll work with a fictional pick-up basketball game.

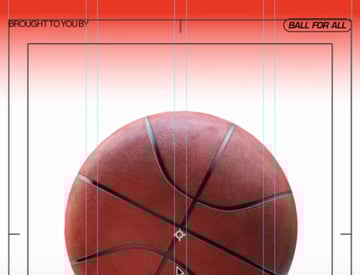
We can start with sketches to define the composition that we like the most. In this case, it'll be a big basketball graphic in the center with key event details at the bottom, and a logo at the top. All inspired by vintage sport ads.

Adobe After Effects tutorial​: Finished basketball poster.Adobe After Effects tutorial​: Finished basketball poster.Adobe After Effects tutorial​: Finished basketball poster.

So, let's get started with our canvas by following these steps:

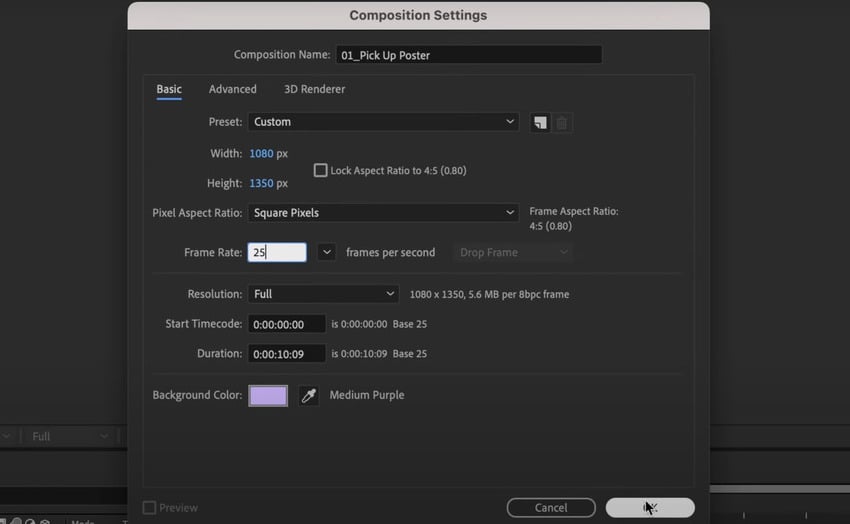
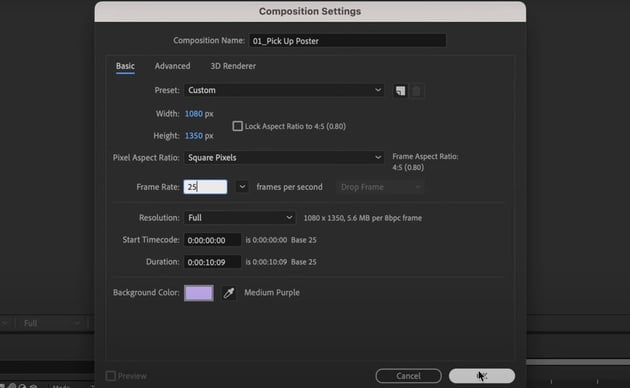
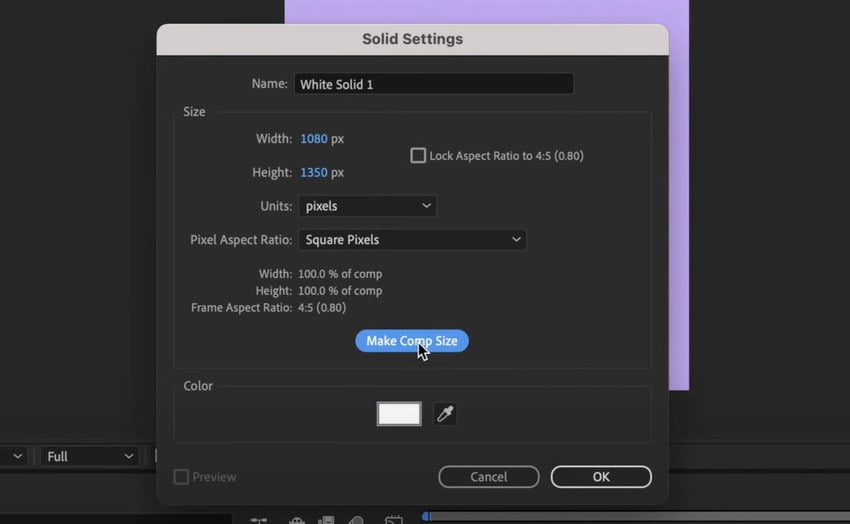
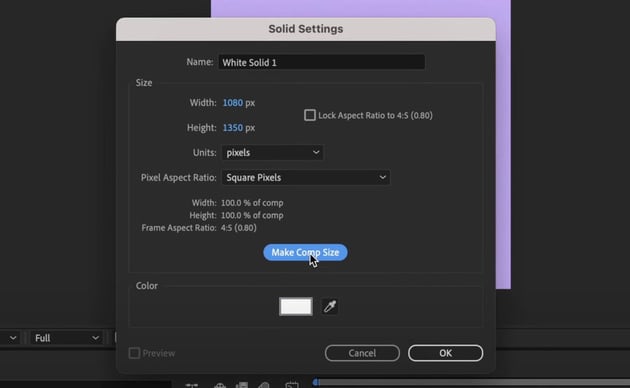
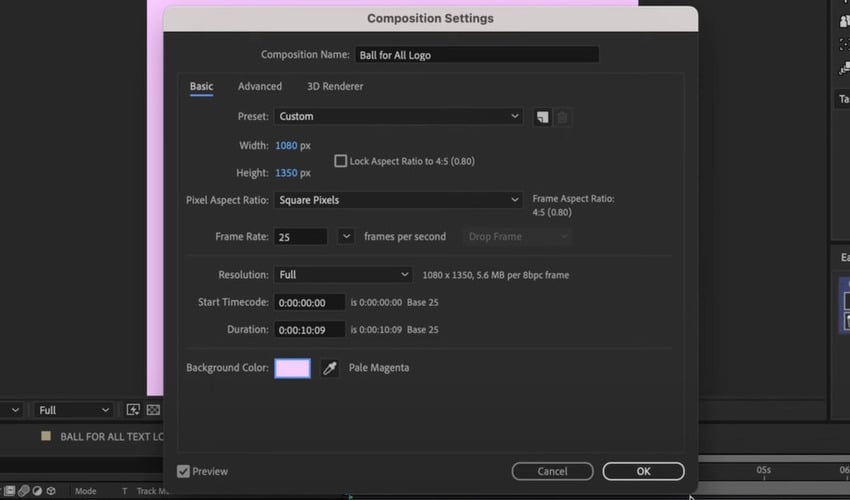
  1. Create a 1350x1080 composition (Instagram’s portrait size) with a 10-second duration at 25 FPS.
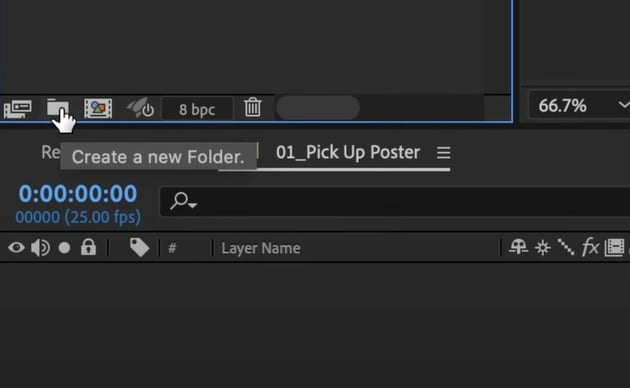
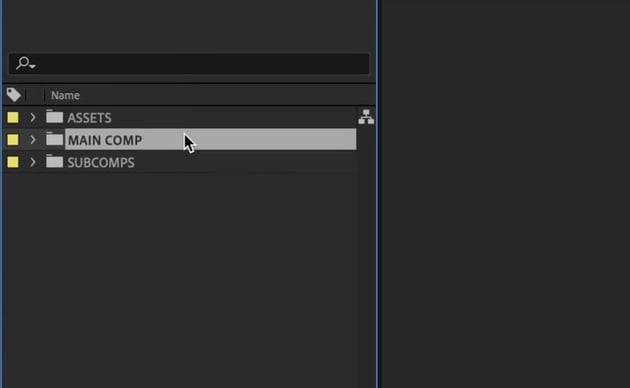
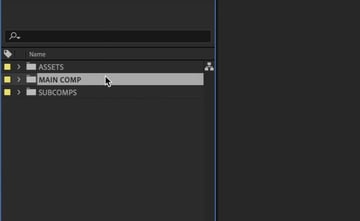
  2. Click on the "Create a new Folder" button to set up folders—Main Comp, Assets, and Subcomps—for a structured workflow.
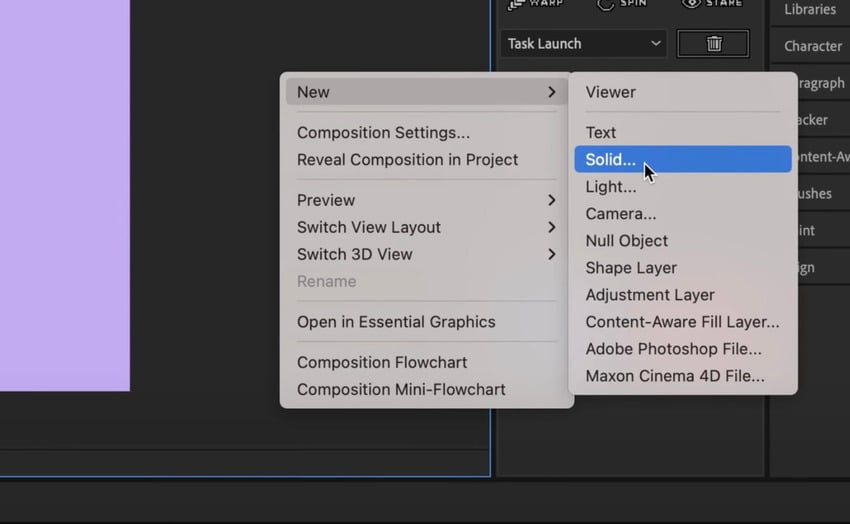
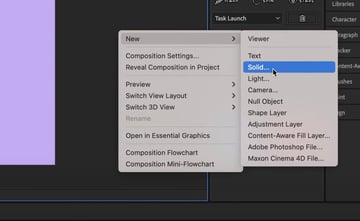
  3. Hit right-click > New > Solid to create a solid color background. Choose the color you'd like to use.
Adobe After Effects tutorial​: Composition settings.Adobe After Effects tutorial​: Composition settings.Adobe After Effects tutorial​: Composition settings.
Adobe After Effects tutorial​: Create a new Folder.Adobe After Effects tutorial​: Create a new Folder.Adobe After Effects tutorial​: Create a new Folder.
Adobe After Effects tutorial​: folders.Adobe After Effects tutorial​: folders.Adobe After Effects tutorial​: folders.
Adobe After Effects tutorial​: Solid background.Adobe After Effects tutorial​: Solid background.Adobe After Effects tutorial​: Solid background.
Adobe After Effects tutorial​: Make Comp Size.Adobe After Effects tutorial​: Make Comp Size.Adobe After Effects tutorial​: Make Comp Size.

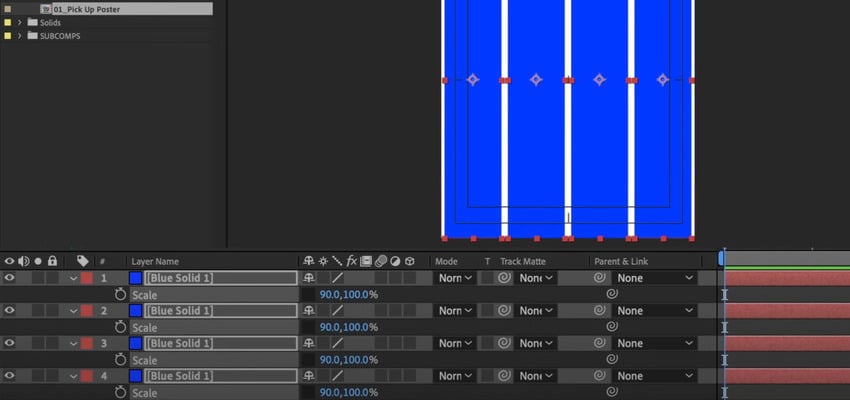
Now, let's add our background grids:

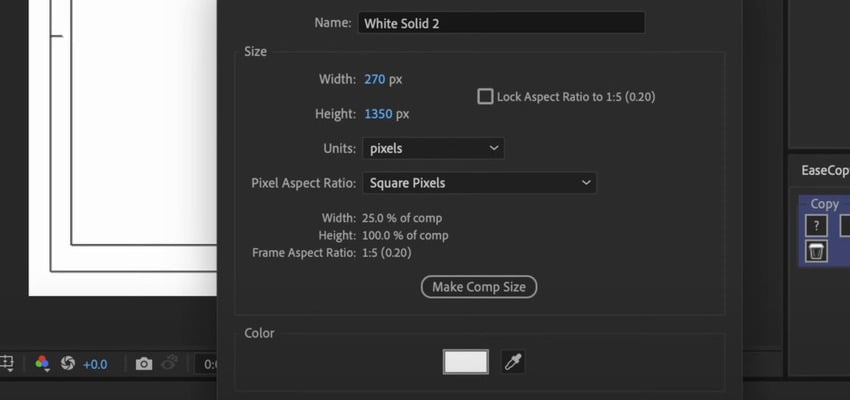
  1. Back in the Solid Settings, create a background of a contrasting color.
  2. Make it 1/4 of the width of your default background.
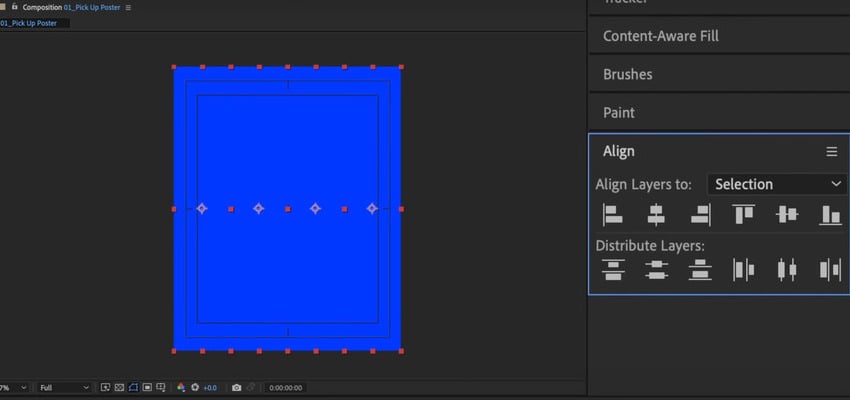
  3. Duplicate it 4 times.
  4. Align the copies using the Align panel.
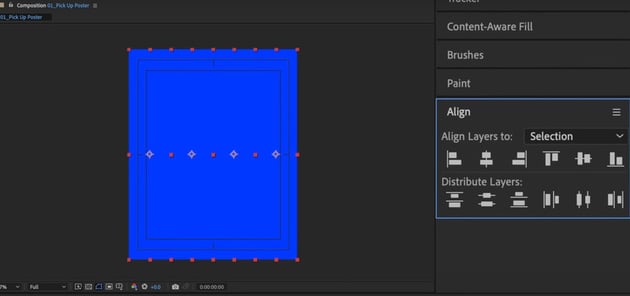
  5. Select them all in the Layers panel to scale them down.
  6. Align them evenly on your canvas.
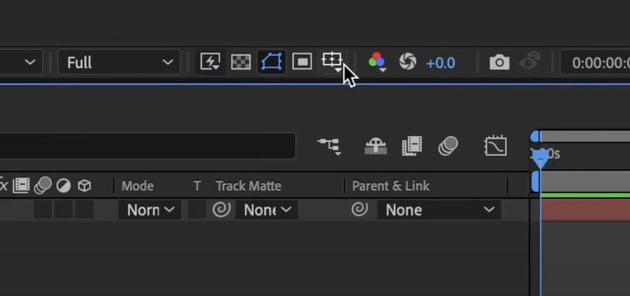
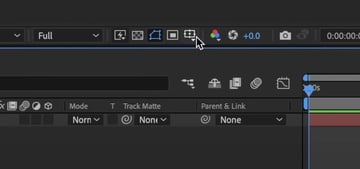
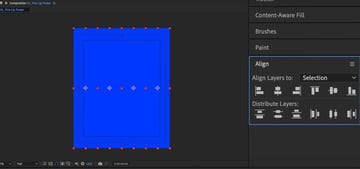
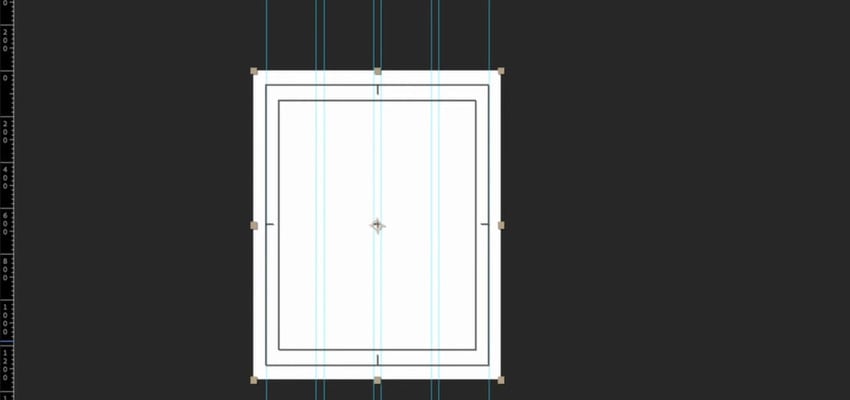
  7. Using these columns as a reference, pull the guides over the default background.
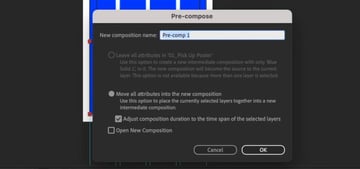
  8. Pre-compose the columns, then hide and lock them away.
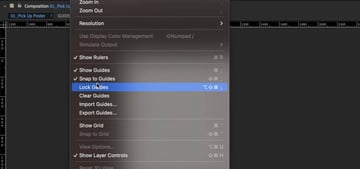
  9. Finally, go to View > Lock Guides so they don't move.
After Effects design: Add grids.After Effects design: Add grids.After Effects design: Add grids.
After Effects design: Solid settings.After Effects design: Solid settings.After Effects design: Solid settings.
After Effects design: Align the copies.After Effects design: Align the copies.After Effects design: Align the copies.
After Effects design: Scale down the copies.After Effects design: Scale down the copies.After Effects design: Scale down the copies.
After Effects design: Pre-compose the copies.After Effects design: Pre-compose the copies.After Effects design: Pre-compose the copies.
After Effects design: Add guides.After Effects design: Add guides.After Effects design: Add guides.
After Effects design: Lock guides.After Effects design: Lock guides.After Effects design: Lock guides.

Getting started on our design

In this lesson, we'll use a video of a rotating basketball as our main element and we'll mask it to delete its background.

We'll work with this basketball asset from the Envato library. Now, let's do the following:

  1. Drop the file into the Assets folder and then into the composition.
  2. Pre-compose the basketball layer, save it as "Ball".
  3. Double-click into the "Ball" comp.
  4. Select the basketball layer and 
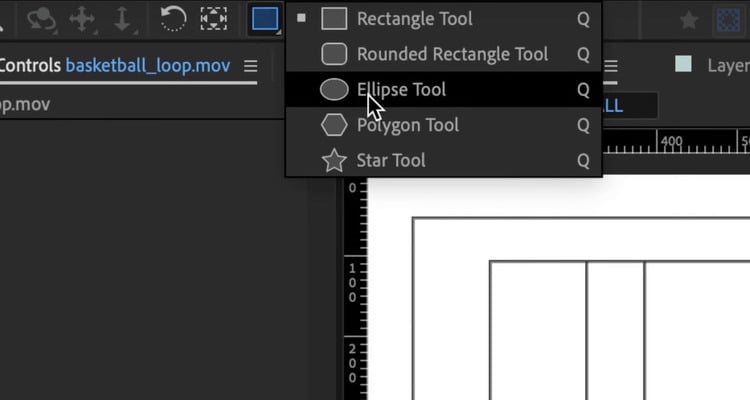
  5. Go to the Toolbar, select the Ellipse Tool, and draw a circle around the ball.
After Effects for graphic design: Elipse tool.After Effects for graphic design: Elipse tool.After Effects for graphic design: Elipse tool.
After Effects for graphic design: Mask the ball.After Effects for graphic design: Mask the ball.After Effects for graphic design: Mask the ball.

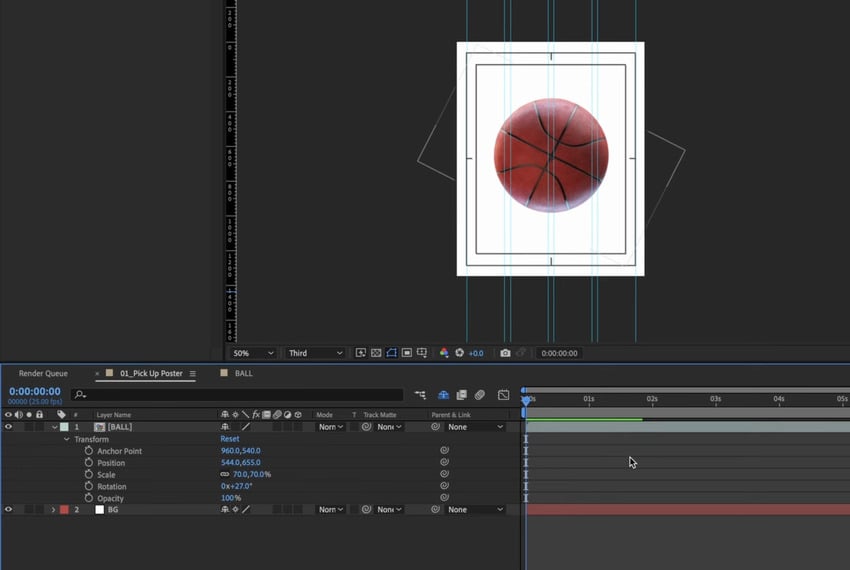
The basketball is now masked into a perfect circle. We can turn the background layer off to see the ball on top of a transparency.

Finally, we'll use the transform tools—scale, position, and rotation—to place the ball centrally. You can find these by toggling down the ball layer.

After Effects for graphic design: Use the transform tools to place the ball as desired.After Effects for graphic design: Use the transform tools to place the ball as desired.After Effects for graphic design: Use the transform tools to place the ball as desired.

Creating text layouts

In this lesson, we'll learn how to create text layouts using shapes, the Bezier Path, and the Type Tool.

We'll create text layouts starting with a simple rectangle. Go to the Toolbar, select the Rectangle Tool.

Make sure you don't have any layers selected so that you don't create a mask instead of a simple shape.

Let's rename the rectangle layer to "Text box". We'll transform our rectangle by doing the following:

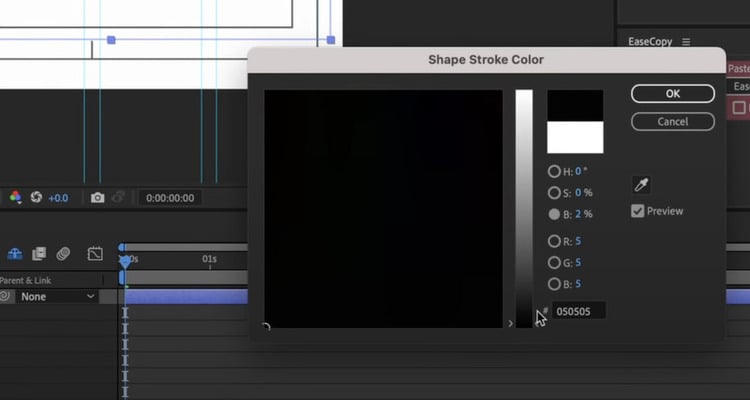
  1. Find the Stroke property on the bar at the top and add a black stroke to our rectangle.
  2. Select the Pan Behind Tool to select our anchor point and move it to the middle of our rectangle.
  3. Now, right-click on the "Text box" layer and convert it to Bezier Path.
After Effects for graphic design: Stroke property.After Effects for graphic design: Stroke property.After Effects for graphic design: Stroke property.
After Effects for graphic design: Pan Behind Tool.After Effects for graphic design: Pan Behind Tool.After Effects for graphic design: Pan Behind Tool.
After Effects for graphic design: Convert to Bezier path.After Effects for graphic design: Convert to Bezier path.After Effects for graphic design: Convert to Bezier path.

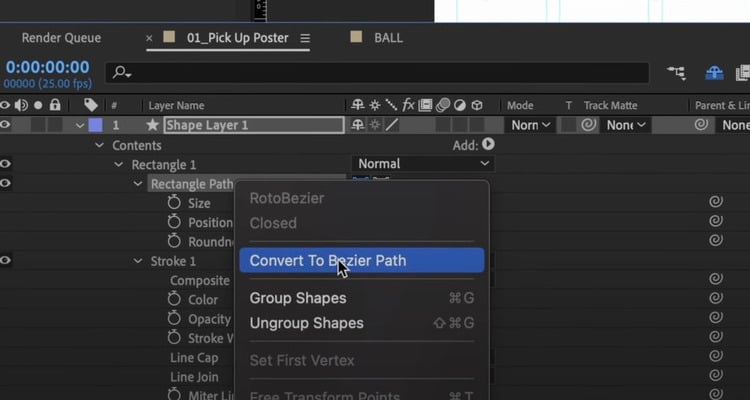
The Bezier path will add points to our shape, just like on Illustrator.

Keep in mind that you can't go back to the original shape once you've converted it to Bezier Path.

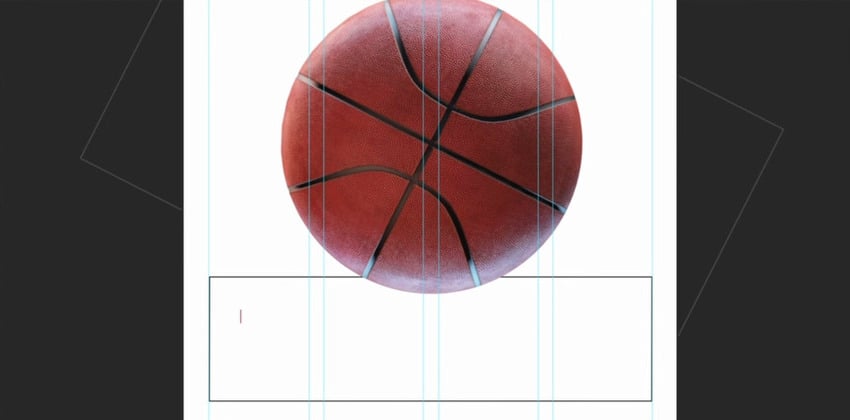
Now we can adjust and move our rectangle as we please. Place it under the basketball, so that the ball kind of seats on top of the box.

Animated poster in After Effects: Adjust and move the rectangle.Animated poster in After Effects: Adjust and move the rectangle.Animated poster in After Effects: Adjust and move the rectangle.

Adding the text

Select the Type Tool at the top. Select anywhere in the comp and start typing the text of our After Effects poster. We'll use these specifications for the main text:

  • Select a font similar to Helvetica (e.g., Neue Haas Grotesk).
  • Scale it up to 35 px, with a kerning of -25 and a leading of 29.
  • Align text with guides and use pre-compositions to organize elements.
Animated poster in After Effects: Select the Type Tool.Animated poster in After Effects: Select the Type Tool.Animated poster in After Effects: Select the Type Tool.
Animated poster in After Effects: Add text.Animated poster in After Effects: Add text.Animated poster in After Effects: Add text.

For the other texts, such as the details, try using different variations of the same font (like a thin or regular version). Or even a completely different, fun font for elements that you want to highlight.

Play around with the text properties until you get a look and feel that resonates with what you have in mind.

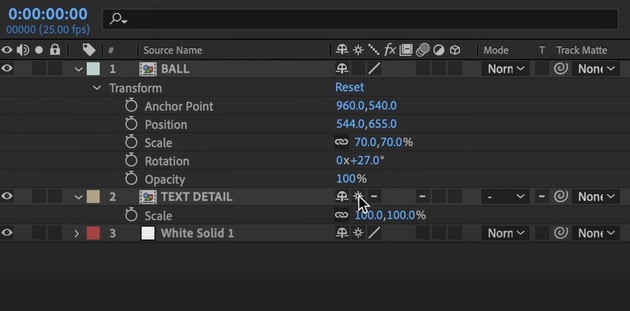
Finally, select all the text elements and pre-compose them. Name this composition "Text detail".

Turn on the Collapse Transformations button. If you scale the text up, it will avoid if from pixelating.

Animated poster in After Effects: Collapse Transformations.Animated poster in After Effects: Collapse Transformations.Animated poster in After Effects: Collapse Transformations.

We've got our ball and our text!

Working with gradients

In this lesson, we'll work with gradient fills to get the vintage aesthetic we're looking for. We'll also add text at the top and a logo.

Creating the gradient

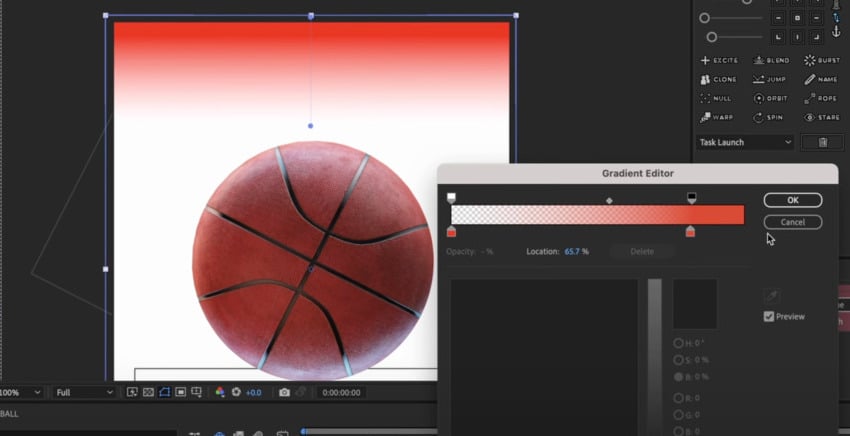
Gradients add depth and style to motion graphics, and in After Effects, they're easy to create and manipulate. Follow these steps to add a red gradient background:

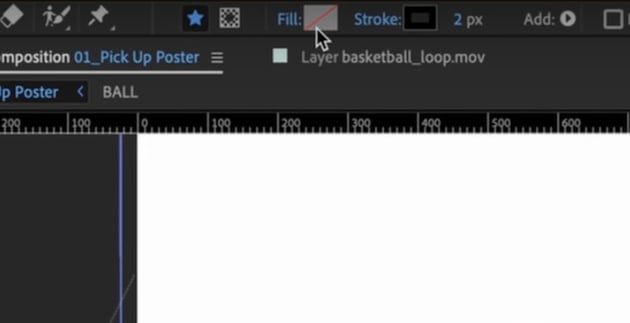
  1. Use the Rectangle Tool to draw a shape covering the entire comp.
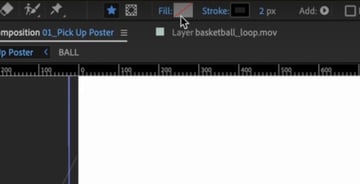
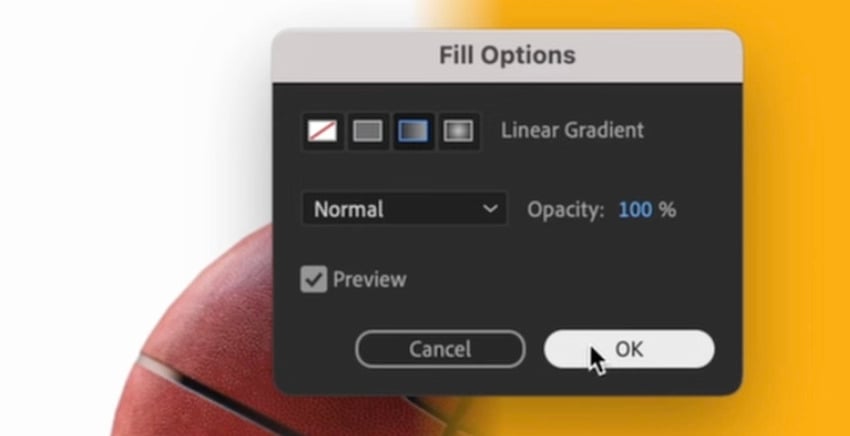
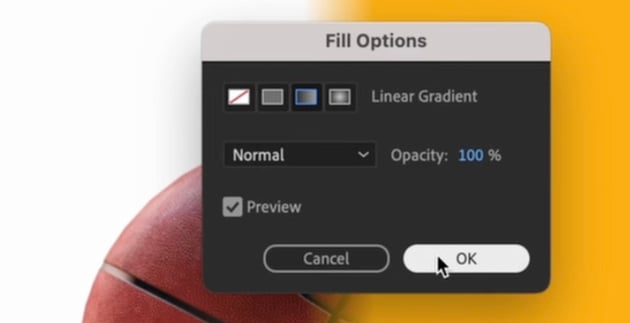
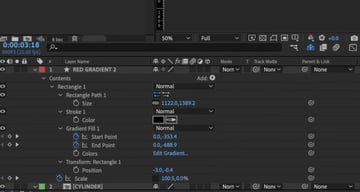
  2. Go to the Fill settings and select a Gradient Fill.
  3. In the Gradient Editor, give it a red color (#F70500).
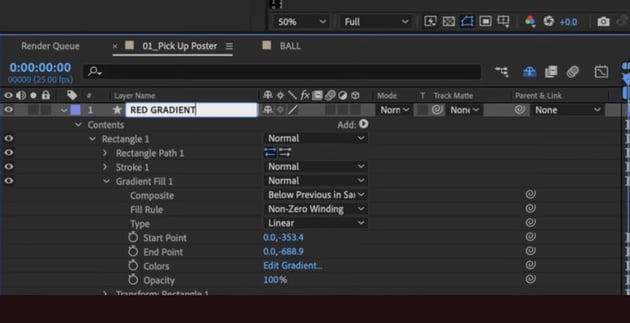
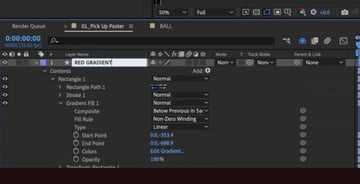
  4. Open the Effect Controls and locate the Start and End Points.
  5. Move the Start Point (0.0,-353.4) to the top and the End Point (0.0,-688.9) lower to create a top-down fade effect.
  6. Ensure a smooth transition by tweaking the fade intensity to avoid sharp edges.
  7. Label the layer "Red Gradient" to keep things tidy.

Store it in a separate subcomp folder to maintain a structured workflow.

Animated poster in After Effects: Fill settings.Animated poster in After Effects: Fill settings.Animated poster in After Effects: Fill settings.
Animated poster in After Effects: Gradient Fill.Animated poster in After Effects: Gradient Fill.Animated poster in After Effects: Gradient Fill.
Animated poster in After Effects: Gradient Editor.Animated poster in After Effects: Gradient Editor.Animated poster in After Effects: Gradient Editor.
Animated poster in After Effects: Red Gradient.Animated poster in After Effects: Red Gradient.Animated poster in After Effects: Red Gradient.

Adding top typography and logo

Text and branding elements reinforce the design's identity. Here’s how to add and style them:

  1. Select the Text Tool and type "Brought to you by" in the already used Neue Haas Grotesk font.
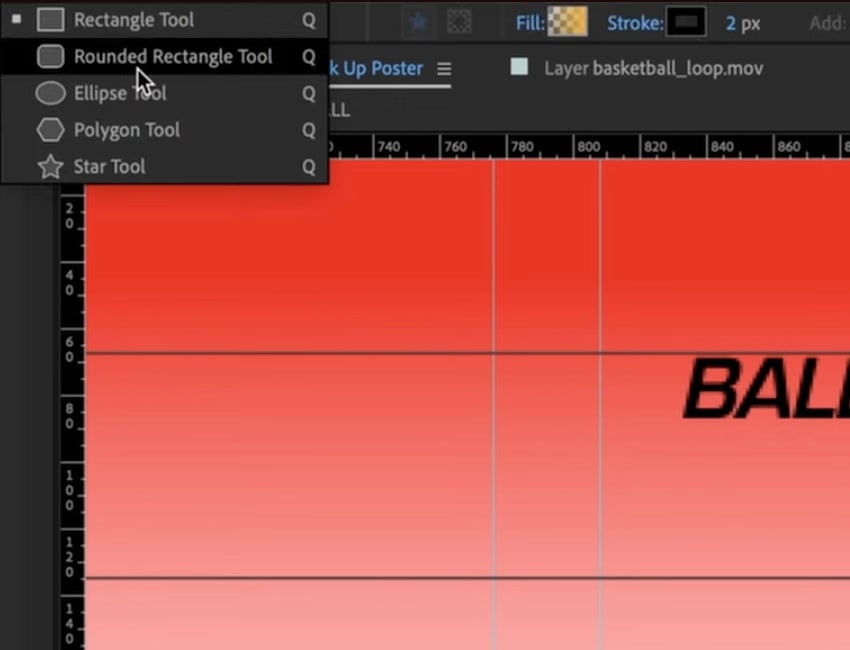
  2. Duplicate the text and replace it with "Ball for All", now with a retro font like Eurostile LT Std Demi Oblique.
  3. Use the Rounded Rectangle Tool to draw a shape around the logo text.
  4. Adjust roundness manually for a pill-like shape.
  5. Convert the shape to Bezier Path to fine-tune the edges.
  6. Name and precompose the logo as "Ball for All Text Logo".
  7. Use Align panel to vertically center text and shape.
  8. Parent the text to the shape using the Pick Whip Tool, so they move together.
How to animate a poster in After Effects: Rounded Rectangle Tool.How to animate a poster in After Effects: Rounded Rectangle Tool.How to animate a poster in After Effects: Rounded Rectangle Tool.
How to animate a poster in After Effects: Adjust roundness manually for a pill-like shape.How to animate a poster in After Effects: Adjust roundness manually for a pill-like shape.How to animate a poster in After Effects: Adjust roundness manually for a pill-like shape.
How to animate a poster in After Effects: Align the elements.How to animate a poster in After Effects: Align the elements.How to animate a poster in After Effects: Align the elements.

Cylinder text effects

In this lesson, we'll work with effects such as Cylinder, Black & White, and Levels. We'll also use tools such as color fills, masks, and keyframes to refine our design and animate everything.

The rotating text effect adds motion and a modern touch. Here’s how to set it up:

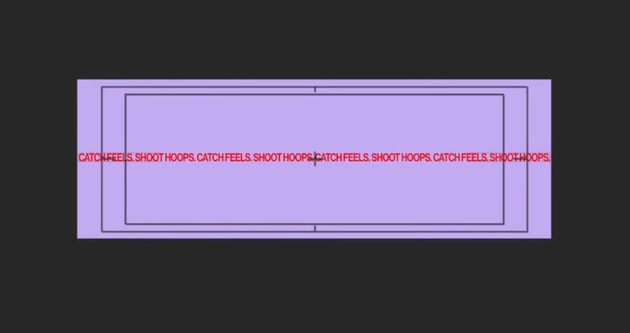
  1. Create a New Composition with a 4000 px width for a seamless loop.
  2. Create new text layer and type "CATCH FEELS. SHOOT HOOPS." in the Neue Haas Grotesk Display font, 18 px size.
  3. Apply the same red color fill (#F70500) for consistency.
  4. Copy the text 4 times so it spans the full width of the comp.
  5. Stretch the text horizontally for a vintage, distorted look.
How to animate a poster in After Effects: The text should span the full width of the comp.How to animate a poster in After Effects: The text should span the full width of the comp.How to animate a poster in After Effects: The text should span the full width of the comp.

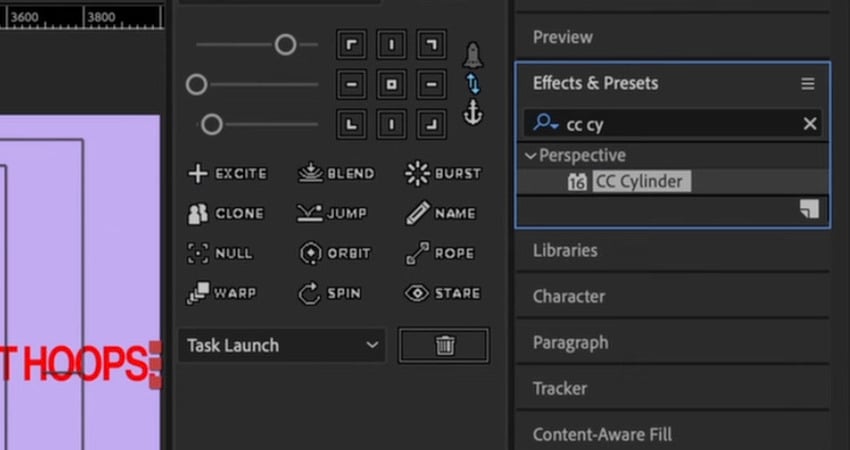
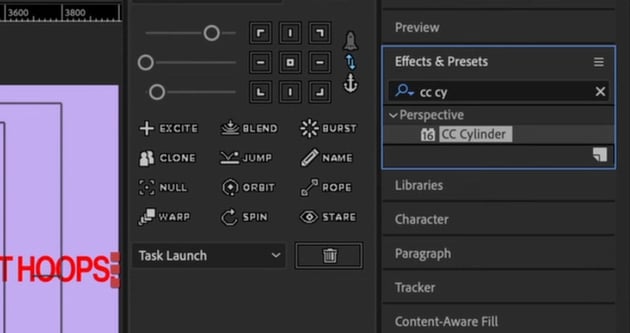
Let's go ahead an apply the Cylinder effect:

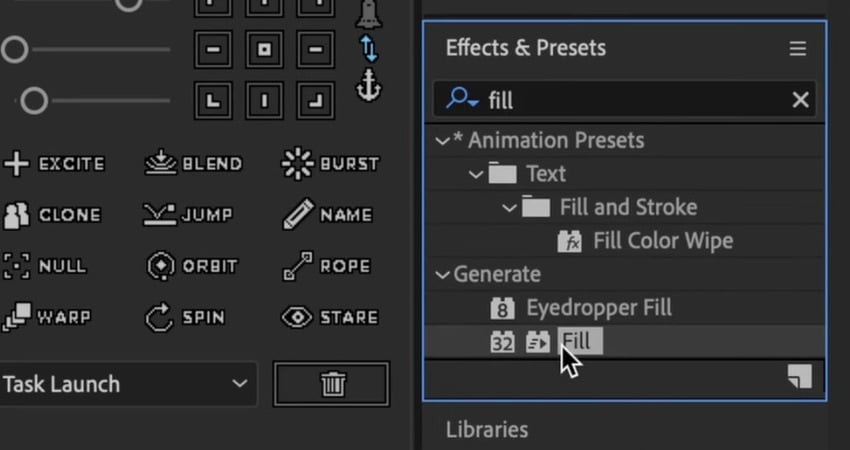
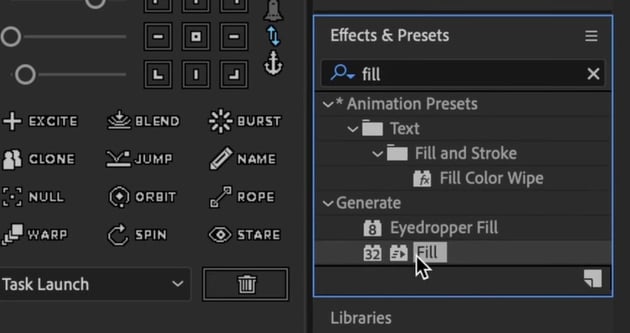
  1. Search for CC Cylinder in the Effects & Presets panel.
  2. Drag it into the text layer.
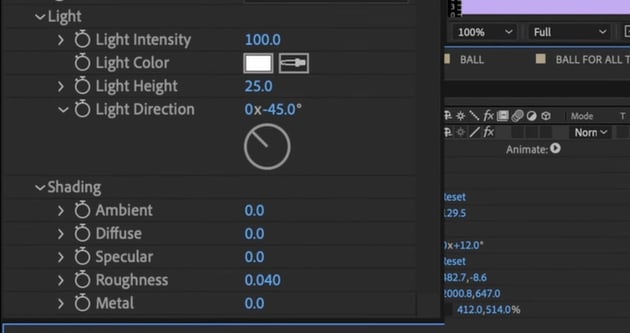
  3. Adjust radius, Y-axis rotation, and Z-axis tilt to wrap text around an invisible 3D cylinder.
  4. In the Shading Settings, turn down the Ambient, Diffuse, Specular, and Metal values to 0.
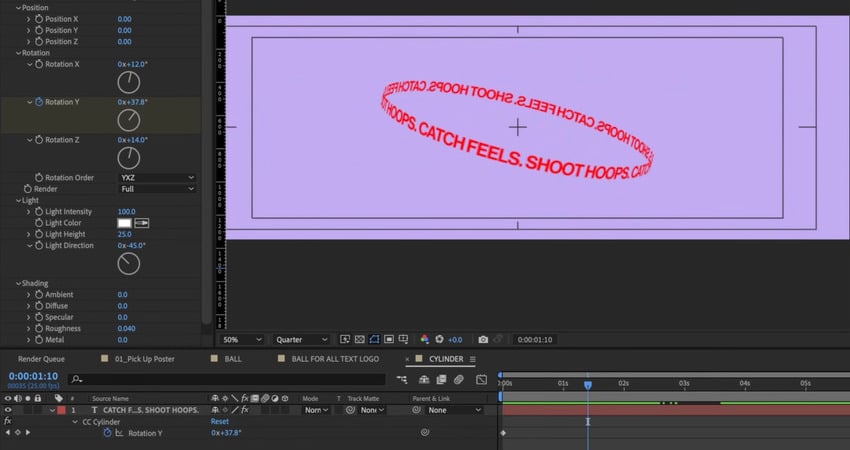
  5. Apply a Fill effect on top of the Cylinder effect to restore the red color.
  6. Animate the rotation by setting keyframes on Y and Z axis rotation to spin the text around.
  7. Adjust the duration for a smooth, readable movement.
How to animate a poster in After Effects: CC Cylinder.How to animate a poster in After Effects: CC Cylinder.How to animate a poster in After Effects: CC Cylinder.
How to animate a poster in After Effects: Adjust the the Shading Settings.How to animate a poster in After Effects: Adjust the the Shading Settings.How to animate a poster in After Effects: Adjust the the Shading Settings.
How to animate a poster in After Effects: Fill effect.How to animate a poster in After Effects: Fill effect.How to animate a poster in After Effects: Fill effect.
How to animate a poster in After Effects: Set keyframes on Y and Z axis rotation.How to animate a poster in After Effects: Set keyframes on Y and Z axis rotation.How to animate a poster in After Effects: Set keyframes on Y and Z axis rotation.

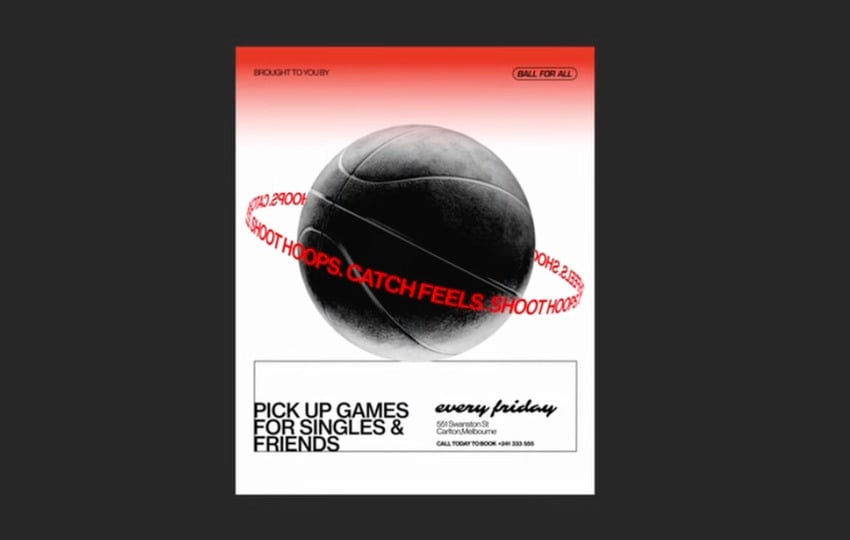
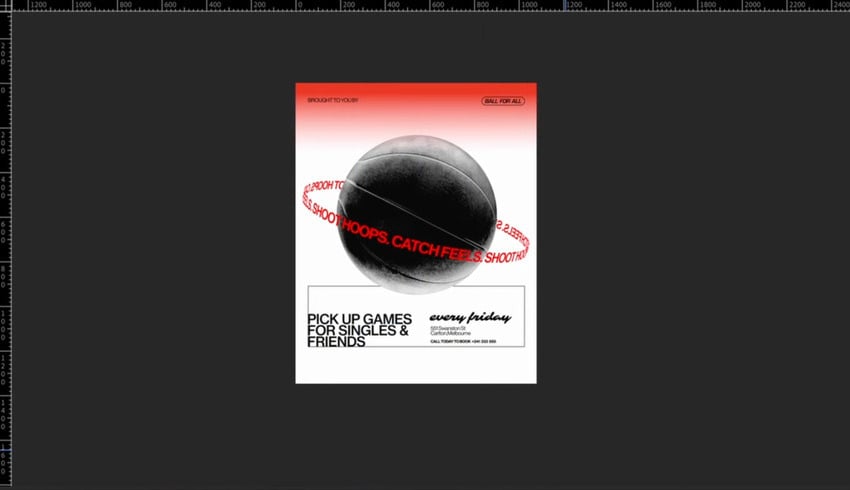
Masking the text to appear behind the basketball

So we want the text to be around the ball, not on top of it. To make the text interact with the ball, we'll add a mask. Follow these steps:

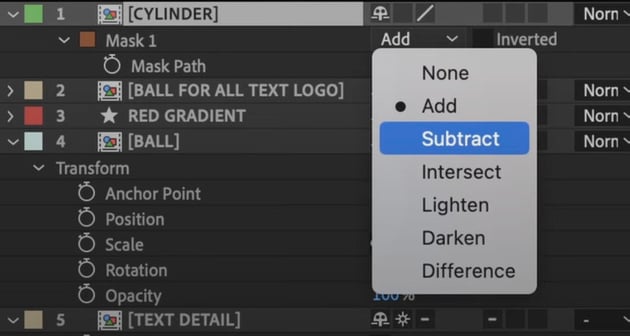
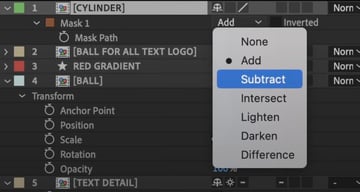
  1. Use the Pen Tool to draw a mask around the part of the text that should be in the back.
  2. Press M, then set the mask to Subtract so part of the text appears behind the ball.
  3. Adjust mask edges slightly to prevent unnatural overlaps.
After Effects for designers​: Pen Tool.After Effects for designers​: Pen Tool.After Effects for designers​: Pen Tool.
After Effects for designers​: Subtract.After Effects for designers​: Subtract.After Effects for designers​: Subtract.

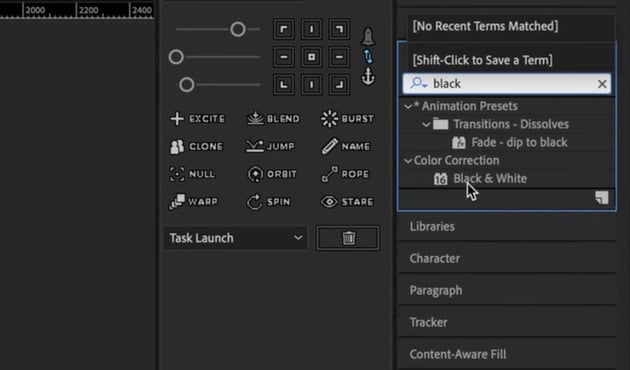
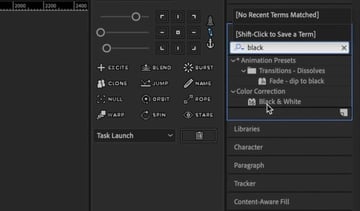
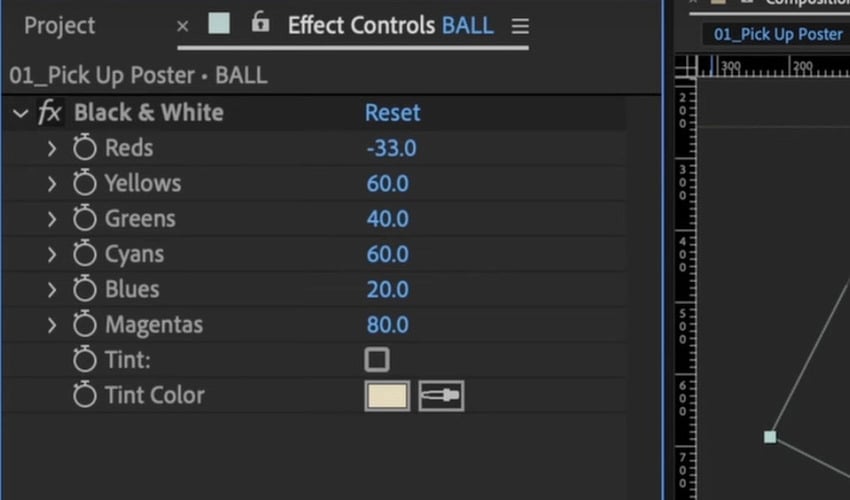
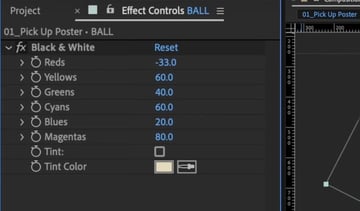
We'll now turn the ball black and white to improve the readability of the text. We'll also achieve a more retro look by doing so.

  1. Look for the Black & White effect in the Effects panel and drop it into the "Ball" layer.
  2. Open the Effect Controls and adjust the reds to -33.
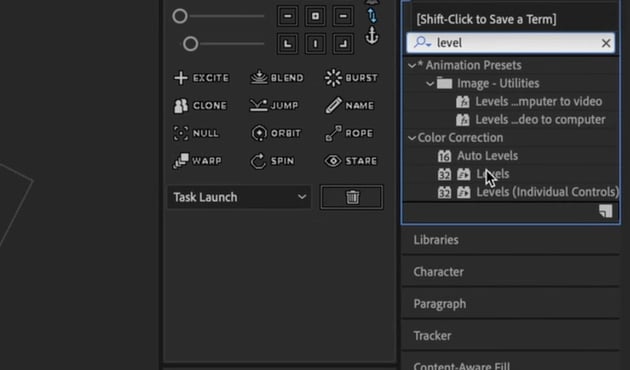
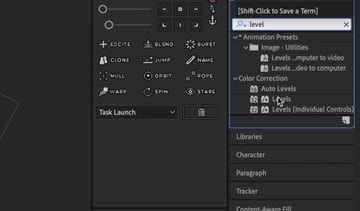
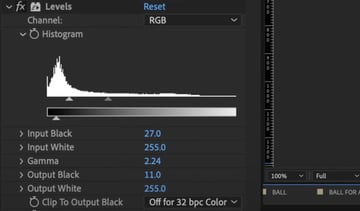
  3. Look for the Levels effect in the Effects panel and drop it into the "Ball" layer.
  4. Set the following Levels values: Input Black to 27, Gamma to 2.24, Output black to 11.
  5.  
After Effects for designers​: Black & White effect.After Effects for designers​: Black & White effect.After Effects for designers​: Black & White effect.
After Effects for designers​: Edit the Black & White effect.After Effects for designers​: Edit the Black & White effect.After Effects for designers​: Edit the Black & White effect.
After Effects for designers​: Levels effect.After Effects for designers​: Levels effect.After Effects for designers​: Levels effect.
After Effects for designers​: Edit the Levels.After Effects for designers​: Edit the Levels.After Effects for designers​: Edit the Levels.
After Effects for designers​: Poster up to this point.After Effects for designers​: Poster up to this point.After Effects for designers​: Poster up to this point.

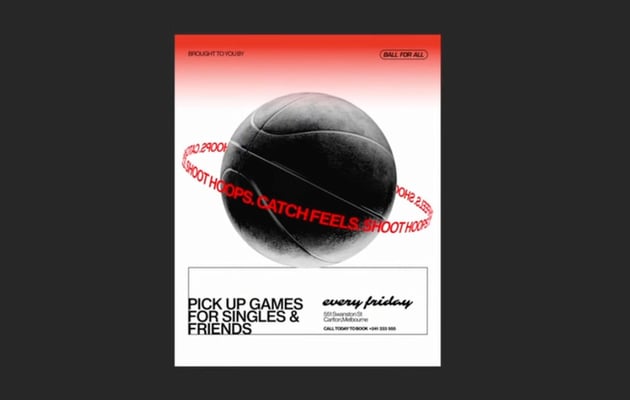
That looks pretty cool! Feel free to scale and position the elements of the After Effects poster in whatever way you like the most.

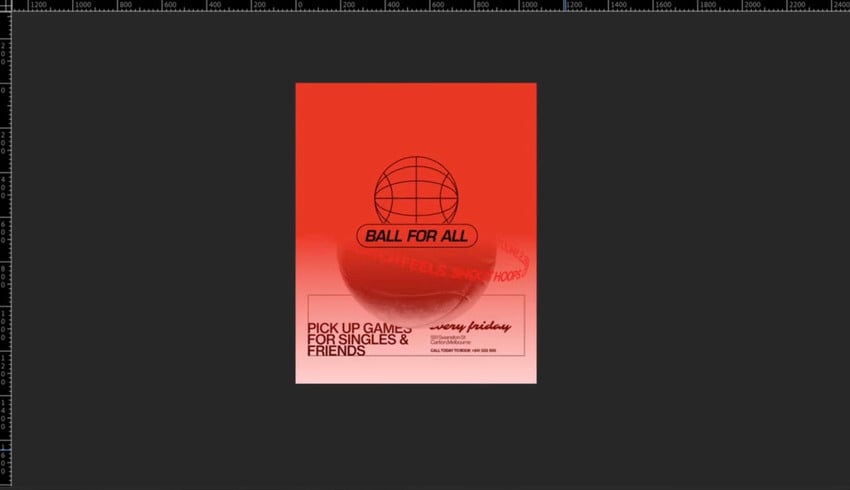
Creating a gradient transition animation

We'll add a red gradient transition to introduce the final logo and text:

  1. Duplicate the Gradient layer and move it to the top of the composition.
  2. Move the anchor point to the top.
  3. Scale the shape from 0% to 100% to create a downward wipe effect.
  4. Animate the Start Point moving downward.
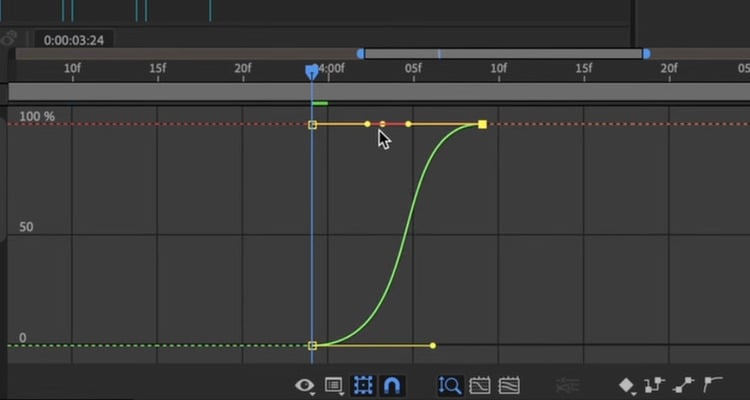
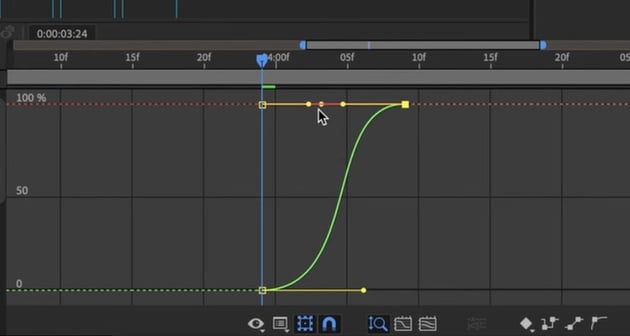
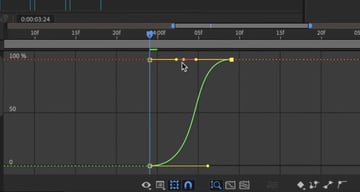
  5. Ensure smooth blending by tweaking the easing in the Graph Editor.
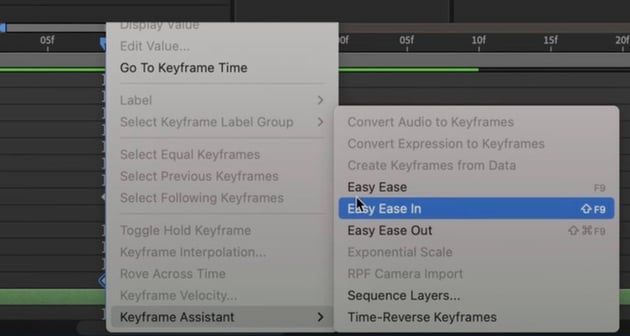
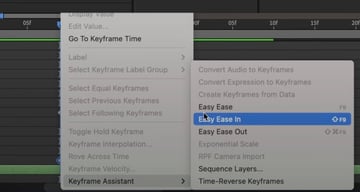
  6. Select all keyframes, right-click Keyframe Assistant > Easy Ease.
  7. Adjust the Graph Editor curves for smooth acceleration and deceleration.
After Effects for designers​: Edit the keyframes.After Effects for designers​: Edit the keyframes.After Effects for designers​: Edit the keyframes.
After Effects for designers​: Easy Ease.After Effects for designers​: Easy Ease.After Effects for designers​: Easy Ease.
After Effects for designers​: Graph Editor.After Effects for designers​: Graph Editor.After Effects for designers​: Graph Editor.

Animating the logo and text reveal

Once the gradient transition occurs, we want to animate the logo and text so that everything looks cohesive. Let's do the following:

  1. Move the rest of the layers (Ball, Text detail, Cylinder, Ball for all) into position.
  2. Set Position Keyframes so the logo moves downward.
  3. Offset animation timing for a staggered entrance.
  4. Fade in the logo using Opacity Keyframes (T on keyboard).

Briefly sneaking into Illustrator

In this lesson, we'll briefly launch Illustrator to create our logo. Then, we'll import it to After Effects.

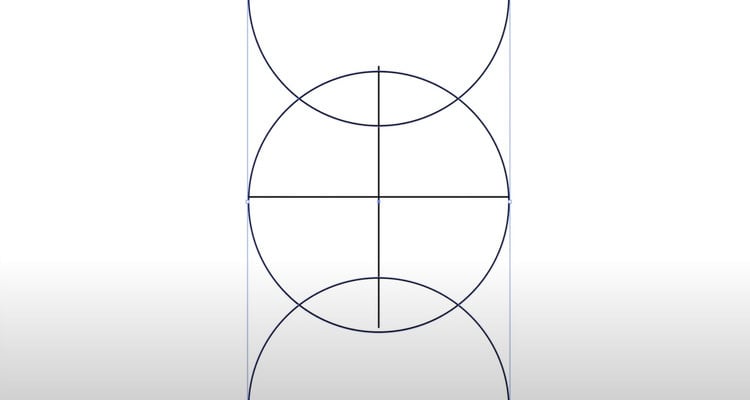
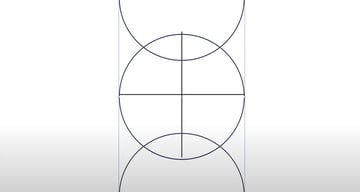
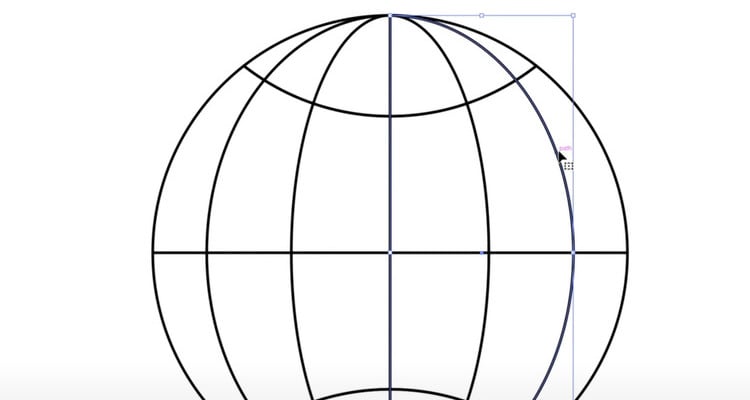
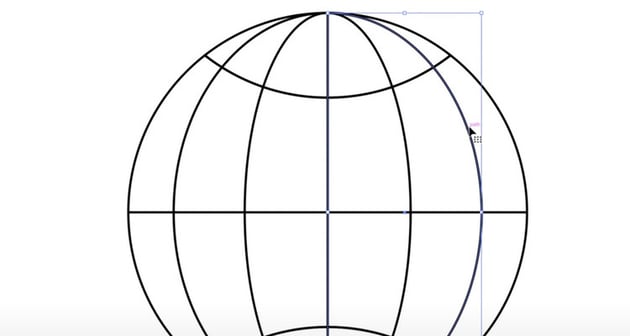
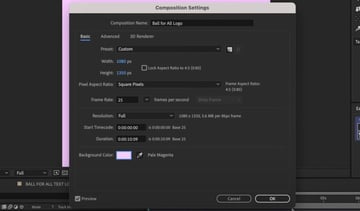
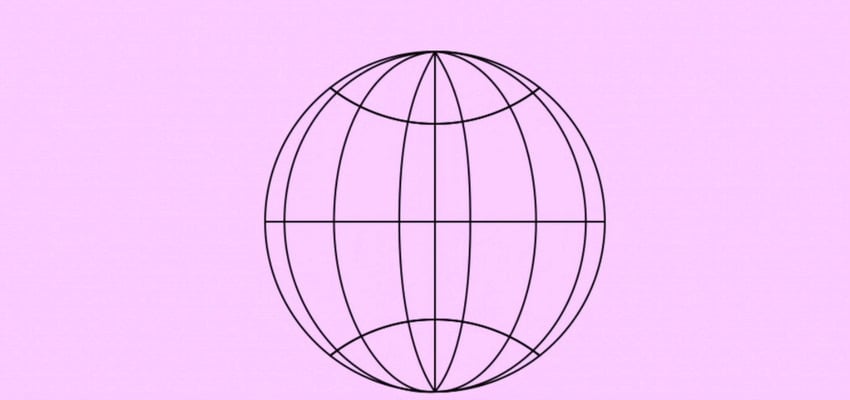
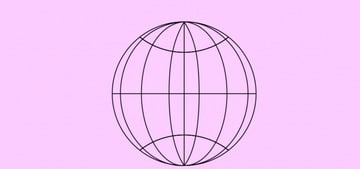
To create the rotating globe basketball, we’ll do a quick detour into Illustrator. First, make a new document that matches the comp size in After Effects and name it "Ball for All Logo".

  1. Use the Ellipse Tool (L) to create a perfect circle and center it.
  2. Enable Smart Guides (View > Smart Guides) for precise alignment.
  3. Draw a horizontal and a vertical line across the middle.
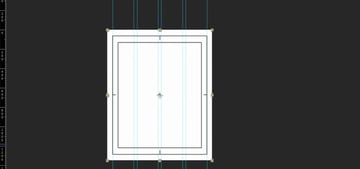
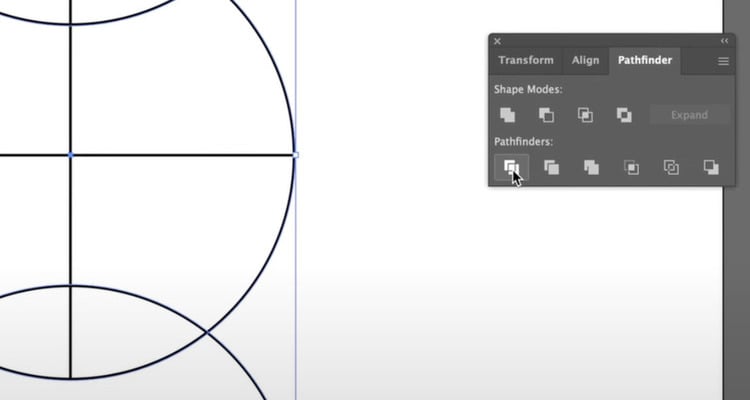
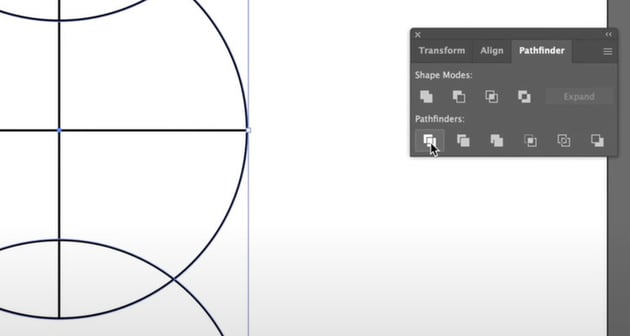
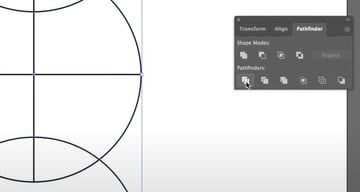
  4. Open Pathfinder and use the Divide tool to split paths.
  5. Delete unwanted sections and align strokes to center.
  6. Duplicate the original circle twice, scaling each down to form horizontal curves.
  7. Use the Scissors Tool (C) to cut one of the paths—this will be animated later.
After Effects poster​: Perfect circle with perpendicular lines.After Effects poster​: Perfect circle with perpendicular lines.After Effects poster​: Perfect circle with perpendicular lines.
After Effects poster​: Pathfinder.After Effects poster​: Pathfinder.After Effects poster​: Pathfinder.
After Effects poster​: Use the Scissors Tool (C) to cut one of the paths.After Effects poster​: Use the Scissors Tool (C) to cut one of the paths.After Effects poster​: Use the Scissors Tool (C) to cut one of the paths.

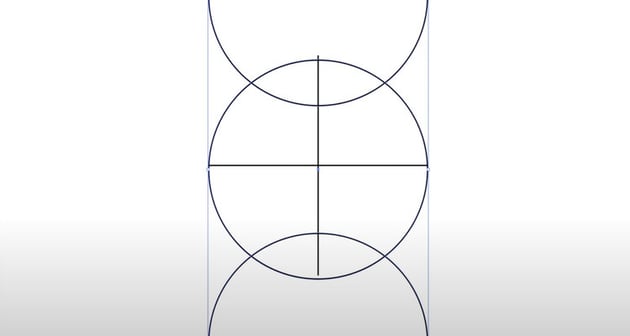
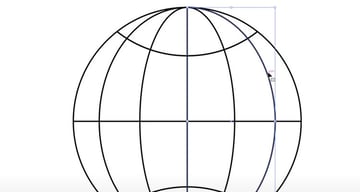
Once we're done, we'll save the file and import it into After Effects. To do this, we need to separate our layers.

Keep one half of the top path for animation and label it "Path". The other half serves as a reference layers (which we'll delete later). We'll also keep the back of the ball and label it "Ball".

We can now save this and drag it manually to our Assets folder in After Effects.

If using Overlord, push it directly into AE for an easy transfer.

This Illustrator segment helps create a more precise and editable path for animation that would be difficult to achieve in After Effects alone. Now, back to AE for animation!

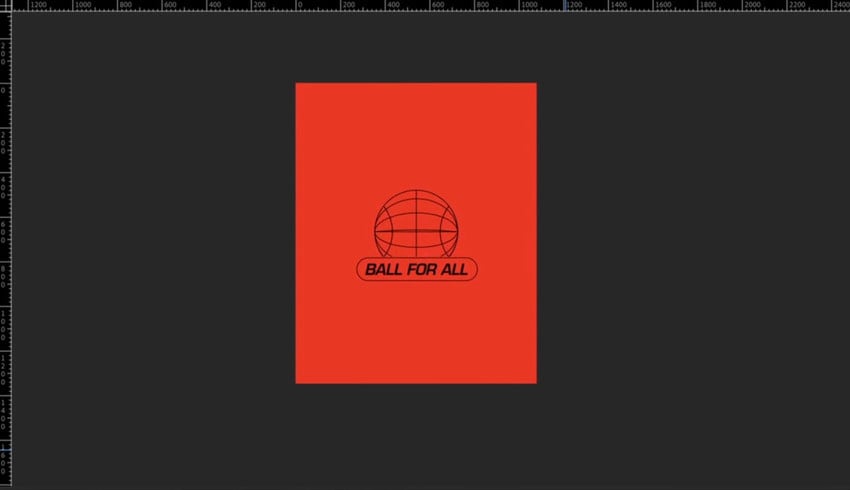
Creating and animating the rotating globe

In our main comp, let's delete our overloaded layers. We'll precompose the Illustrator layers and ensure everything is set correctly in After Effects.

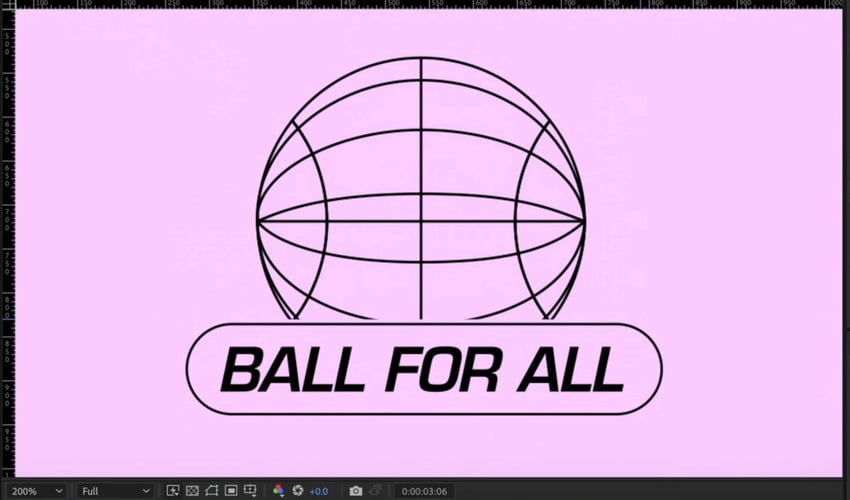
We can now start with the background of this composition.

Check the composition settings. Sometimes, creating a new comp from an existing asset alters the frame rate or background color.
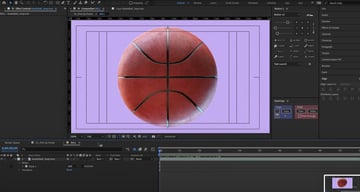
  1. Adjust the background color (e.g., a light purple) for better visibility.
  2. Align everything to the center using Title Action Safe guides.
After Effects poster​: Composition Settings.After Effects poster​: Composition Settings.After Effects poster​: Composition Settings.

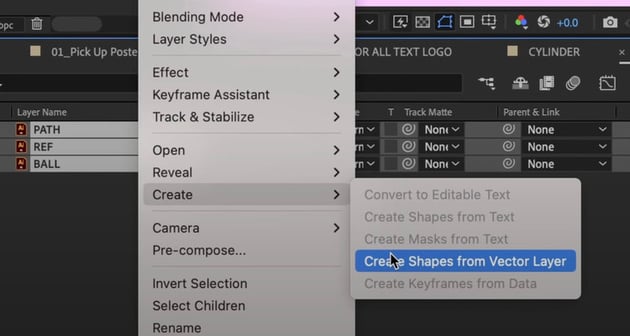
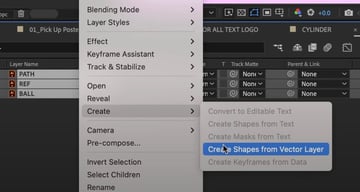
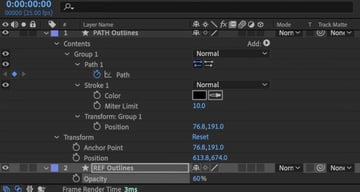
Now let's convert to editable shapes and animate the path directly:

  1. Right-click on the Illustrator layers > Create > Create Shapes from Vector Layer.
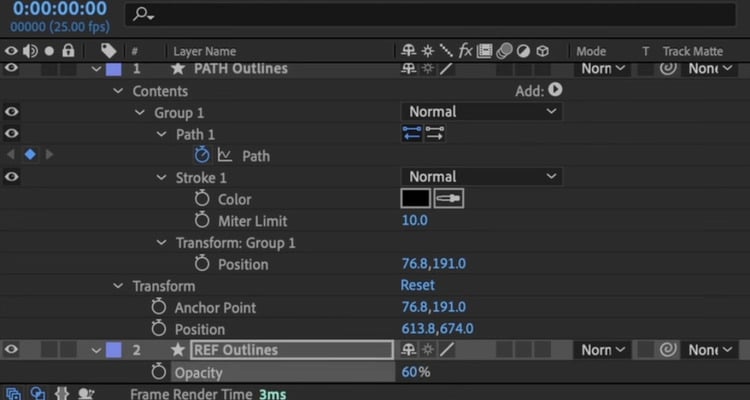
  2. Delete unnecessary layers, keeping only the ones needed for animation.
  3. Reduce the opacity (60%) on reference layers and lock them to avoid accidental edits.
After Effects poster​: Create Shapes from Vector Layer.After Effects poster​: Create Shapes from Vector Layer.After Effects poster​: Create Shapes from Vector Layer.
After Effects poster​: Reduce the opacity.After Effects poster​: Reduce the opacity.After Effects poster​: Reduce the opacity.

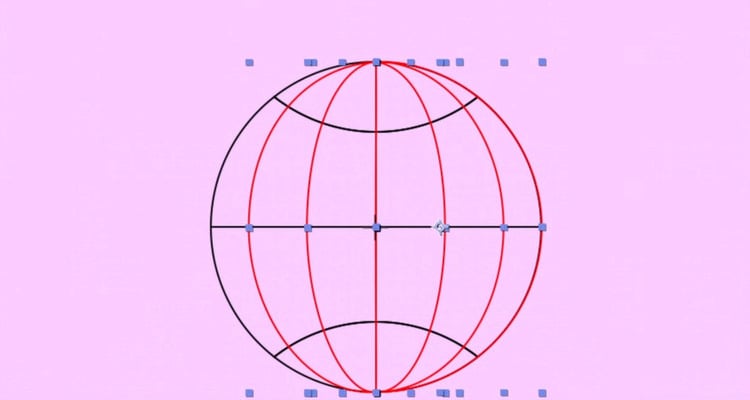
It's time to create the illusion of rotation by animating the curved lines:

  1. Set an initial keyframe at frame 0.
  2. Move forward 10 frames, add another keyframe.
  3. Repeat every 10 frames, adjusting the path each time.
  4. Modify the Bezier curves to ensure smooth transitions.
  • The first keyframe should match the outer edge of the ball.
  • The second keyframe remains unchanged.
  • Subsequent keyframes gradually adjust the curves to mimic rotation.

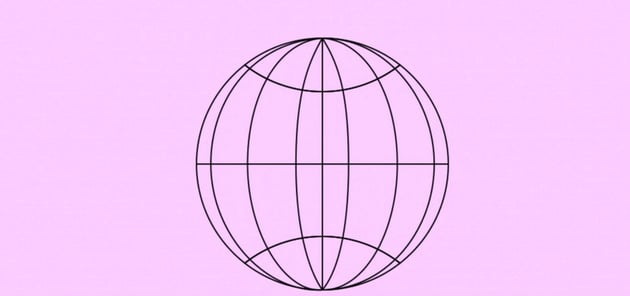
This is a trial-and-error process, so keep on making the small tweaks until it's all aligned with our reference image.

Looping the animation

Here's what we need to do to create a seamless loop:

  1. Trim the animation at the exact frame where it cycles back.
  2. Duplicate and offset the layers to maintain continuity.
  3. Align everything perfectly to ensure smooth transitions.

We'll test the loop by following a few simple steps:

  1. Press B to set the start of the work area.
  2. Move to the repeating frame, press N to set the end.

Let's pre-compose all of these layers. To make the loop play indefinitely:

  • Right-click > Time > Enable Time Remapping.
  • Move one frame back from the end and add a keyframe.
  • Delete the extra final frame (which is blank).
  • Alt + Click the Time Remap stopwatch and type loopOut().
After Effects poster​: Keyframes.After Effects poster​: Keyframes.After Effects poster​: Keyframes.
After Effects poster​: Enable Time Remapping.After Effects poster​: Enable Time Remapping.After Effects poster​: Enable Time Remapping.
After Effects poster​: loopOut().After Effects poster​: loopOut().After Effects poster​: loopOut().

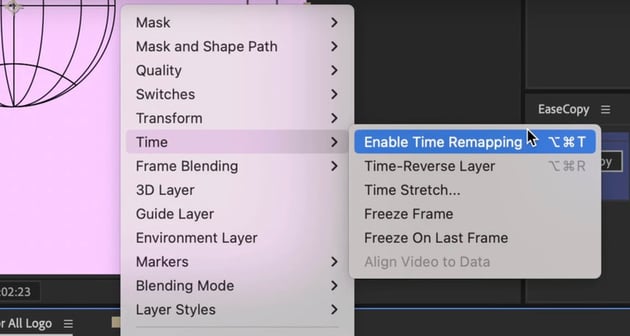
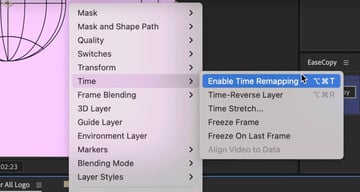
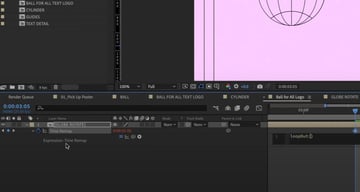
Now, our animation loops seamlessly for any duration!

After Effects poster​: Looping animation.After Effects poster​: Looping animation.After Effects poster​: Looping animation.

Bringing in the logo and animating it

Let's start by importing and adjusting our logo:

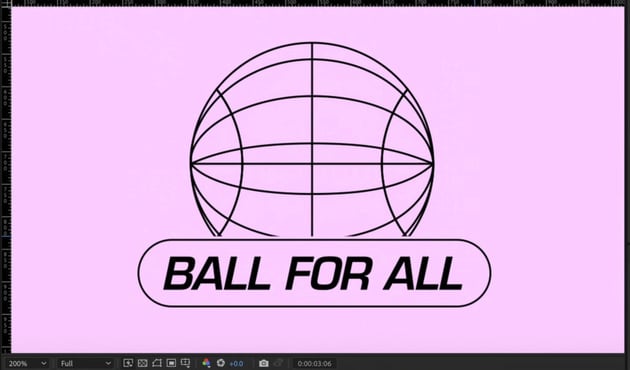
  1. Locate the Ball for all logo and bring it into the composition.
  2. Ensure correct layer parenting so the pill shape and text move together.
  3. Manually adjust the stroke width to maintain consistency with other elements.
  4. Rotate the globe90 degrees for a basketball-like spinning effect.

Now, we'll do the masking and positioning of our ball:

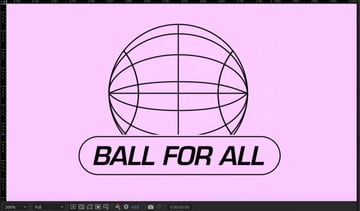
  1. Mask the ball to keep it hidden behind the pill logo.
  2. Adjust the spacing between elements for a balanced look.
  3. Slightly reposition everything to ensure proper alignment.
Adobe After Effects tutorial​: Ball and logo.Adobe After Effects tutorial​: Ball and logo.Adobe After Effects tutorial​: Ball and logo.

To animate the logo entrance, follow these steps:

  1. Match the motion of previously animated elements.
  2. Use the open bracket ([) to align the logo’s start point with the playhead.
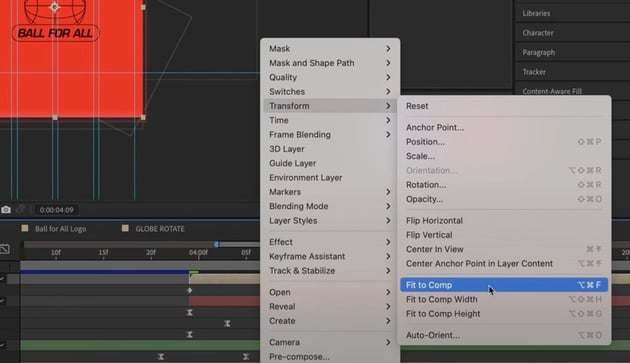
  3. Set a position keyframe at the desired location.
  4. Reset its position back to center using Transform > Fit to Comp.
  5. Apply ease-in and ease-out keyframes for smooth motion.
  6. Use opposite easing to earlier animations: fast in, slow out.
  7. Offset the timing so that the logo enters after other elements disappear.
Adobe After Effects tutorial​: Fit to Comp.Adobe After Effects tutorial​: Fit to Comp.Adobe After Effects tutorial​: Fit to Comp.
Adobe After Effects tutorial​: Poster before transition.Adobe After Effects tutorial​: Poster before transition.Adobe After Effects tutorial​: Poster before transition.
Adobe After Effects tutorial​: Poster during transition.Adobe After Effects tutorial​: Poster during transition.Adobe After Effects tutorial​: Poster during transition.
Adobe After Effects tutorial​: Poster after transition.Adobe After Effects tutorial​: Poster after transition.Adobe After Effects tutorial​: Poster after transition.

We're almost there! Let's now add the subtitle animation.

  1. Copy the "Brought by" text and align it below the logo.
  2. Scale and reposition it properly.
  3. Add position and opacity animations:
    • Start with 0% opacity and move slightly downward.
    • Animate to 100% opacity with a subtle easing effect.
    • Offset the timing so the text appears after the logo.

We'll loop the animation by following these steps:

  1. Reverse the entrance animation for a smooth exit.
  2. Copy and invert the keyframes so the logo exits cleanly.
  3. Use the Graph Editor to fine-tune the motion curve.
  4. The ball animation resets, bouncing back into the scene to restart the loop.
  5. Add gradient masking to smoothly reveal and hide the elements.
  6. Use alpha mattes to ensure the gradient transition looks clean.
  7. Ensure the ball and cylinder text animation syncs correctly with the loop.
You can play with the positioning and the keyframes of each element. The animation can be as fun and dynamic as you want it to!

The result is a seamless transition that reinforces the retro sports aesthetic.

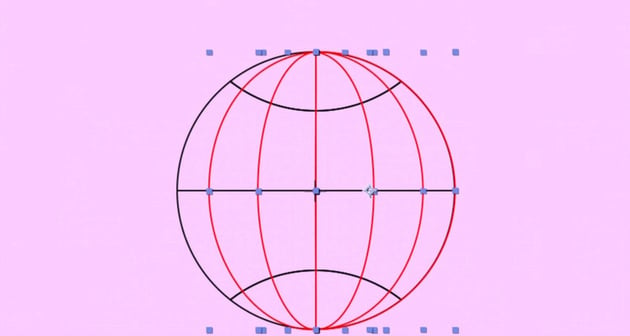
Add some final effects

We'll wrap things up in this lesson by adding final touches to our animated poster. We want to achieve a vintage printed effect and a stop motion feel.

To wrap things up, we want to enhance the vintage feel of our animated poster. We can do it by applying a few additional effects.

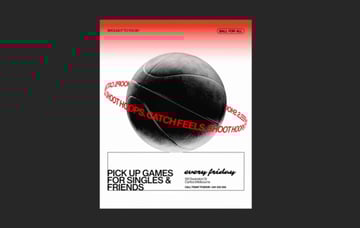
Chromatic aberration effect

  1. Duplicate the final composition 3 times.
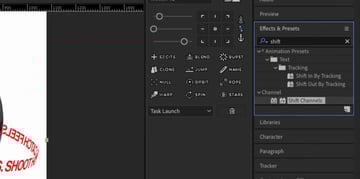
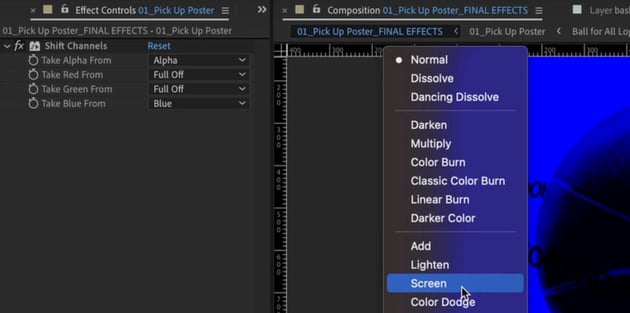
  2. Apply Shift Channels effect:
  • Top layer: Full Off on everything but Blue.
  • Middle layer: Full Off on everything but Green.
  • Bottom layer: Full Off on everything but Red.
  • Set top two layers to Screen blend mode.

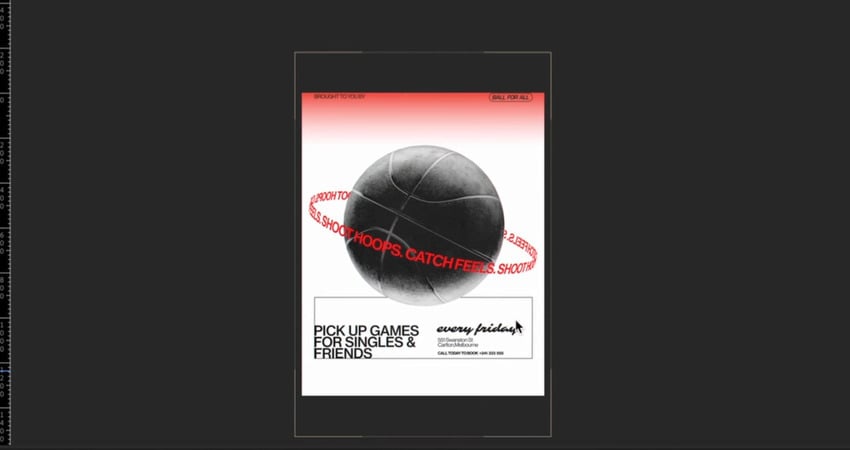
Once you're done, nudge the layers slightly to create a colored fringe effect.

After Effects design: Duplicate the final composition 3 times.After Effects design: Duplicate the final composition 3 times.After Effects design: Duplicate the final composition 3 times.
After Effects design: Shift Channels effect.After Effects design: Shift Channels effect.After Effects design: Shift Channels effect.
After Effects design: Screen blend mode.After Effects design: Screen blend mode.After Effects design: Screen blend mode.
  • For a posterized time effect, apply Posterize Time (10 FPS) to give it a stop-motion feel.
  • To add texture, import a grainy photocopy texture, set it to Multiply blend mode, and reduce opacity.
Finished animated poster in After Effects​.Finished animated poster in After Effects​.Finished animated poster in After Effects​.

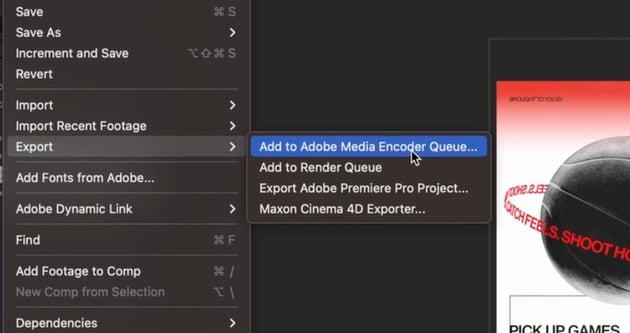
Exporting the final animation

We're done! It's time to render our animated poster using Adobe Media Encoder (H.264 format, MP4) for social media.

Export your After Effects poster.Export your After Effects poster.Export your After Effects poster.

If needed, adjust bitrate settings to enhance quality.

Simply save, export, and share your retro animated poster!

You finished your animated poster in After Effects

By combining gradients, typography, and creative animation techniques in After Effects, you can transform static designs into dynamic visuals.

Follow these steps to experiment with your own layouts, and keep pushing your motion graphics skills to the next level!

If you want to learn more motion design tips and tricks, check out our other Adobe After Effects tutorials here on Tuts+:

  • How to make an animated text effect in After Effects
    Mohamed Elaasry
    23 Jan 2025
  • How to quickly create a transparent background in After Effects
    Andrew Childress
    28 Nov 2024
  • What is chromatic aberration? (and how to fix it)
    Jonathan Lam
    28 Aug 2024
  • After Effects: How to Make a 2D Photo Into a 3D Video
    Jonathan Lam
    06 Aug 2024
  • How to Make & Export Creative GIF Animations in After Effects
    Jonathan Lam
    24 Jul 2024
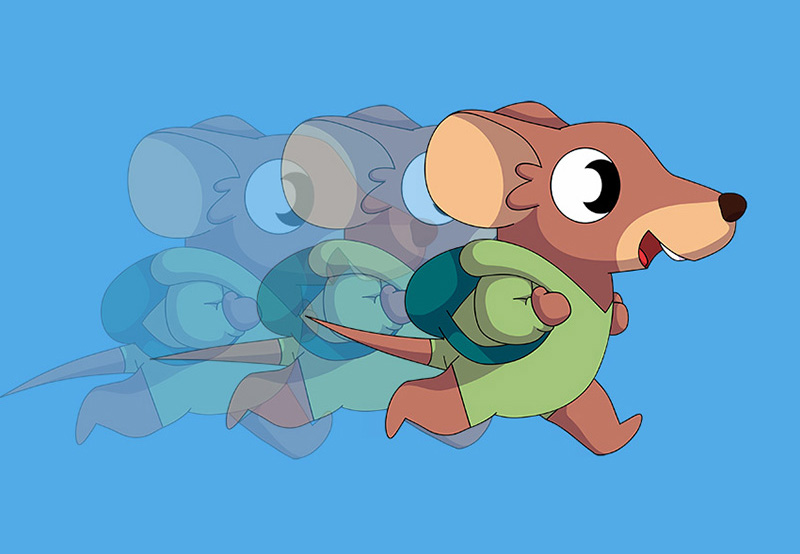
  • How to Quickly Loop a Video Clip in After Effects
    Andrew Childress
    16 May 2024
Jess Riley
Jess Riley
Jess Riley is a designer making motion and graphics for emotion. She is currently based in Melbourne.
One subscription. Unlimited downloads of assets. Full stack of AI tools.
Find everything from photos to fonts, and templates to so much more.
Unlimited Downloads
From $16.50/month
Get access to over one million creative assets on Envato.
Over 9 Million Digital Assets
Everything you need for your next creative project.
Create Beautiful Logos, Designs
& Mockups in Seconds
Design like a professional without Photoshop.
Join the Community
Share ideas. Host meetups. Lead discussions. Collaborate.
envato-tuts+
DiscoverAbout EnvatoOur Pricing & PlansStock VideoVideo TemplatesRoyalty-Free MusicStock PhotosFontsPopular Searches
License & User TermsLicense TermsTerms & ConditionsPrivacy PolicyAcceptable Use PolicyFair Use PolicyCookiesCookie SettingsDo not sell or share my personal information
ResourcesDiscover Tuts+Video & MusicDesignMarketingWeb DesignExplore Blog
HelpHelp CenterBecome an Affiliate
About UsWho We AreOur ProductsOur PurposeJoin Our TeamCompany Blog
AuthorsBecome an AuthorAuthor Sign InAuthor Help Center
Envato MarketEnvato Tuts+Placeit by EnvatoMixkitAll ProductsSitemap

© 2025 Envato Trademarks and brands are the property of their respective owners.