
Today, we'll be building on our previous tutorial, taking our flash photography outside, and learning how to balance our strobe light with the available sunlight while maintaining subject exposure.
If you’re just getting started with outdoor flash photography, shooting on-location might pose a few new challenges for you. Mainly because the available (or ambient) light source, which is the sun, is one you cannot directly control. However, when you get the hang of outdoor flash photography, you will be stunned by the quality of photos you’ll be able to create.
Introduction
The trick in outdoor flash photography is that you need to balance your strobe light with the available light. So basically you will be working with (at least) 2 exposures: your flash exposure, and the camera’s exposure.
Now, since we cannot control the light coming from the sun, we need to adjust our camera exposure to it, for correct background illumination. Once we’ve set our camera to match the available light, all we have to do is adjust our strobe light to match our camera settings to get a correct fill light.
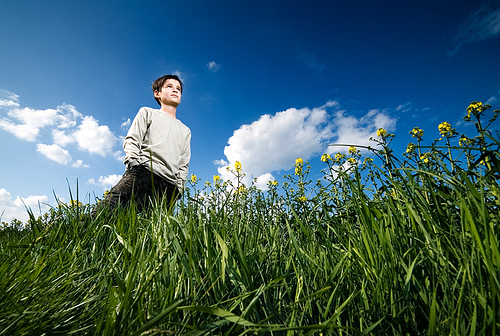
It’s important to keep in mind that since you cannot control the available light on-location, make it a habit to shoot at times when the sunlight is at its best. This is when the sun is low in the sky, which would be about 15 minutes before till after sunrise, and 15 minutes before till after sunset (otherwise known as the golden hour).
Most professional photographers prefer to shoot during the golden hour because, if you choose to shoot during the day when the sun is high in the sky, you will get harsh shadows and high contrast scenes which would make it difficult for you and your camera to capture soft, even exposures.
If you’re bound by a certain time and the sunlight is not working in your favor, you can always shoot in the shade. Try underneath some trees, next to a building, or any other location with soft diffused light.
Since you are shooting with your studio strobe, you will have to pay close attention to your shutter speed. You won’t be able to set your camera’s shutter speed to one that is higher than your flash sync speed. That is because, if you do, you’ll end up with photos with dark areas.
Most cameras have a flash sync speed of 1/200s or 1/250s (refer to your camera manual to learn yours), so your camera's shutter speed cannot go any faster than that if you’re planning to shoot with a flash.
Outdoor Flash Photography Settings


So how should you go about setting your gear for an on-location flash photo shoot? First, set your camera to manual mode and choose a shutter speed equivalent to your camera’s flash sync speed (usually 1/250s) for the largest opening possible, or slower for more depth of field.
Second, position your model against a flattering background. Now point your camera just behind your subject (without having them within the frame), and with your camera’s shutter speed set to match the flash sync speed (or slower), adjust your aperture until you get a correct meter reading.
Now that you know your camera’s shutter and aperture settings, all you have left to do is to meter your flash. With a light meter, adjust your flash power till you get an aperture setting identical to that of your camera’s.
Next, take a couple test shots and see how everything looks. An important thing to keep in mind while shooting with your flash outside is to always revise your results, because the available light will be constantly changing as the sun and/or clouds move - especially around sunrise and sunset. So take a few shots and keep an eye on your histogram. If the available light qualities change, adjust your camera and flash settings to match the new light.


Under-Exposing and Over-Exposing the Background
We’ve learnt how we can make use of ambient light to correctly expose the background, while maintaining subject exposure using our fill flash. So what happens if we want to under expose or over expose the background for dramatic creative effects?
Keep in mind that, now that you’ve accomplished the right camera and flash settings, everything is correctly exposed. Your camera controls the background, and your flash controls your model. I’ll say it again: your camera controls the background, and your flash controls your model. So if you want to alter background exposure, all you need to do is change your camera’s shutter speed. The fill flash doesn’t need any adjustment since it’s already set to correctly illuminate your subject.
To over-expose the background, you’ll need to set your camera’s shutter speed to a lower setting. So if the correct camera settings are 1/60s at f 2.8 and ISO 100 and you wish to over expose the background by, let’s say 1 stop, your new camera settings would be 1/30s at f 2.8 and ISO 100.
Your strobe settings would remain intact. If you want to blow out the background, you would over expose it by, let’s say 3 stops, so your new camera settings would be 1/8s at f 2.8 and ISO 100.
Using the same logic, to under-expose the background you would ride up your camera’s shutter speed. So if the correct camera settings are 1/60s at f 2.8 and ISO 100 and you wish to under expose the background by let’s say 1 stop, your new camera settings would be 1/125s at f 2.8 and ISO 100. Your flash settings would also remain intact.


Outdoor Cross-Lighting


We’ve already discussed how shooting in the golden hour is your best bet for great light. But the question is, what happens if you want to shoot during mid-day sunlight? What if there is no shade, or equally, what if you don’t want any shade?
Well, here is where cross lighting techniques come into play. Cross lighting is achieved by having 2 strong directional light beams coming from opposite directions, with your subject in between.
So basically what you need to do firstly is figure out where you want to place your model. Your best bet would be having the sun to their back to the left or to the right, depending on the available background, unless you want them facing the sun and squinting throughout the photo shoot! This light would also act as a separation light (otherwise known as rim light or hair light), so you want to pay attention to how it falls on your model.
Next you’ll place your strobe in the opposite direction, against the harsh sunlight. You’ll probably want to use a bare flash with no diffuser, so that your light can match up the light coming in from the sun.
Now, set your camera to manual mode with your shutter speed set to your camera’s sync speed for the largest opening possible, and adjust your aperture settings accordingly exposing for the background. Once you’re done with the camera settings, turn your strobe light on, say, half power and take a shot.
Review the results. If the strobe light is not bright enough, move it in closer to your subject. If it’s too bright, either move a little further from your subject or even better lower its power for faster recycle time. Shoot and repeat.


On-Location Photography With No Flash
If you find yourself outdoors with no strobe light on hand, you can use a reflector instead to bounce sunlight back onto your subject's face. You would go about this by placing your subject with their back to the sun to create a nice rim light effect, highlighting their hair from the back. Have someone help you hold a bounce card against the direction of the sunlight, in front of your subject's face to illuminate them from the front.
Experiment with reflector placement till you get a pleasant fill light that gives you the result you're after. The reflected light hitting your model's face from the front would be softer than the background light, and this would create a nice dramatic effect.
As for the reflector, you could go with one that has one silver side, and one golden side. Those are usually cheap, and they can be folded to fit right into your camera and gear bag. Use the golden side for a warm light effect, or the silver side for a more natural bounced light.
Conclusion
Outdoor flash photography is a very interesting area to explore and once you get the hang of it, it can yield amazing professional results that you wouldn't be able to achieve otherwise.
One thing you need to remember is, practice makes perfect. You need to experiment with lighting and subject positioning to learn what works for you and what doesn't. Once you find what suits you best, you will be on the road to creating great photos.
 By
By


