Skip to content

Envato: Get every type of asset for any type of project, and a full stack of AI tools

From $16.50/m
envato-tuts+
envato-tuts+
  • Design
  • Business
  • Photo
  • Video
    Video View all Video
    Start Learning
    • Software
      Software
      • Adobe After Effects
      • Adobe Premiere Pro
      • Davinci Resolve
      • Cinema 4D
      • Blender
      • Final Cut Pro
      • Apple Motion
      • OBS
      • Camtasia
      • Screenflow
      • Kapwing
      • Runway
      • Adobe Rush
      • AI Tools
      • CapCut
      • Spline
    • Equipment
      Equipment View all Equipment
      • Cameras & Lenses
      • Tripods & Supports
      • Drones & Rigs
      • Filters & Accessories
      • Smartphones
      • Lighting
      • Audio Equipment
    • Production & Recording
      Production & Recording View all Production & Recording
      • Lighting
      • Audio
      • Composition
      • Screen Recording
      • Livestreaming
    • Post-Production
      Post-Production View all Post-Production
      • Video Editing
      • Color Grading
      • Motion Graphics
      • Audio
      • Workflow
    • Templates & Presets
      Templates & Presets View all Templates & Presets
      • Intros & Openers
      • Titles
      • Transitions
      • LUTs & Profiles
      • Text Effects
      • Particle Effects
      • Logo Animations
      • Slideshows
      • Presets
      • Scripts & Plug-ins
    • Types of Video
      Types of Video View all Types of Video
      • Instructional
      • Documentary
      • Stock Footage
      • YouTube
      • Social Videos
      • Music Videos
    • Animation
    popular software in Video
    • Adobe After Effects
    • Adobe Premiere Pro
    • Davinci Resolve
  • Web Design
  • Code
  • Music

  • Sign In
  • Tuts+ YouTube
  • Envato
  • Go to Envato
  • |
  • Tuts+ YouTube
  • |
  • Sign In
  • envato-tuts+
  • Design
  • Business
  • Photo
  • Video
    • Software
        • Start Learning
        • Adobe After Effects
        • Adobe Premiere Pro
        • Davinci Resolve
        • Cinema 4D
        • Blender
        • Final Cut Pro
        • Apple Motion
        • OBS
        • Camtasia
        •  
        • Screenflow
        • Kapwing
        • Runway
        • Adobe Rush
        • AI Tools
        • CapCut
        • Spline
    • Equipment
        • Start Learning
        • Cameras & Lenses
        • Tripods & Supports
        • Drones & Rigs
        • Filters & Accessories
        • Smartphones
        • Lighting
        • Audio Equipment
      All Equipment
    • Production & Recording
        • Start Learning
        • Lighting
        • Audio
        • Composition
        • Screen Recording
        • Livestreaming
      All Production & Recording
    • Post-Production
        • Start Learning
        • Video Editing
        • Color Grading
        • Motion Graphics
        • Audio
        • Workflow
      All Post-Production
    • Templates & Presets
        • Start Learning
        • Intros & Openers
        • Titles
        • Transitions
        • LUTs & Profiles
        • Text Effects
        • Particle Effects
        • Logo Animations
        • Slideshows
        • Presets
        •  
        • Scripts & Plug-ins
      All Templates & Presets
    • Types of Video
        • Start Learning
        • Instructional
        • Documentary
        • Stock Footage
        • YouTube
        • Social Videos
        • Music Videos
      All Types of Video
    • Animation
  • Web Design
  • Code
  • Music
  1. envato-tuts+
  2. Home
  3. Video
  4. Animation

Learn 2D Animation in Blender

Jonathan Lam
Jonathan Lam Jul 5, 2023
Copied to clipboard!

Lessons

Play lesson (1 min)
Read Related Content

Play lesson (1 min)
Read Related Content

Play lesson (1 min)
Read Related Content

Play lesson (2 mins)
Read Related Content

Play lesson (2 mins)
Read Related Content

Play lesson (2 mins)
Read Related Content

Play lesson (5 mins)
Read Related Content

Play lesson (1 min)
Read Related Content

Play lesson (2 mins)
Read Related Content

Play lesson (7 mins)
Read Related Content

Play lesson (6 mins)
Read Related Content

Play lesson (56 sec)
Read Related Content

Introduction

If you want to learn how to create simple 2D animations with Blender, then this tutorial is for you. We'll cover the basics of Blender animation and then work on creating a simple 2D bouncing ball animation using Blender's Grease Pencil.

All you'll need to follow along is the Blender app, which is free to download.

Download Blender

Getting Started in Blender (Draw Mode)

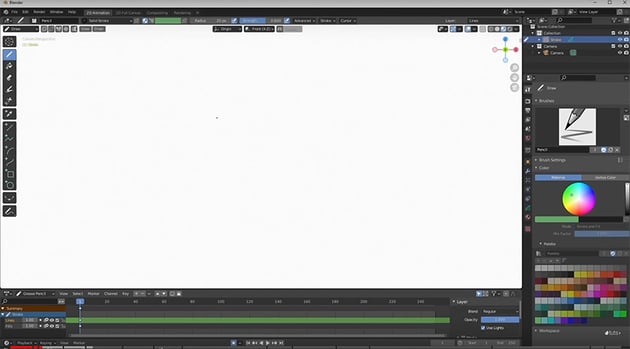
Let's get started in Blender by creating a new document. Go to File > New > 2D Animation, which will bring up a new screen that looks like this:

new 2d animationnew 2d animationnew 2d animation

Watch the video to see some of the basic navigation tools in action. For example, you can use the buttons on the right of the screen to zoom in and out, move the canvas, and switch in and out of camera view. And at the top of the left toolbar, you can see the Draw Tool is highlighted in blue, which means that it's active, so we can draw on the canvas to start creating our 2D animation.

Blender Modes

Here's one more important navigation item to consider. In the top left, you can see a dropdown menu showing various modes we can use.

blender modesblender modesblender modes

In this tutorial, we'll mostly be using three modes:

  1. Draw Mode to draw our 2D animation
  2. Object Mode to position, rotate, and scale it
  3. Edit Mode to change the geometry
Don't worry if this doesn't make much sense yet—you'll see all three modes being used in practice throughout this tutorial.

Create a Grease Pencil Object

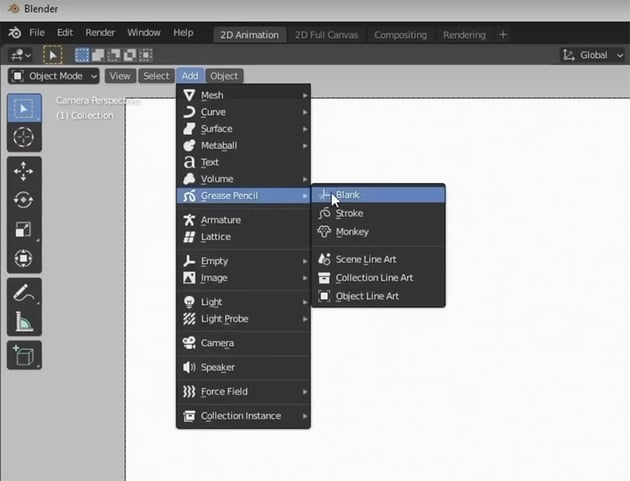
The Grease Pencil is the main tool we'll be using in Blender to create our 2D animation. To select it, we have to go to Object Mode first. Then choose the Add dropdown at the top, and choose Grease Pencil. This gives us several options, as you can see below.

For this tutorial, we'll choose Blank.

grease pencil menugrease pencil menugrease pencil menu

Use the Drawing Tools

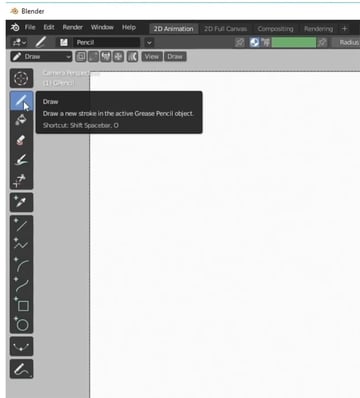
Now let's switch to Draw Mode, where you'll see the following useful tools and settings:

In the toolbar on the left, you have a selection of drawing tools that will look very familiar to you from other graphics programs like Photoshop. They work in a similar way too.

For now, select the basic Draw Tool at the top.

drawing tools in blenderdrawing tools in blenderdrawing tools in blender

With the Draw Tool selected, you'll now see the Active Tool and Workspace Settings panel on the right. Here, you can change things like the colours and brush settings.

draw tool settingsdraw tool settingsdraw tool settings

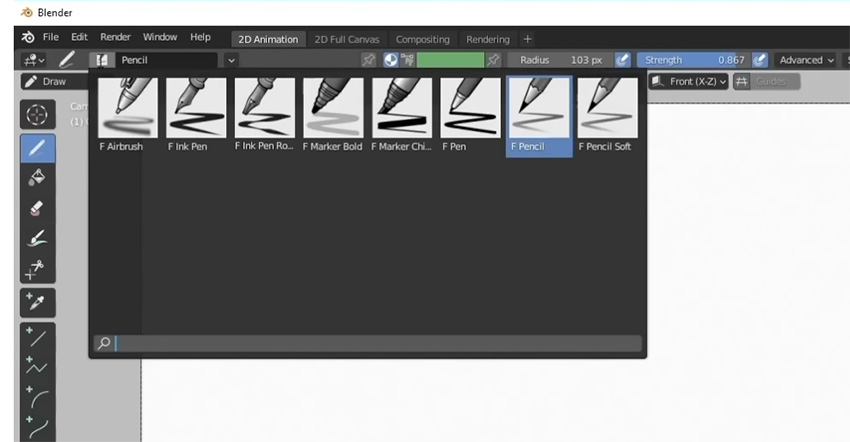
Now, if you click on the Pencil icon at the top, you'll see a range of different pencil styles you can choose from. And further along in the top toolbar, you can change things like the Radius and Strength of the pencil. Select a Radius of 25 px for now.

pencilpencilpencil

Draw the Ball

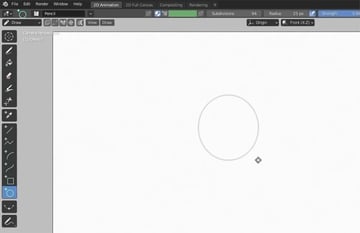
Now that you're familiar with the drawing tools in Blender, let's get started on our project. Drawing the ball is as simple as selecting the Circle Tool from the left toolbar and clicking and dragging. Hold the Shift key to create a perfect circle.

draw a balldraw a balldraw a ball
Always press Enter when you've finished creating a Grease Pencil object. This will create a keyframe at the bottom ("1" in this case) and add the object in the Scene Collection at the top right, where you should rename it to keep your project organised. We'll call it "Ball" here, for example.
new grease pencil objectnew grease pencil objectnew grease pencil object

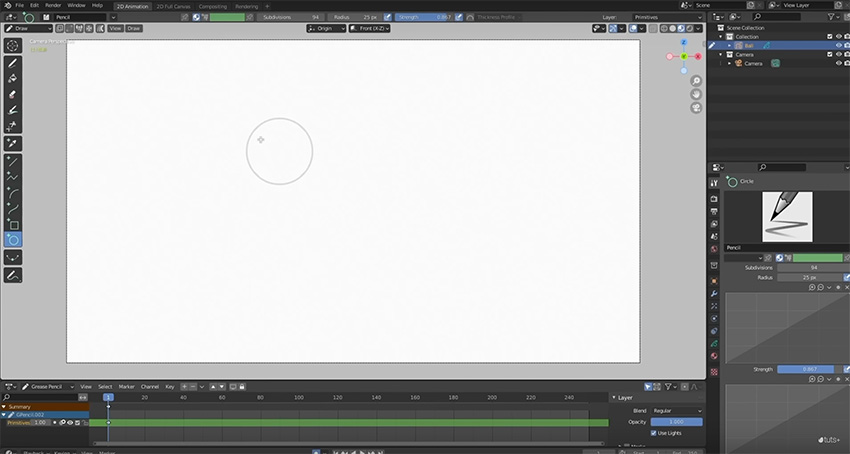
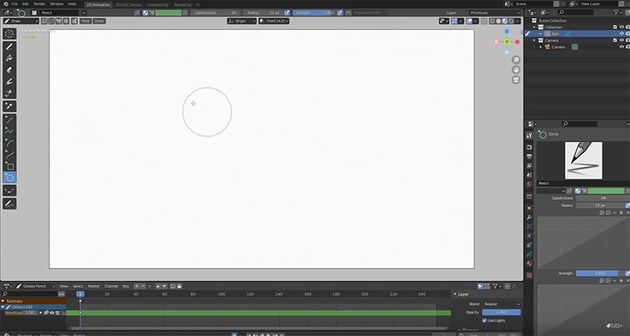
Next, add a smaller circle to represent the shininess of the ball. Switch over to Edit Mode and Rotate the circle as shown below.

rotaterotaterotate

Colour the Ball

Although you'll see a Fill Tool that looks a lot like the one in Photoshop and other programs, the process for adding colour in Blender involves a couple of extra steps:

  1. Click on Material Properties in the bottom right.
  2. Add a New Material and give it a descriptive name.
  3. Choose Fill and select the colour.
  4. Add a New Layer in the Scene Collection at the top right.
  5. Go to the Draw menu at the top left and select Draw > Active Layer > New Layer.
  6. Choose the Fill Tool from the left toolbar and click where you want to add colour—in this case, on the ball.

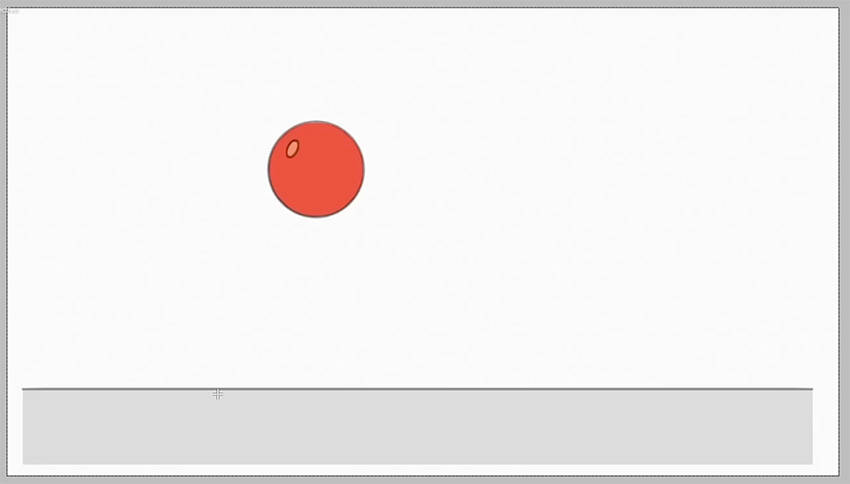
Follow those steps, both for the main ball and the smaller "shine" spot, and you should end up with this:

ball colourball colourball colour
Make sure that your layers are in the right order so that everything is visible. You can reorder layers in the Object Data Properties tab.

Create the Floor

Now, we need to add the floor. This involves the same tools and techniques for drawing and colouring that we've used before, so why not try doing it on your own? If you need help, just check the video to get the full step-by-step instructions.

Here's what you should end up with:

floor addedfloor addedfloor added

Draw the Movement Guide

Now that everything is set up, we're going to draw a movement guide for our ball to show how we want it to be animated.

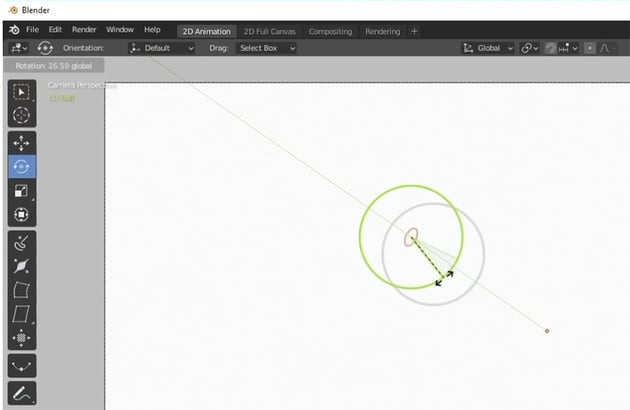
Start by moving your ball into the correct position. So switch to Object Mode and use the Move Tool to move the ball to the top left of the scene.

Next, create a new Grease Pencil Object by going to Add > Grease Pencil > Blank. Call this one "Movement Guide".

Now we can go back to Draw Mode, select the Pencil Tool, and draw a line showing how the ball will bounce across the floor. Here's mine:

movement guidemovement guidemovement guide

"It doesn't have to be super-accurate as this is just going to be used as a guide, and we're going to hide it when we start rendering our animation anyway."

Animate Using Keyframes

Now, it's finally time to start animating the ball! To do this, we'll switch to Edit Mode. Select the Ball object in the Scene Collection at the top right, and turn your attention to the timeline along the bottom of the screen.

You'll see that you already have some keyframes at frame 1—there should be three, representing the ball strokes, the ball fill, and the highlight. Drag over them to select them, and they'll turn yellow.

keyframeskeyframeskeyframes

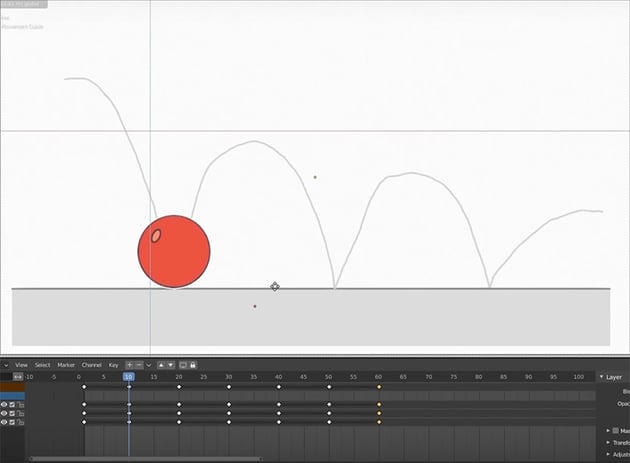
Now press Shift-D to duplicate those keyframes, and drag the duplicates to frame 10. Repeat the process to add keyframes at frames 20, 30, 40, 50, and 60.

Try zooming in to be more accurate—you can do this by simply scrolling on your mouse wheel.

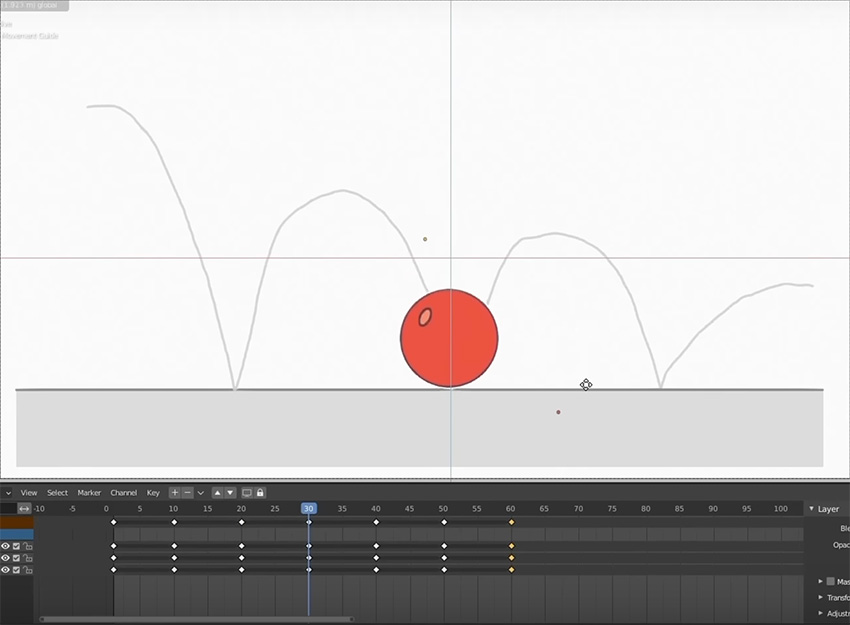
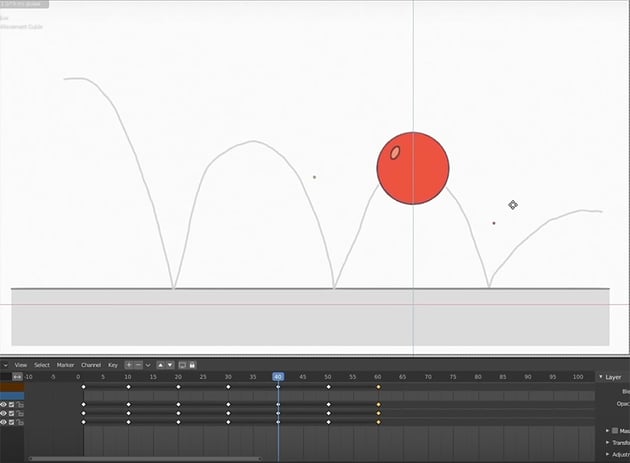
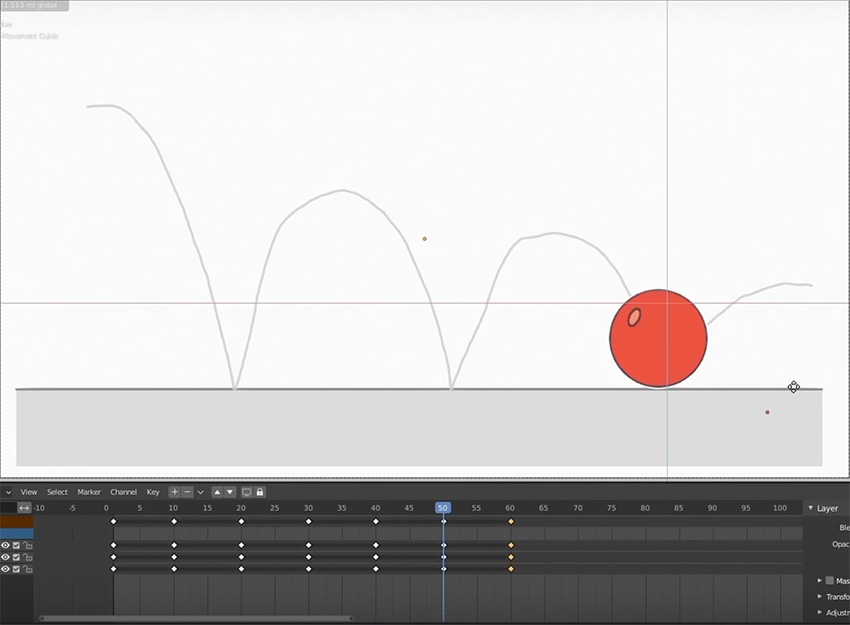
Now we need to move our ball to show how it moves along the movement guide we created earlier. So switch to Object Mode and use the Move Tool to move the ball to the positions shown below for the various keyframes you've created:

frame 10frame 10frame 10
frame 20frame 20frame 20
frame 30frame 30frame 30
frame 40frame 40frame 40
frame 50frame 50frame 50
frame 60frame 60frame 60

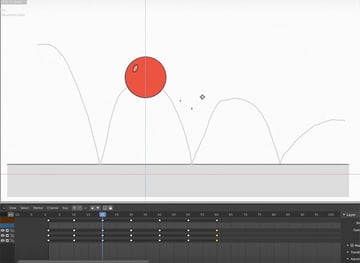
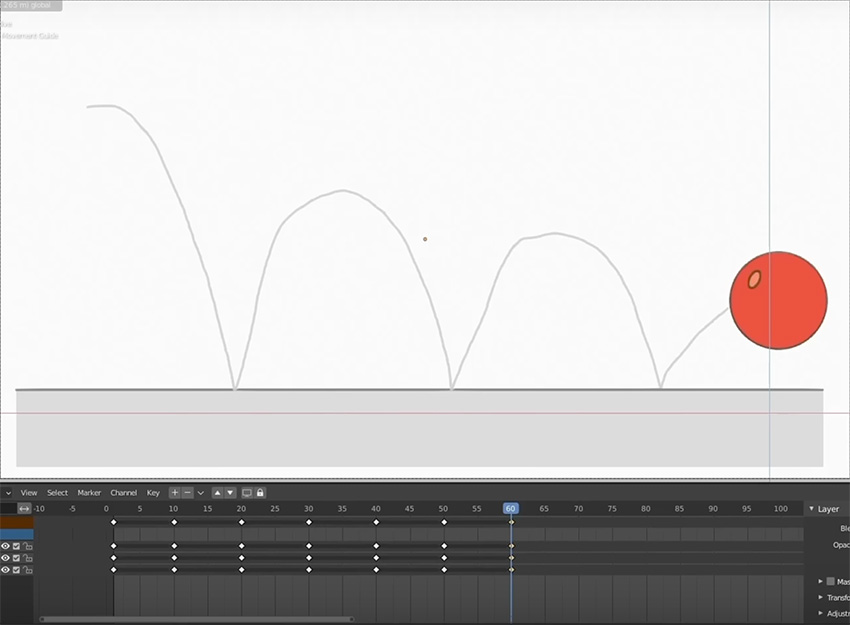
The resulting animation will be quite rough. To make it smoother, add new keyframes every 5 frames, and move the ball so that it corresponds to your movement guide.

It can be useful to distinguish these filler or "in-between" keyframes from the main ones. So select them, hit R on the keyboard, and select Breakdown. This will make those keyframes look smaller than the main ones on the timeline.

Conclusion

And your animation is done! If you need to, you can always make finer adjustments to the animation by dragging the keyframes on the timeline, and you can change the colour by following the same steps as we went through earlier in this tutorial.

If you need creative assets for your animation projects, check out Envato Elements. Get unlimited downloads of professional fonts, graphics, video templates, and much more.

Learn more about 2D animation in Blender in these free YouTube courses:

Created Incredible Animated Hair using Particles in Blender

Or check out some of the free animation tutorials on Envato Tuts+:

  • How to Make 2D Animation in Blender With Draw Mode and Grease Pencil
    Jonathan Lam
    23 Nov 2022
  • How to Animate a Dancing Character With ActorCore and Blender for Free
    Jonathan Lam
    27 May 2022
  • HDR Image Based Lighting in Blender in 60 Seconds
    Karan Shah
    13 Feb 2019
  • Create Clothing for a Character With Blender
    Sandy Gerber
    01 Nov 2016
  • Single-Point Tracking in Blender
    Uriel Deveaud
    03 Aug 2015
  • 2 Points Tracking in Blender
    Uriel Deveaud
    10 Dec 2015
Jonathan Lam
Jonathan Lam
Hi everyone! My name is Jonathan Lam, and I'm a digital artist on a mission to empower, educate and inspire creative students just like you to gain the creative skills you desire! Currently I work for Ubisoft as a concept and game artist. My skills range from graphic design to illustration, animation, 3D modelling/sculpting, concept art, and video editing. Some of the projects I've worked on include Hungry Shark World, Hungry Shark Evolution, Starbeard, and the Kickstarter-funded game called Eminence: Xander's Tales. I've also worked as a graphic designer and illustrator with many high-profile clients, including Riot Games, Sony Entertainment, Hasbro, and Google.
ink_theory
One subscription. Unlimited downloads of assets. Full stack of AI tools.
Find everything from photos to fonts, and templates to so much more.
Unlimited Downloads
From $16.50/month
Get access to over one million creative assets on Envato.
Over 9 Million Digital Assets
Everything you need for your next creative project.
Create Beautiful Logos, Designs
& Mockups in Seconds
Design like a professional without Photoshop.
Join the Community
Share ideas. Host meetups. Lead discussions. Collaborate.
envato-tuts+
DiscoverAbout EnvatoOur Pricing & PlansStock VideoVideo TemplatesRoyalty-Free MusicStock PhotosFontsPopular Searches
License & User TermsLicense TermsTerms & ConditionsPrivacy PolicyAcceptable Use PolicyFair Use PolicyCookiesCookie SettingsDo not sell or share my personal information
ResourcesDiscover Tuts+Video & MusicDesignMarketingWeb DesignExplore Blog
HelpHelp CenterBecome an Affiliate
About UsWho We AreOur ProductsOur PurposeJoin Our TeamCompany Blog
AuthorsBecome an AuthorAuthor Sign InAuthor Help Center
Envato MarketEnvato Tuts+Placeit by EnvatoMixkitAll ProductsSitemap

© 2025 Envato Trademarks and brands are the property of their respective owners.