

Sound design in Premiere Pro tutorial
Welcome to Sound Design in Premiere Pro!
We’re diving into the world of sound design using Premiere Pro.
Great sound design can truly make or break a video. It’s often the secret ingredient that separates a pro-level edit from an amateur one.
In this course, you'll learn how to:
-
Layer multiple sound effects for depth and texture.
-
Blend them naturally with music and voiceovers.
-
Use EQ and dynamics processing to craft a polished, cinematic mix—all within Premiere Pro.
Let’s jump in! First up, we’re going to take a look at a fully edited sequence and break down the sound design choices step by step.
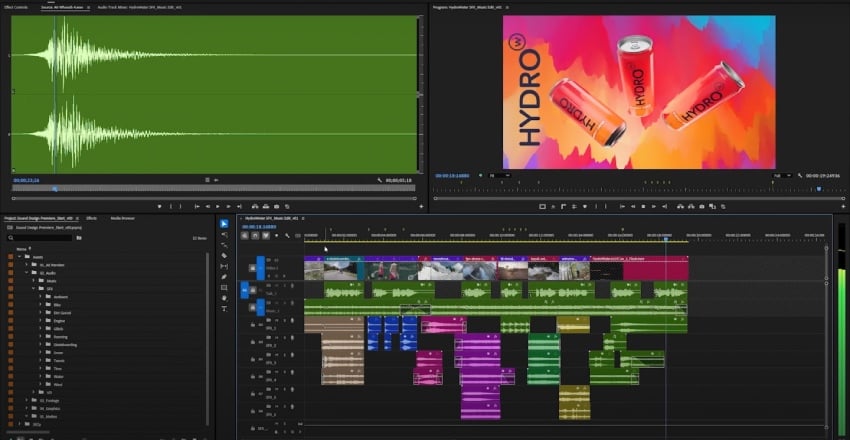
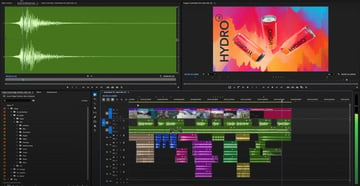
What you’ll create—Hydrowater Ad
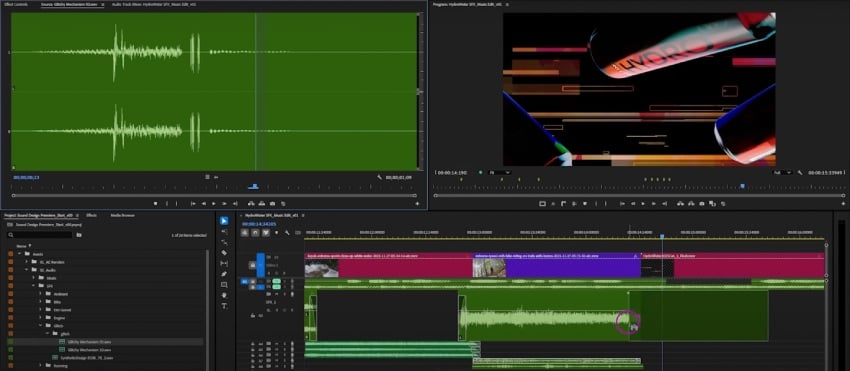
Here, we'll be working with a fully edited sequence—video, music, and voiceover already in place—so we can focus purely on sound design. The goal is to show you how sound effects and small mix tweaks can completely elevate a project’s atmosphere and impact.


We’re using assets from Envato plus a great voiceover from Jonathan Oldham on Fiverr!
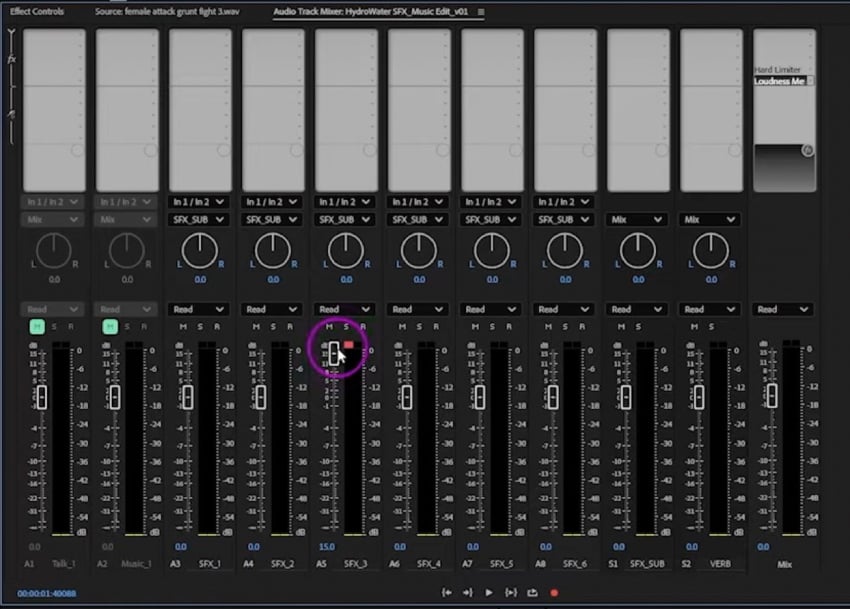
Want more? We'll also learn about Premiere Pro’s Audio Track Mixer and two essential effects:
-
Hard Limiter: keeps your audio from peaking above -1 dB.
-
Loudness Meter: helps you hit that ideal -14 LUFS for web playback (like YouTube).
So, if you’re ready to take your sound design up a notch, let’s jump in and start shaping the perfect audio experience.
Sounds-like music search with Envato
Before we move on, let's take a second to acknowledge the future is here! There’s a new feature called Sounds Like, and it’s a great tool that uses AI to analyze a song and suggest other tracks that sound similar. It really does exactly what the name implies.


To learn how it works, you can copy over any song you want and run a quick search. The results? Honestly, pretty impressive.
Authentic music from PureHits
If you're on the hunt for some nice tunes, have we got just the thing for you! There's this artist channel called Pure Hits. Envato put it together to get some stock music that actually sounds real, and honestly, it's pretty sweet. You can find a bunch of cool tracks over there.
And hey, since this lesson is mostly about sound effects, just a heads up that Envato's got tons of those too—hundreds of thousands to play around with. Just in case you wanted to know.
Finding sound effects on Envato
Getting into the habit of using folders—or "bins" as Premiere calls them—is a great move, and keeping your files organized on your computer too is super helpful.
You can even make templates with your go-to folders, sequences, and audio track settings all set up. Just hit "Save as a template," and you won't have to do it all from scratch every single time. Pretty sweet, right?
Before you start throwing in sound effects, it's usually a good idea to add a few extra audio tracks, especially if the ones you have are locked. Locking tracks once you're happy with them (like your music, voiceover, and video edits) is an easy way to avoid accidentally messing things up.
It can save you from some seriously annoying mistakes that can take forever to fix!
Adding sound effects in Premiere Pro
We're almost ready to start! But, before we do, we need to set up a few more audio tracks. You just need to:
- right-click
- choose Add Tracks
- skip the video tracks
- add about six audio tracks
- leave them set to Standard
- hit OK
You can rename your tracks in the audio mixer to make everything easier to keep track of when you're juggling a bunch of sounds.
Next up, temporarily unlock and quickly mute the clip music and voiceover so we can really focus on the sound effects.

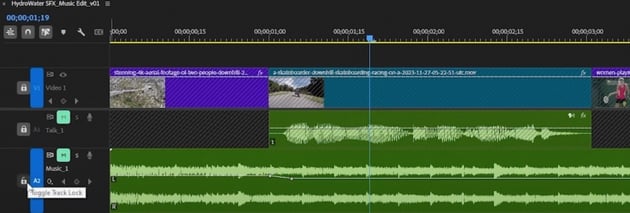

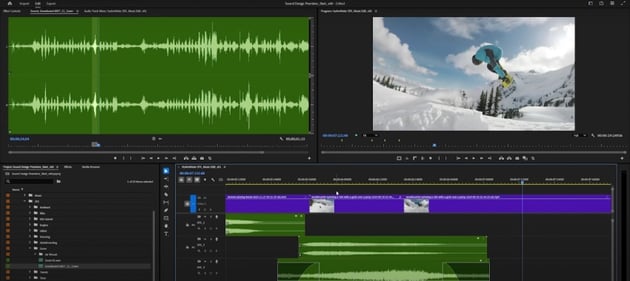
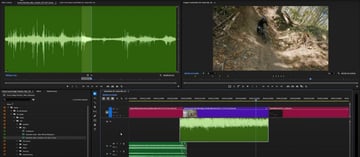
The first clip is a wide shot of a mountain with two skateboarders flying downhill. For this one, a nice ambient forest sound could work. Just load it in the source monitor, set some in and out points, and drag it into the timeline. You can trim it down if you want.
Then there's some great skateboarding sounds ready for the next shot, where one of the riders does a killer skid turn.
Layering sound effects in Premiere Pro
If you want to become the best sound designer out there, you need to master the skill of layering sound effects. Here's an example of how you can do it.
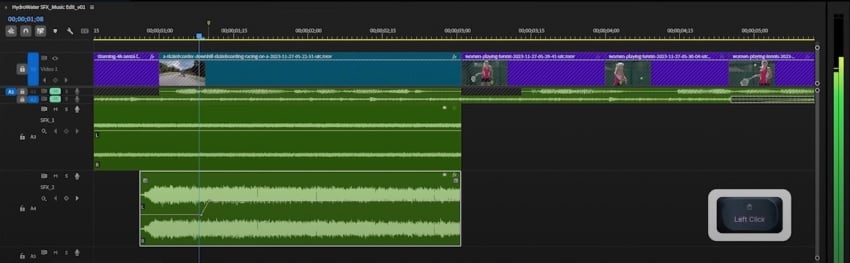
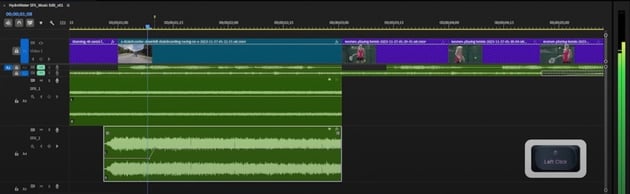

Getting those skate sounds in:
- First off, we just drop those cool skateboarding sounds right onto our timeline, making sure to clear any weird start or end points we don't need.
- Then, we trim that audio clip so it lines up perfectly with how long the skateboarding scene actually is.
- To keep our eyes focused on the audio goodness, we can just tuck away those music and voice tracks for a sec—just hit that Alt key and give your mouse wheel a little scroll. Makes things way less cluttered!
Highlighting the rad skid:
- Okay, so there's this super cool skid turn, right? We're going to drop a marker right there (just tap "M" on your keyboard!).
- To make the sound really follow that awesome skid, we'll add a little volume curve—just hold down Control and click on that volume line to make some dots (keyframes!), then gently shape the line to make it smooth.
- To give that skid some extra oomph, we'll layer in another skateboarding sound effect, making sure it hits exactly at that marker for perfect timing.
Volume tweaks made easy:
- Instead of fiddling with that volume line directly, we'll use this thing called "Audio Gain" (just hit "G"). What's cool about this is that when you adjust the track volume, it actually makes the sound wave bigger or smaller so you can see how loud things are compared to each other. Super handy!
- We'll also throw in a little fade at the end of the skate sound, and Premiere's got these neat new tools that make shaping those fades super smooth and quick.
Setting the mood with ambience:
- We're going to give the background noise a little boost—say, 12 decibels—to make the scene feel more real and alive.
- Now, when we zoom in on the skater, we want the background noise to dip down a bit so we focus on the close-up. We can do this quickly by just Control-clicking twice on the volume line and then dragging it down a bit. Easy peasy!
Adding that speedy whoosh:
- Last but not least, we're going to layer in a wind sound effect. We'll tuck it underneath all the main action to give it that extra bit of energy.
Adding EQ in Premiere Pro with Nova
Okay, after all that, your audio may be layered, but a bit messy. Let's break down how to clean up audio using some handy free tools in Premiere.

Dealing with low-end rumble:
- When you look at a sound's waveform and see frequencies bunched up, that often means there's a lot of low-frequency content.
- Too much low-end can make your mix sound muddy, especially when listening on headphones because they don't always accurately reproduce those super low frequencies.
Getting these plugins into Premiere:
- Once you've downloaded and installed NoVA and the compressor, you need to tell Premiere where to find them.
- Go to your Audio Track Mixer, click the flyout menu, and select "Audio Plugin Manager."
- Point Premiere to the folders where you installed the plugins, let it scan, and then enable the ones you want to use.
- After that, you'll find them in your Audio Track Mixer and in the Effects panel.
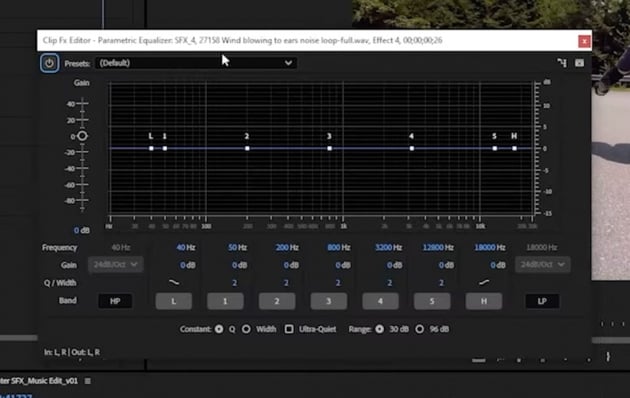
Applying the high-pass filter with NoVA:
- The goal here is to apply a high-pass filter to the sound effect to remove some of those very low frequencies.
- By using an FFT analyzer on the input of the sound effect track, you can see how much low-frequency information is present.
- A high-pass filter can be set to a specific frequency (like 42 Hz in the example) to roll off those lower frequencies, which can help create space for bass in your music track.
A little extra tweak: slip editing:
Sometimes, you might want to slightly adjust the timing of an audio clip. Using the slip edit tool (by pressing "Y" in Premiere), you can shift the content of an audio clip within its existing in and out points. This can be useful for fine-tuning when certain sounds occur in relation to the visuals, like making sure a bubbly wind noise doesn't overlap with a visual transition.
Tennis SFX
Moving on! We need some good tennis ball hit sounds to match all the on-screen action. Luckily, you can find some nice-sounding hits, including serves and regular hits.
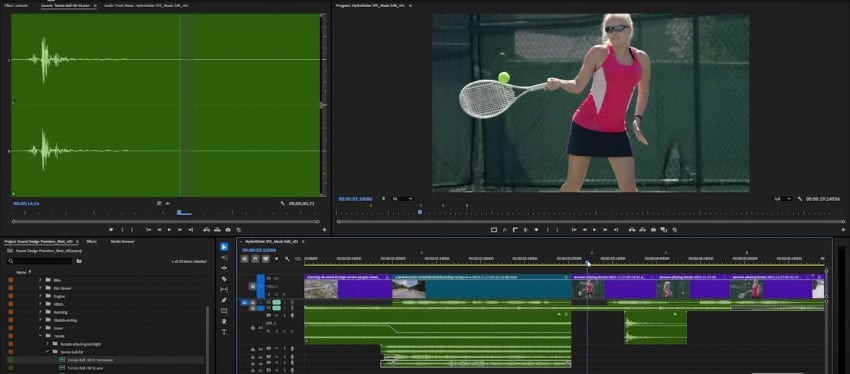


Syncing the sounds precisely:
- To make syncing easier, scrub through your timeline and add markers where you want the initial, sharp part (the transient) of the sound to occur.
- Then, align the "spiky" part of the waveform of each tennis hit sound with these markers.
- If your sounds start snapping to other elements in your timeline and making placement difficult, you can temporarily turn snapping off.
Adding supporting sounds (effort grunts):
- To add more impact, consider layering in some effort sounds, like short grunts or attack sounds, right with the tennis ball hits.
- You might need to experiment with different effort sounds to find the ones that fit best.
- Adjust the in and out points of the supporting sounds as needed.
Dealing with potential clipping:
- If any of your sound effects seem to be clipping (distorting due to excessive volume), simply reduce their level using the audio controls.
Adding reverb in Premiere Pro
You might think you can just slap a reverb effect directly onto a sound effect clip. However, the reverb often cuts off abruptly when the clip ends, which doesn't sound natural. This is especially noticeable with shorter sounds.
Let's dive into a few options to add reverb in Premiere Pro like an expert!

Workarounds for better reverb:
- Using separate tracks: One way is to create dedicated audio tracks just for reverb. You'd then only place the sound effects you want to have reverb on those specific tracks.
- Using submix tracks (the recommended method): Another, often better, approach is to use submix tracks. Here's how to do it.
Setting up submixes:
- Create an SFX submix: This is super useful for grouping all your sound effects together. This way, you can adjust the overall volume of all your sound effects at once later on. Route all your individual sound effect tracks to this SFX submix instead of directly to the main mix.
- Create a reverb submix: This submix will be dedicated to our reverb effect.
Routing to the submixes:
- For each sound effect track you want to add reverb to, you'll create a "send" to the reverb submix. This sends a portion of the audio from that track to the reverb submix.
- The original audio will still go to the SFX submix (and then to the main mix).
Adding effects to the submixes:
- SFX submix: You can add effects here that you want to apply to all your sound effects. For example, a compressor can help to even out the peaks of all your sound effects together. When adding a compressor, you might want to adjust settings like attack time and threshold, and consider using a "look ahead" mode for cleaner sound.
- Reverb submix: On the reverb submix, you'll add your reverb effect.
Sending audio to the reverb:
- On each individual sound effect track that you want reverb on, you'll find a "send" control (often a dropdown or a dial).
- Select your "reverb" submix as the send destination.
- Use the level control on the send to determine how much of that track's audio is sent to the reverb submix. More send equals more reverb.
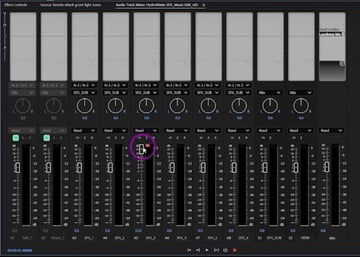
Controlling reverb over time with keyframes:
Here's a neat trick! You can actually control when the reverb is applied by using keyframes on the "send volume" to the reverb submix.
- By switching your keyframe mode from "clip keyframes" to "track send [reverb submix name] volume," you can set the send level to zero (no reverb) before a sound effect and then ramp it up when the sound plays.
- This way, the reverb tail will continue even after the original sound effect has ended, creating a much more natural sound.
- Remember to switch back to "clip keyframes" when you're done adjusting the reverb sends, as it's the more common editing mode.
This method gives you much more control over how and when reverb is applied, leading to a cleaner and more professional sound!
Snowboarding SFX
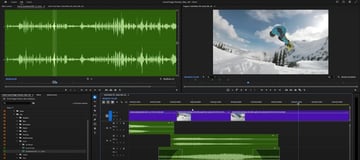
Want to set the scene for the snowboarding SFX? You're in luck! The goal is to add sound effects to a snowboarder clip, focusing on the ride-up and the launch off a ramp during a trick. The initial sound ideas are snowboard riding sounds and a "whooshy" sound for the airtime.

Adding snow sounds:
- Select a suitable snow sound effect and place it directly into the timeline.
- Use a bunch of sound effect tracks for better organization and potential sound layering.
- Don't forget to align the snow sound to the visual action of the snowboarder.
Enhancing the jump:
- Add a specific snowboard sound effect for the jump on a separate track.
- Pair up the loudest part of this jump sound with the visual moment of the launch.
- You may want to increase the volume of this sound at the peak of the jump for more impact.
Creating the "whoosh" effect:
- Here, a "whoosh" sound effect is introduced to emphasize the feeling of speed and air during the launch.
- If need be, trim and align the whoosh sound with the launch point.
- Consider an alternative whoosh sound and swap it in for the first one.
- Adjust the timing of the new whoosh sound using the slip edit tool, and add a crossfade for a smoother audio transition.
After all that, you'll notice that the volume of the whoosh sound is slightly reduced. Worry not! A tip for making fine volume adjustments is to use the control key. There's a potential issue with the high frequencies of the whoosh sound, but you can reevaluate it within the final mix.
Cars SFX
Hey, so are you excited to go for the engine sounds? Let's juice up these drifting cars!
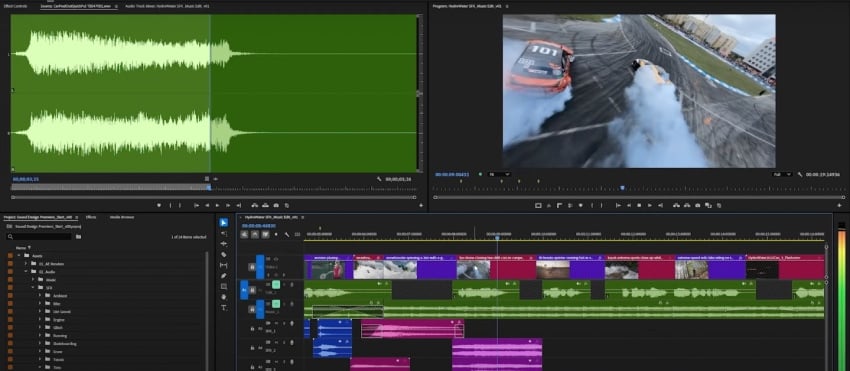
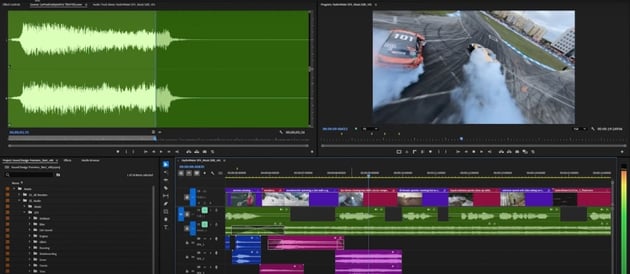

Engine roar I: The slice and color:
First, if that initial engine sound's running too long, just slice it right where the drifting cars shot ends. To make that cut super obvious, go ahead and change the video clip's label color—pick something bright! It'll help you see exactly where to line things up.
Engine roar II: Widening the sound
Here's a cool trick for a beefier sound:
- Grab two copies of that same engine sound.
- In your audio effects panel, pan one all the way to the left (like, -100%).
- Then, pan the other one all the way to the right (like, +100%).
- If that sounds too wide, bring them in a bit, maybe to -50% and +50%. It'll still be spacious but not as extreme.
Adding the Ferrari screamer
- Find another engine sound—something that screams "Ferrari!" (wind noise optional!).
- Just drag that sound into your timeline and layer it with the first engine sounds.
- Add a quick crossfade at the end where it comes in or goes out to make it smooth.
You might want to add a touch of background noise (ambience) later to make it feel more real.
Screeching tires
Time for some squealing!
- Find a tire screech sound you like and drag it into your project.
- To keep things tidy, move your audio tracks around if you need to, so the tire sounds have their own space.
- Give these tire audio clips a different color label so they're easy to spot.
- Look for another tire screech sound, especially one that sounds wide or has a cool stereo feel, and add that too.
Volume control
- Okay, all those sounds together are probably loud! First, select those initial engine sound clips.
- Lower their volume by about five decibels each.
- If that Ferrari engine is still too loud, reduce its volume by around four decibels.
- Even after those tweaks, the whole mix might still be hot. Select all your engine and tire sound clips. Reduce the overall volume of all of them by another three decibels.
Running SFX
Let's punch in some killer running sounds, pronto!
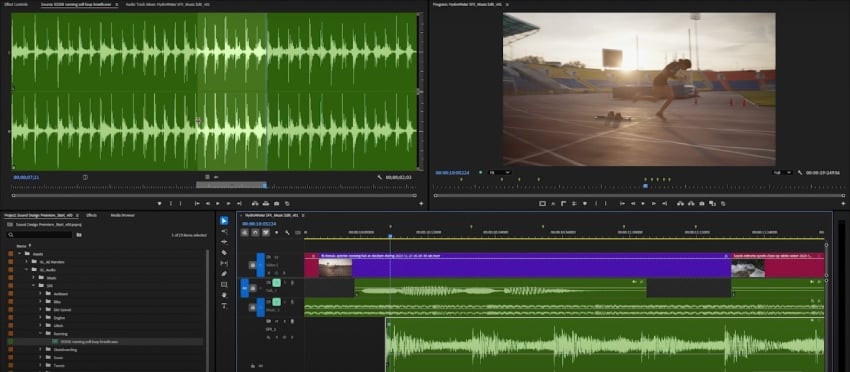


Add footstep markers and grab the right audio:
- The fastest way to sync footsteps? Turn off those pesky audio time units and drop markers right when each foot hits the ground.
- Then, head over to the sound library and snag a chunk of running footsteps. It'll probably need some serious chopping to get those steps tight.
Precision syncing:
- Now, switch back to showing audio time units for detailed work.
- The goal is to make every single footstep hit in the audio line up exactly with those visual markers.
- It'll be close at first, but needs tweaking.
The cut and slip:
- Get near the next marker, and slice that audio clip with Control-K.
- Hover over the marker, hit Y for the slip edit tool, and slide that audio until it's locked on.
- Rinse and repeat: Control-K to cut, then slip edit to nail the sync.
Boom. Nailed it. Those footsteps are locked and loaded!
Kayaking SFX
Time to slam some water sounds onto this giant wave crash! What are you waiting for? Let's get to it!

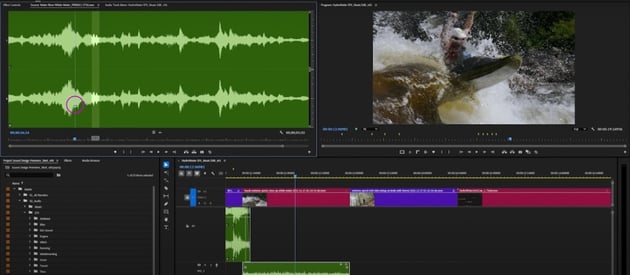

Water vibes:
- Got some "river" audio? Sweet. Drag it in to lay down a base layer.
- The volume will be way too high at first, so yank that down—say nine decibels to start. Tweak it until it sits right.
Work on this same process for the white water and water splashes sound effects! Just make sure to pair the sound and image perfectly to make audiovisual much more impactful.
And, bam! Water sounds added. Sounds about right for a massive wave hit.
Mountain biking SFX
We must pump up these cycling sounds!
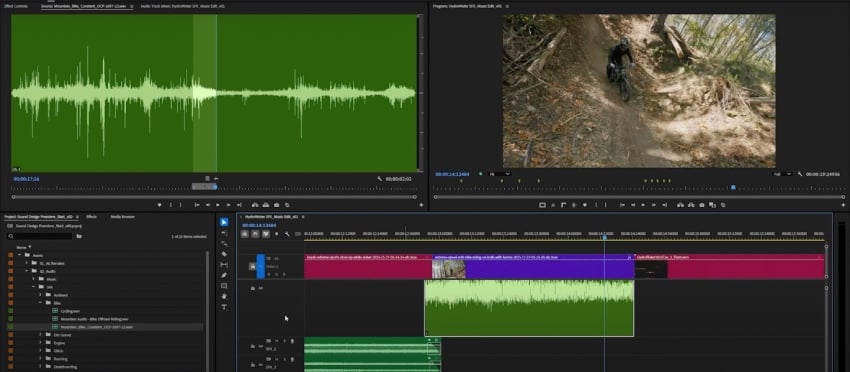

Creating dimension with sound:
- Grab some basic cycling audio and color-code it to keep things tidy.
- Then, let's give this an off-road flavor: add in an audio track that gives this clip a punch.
- You can add more rumble to the mix with a dirt/gravel hit.
- If you want to make things even more interesting, include the sound of wind rushing by.
Basically, play around with any and all sounds that could be associated with mountain biking. Add, move, delete, and cut each track until you find the perfect combo for your clip.
Final level check:
How's it all sound together? Might need to nudge the levels down a couple of dB so it doesn't drown everything else out.
Glitch SFX
Sick graphics deserve equally twisted audio, so it's time to glitch out this outro with some seriously messed-up sounds!
The beauty of glitch? No rules! Chop 'em, mix 'em, stick random bits together—it all sounds gloriously broken.
Layering the digital decay:
- Toss these glitch sounds into the timeline and let them collide.
- Grab as many glitchy sounds to give your clip that true mayhem style.
Punching the light flash:
- Mark the exact frame where that light flashes.
- Now, grab another part of that second glitch sound and slam it right on that marker for maximum impact.
That's the glitchy goodness we're after! Just do a quick crossfade to smooth things out.
One last whoosh:
The end could use a little extra oomph, so let's give it one last whoosh!
- Remember that whoosh sound from before? Let's drag that other whoosh in at the very end for a final sonic blast! But drop the volume down, as it's likely to be loud.

Done and dusted! No more sound effects needed. This outro is sounding properly glitched and awesome.
Mixing and processing
Alright, time to wrestle this audio mix into shape! Here's what we'll do:

Fading in engines:
- Those engine sounds felt a bit abrupt, so we'll just add a quick fade-in to make their entrance smoother.
Initial mix check:
- Let's hear how the sound effects play with the voiceover and music. Unlock the tracks, unmute 'em, lock 'em back down to avoid accidental nudges.
Turns out, things will need a bit of sprucing up.
Taming the SFX:
- First step: pull down the overall level of the sound effects bus by three decibels. That should give the voiceover some breathing room.
Compressor tweak:
- If the voiceover is still getting lost, try hitting the compressor on the SFX bus and lowering the threshold a bit to tame those peaks. Might reduce the punch, but clarity is key.
Individual SFX volume control:
- If you notice those initial engine sounds are still too damn loud, select both and drop their level by as many decibels needed.
Balancing act:
Loud sound effects are fine, but when they clash with the voiceover, it's a problem.
Subtle adjustments are the name of the game until you get the exact balance.
In any case, continue playing with the global volume until you don't feel like all the sounds are overwhelming you and driving you insane.
Keyframe ducking for voiceover:
- Right when the voiceover hits, drop the volume of the SFX submix with keyframes, then bring it back up right after. Feather those keyframes for a smoother transition.
EQ carving for voice clarity:
- If you're craving voice clarity, use an EQ on the music track to cut out frequencies that clash with the speech range. A slight dip in the high frequencies of the music can help. Might sound a bit dull soloed, but it should work in the mix.
Final level push (with compression):
- If the overall mix volume is still a bit low, a compressor before the limiter can help. Use Furrcomp with a slightly lowered threshold and a one-decibel makeup gain to gently knock down peaks and boost the overall level.
The secret here is to play! Make sure all the tracks are meshing well together, and that they're not clashing or overpowering.
Now you're a master sound designer in Premiere!
This session covered a whole bunch! From layering SFX and balancing against voice and music, to precise syncing with markers and light EQ and dynamics. Sound design elevates video, and now, you're a few steps closer to become a true master at it! Explore further into voiceover processing, music editing, and advanced techniques!
And if you're looking for the right companion to give you all the sweet assets you need to create the most killer piece ever, Envato's got you! With a monthly subscription, you get everything you could ever imagine for your creative projects, from sound effects and music, to graphics and photos. Hell, you'll even get AI features that will bring your craziest ideas to life!


