How to Create a Fantasy Macro Drop Photograph
Capturing water droplets is a cliché of the macro photography world, but it’s a fun one and it does take skill and practice to get right.
What You Need


A Macro Lens
There are other ways to make macro photographs. For those, you can check out my article on Getting Started With Macro Photography, but for the purposes of this tutorial, we’re going to be looking at making a macro picture with a DSLR and macro lens.
A macro lens varies in price and you can pick one up relatively cheaply. The focal length will vary, but you’ll be looking to use something in the region of 60mm-120mm, ideally a prime lens as they tend to be sharper and faster. Look for the 1:1 or greater on the side of the lens to be sure it is genuinely capable of macro magnification. I used a Tamron 90mm f/2.8 for this tutorial.
A Table or Steady Platform
You need a good surface to shoot on, firstly for stability, so your drop doesn’t roll all over the place and secondly, so you can get a good angle on your drop and that’s far better done sitting at a table than it is crouched on the floor.
Make sure your surface is well lit—ideally naturally, but artificially if not. Small stick-on lights or bendy torches can be useful for directly lighting your setup.
A Dropper or Syringe
Syringes are sharp and can be dangerous to have lying around, so I prefer to use a dropper. You can probably pick up an empty one of these from the chemist, but if not, they’re easy to find online.
Paraphernalia
As delightfully non-specific as this sounds, it’s probably best to put some thought into it. If you have a craft box lying around then this is a good place to start. If not, off you go to the craft aisle or haberdashery section of your local superstore and go wild.
Feathers and glitter are firm favourites of us fantasy water drop lovers, so stock up on colours that will work well together. Large glitter pieces, like you get in a kid’s set, won’t work. They’re too clunky and heavy for the drop to hold without collapsing. You need fine glitter, like you get for card making or scrapbooking.
Part 1: The Set Up
Step 1. Light Your Scene


You might not be using anything other than daylight, which is fine, but position your feather where it’s well lit, having the light fall towards the centre.
Step 2. Sprinkle Some Glitter


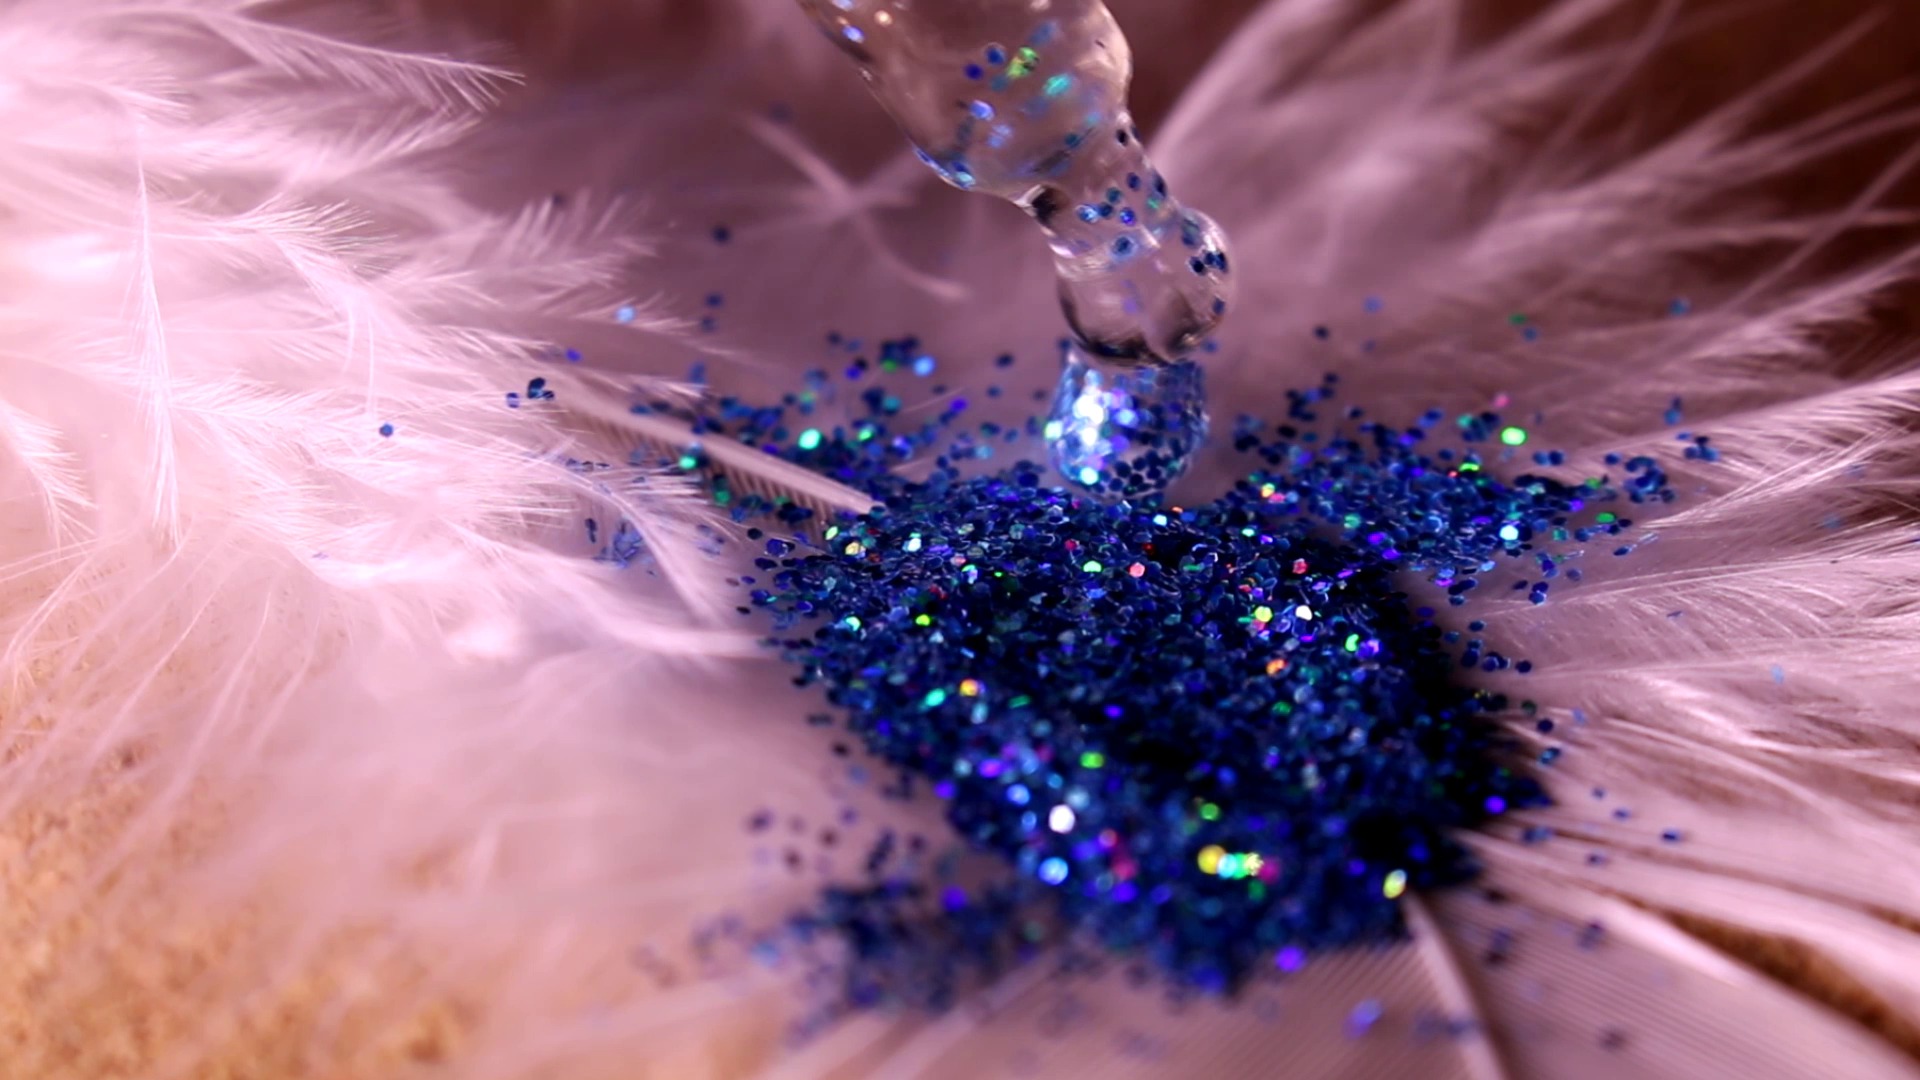
Scatter some glitter in the centre of your feather and make the coverage quite solid, falling away at the edges.
Step 3. Place Your Drop
This can be tricky. Don’t squirt the water out of the dropper, or chances are it might collapse. Instead, squeeze the dropper until water appears at the end but doesn’t fall.
Then, carefully roll the drop along some of the glitter before placing it down on the feather. If you do this right, the drop should have some glitter stuck to the top/sides of it. Don’t sprinkle glitter over afterwards or the drop will collapse.

Part 2: Photographing
Ideally, work in Manual mode, but if you’re not comfortable with that, then Aperture mode is the next best. I also recommend shooting in RAW.
If you’re using a prime macro lens, then it should stop down to a fairly low number, which is great as we’re aiming for a shallow depth of field to create some background bokeh from the glitter.
I usually start with the lowest aperture I can and get as close as I can so that the drop fills the frame, and then slowly pull the lens back until the top of the drop (and hopefully some glitter) are in focus.
At this focal length and with such a shallow DOF, it can be tricky to nail that focus, so try tricks like slowly breathing out while you squeeze the shutter button, or try burst mode to fire off a number of shots at once.
This will take some patience and it’s worth checking on your DSLR screen at 100% to make sure you’ve got sharp focus where you want it. It can be very deceptive to look at it zoomed out on a small screen like that, and it’s really disappointing to export them from your camera only to discover they’re all blurry.
Part 3: Editing
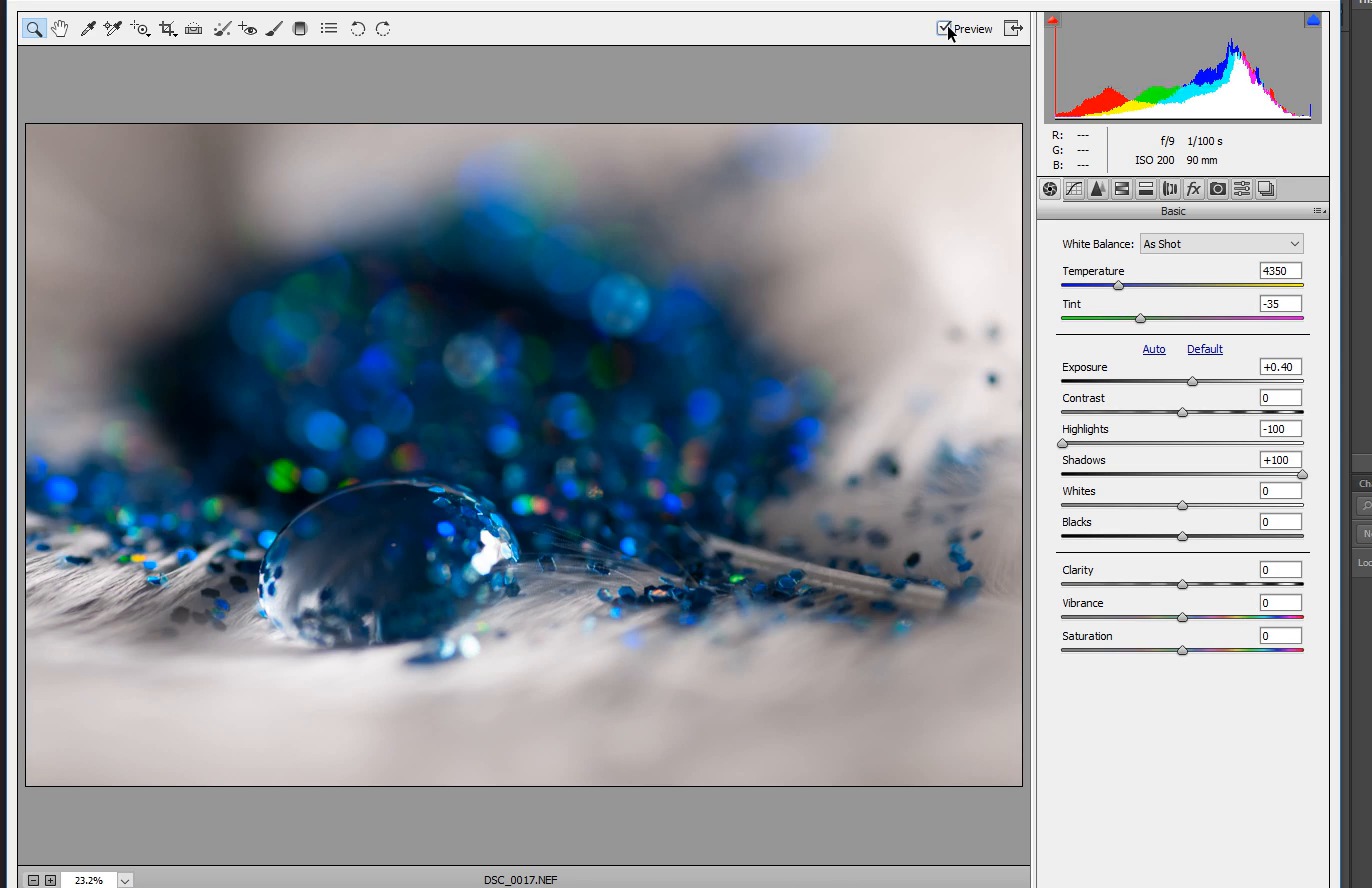
Step 1. Make RAW Adjustments
Once you’ve chosen the shot(s) you want to edit, make RAW adjustments first. If you don’t shoot RAW then you can skip this step and move on to step 2.

All I’ve done here is drop the highlights and boost the shadows, for a more balanced histogram.
Step 2. Remove Colours
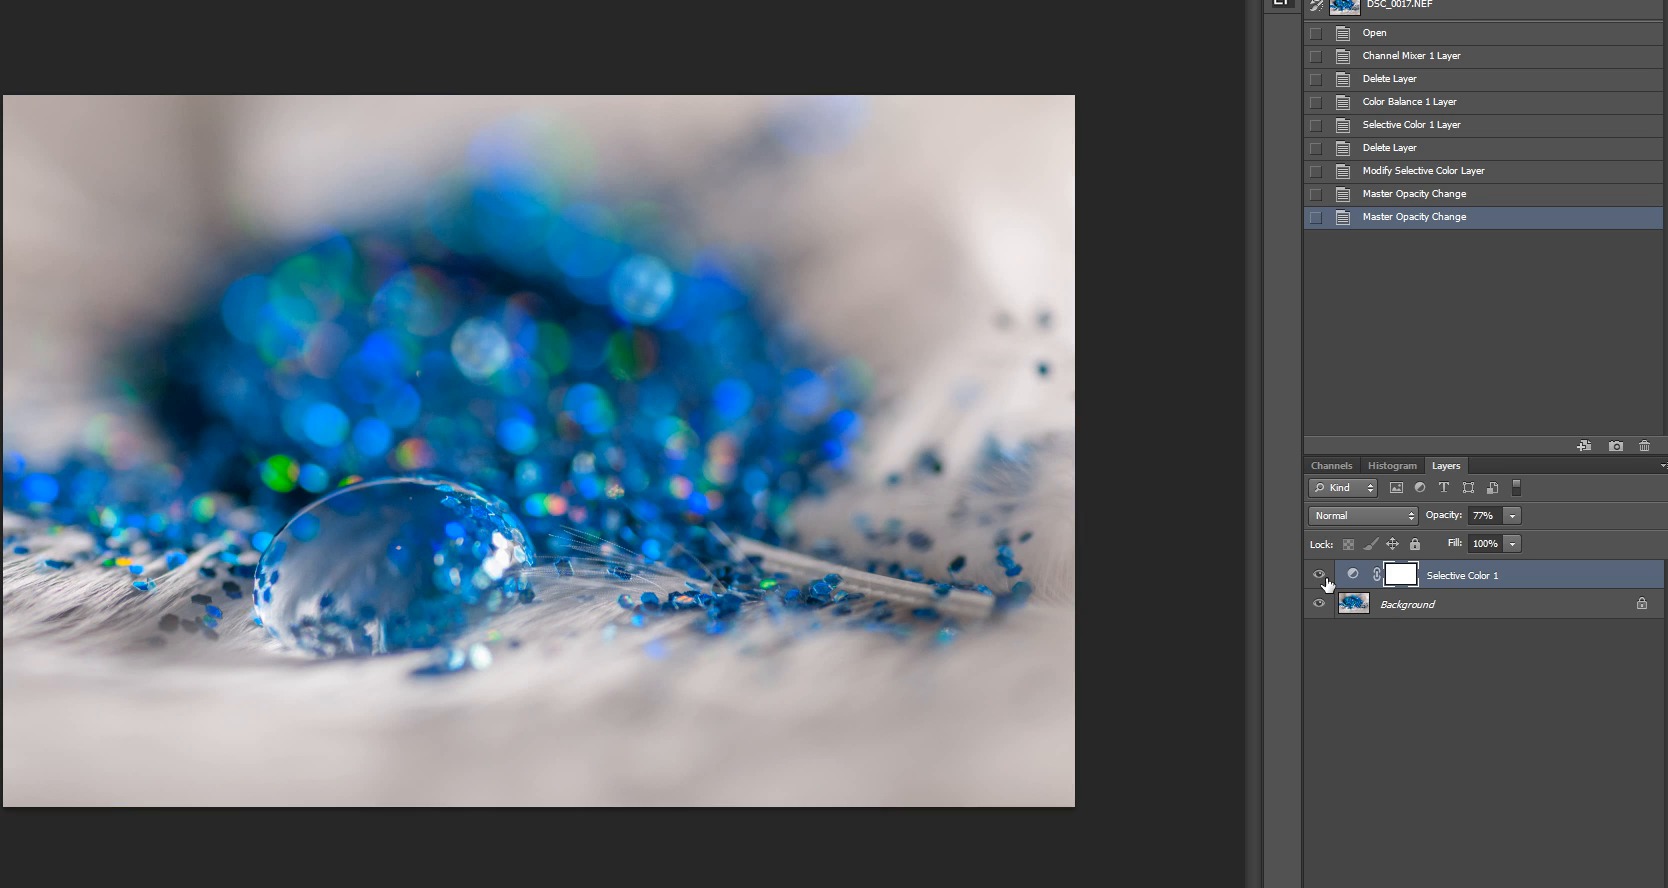
As my feather is white and the glitter is blue, I wanted to take all of the warm colours of the image, to make it as crisp as possible.
I created a Selective Colour adjustment layer and toned down the warm colours (yellows, reds, magentas) until the overall look was much cooler and cleaner:

Step 3. Use the Nik Collection to Enhance the Image
Now that it's free, I’ve become a big fan of Google’s Nik Collection to speed up my workflow.
Dfine
Define is a noise removal tool and by using this, I was able to eliminate some of the colour noise in the image, without causing my drop’s edges to become soft.


You can see that I made use of the control points to tell the software not to apply the filter to those parts. Anything you want to keep sharp should have a control point.
Color Efex
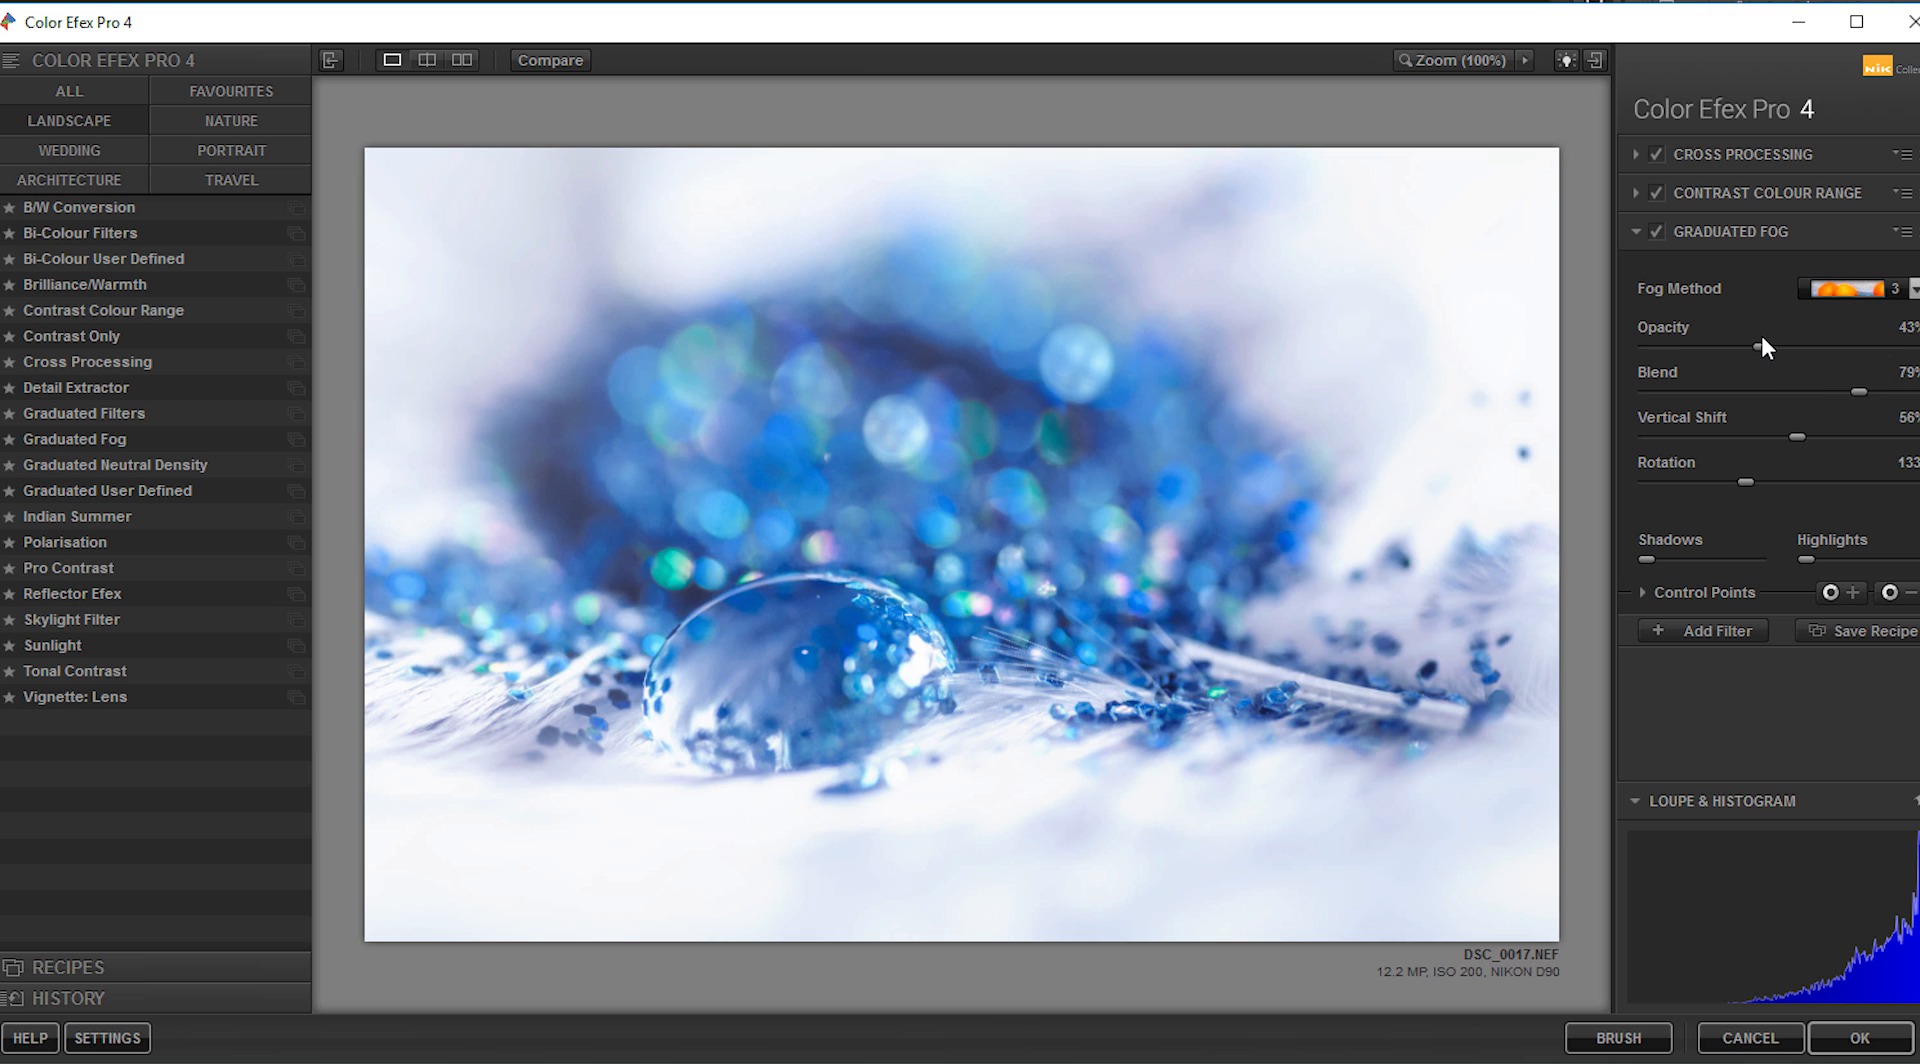
Color Efex has a number of presets and filters, all of which are adjustable.
Here are my processing steps:

Alternative: Use Actions
If you’ve not yet got to grips with the Nik Collection, then not to worry, you can try some of our recommended Photoshop Actions from Envato Market.
- Charles Brown's Noise Reduction Photoshop Action offers noise reduction whilst preserving details.
- You can achieve a cross processing effect with this set of X Pro Retro Photoshop Actions
- Bump up your image's colour contrast with the PROActions Bundle – Film & Special Effects
- Add some atmospheric fog with the Fog Photoshop Action.
Finish Up
To finish, I’ve given the drop and surrounding area a sharpen and removed a couple of distracting dots:


I first started making fantasy macro pictures when I got my macro lens about 10 years ago, and although they’ve become somewhat of a cliché, I have a lot of fun making them, even now.
Once you’ve nailed the technique then you can start expanding on your images by using different materials, coloured drops and new environments.
They key thing is light. It’s tricky enough to nail the focus on macro shots without throwing the problem of low light into the mix. If daylight is lacking, then pick up a cheap LED torch. You might need to adjust your white balance, but it works just as well in a pinch.
In the beginning, you’re likely to have a lot of collapsed drops, which, in turn, sticks the glitter together which means you have to scrap the lot and start over. Keep your supplies plentiful and above all, try to have patience. If you find yourself getting frustrated, leave it alone for a while and then come back to it; above all this should be fun and enjoyable.
One last thing is to remember to clean everything efficiently when you’ve finished shooting. The last thing you want is for stray pieces of glitter to pop up in your lens or camera.


