

TL;DR: In this tutorial, you’ll learn how to resize an image in Premiere Pro step by step. You’ll adjust Scale manually in the Effect Controls panel and use the Fit and Fill shortcuts in the Properties panel for faster alignment. These techniques help you avoid floating images, eliminate black bars, and make every frame look intentional.
Key tips before resizing images in Premiere Pro
Learning how to resize an image in Premiere Pro is simple, but understanding why scale and framing matter will help you achieve better results in any video project. Before you begin adjusting scale, keep these principles in mind:
- Use high-resolution images.In 2026, most videos are exported in HD or 4K. If you start with smaller files, scaling them up will quickly reveal softness or pixelation. Choose sharp images that match or exceed your sequence resolution so they remain clear when enlarged.
- Prioritize landscapephotos. Landscape images naturally fit standard video frame ratios like 16:9, which means fewer black bars and less aggressive cropping. If you’re mixing portrait and landscape shots, you’ll likely need to adjust how each image fits the frame. As you’ll see later, tools like Fit, Fill, and manual scaling give you control over how your image adapts to the sequence.
- Add movement with intention. Video is a motion-driven medium. If you jsimply drop in static images, your edit can feel more like a slideshowthan a cinematic sequence. Whether you keep images static or animate them later, getting the scale right ensures your visuals feel deliberate and cohesive from the start.
4 steps to resize an image in Premiere Pro
Now, let’s walk through the exact steps to resize an image in Premiere Pro. It’s not complicated, but knowing exactly where to click is what separates guesswork from control.
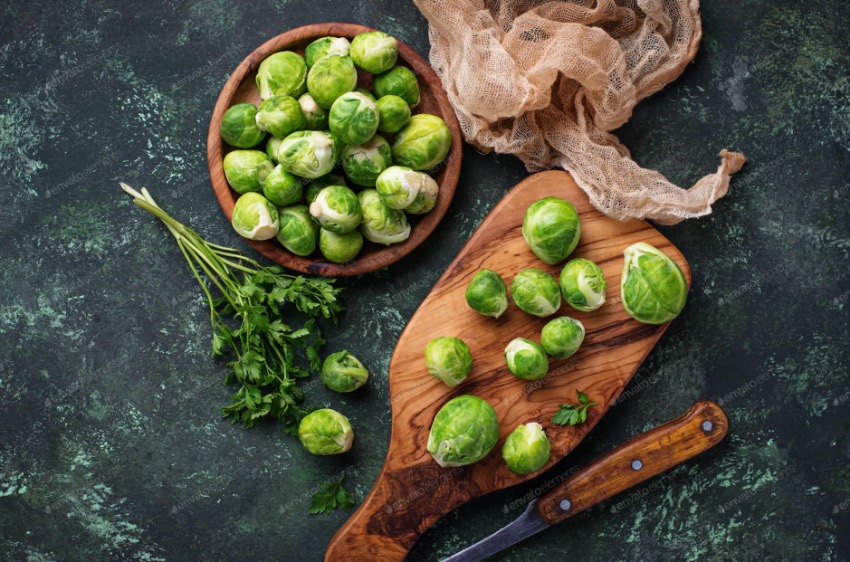
We’ll use twohigh-quality stock photos from Envato to see how everything works in a real project.

Now, let’s look at how to change image size in Premiere Pro in a few quick steps.
1. Add an Image to the Timeline
With a project open in Premiere Pro, you’ll first want to bring in an image. Once imported, it will appear in the Timeline panel, at the bottom center of Premiere Pro.
To add it to your sequence, locate the file on your computer. Click and drag it onto the Timeline, then drop it into place.
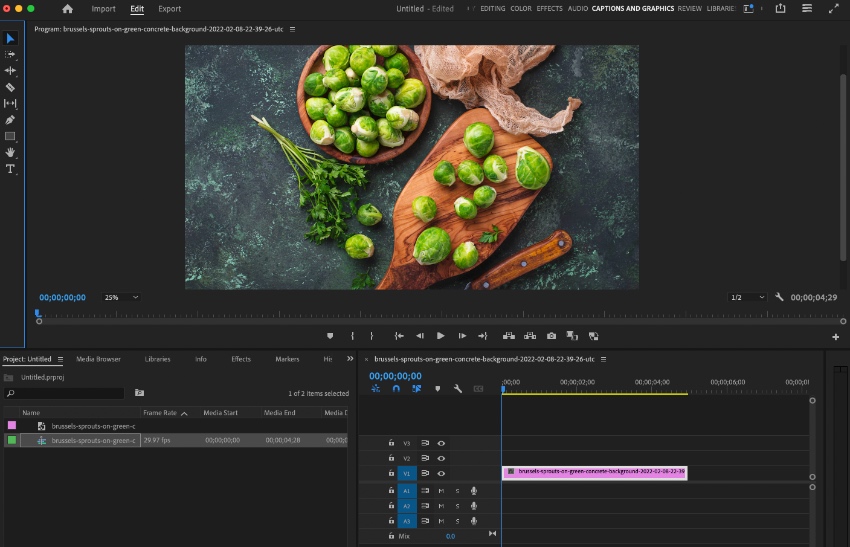
2. Launch the Effect Controls
Depending on the size of your image, it may fit nicely within the frame. In most cases, though, you’ll need to adjust the scale. If you see black bands around the image, enlarge it to fill the frame. More often, you’ll actually need to scale it down, since many still images extend beyond the edges of your sequence.
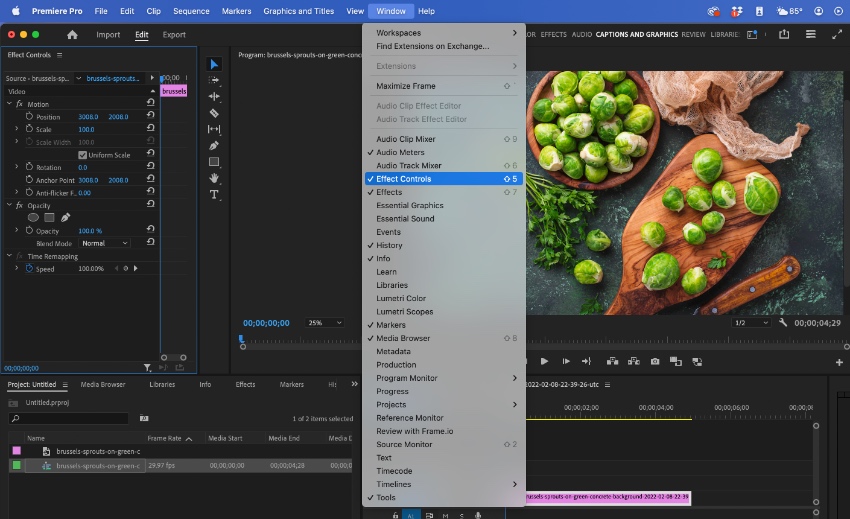
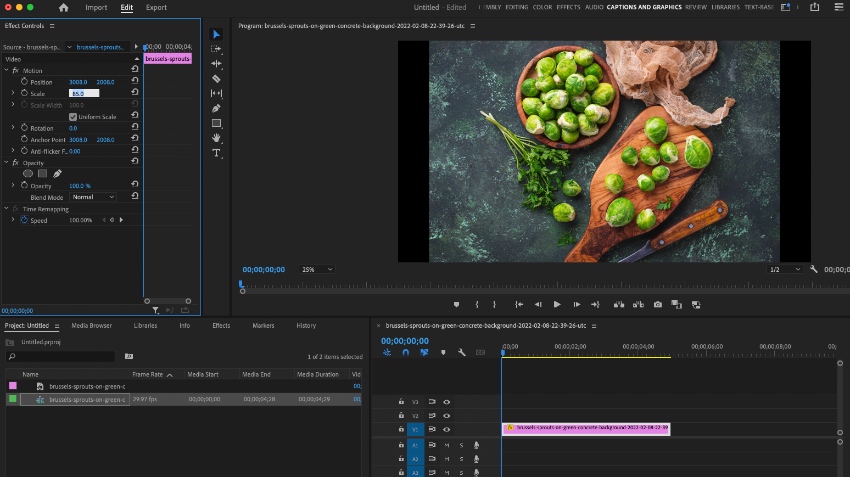
To adjust your image, head to the Effect Control panel on the left side of your screen, next to the Program Monitor. If you don’t see any options at first, click directly on your image clip in the Timeline. As soon as it’s selected, the available controls will appear.
3. Adjust the Image Scale
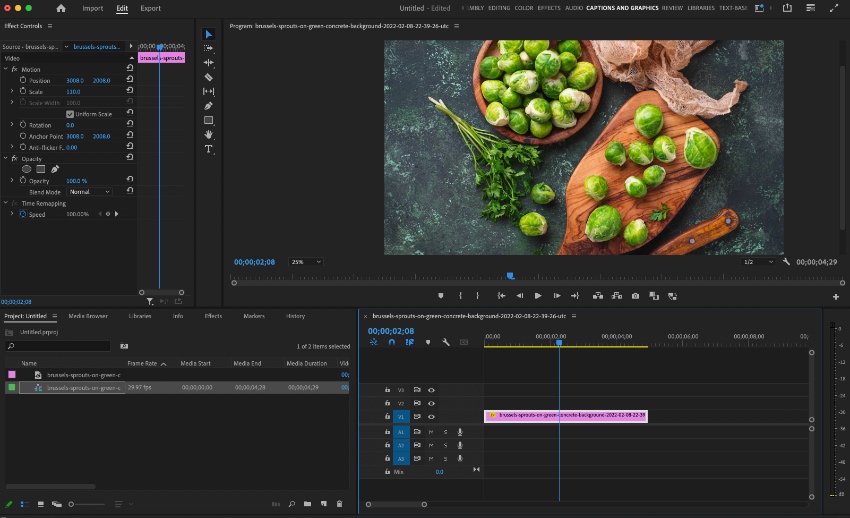
With your image in the Timeline and the Effect Control panel open, unfold the Motion section.The option you’re looking for is Scale.
By default, images are set to 100%scale. To adjust it, click inside the Scalevalue box and enter a new number. You’ll see the result update instantly in the Program Monitor.

Values above 100 zoom the image in, centered on its anchor point. Values below 100 shrink the image. If you scale it down enough, you’ll start to see the black space around the edges of your frame.
Note:
Under Transform in the Properties panel, you’ll find options like Fit and Fill.
- Fit resizes the image so the entire photo remains visible inside the frame. This preserves the full composition but may leave black borders depending on the aspect ratio.
- Fill scales the image to cover the entire frame. This removes black borders but may crop portions of the image.
If your sequence is horizontal and you insert a vertical photo, Premiere preserves the original proportions. Choosing Fit or Fill helps you decide whether you want full visibility or full frame coverage.
The Scale control under Motion can also be used creatively. Preview your image at 100%, then increase it to 200% to see how dramatically the framing changes.
In this example, we’re using the first image from the tutorial so you can clearly see how scaling affects composition.
At higher values, you can emphasize details, tighten the composition, or draw attention to a specific subject. Just be mindful of image resolution; scaling too far can reduce sharpness.
4. Preview the finished result
Just like that, you’ve resized an image in Premiere Pro. As a final check, play your sequence from the beginning.
This quick preview helps you catch anything unexpected before exporting or sharing your project. Make sure your image fills the frame correctly, and adjust the Scale value again if needed. If the image shifts out of alignment while scaling, simply double-click the clip in the Program Monitor, then drag to reposition it until the framing matches your vision.
Final thoughts on changing image size in Premiere Pro
Changing image size in Premiere Pro may seem like a small technical adjustment, but it has a significant impact on the overall quality of your edit. When your visuals fit the frame cleanly, without stretching, awkward crops, or black bars, your project instantly feels more professional.
You’ll use this technique constantly when working with still images, mixed formats, or multi-platform content. In 2026, when videos are created for everything from widescreen YouTube to vertical social feeds, knowing how to resize images properly gives you the flexibility to adapt your content to any format.
Now that you’ve mastered resizing, it’s time to create with better assets. Envato gives you access to high-quality stock photos, video templates, transitions, presets, motion graphics, and even AI-powered creative tools, so you can scale your visuals and your ideas at the same time.
Resize with intention. Create without limits.
Premiere Pro templates are just the tip of the iceberg with Envato Elements. As a member, you’ll enjoy unlimited access to over 15 million digital assets. These include fonts, stock video, music, and more. It’s the ultimate value for creatives in 2024 and beyond.
Choose a premium Adobe Premiere Pro template and enjoy:
- Sleek modern styles. Templates help your content look its very best. Modern styling is used that looks right at home on the big screen.
- Cinematic effects. Need cool transitions and animations? You’ll find plenty, with studio-quality designs.
- Easy-to-use features. If you’re not a video expert, no worries. Premium templates are easy to use, and many come with helpful tutorials to assist you.
As you can see, you can’t afford to miss out on Envato Elements. Join today and download your favorite templates from the incredibly vast library.
Resize an image in Premiere Pro FAQs
|
How do I resize an image without losing quality in Premiere Pro? |
|
To maintain image quality, use a file that matches or exceeds the resolution of your sequence. For example, use at least 1920×1080 images for a 1080p timeline, or 3840×2160 for 4K projects. Avoid scaling far beyond 100% unless the image has extra resolution to support it. Enlarging small images stretches the pixels, resulting in softness or visible pixelation. In modern workflows, starting with high-resolution assets is the simplest way to keep your visuals sharp. |
|
Why does my image look blurry or pixelated after scaling up? |
|
Blurriness usually happens when the image resolution is lower than your sequence resolution. When you scale above 100%, Premiere Pro enlarges existing pixels rather than creating new detail. Another common reason is exporting at a higher resolution than your original media supports. For example, inserting a 1080p image into a 4K sequence and scaling it aggressively will reduce clarity. The solution? Use higher-resolution images from the start and preview at 100% playback resolution in the Program Monitor to check true sharpness before exporting. |
|
Why are black bars appearing after I import my image? |
|
Black bars appear when your image’s aspect ratio doesn’t match your sequence settings. For example, placing a vertical (9:16) image into a horizontal (16:9) sequence leaves empty space on the sides. You can fix this by:
Choosing between Fit and Fill depends on whether you want full visibility or full frame coverage. |
|
What’s the difference between “Scale to Frame Size” and “Set to Frame Size”? |
|
This is one of the most misunderstood settings in Premiere Pro.
In modern workflows, Set to Frame Size is generally the safer, more flexible choice. |
|
How do I resize an image for vertical formats like 9:16 (Instagram Reels or Shorts)? |
|
First, create or switch to a 9:16 sequence (1080×1920 or 2160×3840 for 4K vertical). Once your image is in the Timeline, adjust Scale under Motion or use the Fill option in the Properties panel to ensure the frame is fully covered. Keep in mind that horizontal images placed in vertical sequences will need to be cropped or repositioned. Use the Position controls to refine composition and keep your subject centered. In 2026, designing with multiple aspect ratios in mind from the start saves significant editing time. |
|
Can I animate an image resize in Premiere Pro? |
|
Yes. You can animate Scale using keyframes in the Motion section of the Effect Controls panel. By setting a starting Scale value and adjusting it later in the Timeline, you create a smooth zoom effect. Even a subtle zoom adds movement and prevents static images from feeling like a slideshow. Just be mindful of resolution limits—large zooms require higher-resolution images to stay sharp. |
|
How do I resize multiple images at once in Premiere Pro? |
|
After adjusting the Scale on one image, copy the clip (Cmd/Ctrl + C). Then select the other images in your Timeline and choose Edit > Paste Attributes (Cmd + Option + V / Ctrl + Alt + V). In the dialog box, check Motion, then click OK. Premiere will apply the same Scale and Position settings to all selected clips, helping you keep consistent framing across your sequence. |
|
How do I reset an image to its original size? |
|
To reset your image in Premiere Pro, return the Scale value to 100% in the Motion section. If you’ve applied additional transformations, you can right-click the Motion property and choose Reset Parameter to restore default settings instantly. This is especially useful when experimenting with zoom or reframing and needing a clean starting point |
 By
By


