


Welcome to Photoshop in 60 Seconds, in which you can learn a new design skill, feature, or technique in just a minute!
Adobe Photoshop JPEG Compression in 60 Seconds
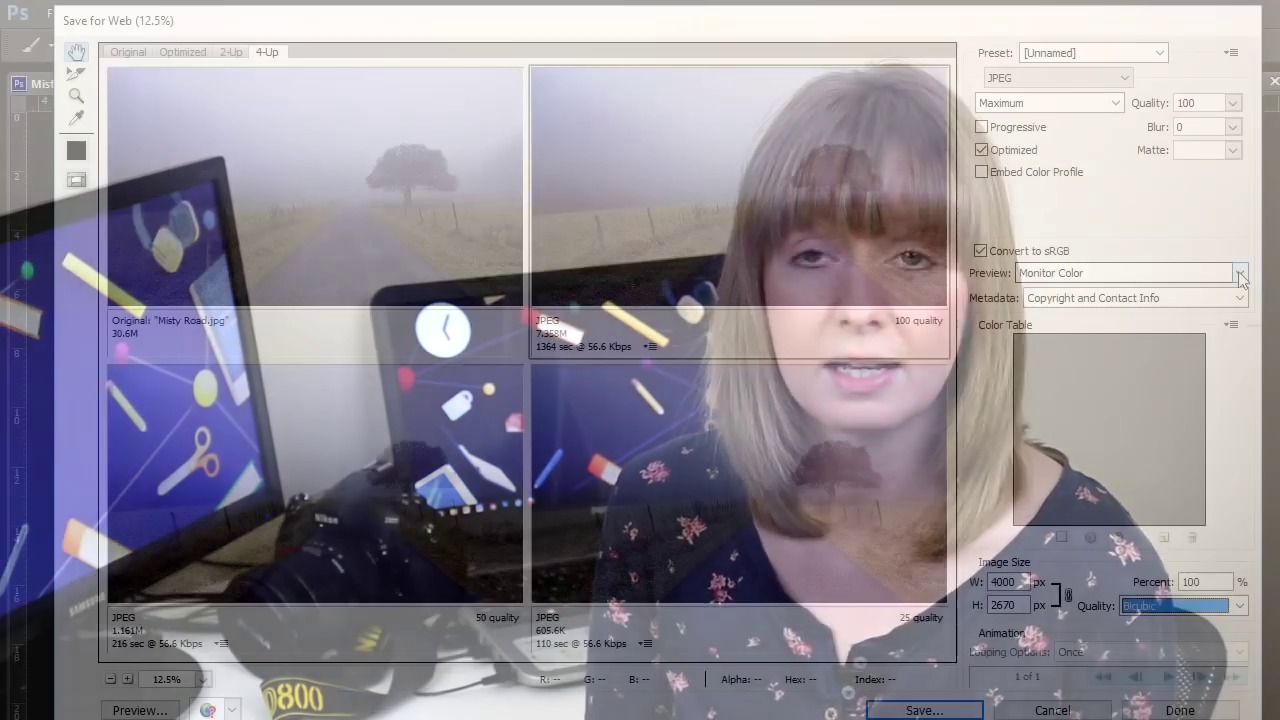
Save For Web is a feature of later editions of Adobe Photoshop that lets us balance size and quality to get the best resulting image.
Browse the incredible selection of Save for Web Photoshop Actions on GraphicRiver to save your photos faster. And check out the video below to learn more.
What You Should Know About JPEG Compression
Save For Web won’t change your original image and by using the 2up, 3up and 4up options, you can compare your changes to your original, immediately.


Quality options will let you change the amount of pixels sampled and is set to Bicubic by default.


Quality goes from Maximum, with no visible distortion,
to low, which generally creates a lot of messy areas called artifacts.


Once happy with your picture, you can see a Preview in a web browser and then Save with the option to rename your file something more web friendly.
Want to learn more? Check out the video above to see this lesson at work!
A Bit More Detail
Learn more about JPEG Compression on Envato Tuts+:

 How to Export JPGs from Lightroom Classic


 Facebook JPEG Compression: How to Get the Best Image Quality on Your Timeline


 Save For Web: Better JPEG Compression with Adobe Photoshop

 Twitter JPEG Compression: How to Create the Best Quality Image for Your Feed
60 Seconds?!
This is part of a series of quick video tutorials on Envato Tuts+ in which we introduce a range of subjects, all in 60 seconds—just enough to whet your appetite. Let us know in the comments what you thought of this video and what else you'd like to see explained in 60 seconds!
 By
By


