
DaVinci Resolve remains at the forefront of digital video editing, offering an unparalleled suite of features for post-production, color grading, and audio editing. Mastering DaVinci Resolve keyboard shortcuts is akin to a musician learning scales; it’s the foundation that enables creativity to flow unhindered. This guide dives into the 30+ most essential keyboard shortcuts that every DaVinci Resolve user should know in 2024, promising an uptick in editing efficiency and creative output.

Comprehensive Guide to DaVinci Resolve Keyboard Shortcuts
Basic Editing Shortcuts for DaVinci Resolve
Diving into the world of video editing with DaVinci Resolve, we find ourselves amidst a sea of shortcuts that make our journey smoother and our edits quicker. These DaVinci Resolve shortcuts, a mix of keyboard strokes and commands, are our best friends in the editing room. They let us cut, copy, paste, and tweak our projects with ease, turning complex tasks into simple, quick actions. For anyone looking to master DaVinci Resolve, knowing these hotkeys is like knowing the secret paths through a thick forest.

Action |
Shortcut (Windows/Mac) |
Cut |
Ctrl + X / Cmd + X |
Copy |
Ctrl + C / Cmd + C |
Paste |
Ctrl + V / Cmd + V |
Undo |
Ctrl + Z / Cmd + Z |
Redo |
Ctrl + Shift + Z / Cmd + Shift + Z |
Save Project |
Ctrl + S / Cmd + S |
Ripple Delete |
Backspace / Delete |
Split Clip at Playhead |
Ctrl + B / Cmd + B |
Breakdown of Each Shortcut:
- Cut (Ctrl + X / Cmd + X): Quickly removes and stores the selected clip for placement elsewhere.
- Copy (Ctrl + C / Cmd + C): Duplicates the selected clip without removing it from its original position.
- Paste (Ctrl + V / Cmd + V): Inserts the stored clip at the current location in the timeline.
- Undo (Ctrl + Z / Cmd + Z): Reverses the most recent action, an essential tool for correcting mistakes.
- Redo (Ctrl + Shift + Z / Cmd + Shift + Z): Reapplies an action that was just undone, useful for toggling changes.
- Save Project (Ctrl + S / Cmd + S): Saves the current state of your project, a crucial habit for safeguarding your work.
- Ripple Delete (Backspace / Delete): Deletes the selected clip and automatically closes the gap, keeping the timeline tight.
- Split Clip at Playhead (Ctrl + B / Cmd + B): Cuts the clip into two parts at the playhead’s position, allowing for precise editing.
Advanced Editing Shortcuts for DaVinci Resolve
For those ready to take their DaVinci Resolve editing skills up a notch, the Advanced Editing Shortcuts for DaVinci Resolve shortcuts list is all you need. This section highlights five advanced shortcuts that open up a world of precision and efficiency. From making quick ripple edits to seamlessly adding transitions, these DaVinci Resolve keyboard shortcuts, including the latest DaVinci Resolve 18 shortcuts, empower you to fine-tune your projects with expert agility.

Action |
Shortcut (Windows/Mac) |
Ripple Edit Left |
Alt + Left Arrow / Option + Left Arrow |
Ripple Edit Right |
Alt + Right Arrow / Option + Right Arrow |
Slip Edit |
S |
Add Transition |
Ctrl + T / Cmd + T |
Toggle Full Screen Viewer |
Ctrl + Command + F / Ctrl + Cmd + F |
Breakdown of Each Shortcut:
- Ripple Edit Left (Alt + Left Arrow / Option + Left Arrow): Adjusts the edit point to the left, closing gaps in the timeline without leaving blank spaces, ideal for refining edits.
- Ripple Edit Right (Alt + Right Arrow / Option + Right Arrow): Similar to Ripple Edit Left but moves the edit point right, ensuring seamless content flow in the timeline.
- Slip Edit (S): Alters a clip's in and out points without changing its duration or timeline position, perfect for adjusting shot timing.
- Add Transition (Ctrl + T / Cmd + T): Quickly inserts a standard transition, streamlining the process of smoothing clip joins without manual drag-and-drop.
- Toggle Full Screen Viewer (Ctrl + Command + F / Ctrl + Cmd + F): Expands the viewer to full screen for a clear, focused view of the current frame or sequence, crucial for detailed editing or previews.
Color Grading and Correction Shortcuts for DaVinci Resolve
Unlock the true potential of your footage with the Color Grading and Correction Shortcuts for DaVinci Resolve, a crucial set of shortcuts for anyone looking to master the art of visual storytelling. This section zeroes in on five essential shortcuts that will transform your color grading workflow. From activating the primary workspace to effortlessly toggling between viewer modes, these DaVinci Resolve hotkeys are designed to enhance your efficiency and creativity.


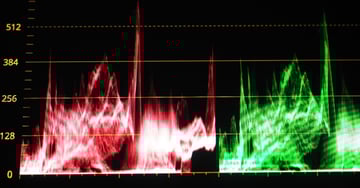
Image of Color grading graph or RGB colour correction indicator on monitor from Envato Elements
Action |
Shortcut (Windows/Mac) |
Activate Primary Workspace |
Alt/Option + P |
Highlight Shadow |
Shift + H |
Toggle between viewer modes |
Shift + F |
Bypass all grades |
Shift + D |
Zoom to Fit |
Shift + Z |
Breakdown of Each Shortcut:
- Activate Primary Workspace (Alt/Option + P): Swiftly transitions you to the Color panel, centralizing access to color grading tools for an efficient workflow.
- Highlight Shadow (Shift + H): Isolates and displays only the highlights or shadows in an image, aiding in targeted adjustments for precise color grading.
- Toggle between viewer modes (Shift + F): Switches the view within the Color panel among single viewer, split-screen, and comparison modes, facilitating detailed assessment of grading effects.
- Bypass all grades (Shift + D): Instantly turns off all color grading for the current clip or timeline, allowing for quick comparisons between graded and original footage.
- Zoom to Fit (Shift + Z): Adjusts the viewer to automatically fit the entire image within the screen, essential for evaluating the color balance and composition of your footage at a glance.
Fusion and Visual Effects Shortcuts for DaVinci Resolve


Action |
Shortcut (Windows/Mac) |
Add Tool |
Shift + Space |
Connect Nodes |
F |
Disconnect Nodes |
Shift + F |
Add Merge Node |
Shift + M |
Delete Node |
Backspace/Delete |
Breakdown of Each Shortcut:
- Add Tool (Shift + Space): Opens the tool selection window, streamlining the addition of Fusion nodes to your project. This shortcut is pivotal for building and customizing your node tree efficiently.
- Connect Nodes (F): Instantly connects two selected nodes, a fundamental action for structuring visual effects and composite workflows. It's crucial for efficiently managing the flow of operations within your project.
- Disconnect Nodes (Shift + F): Breaks the connection between selected nodes, offering flexibility in reorganizing or modifying your node tree. This function is particularly useful for troubleshooting or refining your visual effects composition.
- Add Merge Node (Shift + M): Adds a Merge node, essential for compositing multiple images or effects layers. This shortcut is key to layering elements seamlessly and is central to complex compositing tasks.
- Delete Node (Backspace/Delete): Removes selected nodes, simplifying the process of cleaning up or adjusting your node structure. This action helps in maintaining an organized and efficient workspace within Fusion.
These shortcuts are designed to facilitate a smoother and more intuitive workflow on the Fusion page of DaVinci Resolve, enhancing your ability to create and adjust visual effects with speed and precision.
Fairlight and Audio Editing Shortcuts for DaVinci Resolve


Step into the world of Fairlight and discover the power of audio editing in DaVinci Resolve. This section shines a light on five essential shortcuts that will transform your audio post-production workflow. Whether you're adjusting clip volumes, selecting all tracks for a quick edit, or fine-tuning the start and end of your audio clips, these DaVinci Resolve shortcuts are your key to a more efficient and streamlined process.
Action |
Shortcut (Windows/Mac) |
Increase / Decrease Clip Volume |
Alt/Opt + Up Arrow / Alt/Opt + Down Arrow |
Select All Tracks |
Ctrl/Cmd + A |
Trim Audio Clip Start |
Alt/Opt + Left Bracket |
Trim Audio Clip End |
Alt/Opt + Right Bracket |
Add Audio Keyframe |
Alt/Opt + Click |
Breakdown of Each Shortcut:
- Increase / Decrease Clip Volume (Alt/Opt + Up Arrow / Down Arrow): Adjusts the volume of selected clips incrementally, allowing for quick on-the-fly mixing directly in the timeline, enhancing or diminishing audio levels without accessing separate mixers or panels.
- Select All Tracks (Ctrl/Cmd + A): Enables bulk actions across all audio tracks, such as applying effects or adjustments collectively, streamlining global edits and project exports.
- Trim Audio Clip Start (Alt/Opt + Left Bracket): Precisely trims the beginning of an audio clip to the playhead’s position, facilitating quick adjustments to the start of audio segments for tighter sync with visual elements.
- Trim Audio Clip End (Alt/Opt + Right Bracket): Similarly, trims the end of an audio clip to the playhead’s location, allowing for succinct edits to clip duration and seamless integration with subsequent audio or video clips.
- Add Audio Keyframe (Alt/Opt + Click): Inserts a keyframe at the cursor's location within the clip, enabling detailed control over audio dynamics such as fades, volume shifts, and pan changes, crucial for nuanced audio storytelling.
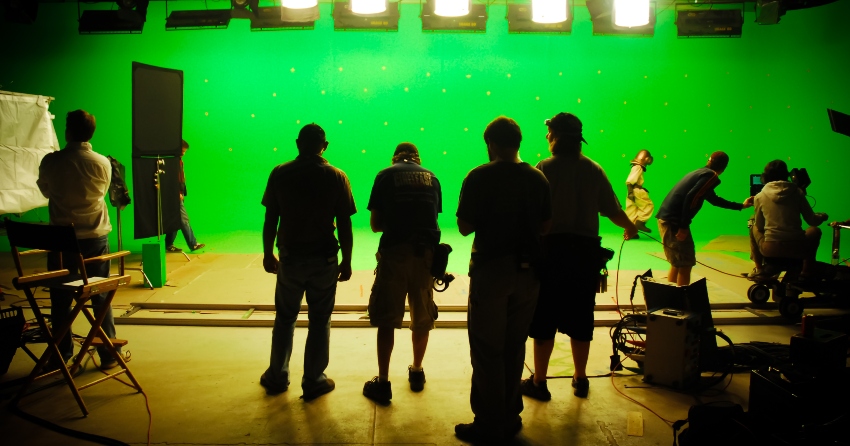
Bonus Section: DaVinci Resolve Workflow Optimization Shortcuts


Image of flow management concept taken from Envato Elements
Unlock the full potential of your video editing workflow with these handpicked DaVinci Resolve shortcuts designed to optimize your editing speed and efficiency. From quick navigation between different panels to simplifying timeline management, this bonus section is your key to a smoother, more streamlined editing experience.
Action |
Shortcut (Windows/Mac) |
Open Media Pool |
Ctrl/Command + 1 |
Open Edit Page |
Ctrl/Command + 2 |
Open Fusion Page |
Ctrl/Command + 3 |
Open Color Page |
Ctrl/Command + 4 |
Open Fairlight Page |
Ctrl/Command + 5 |
Full Screen Timeline |
Ctrl/Command + F |
Go to Beginning of Timeline |
Home |
Go to End of Timeline |
End |
Breakdown of Each Shortcut:
- Open Media Pool (Ctrl/Command + 1): Instantly access your media pool, allowing for quick import and organization of your media files, setting the stage for your editing process.
- Open Edit Page (Ctrl/Command + 2): Transition seamlessly to the Edit Page, where you can begin cutting and assembling your project with precision.
- Open Fusion Page (Ctrl/Command + 3): Jump to the Fusion Page for advanced visual effects and motion graphics, unleashing your creativity without limits.
- Open Color Page (Ctrl/Command + 4): Navigate directly to the Color Page, where you can grade and color correct your footage, bringing your vision to life.
- Open Fairlight Page (Ctrl/Command + 5): Access the Fairlight Page for sophisticated audio post-production, ensuring your project sounds as good as it looks.
- Full Screen Timeline (Ctrl/Command + F): Expand your timeline to full screen for detailed editing work, allowing you to focus entirely on your edits.
- Go to Beginning of Timeline (Home): Quickly navigate to the beginning of your timeline, ensuring efficient workflow navigation and edit review.
- Go to End of Timeline (End): Jump to the end of your timeline to review or continue editing your project's concluding segments.
Greatest DaVinci Resolve Shortcut of all: Envato Elements.
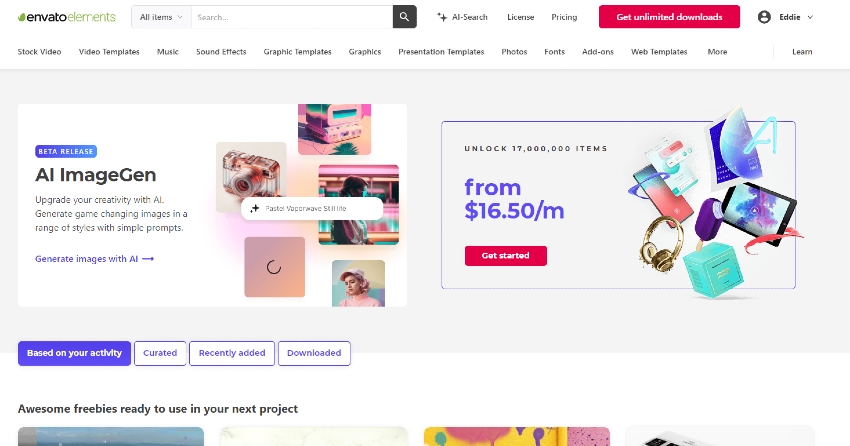


Beyond mastering shortcuts, the quality of assets used can significantly impact your project's final look and feel. Envato Elements offers unlimited access to a vast library of high-quality video templates, stock footage, and music tracks to elevate your projects. With Envato Elements, you're not just saving time with efficient shortcuts; you're also enhancing your creative output with professional-grade assets. Discover how Envato Elements can transform your video projects by exploring its comprehensive collection today.
Check out a few of my other articles to learn more about DaVinci Resolve:


Conclusion
Keyboard shortcuts in DaVinci Resolve are more than just time-savers; they are essential tools in the video editor's toolkit, enabling you to work smarter, not harder. By incorporating these shortcuts into your daily workflow, you'll not only speed up your editing process but also gain more time to focus on the creative aspects of your projects. And remember, with Envato Elements, you have a treasure trove of assets at your fingertips, ready to elevate your video editing to professional heights.
 By
By


