

Learn everything about video editing in DaVinci Resolve. From setting up your project and importing footage, to adding graphics, logos, and text.

Jump straight to the chapter you want to follow:


What You'll Learn
- How to use DaVinci Resolve
- How to set up your DaVinci Resolve project
- How to import your footage
- How to use DaVinci Resolve to edit the best takes
- How to add graphics, logos, and text to your DaVinci edit
- Learn the DaVinci Resolve basic color correction
About Your Instructor


TOM GRAHAM
I'm a multi-skilled content creator with a background in commercial filmmaking. I've worked as a Director, DoP, Producer, Editor, and Creative Director across television commercials, feature films, and large-scale corporate video events. I now use this experience to create post-production and filmmaking content for the Envato Tuts+ YouTube Channel.
1. Introduction
1.1 Welcome to the Course
I'll start this DaVinci Resolve tutorial for beginners with a brief overview. We'll go through what we'll cover and the DaVinci Resolve editing skills you can expect to pick up.
"If you've never touched video editing software before, this is the course for you. Stick with me, and I'll show you from start to finish all the processes that you need to know."
Before you start, here are the source files I'll be using in this DaVinci Resolve user guide:
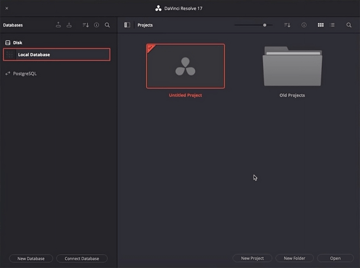
1.2 Opening DaVinci Resolve for the First Time
Now let's open up the software and create a project. I'll explain what databases are in DaVinci Resolve and show you how to create your first project.


1.3 Complete Overview of the DaVinci Resolve Workspace
When you first open up DaVinci Resolve for editing, it can look a bit confusing:


Don't worry! I'll give you a complete overview of the workspace and break everything down. I'll take you through each of the seven tabs along the bottom of the screen. These correspond to different DaVinci Resolve edit functions:
- Media: for importing and working with different media
- Cut: for quick, basic editing
- Edit: for more in-depth editing of your videos
- Fusion: VFX software, similar to Adobe After Effects
- Color: powerful tools for color grading
- Fairlight: for professional audio editing
- Deliver: where you finalize and export your project
2. How to Set Up a Project and Import Footage
2.1 How to Set Up Your Project and Import Your Files
Getting started is pretty easy. Head to the Media tab and find your footage in the Explorer window in the top left. Then, and drag and drop it into the Media Pool at the bottom of the screen.


Now that we've got some footage to work with, let's set up our DaVinci Resolve project. Click on the cog wheel in the bottom-right corner to bring up the Project Settings.


We have a lot of options here, but most of them are fine to leave at their default settings. For now, we'll set the Timeline resolution to 1920 x 1080 HD and the Timeline frame rate to 25 frames per second. You can work with different settings if you want, but that's what I'm using for this project.
2.2 How to Create a Timeline From Your Imported Files
So now we can organize our footage in the timeline. I'll drag in some stock footage and audio files. Hit Command-A to select everything, and right-click > Create New Timeline Using Selected Clips.
This brings up a dialog box where you can name your project and choose the settings.


Now that we have a timeline, we can double-click on it to enter the Edit tab. Now we're ready to start editing our footage, which we'll do in the next chapter.
3. How to Edit Footage in DaVinci Resolve
3.1 A Complete Overview of the Edit Tab
When you open the Edit tab, you'll see that all of the footage has been added to the timeline.


That can be useful, but I prefer to start with a clean slate. So highlight everything and delete it, and we'll start adding our footage and media later.
First, I'll give you an overview of the Edit tab. We'll start by looking at the tabs in the top left:
- Media Pool: this is like the Media tab, but more accessible. You can easily drag your media into the timeline.
- Effects: from here, easily add things like transitions, titles, and other effects.
- Edit Index: tools to help you organize your project and navigate quickly.
- Sound Library: a library of sound effects to use in your projects.
We'll also look at the Mixer, the Metadata panel, the Inspector, and more!
3.2 The Editing Process in DaVinci Resolve
So you have some interview footage, along with B-roll footage and audio. How do you begin to put it all together?
In this section, I'll take you through the essential steps in the editing process. These steps will work in DaVinci Resolve or any other video-editing software.


How to Edit Video
Cut Your Interview
Find the best takes that you want to use in your video, and cut out the unwanted parts.
Craft a Story
Arrange the footage to create a story. Remember, you don't have to present the footage in the order it was recorded.
Add Your B-Roll, Music, and Graphics
Use these to highlight and illustrate points, hide jump cuts, and make it all look more polished.
3.3 Making Selects in DaVinci Resolve
So we'll start with the first step outlined above. We'll do a quick edit of our interview footage by cutting out the questions and any unwanted bits. Select only the best takes.
Drag the interview footage into the timeline and delete any unwanted audio tracks. You'll see several. The main audio track with the interviewee speaking is the one with the biggest waveforms.


Unlink the audio tracks and delete the unwanted ones. Then, relink the main audio track to the video footage (right-click > Link Clips) to begin editing.
Next, go through and start cutting the parts you don't need.
To make cuts, you just need three keys on your keyboard: A, B, and Delete! Click on one end of the section you want to cut, and hit B to insert a cut point. Then hit B on the other end to insert another cut point.
Click on the section in the middle and press A to select it, and Delete to get rid of it.


3.4 How to Craft a Narrative From Your Selects
4. How to Enhance Your Video With Motion Graphics and More
4.1 How to Create a Compelling Intro


Then I'll add a premade intro. I created this using a DaVinci Resolve intro template from Envato Elements.


So we've already gone from simple interview footage to a professional-looking intro. In the rest of this chapter, we'll continue to add music, graphics, and effects to create a compelling video.
4.2 How to Add Music to the Edit
Now let's add some music by dragging the track onto the timeline.
As we go through and add more footage, I'll show you how to make cuts so that the music fits your editing decisions. We'll also look at fading the music out at the right times and making it fit seamlessly with the other audio tracks.


4.3 How to Refine Your Edits and Add B-Roll Footage
Watch video lesson (14 mins) ↗
Now we're going to keep refining our edits and selecting only the best footage. But as we keep cutting and rearranging, we're going to hit a problem: jump cuts.
So here are some tips for hiding jump cuts in your footage:


Tips for Handling Jump Cuts
Create a Punch-in Edit
Zooming in on your speaker is a natural way to transition over a jump cut.
Use the Rule of Thirds
When you're lining up your edit points, use the rule of thirds. It helps you ensure the subject is positioned in roughly the same part of the frame.
Use B-Roll
Adding B-roll footage is a great way to hide a jump cut. Use relevant footage to illustrate what the speaker is saying.
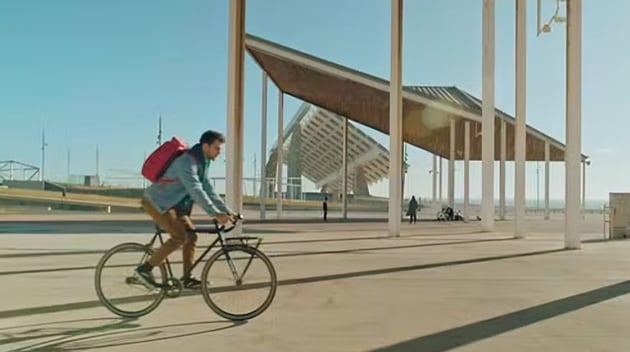
4.4 How to Use Stock Footage to Enhance the Narrative
In addition to the B-roll footage that we've shot, we can enhance our project by adding stock footage. There's a whole range of great options out there that you can use. It also saves a lot of the time and expense involved in shooting everything yourself.


4.5 How to Create a Music Bed
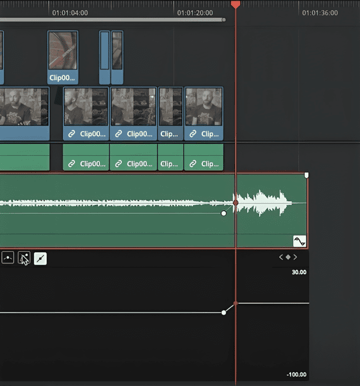
Earlier, we added music to our intro, so now we'll add music to the rest of the video.
I'll show you the best way to add the music, and I'll show you how to add keyframes to adjust certain parts of your audio. For example, here I'm increasing the volume at the end, after our subject has finished speaking.


4.6 How to Create Animated Lower Thirds
Now we need some text to say who our interviewee is. I'll show you how to create animated lower thirds quickly and easily.
All you need to do is go to the Effects panel on the left and pick the text effect you want. I like Digital Glitch Lower Third, so I'll just drag that into the timeline.


Then you can go to the panel on the right of the screen to type in your own text. You can use the same panel to change the font, size, and position of your text.


4.7 How to Add a Title for the Outro
We can create a title for the outro in the same way as we created the lower third just now:
- Pick an effect you like.
- Drag it into the timeline.
- Type in your own text and customize the font, size, etc.


I'm using the Jitter effect. I'll also show you how to add a Non-Additive Dissolve effect to fade the title out at the end.
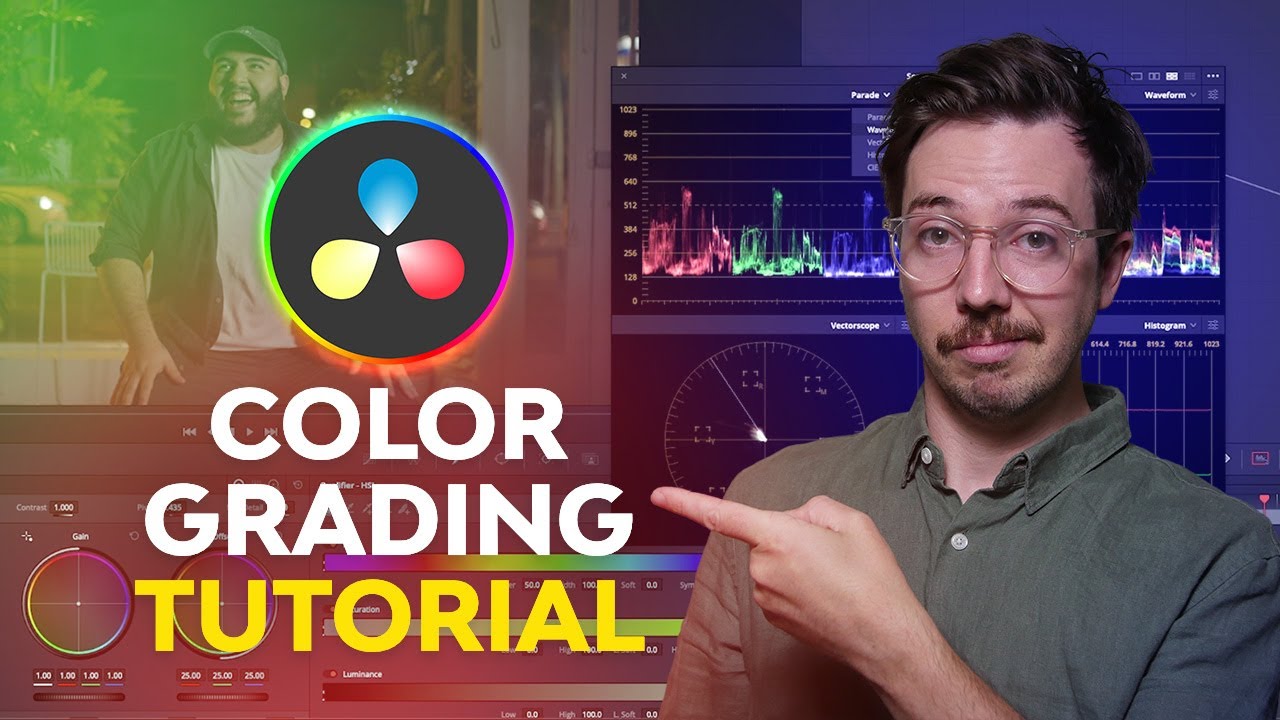
5. Color Grading in DaVinci Resolve
5.1 How to Color Grade Your Footage


I'll show you how to apply LUTs to your footage and then tweak the results to get just the look you want.
5.2 How to Duplicate a Color Grade Across Multiple Pieces of Footage
So now we have some footage with proper color grading applied to it:


But that's just one clip. How do we apply it to the rest of our project?
Right-click on your color-graded footage and choose Grab Still. This will give you a thumbnail in the top left. Then you can go to another clip and right-click > Apply Grade.
So now you have all your clips with the same color grade. You can go in and make individual tweaks for each clip where necessary. With this little trick, you'll be able to color grade your whole project in no time!
6. How to Finalize and Export Your Project
6.1 How to Mix and Master Your Dialogue Track—the Easy Way!
Our video is looking great now, but it's still sounding a bit tinny. DaVinci Resolve has some great audio tools in its Fairlight panel. Watch this video for an in-depth guide to processing voice recordings with Fairlight:


That helps a lot. You can also apply presets or tweak individual settings via this dialogue box. For this video, using the Male VO preset is just what we need.


Now we are done! We can just review our video one more time before exporting it.
6.2 How to Export From DaVinci Resolve
Exporting from DaVinci Resolve is quite easy. Just go to the Deliver tab, and you'll get a bunch of settings to choose from. For the most part, you can choose a preset designed for a particular platform, such as YouTube, Vimeo, etc.
Then hit Add to Render Queue. You can queue up multiple videos to render at once if you want. Then when you're ready, just hit Render All, and it will render the video and save it to your computer.
And that's it!


7. Conclusion
7.1 Congratulations, You’re Now a Video Editor!
So we've now created a mini-documentary. You now know how to import and edit your footage, how to add B-roll and stock footage, how to work with audio, and much more.
"If you've never touched video-editing software before, go ahead and download DaVinci Resolve right now—it's completely free. Then rewind the video, follow my steps, and you'll be well on your way to becoming an editor."
Learn More About DaVinci Resolve
There's plenty more to learn about this wonderful editing app. Here are some great DaVinci Resolve videos to watch next:


We also have hundreds of free DaVinci Resolve tutorials here on Envato Tuts+. Try these to start with:

 How to Refine the Colour in Videos Using DaVinci Resolve


 How to Denoise Footage in DaVinci Resolve: A Complete Guide


 How to Use Noise Reduction on Audio in DaVinci Resolve (With Fairlight)


 How to Sync Audio and Video Tracks in DaVinci Resolve

 How to Colour Grade Video Backgrounds in DaVinci Resolve

 How to Export Color-Corrected Clips From DaVinci Resolve

 By
By


