
TL;DR: To cut video in DaVinci Resolve, split clips with Ctrl/Cmd + B for quick edits, use Blade Mode for precise frame cuts, trim to refine timing, crop to improve framing, or apply Scene Cut Detection to automatically break long footage into smaller clips, plus a few smart tips to improve your final cut.
Editing is where your story truly takes shape. Each cut, trim, and split determines how your audience experiences the footage. DaVinci Resolve gives you powerful tools to control that process with precision.
Learning how to cut video in DaVinci Resolve isn’t just about removing mistakes; it’s about shaping pacing, improving clarity, and guiding attention. Once you understand the different cutting methods available, your workflow becomes faster, cleaner, and far more intentional.
How to cut in DaVinci Resolve.
5 ways to cut video in DaVinci Resolve
If you're wondering how to cut video in DaVinci Resolve, the short answer is: there isn’t just one way to do it. The software includes several tools designed for different editing situations—from quick shortcut-based splits to frame-level precision and automated scene detection.
But first, set up your project correctly.
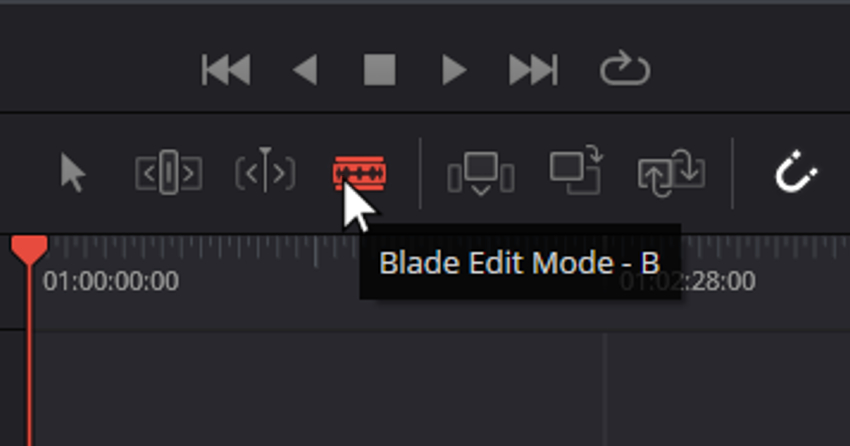
How to cut a clip in DaVinci Resolve: Blade tool.
Getting started with DaVinci Resolve
Learning how to cut in a video with DaVinci Resolve for the first time? Think of the Edit tab as your workbench. This is where your video clips lay, waiting to be shaped into your final masterpiece.
It's crucial to keep this space organized. Having a clean workspace right from the start can make your editing process smoother. It's a solid foundation for the creative journey ahead.
Learning how to cut in DaVinci Resolve is key to achieve such an organized workflow. It allows you to trim down lengthy footage, remove unwanted scenes, or rearrange your flow.
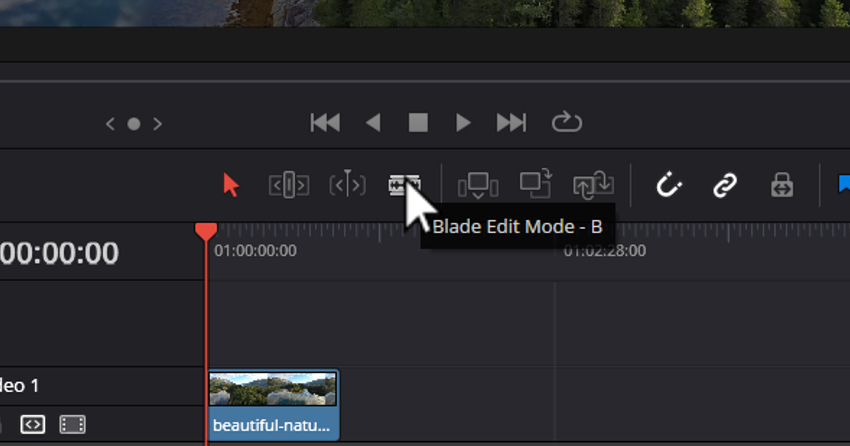
Use DaVinci Resolve to cut a clip: Blade Edit Mode.
Basic cutting techniques
Using the Cut tool for basic edits
- Open DaVinci Resolve. Launch DaVinci Resolve and open your project.
- Select your clip. On the timeline, select the clip you want to edit.
- Activate the Cut tool. You can activate the video Cut tool by clicking on the razor icon in the toolbar above the timeline. Alternatively, you can use the keyboard shortcut Command B (Mac) or Ctrl B (Windows).
- Make your cut. Move your cursor to the point on the clip where you want to make the cut. A simple click will slice the clip into two parts. You can then select and delete any unwanted sections or move them around.
How to cut in DaVinci Resolve: User selecting spot to cut clip.
Precision editing with Blade Edit Mode
- Switch to Blade Edit Mode. Press the B key on your keyboard or select the blade icon from the toolbar.
- Choose the exact frame. Scrub through your clip in the timeline to find the exact frame where you want to make the cut.
- Cut at the frame: Once you've found the perfect frame, click to make the cut. Blade Edit Mode allows for frame-by-frame precision so your cuts are right where you want them.
Tips for effective cutting
- Zoom in for precision. Use the zoom controls to get a closer view of your timeline. This will help you make more accurate cuts, especially when using Blade Edit Mode.
- Use snapping. The snapping feature makes it easier to align your cuts with other clips or timeline markers.
- Review your edits. Always play back your edits to ensure the cuts are smooth and achieve the desired effect.
Advanced cutting techniques in DaVinci Resolve
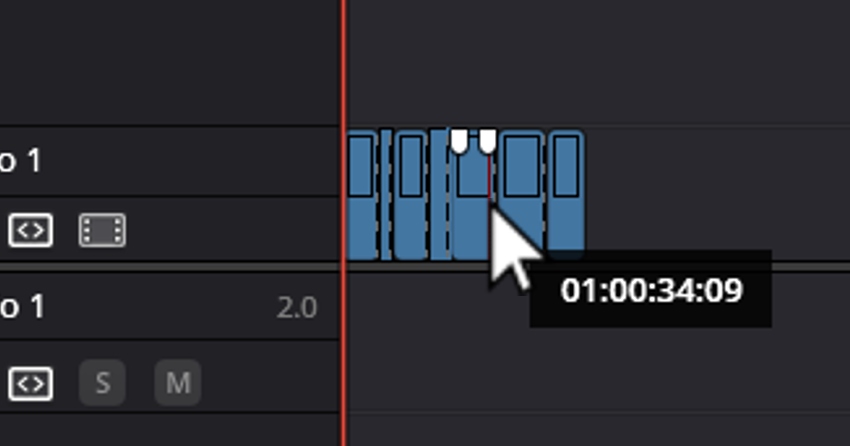
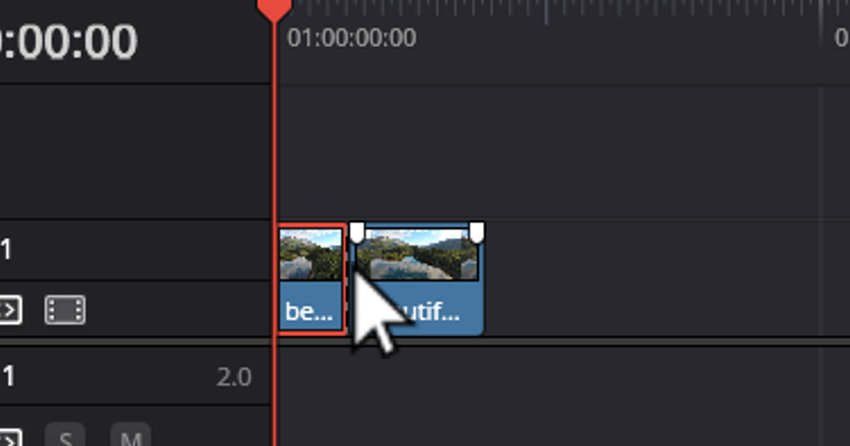
How to cut a clip in DaVinci Resolve: Using Blade Edit Mode on several spots.
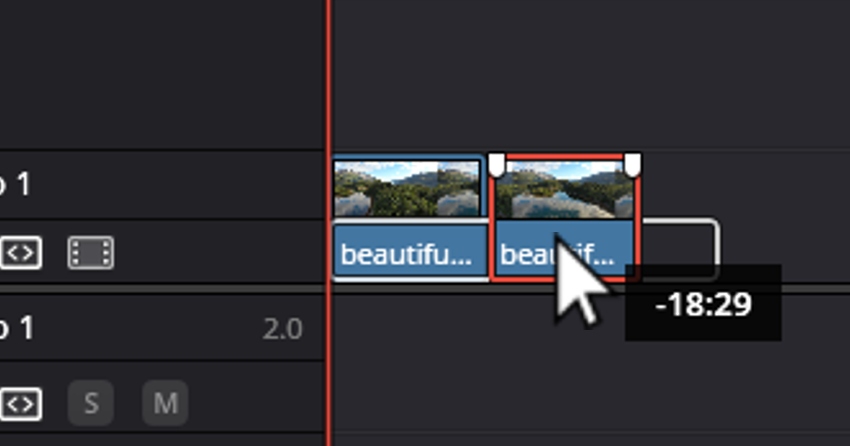
Split clips in DaVinci Resolve for flexibility
- Position the playhead. Navigate through your timeline. Position the playhead where you want to split your clip.
- Split the clip. Press Command B (Mac) or Ctrl B (Windows) to split the clip at the playhead's location. You can now rearrange or edit the two separate parts independently.
Trimming clips for precision
- Enter Trim Mode. To start trimming your clips, press T on your keyboard. This switches to Trim Mode, giving you detailed control over the start and end points of your clips.
- Adjust start and end points. Click and drag the edges of your clip to adjust its duration. This deletes excess footage from the beginnings or ends of your clips without altering their position on the timeline.
- Use custom keybinds. For editors looking to expedite their trimming process, DaVinci Resolve keybinds. These allow you to create custom keyboard shortcuts. Set up keybinds for your most-used trimming actions to speed up your editing workflow.
How to cut in DaVinci Resolve: Trimming clips.
Cropping videos to enhance focus
- Select your clip. Click on the clip you wish to crop in the timeline.
- Open the Inspector window. With your clip selected, navigate to the Inspector window. This is typically found in the upper right corner of the interface.
- Adjust crop parameters. In the Inspector window, locate the Crop section. Here, you can adjust the top, bottom, left, and right crop parameters.
Crafting visually compelling stories
The techniques of splitting, trimming, and cropping are foundational yet powerful tools in your DaVinci Resolve editing arsenal. By employing these methods, you can craft videos that not only capture but also hold your audience's attention through precise storytelling and focused imagery.
As you become more comfortable with these advanced cutting methods, you'll discover the vast creative possibilities they unlock.
Using DaVinci Resolve to cut a clip.
Tips and tricks for efficient video cutting
Boosting your video cutting efficiency in DaVinci Resolve is all about getting to know the keyboard shortcuts. These shortcuts are like secret codes that make your work faster, letting you do more in less time. For example, learning how to cut in DaVinci Resolve using just a simple key press can transform your editing workflow.
A bit of practice goes a long way. Start slow, get to know the shortcuts for how to cut a clip in DaVinci Resolve. Soon, you'll be able to cut and edit videos with ease.
With patience and practice, you'll find yourself avoiding those common pitfalls effortlessly.


Linking to Scene Cut Detection
The Scene Cut Detection tool in DaVinci Resolve is a game-changer. Especially when you need to split clips in DaVinci Resolve into short individual scenes. This feature uses advanced algorithms to analyze your footage and identify where cuts occur.
Here's how to cut clips in DaVinci Resolve using this video cut tool:
- Open DaVinci Resolve. Open a project where you want to use the Scene Cut Detection tool.
- Import your footage. Import the clip you want to analyze into your project's media pool.
- Access Scene Cut Detection. Navigate to the Media page. Locate the clip you intend to analyze, right-click on it, and select "Scene Cut Detection". This opens the Scene Cut Detection window, where DaVinci Resolve identifies and marks the transition points between scenes.
- Analyze your clip. Click the "Analyze" button. DaVinci Resolve will now scan through your clip, identifying potential cuts. This process may take some time, depending on the length and complexity of your footage.
- Review and adjust cuts. After the analysis is complete, you'll see a timeline with markers indicating where DaVinci Resolve has detected scene cuts. You can review these and make adjustments. You can adjust any missed or incorrectly marked cut by adding or removing markers.
- Add cuts to timeline. Once you're satisfied, click the "Add Cuts to Media Pool" button. DaVinci Resolve will split your clip into individual scenes based on the markers and add them to your media pool.
- Begin editing. Once you split the clips in DaVinci Resolve, you can start the creative process.
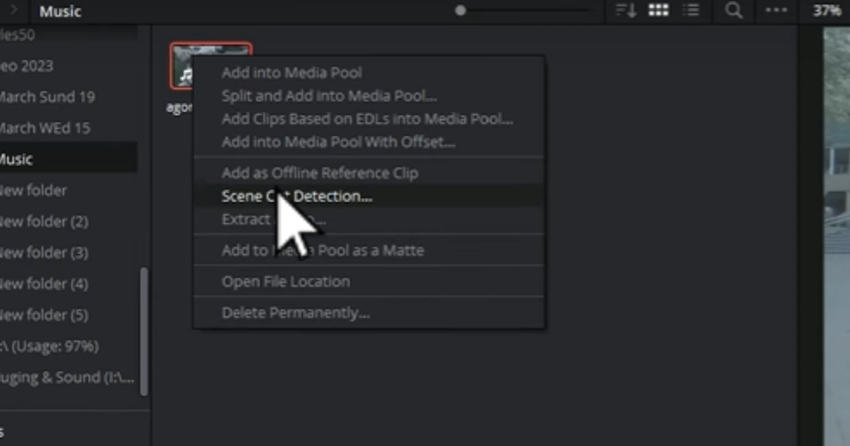
How to cut in DaVinci Resolve: Access the Scene Cut Detection menu.
Using the Scene Cut Detection tool can significantly speed up the initial phase of your editing workflow. It allows you to jump straight into the creative aspects of editing without spending hours manually splitting your clips.
Turning simple cuts into professional edits
You now have multiple ways to cut video in DaVinci Resolve. Here’s when each method shines:
- Shortcut cuts for speed
- Blade Mode for frame-level precision
- Trim Mode for cleaner timing
- Crop tools for improving composition
- Scene Detection for breaking down long footage automatically
The real skill isn’t using every tool at once. It’s knowing which one fits the moment. Some edits need speed. Others need precision. And sometimes automation saves you hours. Once you understand the differences between splitting, trimming, reframing, and automatically detecting scenes, your workflow becomes smoother and more intentional.
If you want your edits to stand out visually, pairing strong cutting techniques with high-quality creative assets makes a noticeable difference. Video templates, motion graphics, music, sound effects, and AI Tools that can elevate even a simple cut into something polished and professional.
Open your next project and try these techniques in action. The more you practice, the more natural and faster your editing decisions will become.


How to cut video in Davinci Resolve FAQs
|
What’s the difference between cutting, trimming, and splitting in DaVinci Resolve? |
|
Cutting is a general term for dividing footage. Splitting specifically separates a clip into two pieces at the playhead. Trimming adjusts the start or end of a clip without creating a new segment. Splitting creates structure; trimming refines timing. |
|
When should I cut vs. trim in DaVinci Resolve? |
|
Use cutting when you need to remove or rearrange sections of footage. Use trimming when your structure is already set, and you only need to fine-tune pacing. If you’re shaping the edit, cut. If you’re polishing it, trim. |
|
How do I know if a cut is in the right place? |
|
Play back the sequence and focus on rhythm and natural flow. A good cut feels invisible — the viewer should stay focused on the story, not the edit itself. If it feels abrupt or awkward, adjust the timing by a few frames. |
|
How do I cut multiple clips at once in DaVinci Resolve? |
|
You can select multiple clips and position the playhead where you want the cut, then use the split shortcut. DaVinci Resolve will divide all selected clips at the same point, which is useful for multi-layer edits. |
|
Why is my cut splitting the video but not the audio? |
|
This usually happens when Linked Selection is turned off. Enable the chain icon in the toolbar to make sure video and audio stay connected. Otherwise, DaVinci Resolve treats them as separate clips. |
|
Why does DaVinci Resolve leave a gap after I delete a clip? |
|
Deleting a clip removes it but does not automatically close the space. Use Ripple Delete to close the gap instantly and keep your timeline continuous. |
|
Can I undo a cut in DaVinci Resolve? |
|
Yes. Press Cmd/Ctrl + Z to undo your last action. You can step back multiple edits if needed. |
|
Can I cut a video in DaVinci Resolve free? |
|
Yes. The free version includes all essential cutting, trimming, and scene detection tools. For most creators, the free version is more than enough for professional-quality edits. |
 By
By


