

Course overview
So you want to be a video editor? Well, I'm a professional video editor, and together we're going to learn everything that you need to know to get started with editing videos.
If you're just starting out with video editing then you probably have an idea of the kind of videos that you want to create. The good news for you is that the fundamentals of video editing can be applied to any and all styles of video—any genre, any platform, and in any editing program.
"In a nutshell, it's about getting the creative ideas out of your brain and into a video editing program, and then out into the world for others to see. You do this through a combination of creativity and efficient workflows."
If you've already got some baseline editing skills, then stick around because there will be plenty in this course for you. If you're a complete beginner, well get that notepad out and start taking some notes!
Here's my very first tip:
Video editing tools
There's an old saying that a shoddy worker always blames their tools. Tools aren't important—what's important is knowing how, when, and why to use them.
The current tools of the video editing trade are software programs such as Adobe Premier Pro and DaVinci Resolve, sometimes known as NLE or non-linear editors. They offer what's known as non-destructive editing, which simply means that you can import your footage and then chop it up, splice it, shorten it, put effects on it, and all the while the original piece of footage remains intact.
For the purpose of this course, we're going to use DaVinci Resolve, but you can use whatever editing program you have access to, and all of the ideas I'm going to share with you will transfer across as they are program-agnostic. You could be working in Premere Pro, Final Cut Pro, or CapCut for that matter—the principles of video editing remain the same.
You'll be working on a real video-editing project, and you can download the project files here to follow along.
I'm not going to spend a whole lot of time explaining how to functionally use DaVinci Resolve or exactly what each button is or where it is. Instead, I'll focus on the creative process and the practical workflow of crafting and editing, and I'll explain what tasks need to be completed along the way.
If you do need a refresher or an introduction to DaVinci Resolve, check out my previous course:

The linear process of editing
Although we refer to it as non-linear editing, the process of editing is actually quite linear:
- Import
- Making selects
- Making a rough cut
- Doing a polish pass
- Exporting and delivering your video
As I said, these concepts will work in any editing program, so pick the one you feel most comfortable with.
Import
I've been editing for about 17 years now, much of that professionally, so I've had to learn these best practices as years have gone by, and I've had to unlearn the bad habits I picked up by teaching myself how to edit in the very early days.
One major bad habit that I've had to leave behind is unorganized hard drives and projects. If you're working with others, you just have to be organized—there's no two ways about it.
"Someone else should be able to open up your project within five minutes and understand exactly where everything is and be able to jump in and continue your work."
Even if you plan to work solo, you can still follow these importing and setup tips—it's a good starting place, and you want to start off nice and organized.
Setting up your project files
Let's look at how I organize my working drive. You can see that I have it laid out with this folder structure:

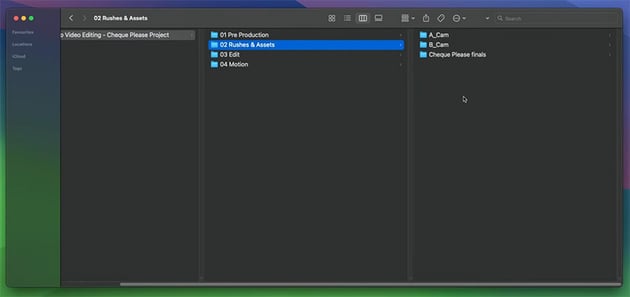

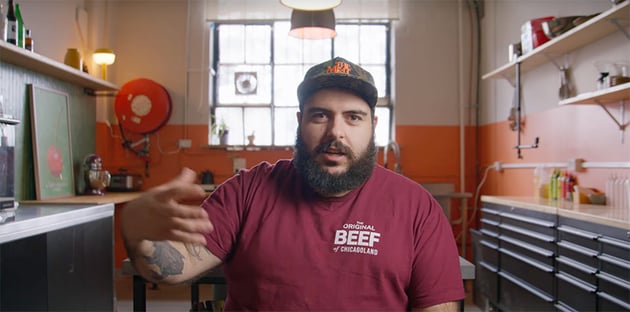
All we have in there right now is the rushes from our shoot, which in this case is a brief interview as well as some cooking videos that I shot for my friend's YouTube channel.
So here's the structure I recommend:
- Pre-production: everything you've been working on prior to the video shoot, e.g. scripts, visual references, color palettes.
- Rushes & assets: the video files from the shoot, plus any supplementary assets like music, sound effects, and graphics.
- Edit: the working files for the project and any backups or video exports from your editing program.
- Motion: similar to edit, but it's for motion graphics, e.g. working files and exports from After Effects.
- Proxies: not always needed, but we'll add it for this project because I want to expose you to that workflow—I'll explain it next.
What is a proxy workflow?
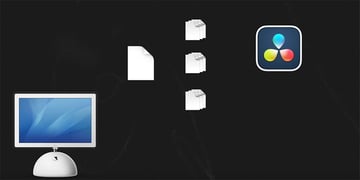
If you're unsure what proxies are, here's a quick explanation:
- You take a big chunky media file and make small, easy-to-manage copies of it.
- The editing program that you're using imports both versions.
- When you're working on the edit, it favors the small proxy files, making it easier to play back and work with.
- When you export, it automatically relinks the big, chunky file so that you're exporting the highest quality footage.


Setting up DaVinci Resolve
Now that we've got Resolve open, the next step is to go through and organize the Media Pool to reflect the file structure on your hard drive.

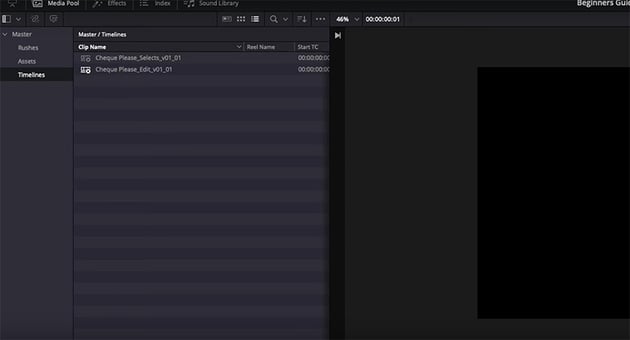
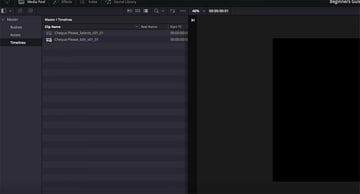
As you can see, I've got all my folders—my rushes, my assets, and my timelines—and I've created a select timeline and a V1 edit timeline.
DaVinci Resolve proxy settings
For this project, because the media I'm working with is so chunky, I'm going to go to my settings and make sure the proxy settings are to my taste. Here's what I've selected:


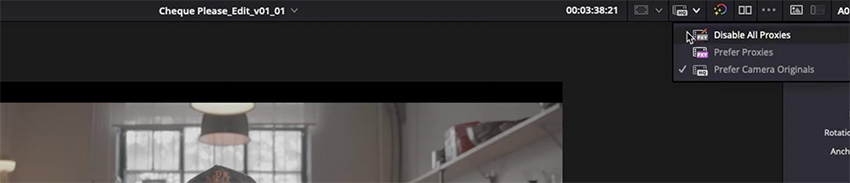
Then I'm going to go back to my Rushes folder, open it up, highlight all the shots, and then right-click and select Generate Proxy Media. That will create a full suite of proxies ready to go for your project. You can also toggle your proxy files on and off with this little button at the top.


Making selects
When you're making selects, my school of thought is to get it all on the page. I find it best not to mess with any of the tools designed to speed up your workflow.
I've provided a few working files so that you can follow along with the process and make your own selects. Download the files here:
The footage was shot with two cameras: an A camera and a B camera. Let's stack the A camera on top of the B camera in the timeline.


Generally, you'll have audio on both cameras, and you can just highlight the clips, right-click, and select Sync Files via Waveform. But I'm going to show you how to do it manually.
Manually syncing audio and video
To sync audio and video manually, it's best to have your subject make a sudden noise like clapping. Then you can just line up your playhead on the audio peak of the waveform, and drag the A camera footage along to match where the clap happens.


Pplay it through in a few different parts along the clip just to make sure that everything stays in sync, and then you can right-click > Link Clips. Now they move together in sync.
Now we can continue making selects.
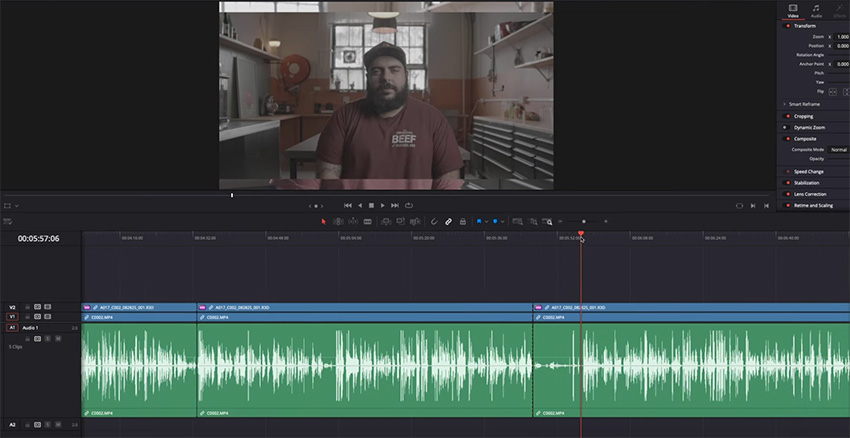
"A really good way to start making selects, especially with interview footage, is to get used to reading the waveform of the audio."
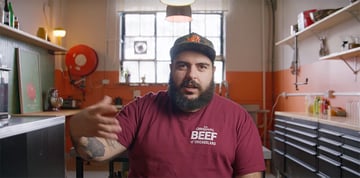
If you zoom out on the timeline, you can see that there are sections where it's very clear that Hayden is speaking just because of the peak in the audio, and there are sections where he's clearly not speaking. So because we're not going to use any of the interviewer's comments in this edit, you can pretty safely go ahead and remove all of those sections where Hayden isn't speaking.


Another pretty safe bet is that there's going to be a little "top and tail" that you won't need. By that I mean all of the stuff at the start where Hayden does the clap sync and asks if we're ready to go, and then all of the stuff at the end where he and I start to discuss the next part of the shoot. You can go ahead and just chop those out.
Now you have just the sections where Hayden is answering questions, and finally the creative part begins. You now get to go through and listen to all of these responses and start to pull sections out that you think are either:
- worth keeping
- maybe worth keeping
- definitely not worth keeping
So go ahead and make your cuts and see what you would want to keep from this chat with Hayden. Here's a one-line brief for creating this little narrative:
"Give context to Hayden's studio and inspire chefs and creatives to reach out and book the space."
The rough cut
Now that we've made our selects, it's time to migrate those over to the edit timeline. We can still keep the selects timeline as well, in case we want to go back and revisit the selects at a later date.
To move everything over, simply select all, copy the clips, and then go to the edit timeline and paste them in. Now we can go through and start to assemble our selects for the rough cut. You might also hear people refer to this cut as the assembly edit—they're the same thing.
To make a rough cut, start by playing the whole thing through. When you see something that you think will work well, just move those selects up a bit. Remember the brief as you're doing this, and select clips that will support the story you're aiming to tell.


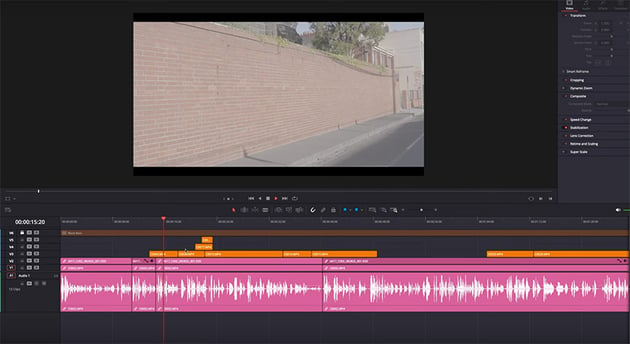
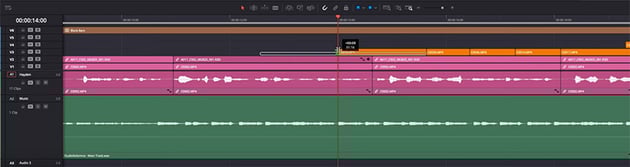
Then you can select all of the ones that you want to keep, right-click, and choose Clip Color. Change it to something very different, like pink, and drop the A cameras back down. Then move the unselected ones off to the side, and close all of the gaps in your selected clips.


Now we can play through the pink section, which is going to be in chronological order of how he said it. The next job is to shift everything around and create a new story based on our brief and based on what we've selected.
For example, there are some parts where Hayden is talking about himself, but the brief is to inspire chefs and creatives to reach out and book the space. So we can cut some of the parts that are more about himself and focus more on the parts that will inspire his target audience.
There are other parts where, as in any kind of on-camera interview, the subject is waffling and trying to find his thoughts. So we can cut some of those parts out and keep only the parts that are most useful.
So for now, don't worry about making it perfect—just focus on piecing the story together. It's fine to rearrange clips and play them out of order to tell a better story. For example, there's a clip in the middle where he talks about hoping that what will come out of this kitchen are some fun recipes and awesome stories, and that will work perfectly as a conclusion, so we'll move that to the end.
When you've finished, you can delete those clips we moved to the side earlier. We still have them in the selects timeline, so we can always go back to them if we need to. Here's how it should look at the end of the rough cut, with a single cohesive timeline.


Crafting a narrative from your selects
Now we need to go through and add some B-roll and choose our camera angles. But first, there's a little issue we need to sort out. Right now, the A camera is in a 2.35:1 aspect ratio, and the B camera is in a standard 16x9 frame.
For the sake of this project, let's do the 2.35:1 aspect ratio to give us that beautiful wide angle. So let's hide the top and bottom of our 16x9 frame. I'm going to show you the quick and dirty way to do this because it works in basically any editing program.
In Resolve, just go up to your Effects and choose Generators > Solid Color.


Then drop that on your timeline, and crop it so that it fits perfectly along the bottom.


Then just hold Option and drag it up to duplicate it, and position the other black bar at the top.
OK, now we're ready to move on to our B-roll. Let's go to our Media Pool and bring in some footage from the kitchen and from the Brunswick area of Melbourne where the studio is located. Chop off the audio because we're not going to be using that, and color-code the clips so that you can tell the location shots from the studio shots.
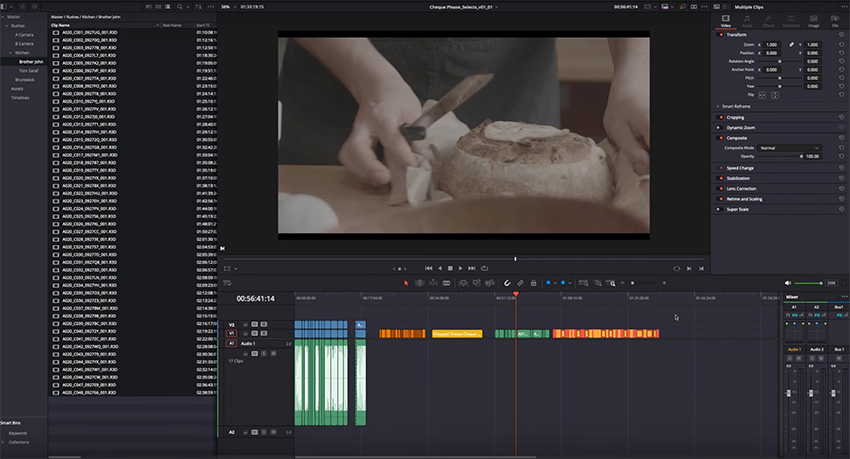


Now we're going to create some selects of all of our B-roll, and we can do that in the same way we did before, by moving up the ones we think will work.
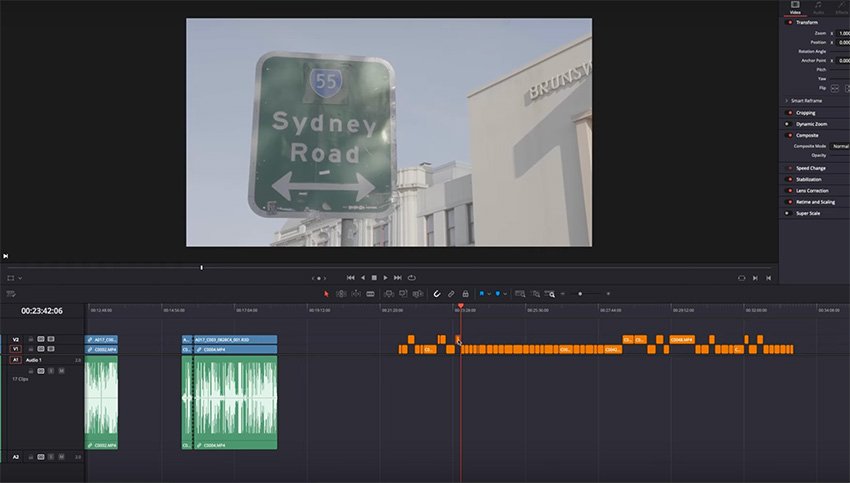


Now, it's time to start placing it on the timeline. Look for appropriate places to use B-roll footage to supplement the story. For example, early on he talks about the location and mentions Brunswick, so that's a perfect place to drop in some of our Brunswick footage.

Then, later on, he talks about the kitchen, so we can use our kitchen footage there. We can also use B-roll to cover hard cuts, so look for opportunities to do that. And in some cases, we can cover the cuts either by alternating between the A camera and B camera or by zooming in by 1.3 or 1.5 to create a closer crop.
Sometimes, the footage will dictate the content. For example, I'd included a section where Hayden talks about a chef called Frankie, but our footage shows different chefs. So to avoid confusion, it's best just to cut that section.
Finally, remember that you'll want to add graphics and text in places, e.g. for providing contact details at the end, so keep that in mind and choose B-roll footage that will allow enough space to put some graphics over the top.
Envato, the perfect creative companion
This is the perfect place in this course to talk about Envato and why an unlimited subscription to the platform is invaluable for editors like yourself.
Right now, we've got a rough cut for the video we're working on, but obviously it needs a bit more attention before we can be happy sending it out to other people to watch and give us feedback. It needs things like music, sound effects, and maybe a bit of extra stock footage here and there just to illustrate some points. We could even use some motion graphics too.
The beauty of an unlimited subscription is that you have access to literally millions of assets, and you can grab them in the highest possible quality, drop them into your edit, play around with them, and decide if they fit or if you want to try something different—all without having to worry about download quotas or running out of credit or anything like that. It's the perfect companion for the creative part of your editing workflow.
If you're interested to learn more or could see just how valuable a subscription would be to your workflow, then make sure to hit the link below and sign up to Envato today.
Finding music, sound effects, and graphics
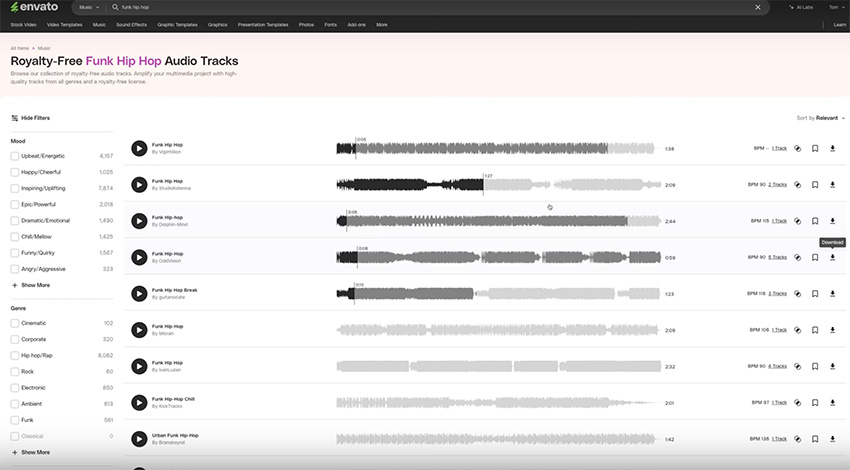
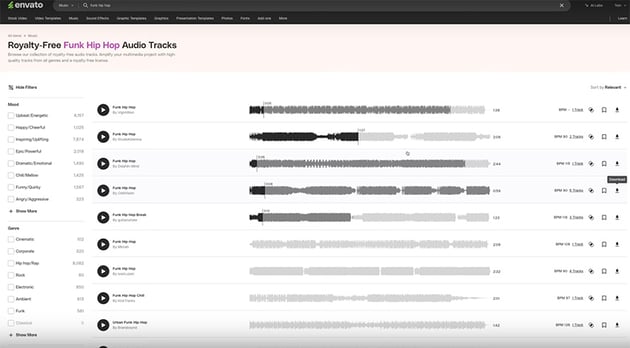
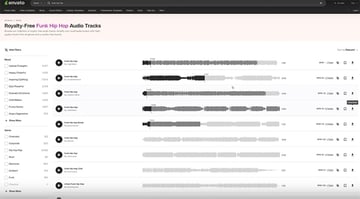
So let's grab some music tracks for our video. We'll just go to the Music section on Envato and search for "funk hip hop" (you can of course choose any kind of music you like). We can then play through the tracks, choose a couple that might work, and download them.
Now, let's head back over to DaVinci Resolve and bring those tracks in. You'll probably have to drop the volume—I generally like music to sit somewhere around -23 dB, depending on the track and what's happening with your dialogue. We'll also need to normalize our audio levels for the dialogue, so just highlight that track, right-click > Normalize Audio Levels, and we can target a -6 dB Peak.


This is by no means an in-depth tutorial on how to mix and master your audio for video—these are just some of the quick tools that you can use when creating videos like this. If you want more detail, check out this detailed five-hour course on audio editing:
One good way to make the music and dialogue work better together is to go to Hayden's track and change the Voice Isolation settings. I usually find that a level of 70% works well.
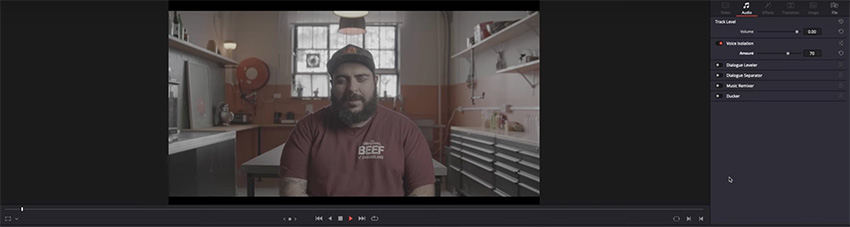
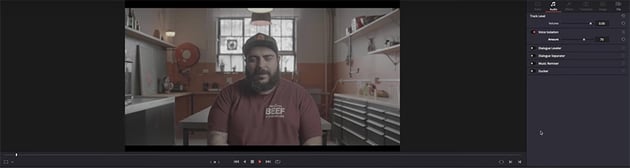
I also want the music to duck underneath our audio, so click on the music track and turn on Ducker. We can of course Target our source, which is "Hayden", and set the Duck level to 6.0. This brings the music level down when Hayden is speaking and increases it during the breaks.
Our first music track isn't long enough to cover the whole video, so we'll need to add a second one at the end. Use the same settings as for the first track, and then try to line up the beats of the two different tracks so that the transition feels seamless.


Now let's go through our B-roll footage and see how it lines up with the music, cutting on the beat where we can (i.e. switching scenes on the beat of the music.


"You don't always have to do it, but I find that cutting on the beat is a nice visual trick that often makes the edit look smoother."
The polish pass
Now that we've finished our rough cut and added audio, it's time to do the final polish pass. We'll start by heading back to Envato and looking for some title templates to work with. You can filter by the program you're working with—of course, I'm using DaVinci Resolve today, so here's what I get.
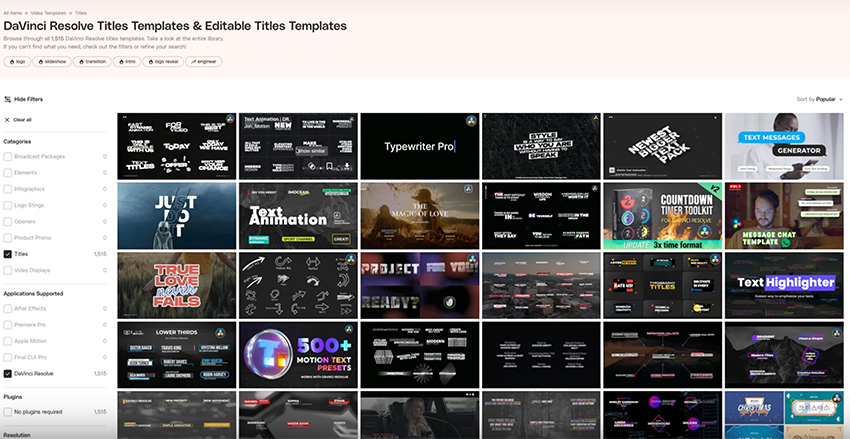

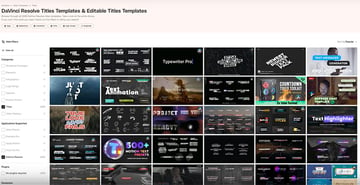
I'm going to use the Kinetic Typography and Minimal Lower Thirds templates, so I'll download those and load them up in DaVinci Resolve.
Creating motion titles in DaVinci Resolve
All of the assets that you get from Envato come with a lot of documentation on how to install them, so just follow the instructions to get them loaded up in DaVinci Resolve. Then you'll see them appear in your Effects panel.
Once you've done that, it's very easy to add motion titles to your video. Just pick the effect that you like, and drag it onto the timeline (I'm using Kinetic Title 3.0-09). It'll come in with some default text, in this case "Hello!"
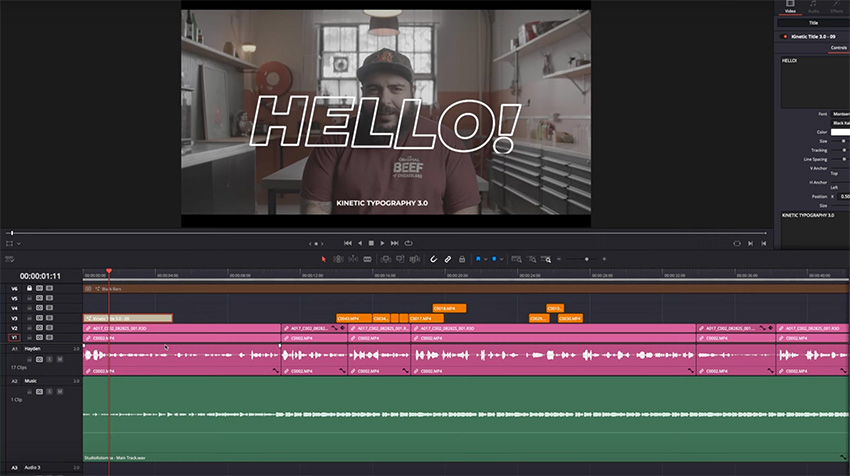

All you need to do is type in the text you want in the box on the right. You can also change the font and the text colour (in this case, I chose a handwritten font called Infamous, and I'll change the colour to match the yellow of the Cheque Please logo below).
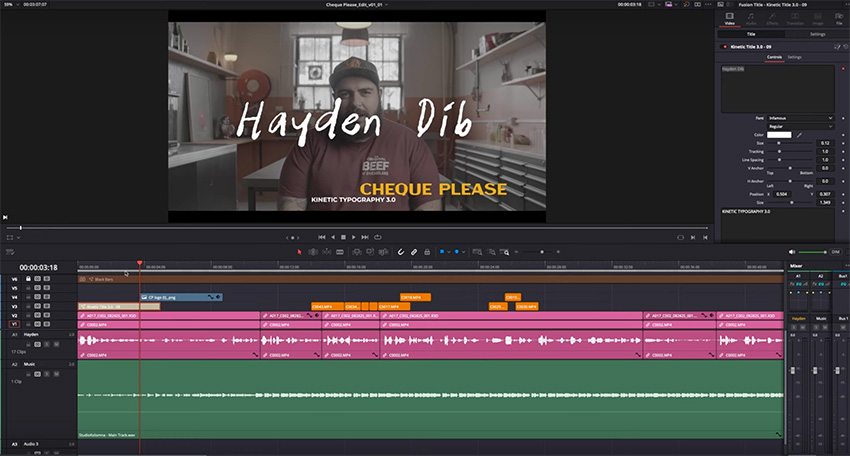
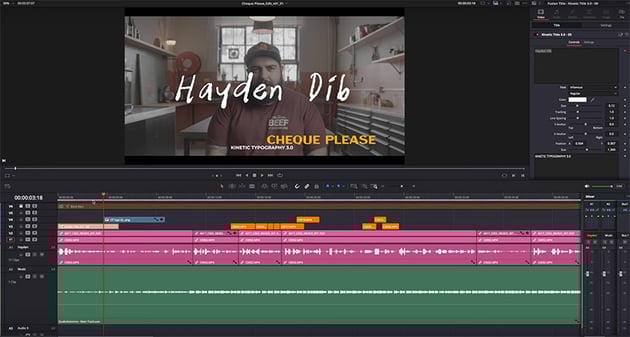

And of course you can move it around on the screen and make it smaller or larger. Then you get all the cool effects—like outline text, typewriter effects, and more—without needing to get into the details of text animation.
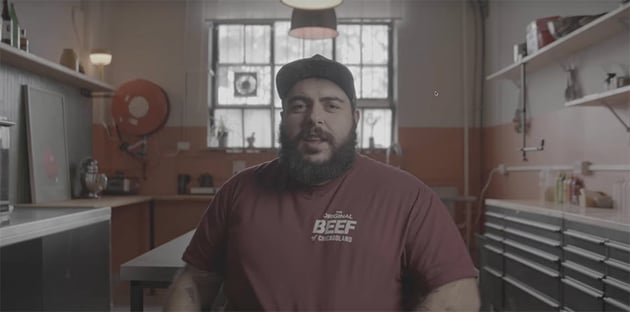
Doing a basic colour correction and grade
Colour grading is a huge topic, so I'm not going to get into the details of it here, but I will show you how to do a quick color space transform for each piece of footage that you have, and then we'll do a very simple primaries color grade. We'll look at three things:
- Luminance levels, i.e. lighting
- Color balance
- Contrast
Now let's open up the Color tab in DaVinci Resolve.
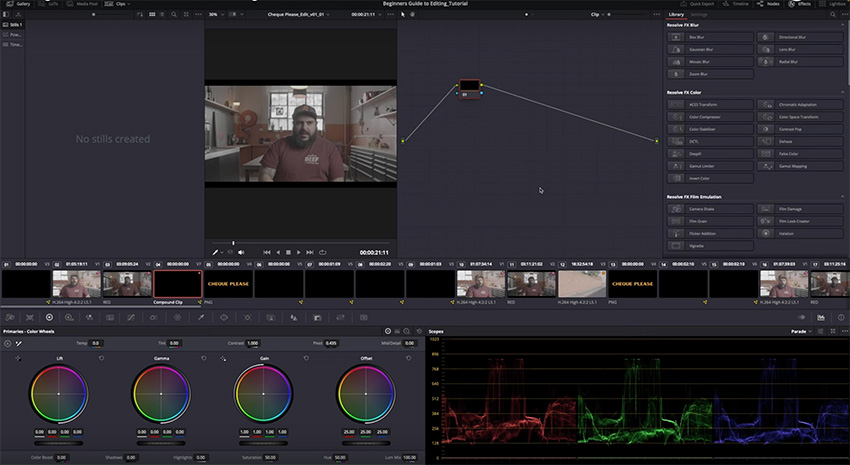
You've got a gallery section on the left which we'll use to create our look, and then you've got your effects over on the right, with a viewer in the middle and nodes next to it. The nodes allow you to add different steps in the color grading process, proceeding in order from the input on the left to the output on the right.
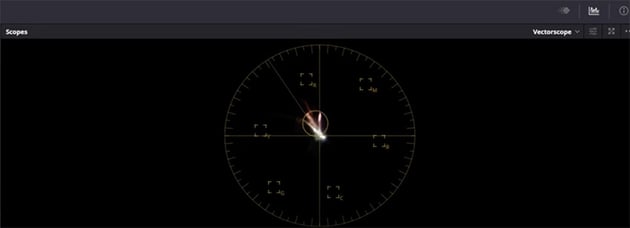
Underneath that, you'll see a thin strip containing all of your clips, and then at the bottom you have the primaries color wheels on the left and the scopes on the right. You can change both of those to show different tools, but these are the best ones to start with.
Let's start by hitting Option-S twice to make three nodes. Drag a Color Space Transform onto the third node.
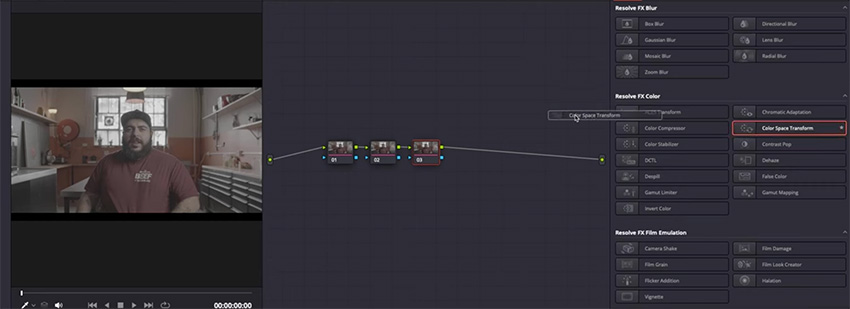
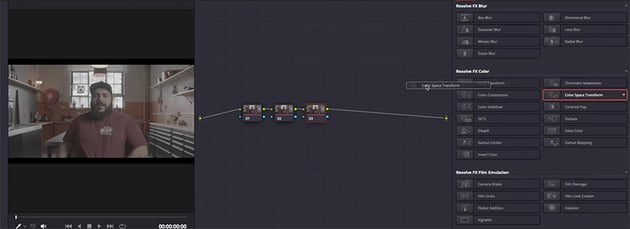
Then change the settings on the right based on the scene and on the camera settings that you were shooting with.
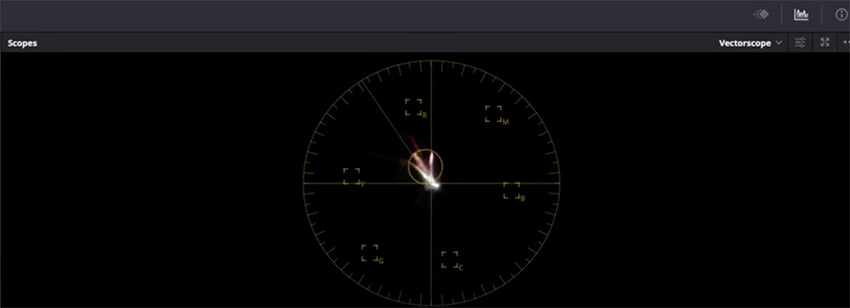
The second node is where I like to do my luminance and contrast corrections, so we'll go into the Scopes at the bottom and make changes to the RGB Parade. You can make changes just by dragging on the wheels and moving them left and right. You can see the effects instantly, so it's easy to experiment and try to get your footage to look vibrant and realistic, making sure you don't lose any details in the highlights and shadows.
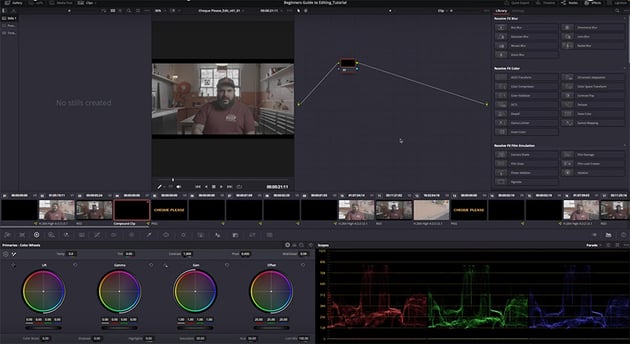
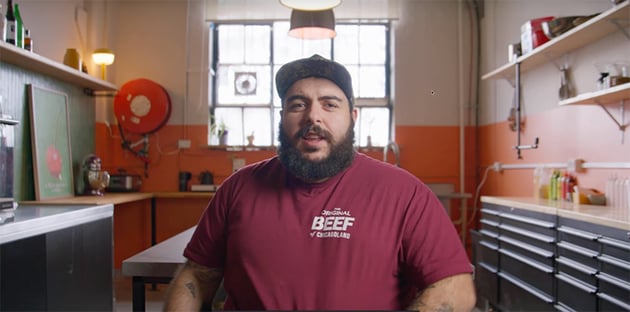
When you're happy with your footage, just go to the gallery, right-click on your footage, and Grab Still. Then you can go through and select all of the similar clips (in this case, all the footage of Hayden talking), and then right-click > Apply Grade. That will apply the same grade to all your footage. You can then go through and make more detailed adjustments where necessary, but it's a good starting point.
The B-roll footage from Brunswick, however, was shot outside in completely different conditions and with a different camera, so we'll need to go through the whole process again to colour grade that footage separately. But we can apply the same principle of grading one clip and then applying the same grade to all similar clips.
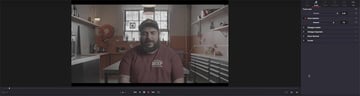
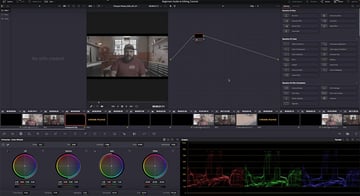
When we've finished, here's what we end up with:


As I mentioned, colour grading is a huge topic, and we've just gone through the basics here. If you want to learn more, watch the full course on DaVinci Resolve colour grading.
Our finished product!
Now that we've finished our polish pass, we're pretty much done. Before we move on to exporting, it's important to play through the whole video one last time and make sure everything looks right.

It's now a video we can share with the world, which is the very exciting part or the scary part—or both, let's be honest. But there's one last little step in that process that we need to understand, and although it's the last step, it's pretty much as important as any other step in this process. That step is getting your video out of your editor in the right format so that others can see it in the way that you want them to see it, and we'll cover that next.
Export & delivery
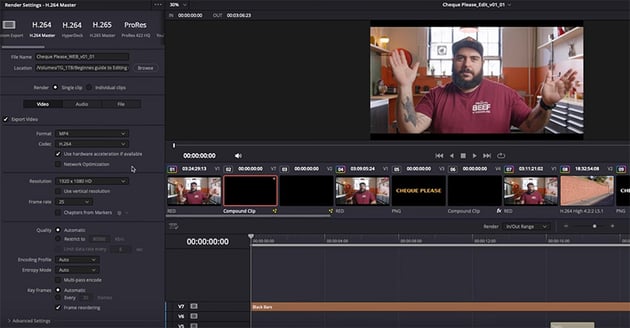
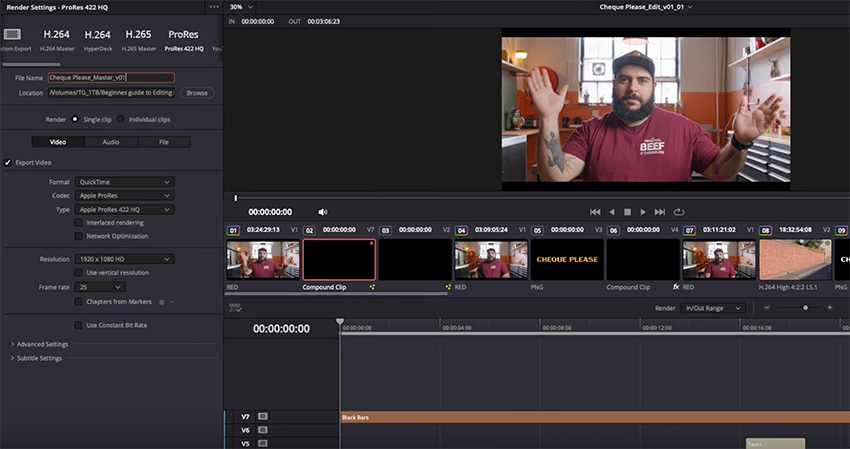
Exporting video correctly out of Resolve—and pretty much any other video-editing software—is really simple if you stick to the basics.
We're going to export two versions of our file:
- A master copy in ProRes
- A web-ready copy in H.264
First, let's give a quick runthrough of what these things are.
What is a codec?
A codec is a software process that's used to take a large file or series of files and compress it down into a single manageable file for delivery, and then on the other end it's used to allow the viewer to decode that file or series of files to be viewed.
The main codecs used for video files are H.264 and ProRes. When the compression process is complete, the file will then be contained in a wrapper so that it can be shared, and that wrapper will be the file extension.
- MP4 files use the H.264 codec.
- MOV files use the ProRes codec.


Lossy vs. lossless codecs
H.264 is a lossy codec, meaning that the file size is reduced but some data is lost during the compression process, while ProRes is a lossless codec, meaning larger file sizes and higher quality.
That's why we're going to export two versions: a smaller H.264 version for sharing online, and a high-quality ProRes version to keep as the master file or to share with clients who want a copy of the final files.


Congratulations, you’re now an editor
You are now a video editor! Well, if nothing else, you are well on your way to becoming one, and you should have all of the skills you need to get stuck into your first video edit without having too many process-stopping questions along the way.
Learning is a continuous journey—I've been at this well over 15 years, and I'm still learning something with every single piece of content that I make. I expect your journey will be similar, so keep at it!
Luckily for you, as a beginner right now, there's a treasure trove of information out there to help you. So make sure to check out these free video editing tutorials:

 DaVinci Resolve Beginner Tutorial | Free Video Editing


 10 Best Open Source Video Editing Software for 2025


 10 Free Premiere Pro Courses — Learn Video Editing & More (2025)


 How to Set Up Video Projects in DaVinci Resolve


 The Ultimate Guide to Color Grading in Premiere Pro

 10 Colourful Preset Packs to Add Picture Styles to Video Using Premiere Pro (LUTs)
Also subscribe to the Envato Video YouTube channel for regular videos like this, and watch these courses on video editing:


