

Introduction
Kinetic typography is text with an attitude—it moves, bounces, warps, and smashes onto the screen like it owns the place. It’s not just words; it’s motion design that hits hard, amps up emotion, and keeps eyeballs locked in.
Moving text is everywhere—movies, ads, music videos, you name it. If you want to stand out, learning kinetic typography is a game-changer.
This lesson dives into seven key techniques for After Effects text animation. We’re aiming for a Pixar-style playful opening with jazzy vibes and smooth animations. This After Effects kinetic text tutorial is all about kinetic typography, so let's get moving right about now!
CC Spotlight
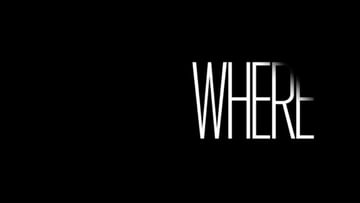
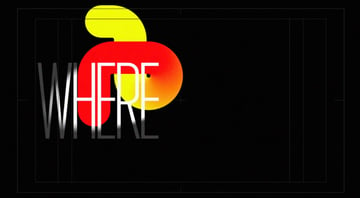
Breaking down the first scene: "Where"
The first motion typography in After Effects is a simple back-and-forth text movement with a spotlight effect. Instead of a basic ease-in-ease-out motion, we amp it up with a fast-in, fast-out bounce, making the word look like it’s dodging the spotlight.
-
Graph editor magic: Instead of default smooth easing, we use a more dynamic motion curve, creating a natural flow.
-
Spotlight effect: Using the CC Spotlight tool, we create a realistic light-and-shadow effect that adds depth.
-
Layering for depth: By duplicating and masking elements, we make the text weave in and out of foreground shapes for a 3D illusion.


Why this kinetic typography in After Effects works
This combo of motion, lighting, and depth makes the text animation feel more polished and engaging. And the best part? It’s all done with simple techniques in After Effects.
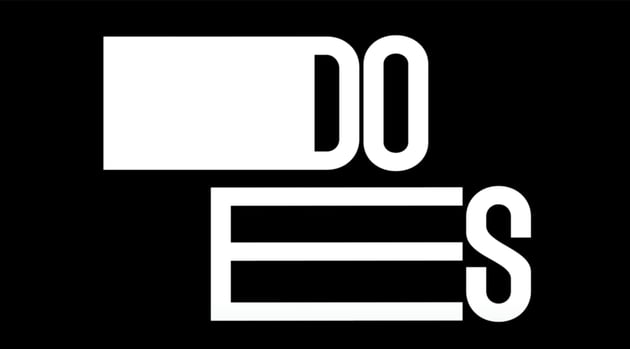
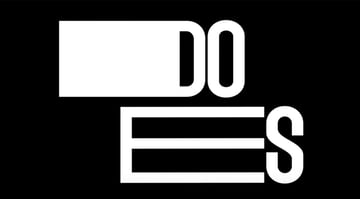
Stretchy text shapes
Adding some big, bold, stretchy text animations to your videos is no sweat when you know how to do it. Learn some tips for kinetic text in After Effects.
Step 1: convert text to shapes
First, you need to turn your text into editable shapes:
-
Right-click your text layer → Select Create Shapes from Text
-
This will create a new shape layer while hiding the original text.
-
Open the shape’s Contents → Drill down into each letter to find its Path.
Step 2: stretch & animate
-
Select the anchor points on a letter and drag them outward to stretch the text.
-
Set keyframes at different points in time to create movement.
-
If a letter has an inside path (like "O" or "A"), adjust both paths together.
-
Use the Graph Editor to tweak motion speed for a smoother, snappier effect.

Why this kinetic text in After Effects works
By manipulating text paths, you get fluid, custom text animations that go beyond basic scale transformations. Experiment with different fonts and motions to create your own bold, eye-catching effects.
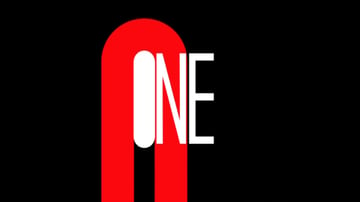
Shapes and track mattes
Pull off a slick, seamless transition where a ball transforms into part of your text. Here’s how this After Effects text animation is done.
Step 1: animate the inner path of a letter
-
Convert text to shapes (
Right-click→ Create Shapes from Text). -
Focus on a letter with an inner path (like "O").
-
Animate that inner path, growing it from a small dot to its full shape.
Step 2: match the ball to the text
-
Have a ball animation that lands exactly where the inner part of the "O" starts.
-
As the ball disappears, the "O" expands open, making it feel like one continuous motion.
Step 3: track matte & masking magic
-
Use track mattes to reveal letters as the animation plays out.
-
If a letter needs to "appear" behind something (like a moving snake shape), a track matte makes it look like it’s being drawn in.
-
Masking trick: To move text while keeping a mask static, use Range Selector → Position instead of normal position keyframes.


Why this After Effects text animation works
This technique creates a fluid, natural transition between elements, keeping the animation engaging. Plan ahead—certain letters and movements work better than others!
Animate on paths
Sick of having text that just types out? Make the text flow along a path instead! Follow these steps to do this kinetic typography in After Effects and make it move with style.
Step 1: set up your text path
-
Create separate text layers for each letter if you want independent movement.
-
Draw a mask path on a null object with the Pen Tool.
-
Copy that mask path to each text layer.
Step 2: attach text to the path
-
Select the text layer, go to Path Options, and choose your mask path.
-
Now your text will follow that path—you can animate it with First Margin and Last Margin settings.
Step 3: customize movement
-
Perpendicular To Path: Keeps letters upright as they follow curves.
-
Reverse Path: Flips the direction of movement.
-
Tracking Adjustments: Space out letters dynamically.
Step 4: time it right
If all letters move at the same speed, they’ll clump together. Instead:
-
Stagger start times for a natural effect.
-
Adjust keyframes individually for better flow.


Example: Changing a square dot on a question mark into a circle for design consistency.
Why this kinetic typography in After Effects works
Text-on-path animation gives you way more control than basic effects. Experiment with timing, spacing, and movement to create something unique!
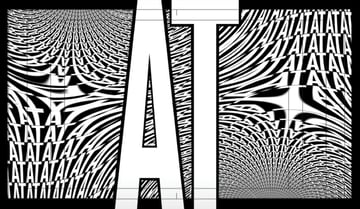
CC RepeTile & flo motion
Trippy, warping text effect can make your projects that much cooler. Here’s how to do this After Effects text animation using CC Repetile and CC Flow Motion.
Step 1: expand your text with CC Repetile
-
Start with a single word (e.g., "AT") in the top left.
-
Apply CC Repetile to expand it horizontally and vertically to fill the space.
-
Adjust the Expand Left, Right, Up, Down settings to stay within your margins.
Step 2: add warping with CC Flow Motion
-
Apply CC Flow Motion to the text layer.
-
This gives you two knots that act as distortion points.
-
Move these knots around to warp different areas of your text.
-
Adjust the amount to control how extreme the effect is.
-
Go negative or positive for wild results.
Step 3: create a bold border effect
-
Convert the text into shapes (
Create Shapes from Text). -
Make a larger version of the text for an outline.
-
Use a track matte to cut the outline from the warping layer.
-
Now, your warped text appears inside a bold text-shaped cutout.


Experiment like a mad scientist
Effects like CC Flow Motion can turn boring text into something dynamic. But it won’t look perfect instantly—you have to play around.
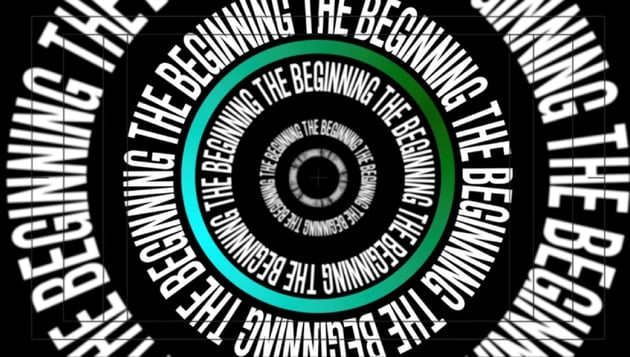
Faking depth of field
Want to make text look like it’s floating in 3D space—without actually using 3D layers? Do this After Effects text animation using text on a path, scaling, and blur.
Step 1: create the circular text path
-
Type out a phrase and repeat it a few times to make a seamless loop.
-
Use the Ellipse Tool to create a circular mask on a null object.
-
Copy that mask and paste it onto the text layer.
-
Set the text layer’s Path Options > Mask 1 to make it follow the circle.
-
Reverse the path if needed so the text sits on the outside of the circle.
Step 2: add the rotation effect
-
Scale the text layers differently to fake depth (e.g., closest = big, farthest = small).
-
Apply opposite rotations to some layers for a counter-rotating effect.
-
Keep it linear (no easing) for that smooth, constant movement—think 2001: A Space Odyssey vibes.
Step 3: parent everything for easy scaling
-
Parent all text layers to a global adjustment layer.
-
Now, adjusting one scale property will affect all the layers at once.
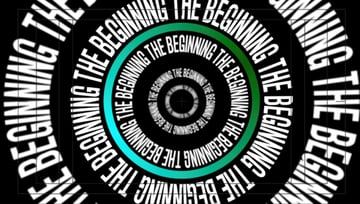
Step 4: fake 3D depth with gaussian blur
-
Closest text = heavily blurred (~20% blur).
-
Middle text = sharp (0% blur).
-
Farthest text = mild blur (~10%).
-
This mimics camera depth of field, making it feel like true 3D.

Sync to music & timing
-
Instead of everything appearing at once, stagger the timing to match the beat.
-
This keeps the animation dynamic and visually engaging.
Slider control & expressions


Bringing it all together
We're almost done learning about After Effects kinetic text! Are you excited? It's time to bring it all together.
So, by now, you’ve got your text bouncing, sliding, and morphing—now how do you connect those scenes seamlessly? The trick isn’t always fancy transitions; it’s smart timing and flow.


Keep it kinetic!
That’s it!
With kinetic typography in After Effects, you're one step closer to putting together the most creative and exciting audiovisual projects. All you have to do now is keep it smooth, keep it synced, and most importantly—keep it kinetic.
And, if you need assistance as you're working with kinetic text in After Effects (or with anything else regarding your creative projects), turn to Envato. For a low monthly subscription, you get everything you could ever need - from video templates, sound effects, stock video, and more. Sign up to get unlimited downloads of premium digital assets!


