Course intro and overview
Premiere Pro is one of the industry-standard video-editing apps right now, but the learning curve for a beginner can feel very steep. In this beginner's quick start guide for Premiere Pro, I'm going to take you from a completely blank slate to being able to confidently navigate the program and create professional edits that feel modern and fresh.
It's going to be a rapid-fire overview to get you up to speed with the program, and then we'll ease into some of the more creative and technical aspects that go into crafting an edit. Let's make you a video editor!
"Video editing is an inspiring and rewarding creative pursuit, but it can be utterly frustrating when you're starting out. But don't worry—if you're feeling lost, I've got you covered."
Premiere Pro quick start guide
In this section, we'll go through a rapid-fire overview of Premiere Pro to show you the layout, the various different sections, and everything you need to know just to navigate the program.
Premiere Pro layout overview
Workspaces are an important feature of Premiere Pro. To access your list of prebuilt workspaces, you can click the button shown at the top of the menu in the image below.
If you want them all listed in the Workspaces toolbar, you can select Show Workspace Tabs, or if you want to show just the one you're working on, click Show Workspaces Label. Or you can click Show Workspaces Label a second time, and they'll all disappear and all you'll see is the button.

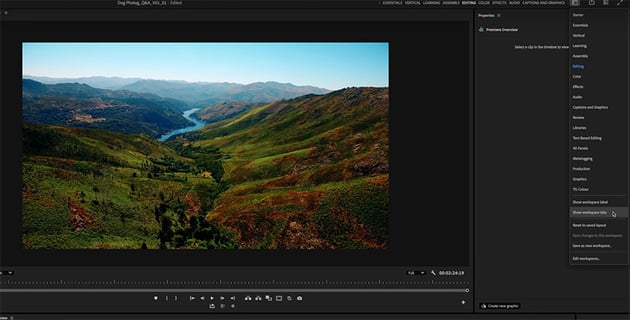

You can also edit which workspaces you see in those tabs by clicking the Edit Workspaces button. Just drag and drop to reorder to your heart's content. If you ever want to reset them to their default, you can do so by going to Window > Workspace > Reset to Saved Layout.
The main workspaces we'll be looking at in the larger course are Assembly, Editing, Captions, Graphics, and Color. Let's go into Editing mode right now and look at some of the video tools available to you.
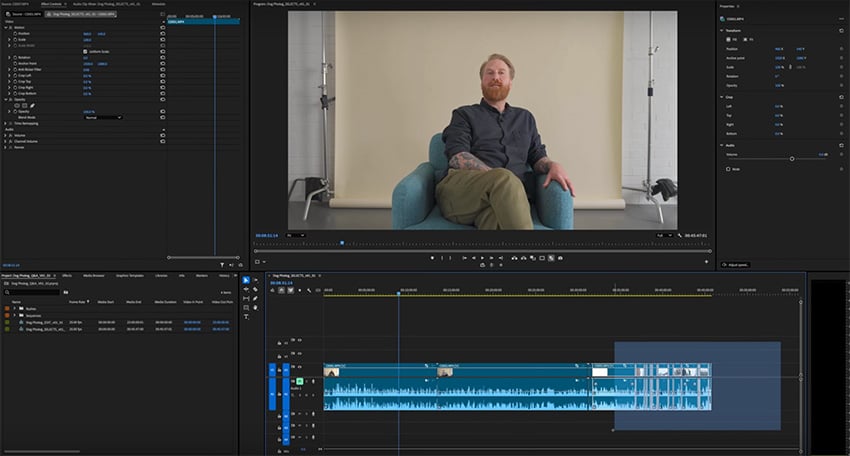
In Editing mode, you'll see your Program Monitor in the middle. This is showing you the footage you're editing. On the left, we have a few panels, the important ones being the Source Monitor and the Effects Controls panel. The Source Monitor is a view of the media selected in your Project panel and not something that you've actually committed to your edit. It's more of a staging area. In this example, it's showing the sunset footage.


In the bottom left is your Project panel, which is where all of your files live. In this section, you also have a few other tabs, and the most important of those, in my opinion, is Effects, which you'll use often. You can drag it over to the left to make it more accessible.
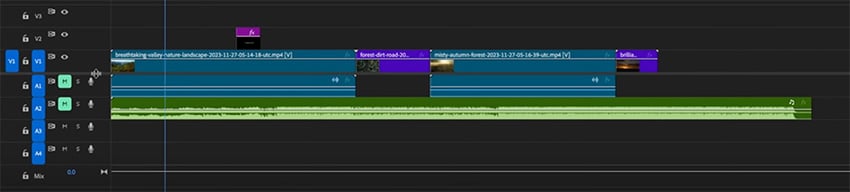
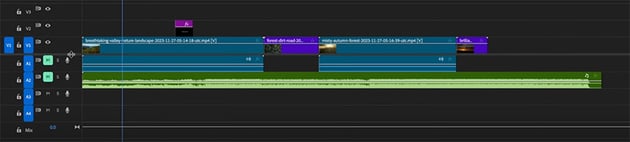
Next to that, we have our Tools panel (the vertical list of icons). Then next to that, we have our sequence window. You'll see we have a few clips in there already, both audio and video, and that's what our Program Monitor above is displaying.
We then have the Properties panel in the top right. Below the Program Monitor, we also have some quick buttons for doing various bits and pieces, and we'll get into those in more detail later in the course.
Another button I want to show you is the magnet icon, which is our snapping tool—the keyboard shortcut for this is S. This makes things snap to each other when we're moving them around our sequence.
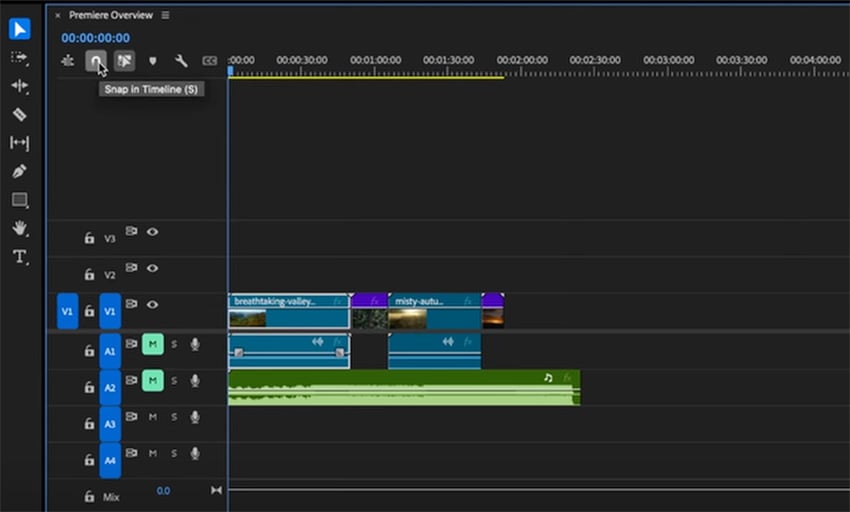


Next to that, we have the link selection button. With that one on, it means that clips that have linked audio and video or other clips that you've linked together will move with each other, even if you just click one of them. For instance, if you click and drag the video, the audio that is linked will move with it. With it unchecked, you can move those linked clips individually.
This course is brought to you by Envato, the unlimited creative subscription. The broadest range of categories, everything that you need to make great videos. Click the link below and start creating now.
Editing basics in Premiere Pro
Now, let's start to move some things around our sequence. In the image below, you'll see I've chosen the Selection Tool (V) and I'm using it to move the playhead to show different parts of the clip in the Program Monitor. You can also use it to select clips on your timeline, as well as to interact with most of the functionality of the app. It's essentially your mouse or cursor.


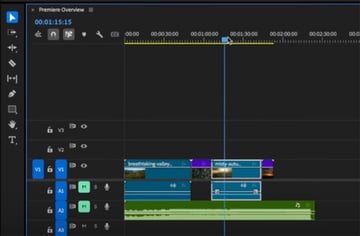
Select individual clips with a click, select multiple clips with a click and drag to cover the ones you want to select, and then move them with a click and drag along the sequence.
On the playhead, a single click will put your playhead in that place and show the relevant clip in the program monitor. A click and drag will let you scrub along your timeline. For finer control, you can zoom in on your sequence with the plus and minus keys on your keyboard, or hold Option and scroll in and out on your mouse's scroll wheel. For even finer adjustments, use these keyboard shortcuts:
- Left and right arrow keys: move a frame in either direction.
- Hold Shift and hit those keys: a five-frame jump.
- Spacebar: play and pause your footage.
- L: speed up your playback in the forward direction
- J: play back in reverse. If you press J or L multiple times, it will increase the speed in either direction.
Another important tool is the Razor Tool (C). Click on a clip with the tool selected, and it makes a cut, splitting the clip in two. You can then delete the part of the clip that you don't want or move it elsewhere on your timeline.
If you cut the clip and then delete it, but don't move the other clips, it will create a gap called a ripple. To delete this ripple, select it by clicking the blank space in between two clips and right-click > Ripple Delete, or simply hit the Backspace key. Alternatively, if you want to delete a clip and close the gap in one go, just press Option-Backspace.
The Text Tool is also a handy one in this section. Selecting the tool and clicking in the Program Monitor will create a text box that you can input your text in. You'll see it also creates a text layer on our sequence, and you can change your text options in either the Effects Controls panel or the Properties panel.
Premiere Pro is layer-based, so anything that appears on top in the video layers will take priority to that below. Also, note that video and audio sections are split on the sequence. Anything above the middle line is video, and anything below the line is audio.
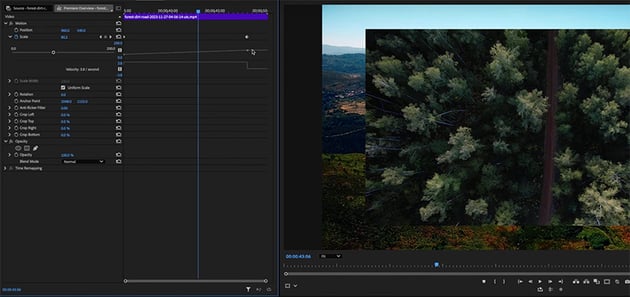
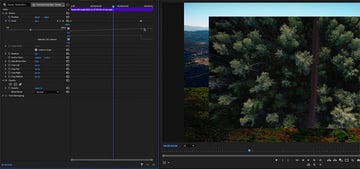
With a clip selected, you can access a range of handy tools in the Effects Controls panel. You'll probably use position, scale, opacity, and crop tools the most. For instance, to make a clip smaller, just change the Scale value in this panel, and you'll see the change taking effect in real time in the Program Monitor.
All of these tools have a little stopwatch icon next to them. These enable keyframes, which we use to create basic animations. Anything with this icon next to it can be keyframed. For example, we can click on the stopwatch next to Scale to create a simple scaling animation. Make the Scale parameter 50 at the start, and then add another keyframe and make the Scale 100. The clip will gradually get bigger.

By default, we create linear keyframes, which means that the move happens at a set speed and velocity over time. However, if we want our animation to be a little more dynamic, we can create eased keyframes. A quick and easy way to do this is to select these keyframes and right-click > Ease In. Now you can see we have a curve.
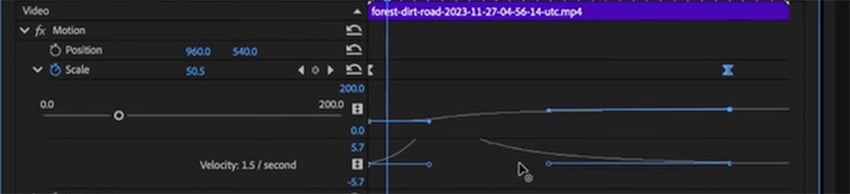
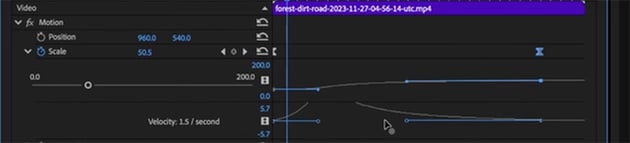

Playing that back, we can see the animation is a little more dynamic.
By the way, if you're wondering where I got this footage, head to Envato. You'll find millions of assets across a broad range of categories, perfect for video creators. You can download all the assets I'm using in this course right here:
Now, let's move on to the audio tools. We'll stay in the Editing workspace, but to really get down to the nitty-gritty, you can always switch over to the Audio workspace.
The most important audio tool available in the Editing section is the Audio Gain or the loudness of the clip, and you can change this easily in a couple of ways. The first way is to click and drag the little white line in the audio. You can also right-click and select Audio Gain for more detailed controls.


Another task that you might want to complete on a day-to-day basis when editing is increasing or decreasing the speed of your clip. If you select the video clip you want to change, you can right-click and go to Speed/Duration to make changes to either the specific duration or the speed.
Adding effects and transitions to your clips is really simple as well. Just go to the Effects panel, find an effect you want, and drag it onto your clip.
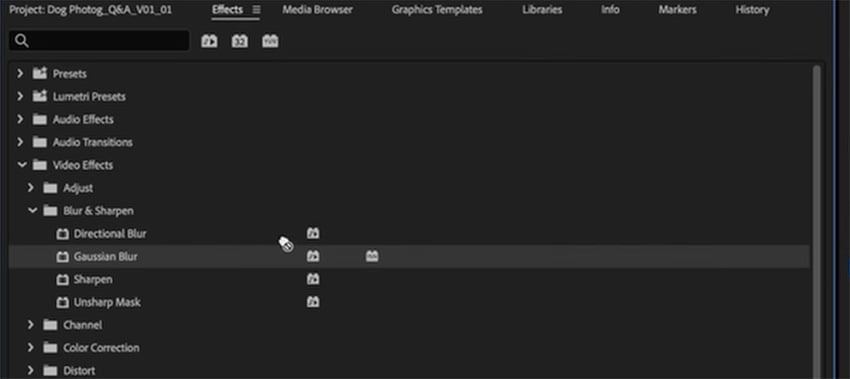
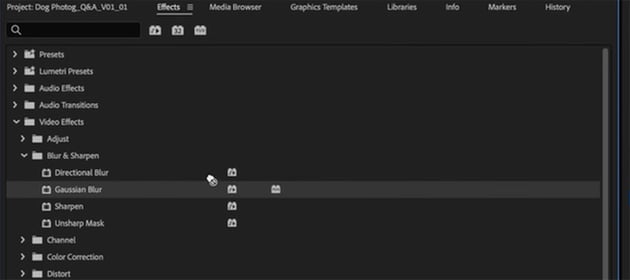

The controls for that effect will appear in the Effects Controls panel, so you can fine-tune it as much as you like.
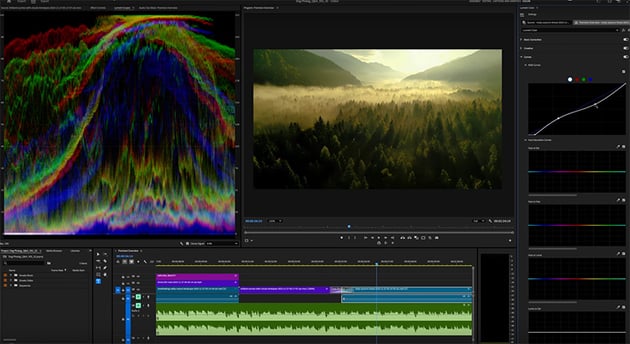
Stepping out of our Editing workspace and into the Color panel, we can now do some basic color grading. We'll take a much, much deeper look at this in the main part of the tutorial, but here is where you can make corrections to your footage and produce creative grades using the Lumetri color panel.


Exporting from Premiere Pro
Finally, once you're happy with your masterpiece, just head back to the Editing page to export it. Bring your playhead to the beginning of your sequence and hit I on your keyboard to set an in point. Then go to the end of your sequence and hit O on your keyboard to set an out point. You'll see that this section is then highlighted.
Now, click on the Export tab. It's easiest just to use presets:
- If you're going to upload to the web, select a high-quality H.264 preset that matches your sequence settings.
- If you want to export a master copy for safekeeping, select a Prores preset.
Set your file name, select your destination, and hit Export. No need at this point to send it to Media Encoder.
That's it for our flying overview of all of the crucial tools and workspaces that you need to know for day-to-day editing tasks in Premiere Pro. Next up, we'll dive deeper and look at all of those tools in action as we create a real edit.
Setting up a project
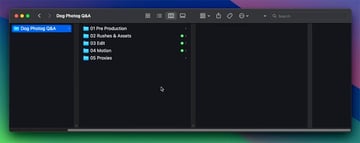
Before we start our project, I want to show you how I set up my hard drive for a project. You can use any folder structure you want, but I find this setup works well.
The key elements are:
- Pre-Production: anything that I've been working on prior to the video shoot, e.g. scripts, visual references, color palettes, etc.
- Rushes & Assets: video files from the shoot, plus any other source assets I'll need for the edit.
- Edit: the Premiere Pro working files.
- Motion: motion graphics files.
- Proxies: proxy media (used for smoother playback of large files during editing)


What are proxies?
Proxies are smaller, more manageable copies of our working files. In this case, we'll transcode them into an editing format or an editing codec like Prores, so that we have a nice smooth playback for our entire edit. And then once you export at the end, everything relinks.
"If you have problems working with footage in Premiere Pro, if you're getting stuttery playback and it's just doing your head in, a proxy workflow is for you. "
Setting up a new project in Premiere Pro
Now, let's open up Premiere Pro. When you launch the program, you'll be greeted with a page that will show some recent projects you've been working on. Click New Project up in the top right.
New in the 2025 version of the app, you now get a dialog box that asks you to set up your project name, location, and template. So pop in your name and destination. Mine will be dogfotog_qa_v01, and my location will be the Edit folder on my hard drive. Leave the template option blank, and hit Create.
Importing media
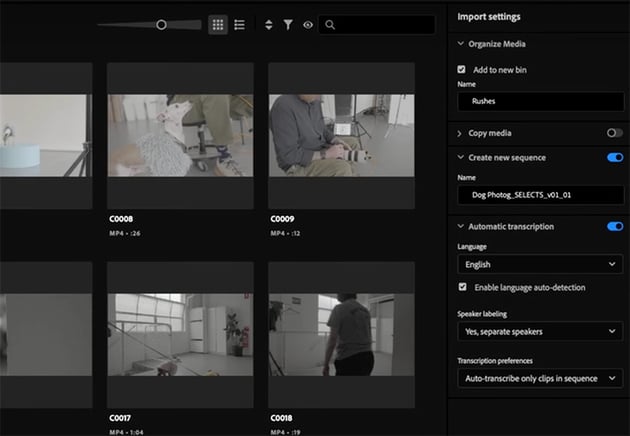
When your new project opens up, you'll find yourself in the Import workspace, and you'll see a bunch of sample media from Adobe that you can play with. On the left, you can select your hard drive and navigate to the Rushes folder we saw earlier in my Finder. Just select a couple of clips to import.

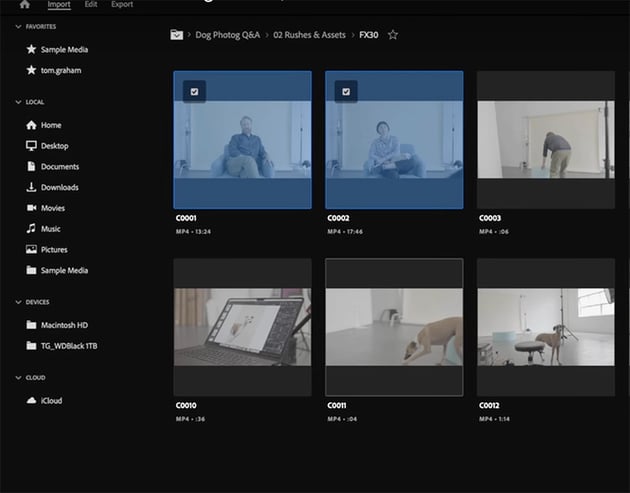

Over on the right, you'll see some options to help kick your project off in a nice, tidy way right from the start. You can add the media that you're importing to a new bin, which is what Premiere Pro calls a folder. So let's do that, and we'll call it Rushes.
The next option is to copy media. This is only relevant, though, if you're importing files directly from the camera's recording media.
The next setting down is to create a new sequence, and we'll go ahead and do that here. A sequence is essentially your edit over time. As you start to work on projects of more scope, you could have multiple sequences making up an edit. Then finally, you have automatic transcription. Let's turn this on, and select the options shown below.

Now let's move over to the top-level editing section, and in the top toolbar, make sure you're in Assembly.
Over on the left, you have the Project panel, which is effectively your file browser, and it will start to reflect the hard drive that you're working on if you're keeping things nice and tidy, which I know you will be. You can see the bin that we created with our rushes in it, and you can see the sequence we created in this panel has also opened up in the Timeline panel.
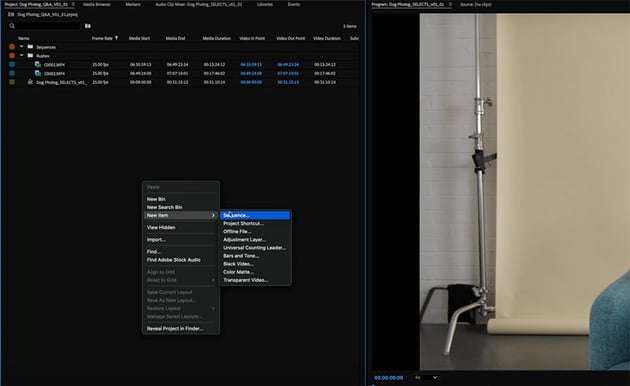
Let's also create a master sequence where we can build our edit. Right-click and select New Item > Sequence, and pick a preset that works for you. I suggest one of the HD 1080p or 4K presets. Name your sequence and hit OK.


Setting up proxies in Premiere Pro
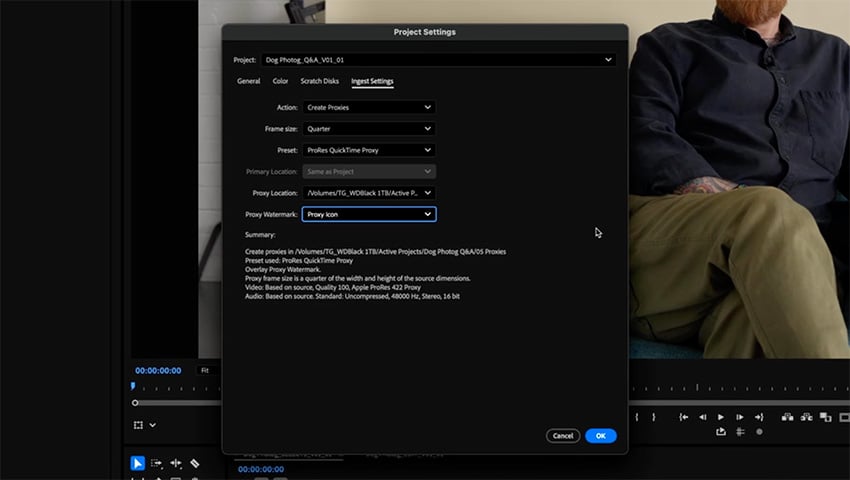
Now, earlier I talked about proxy workflows, so let me run through how to set that up briefly. You go to File > Project Settings > Ingest settings and set the Action to Create Proxies. Here are the settings I recommend. I like to keep the proxy watermark on to make sure that I know that I'm looking at the proxy versus the original while I'm working.


Now, when you import your footage, the media encoder will open up in the background and import both the proxy and original files into your project.
Once you've set up your proxies, you'll see the proxy icon show up in the bottom-left corner of your footage as it plays back, and your playback should be nice and smooth.
Making selects
The next step is to select the footage we want to use in our project. The way I generally like to go about this is to throw most if not all of my rushes onto the timeline and then start sifting through it from there.


The more traditional way to do this—and the way that Premiere lays it out for you—is to audition your clips in the Source Monitor, set your in and out points for the parts of the video that you want to include, and then bring it down into your sequence and build your selects out from there. That is a good approach—I just prefer to see everything in one place. There's no right or wrong way to go about it, so do what works for you.
My way has the benefit of being able to get a really good top-level view of the project and everything that you're working with. So the way I'd approach this edit, something with a piece of camera, a bit of dialog, and then some B roll, is to focus on cutting our story together first.
So I'll delete the B roll for now and focus just on the audio pieces, so that we can craft our story. Then we'll bring our B-roll back in later. We also have two people speaking, so I'll change the color of the clips so I can easily see who's speaking. You can do that by selecting a clip that you want to change (you can select multiple if you want), and then simply right-click > Label, and choose the color you want.
"Make sure that you sit down and play through everything before you start making selects. You need to know the content in full before you can craft a story."
If you're the one who's directed and shot this footage, you've probably got a pretty good handle on it, but it still does pay to watch it all through before you start cutting it up. If you're simply the editor and didn't work on the production, then definitely sit there and watch all of your rushes before you start making selects.
Text-based editing
Now, with an audio-based edit like this, you can go two ways. You can go old school or new school, and I'll show you both.
Option 1: Text-based editing
Let's start with new school. I mentioned earlier that text-based editing exists now, and because we clicked those buttons when we imported the footage, our audio clips have automatically been transcribed and are waiting for us over in the text-based editing workspace.
So on the left, you can see the text transcript. You can click anywhere in the transcript, and your playhead will jump to that point in the sequence. Not only can you jump around visually, but you can also highlight sections of the text, delete them from the transcript, and they're automatically deleted from your sequence.


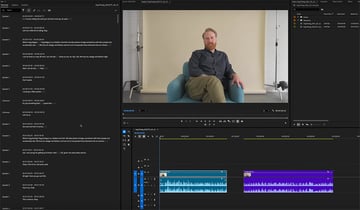
So you can see how easy it is to go through and quickly make your selects based on the text. If you know your content, it's very easy to see in the transcript which parts you want to keep and which parts are not relevant.
Option 2: Read the waveforms
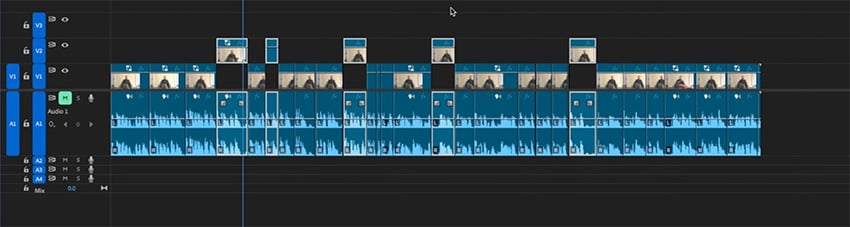
The old-school method is to read the waveforms. I'll demonstrate this on Heather's piece to camera. Because this is just one person speaking to camera, we can look at the shape of the waveforms and see that the peaks on the waveform are where Heather is reading the script, and the lulls and troughs in the waves are the parts that just that aren't relevant or where we might be discussing the next part.

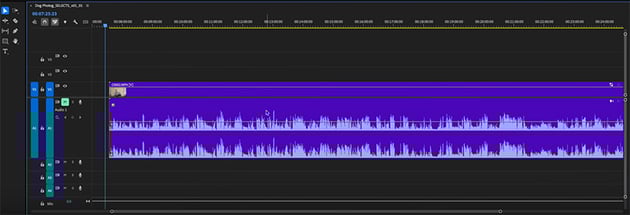
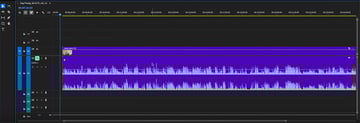
So I like to go along and make cuts with my Razor Tool in the parts that are obviously not responses. And of course, I will just give them a quick listen as I go to make sure. Then I'll delete those bits and be left with just the relevant responses to camera.
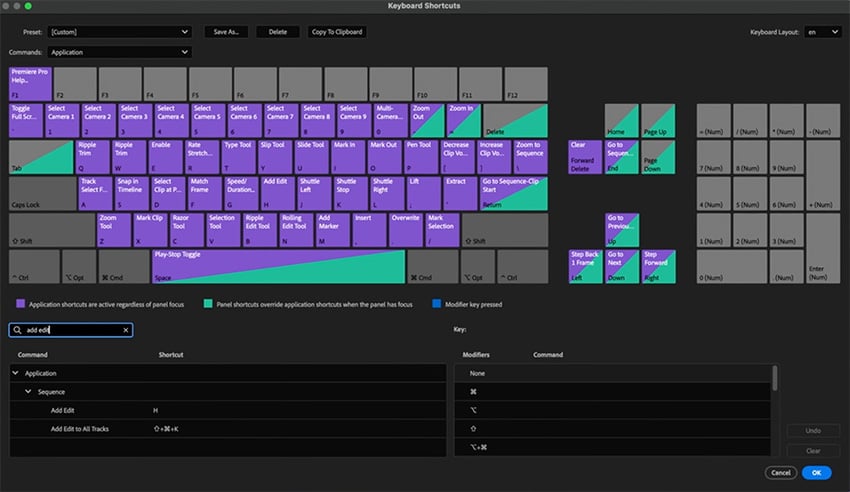
A quick way to do this is to set up a keyboard shortcut. You can do this by going to the Premiere Pro menu, choosing Keyboard Shortcuts, searching for Add Edit, and assigning to a key. You'll see I have it set to the H key.

Now, back in my sequence, if I click somewhere in the empty part above the clips and hit H, it'll make an edit all the way down through any track that is targeted and not locked. This works well if you have multiple layers of video stacked on top of each other.
Generally, 90% of my workflow when making selects is in this fashion. Spacebar to play, listen to the part I want to keep, Spacebar at the start of where I want to make the cut, H on my keyboard to add the edit, double-tap L to play forward in double speed, Spacebar again when I think the next usable moment is about to start, H on the keyboard to add another edit, and then Option-Backspace to delete the clip and close the gap. Now do that a couple of hundred times, and you have yourself a sequence of selects.
That might sound a bit confusing at first, but once you get that muscle memory in, you can start to edit really quickly without a mouse. So pick new school, old school, or a combo of both, and see what works for you.
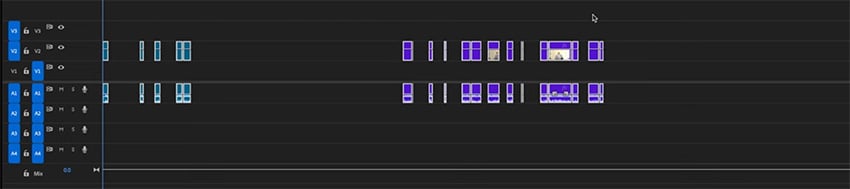
So now I have a sequence with the selects from both Dan and Heather's piece to camera. My job is to now go through each of them and decide which is the best take. Some takes might be better than others for performance alone, or you might be looking up for things like audio or lighting glitches. Some will just vibe with you better than others. Right now, it's time to get that human brain to work and make some choices.
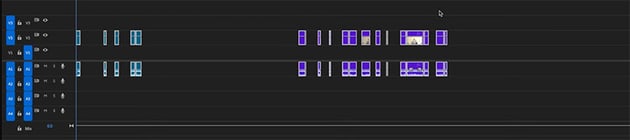
I like to just move my favorite ones up into the V2 track so that once I've got them all picked out, I can easily highlight them and then copy and paste them over into the edit sequence.


Creating an edit
As you can see, when I pull these selects over into the edit sequence, I have a bunch of gaps or ripples.
Now, if you're interested in seeing my thought process play out in a step-by-step fashion when it comes to making creative decisions in an edit, you should definitely check out my beginner's guide to video editing.
In that course, I take a really methodical approach to crafting a similar piece of work to this project, and I explain my thought process pretty much with every cut. So if you really want to get into the weeds, check that video out next.
For this quicker guide, though, we're going to skip my creative musings. So I've pulled all of those best takes into my edit sequence, and I've arranged them in the order that works best for me. You can see that I've cut back and forward between Dan and Heather, and I've left some placeholder gaps for titles.
I've also employed the punch-in technique on a number of shots where we had some jump cuts.
A jump cut is not inherently a bad thing, and sometimes people like to use them. However, it's not always desirable. One way to get around that is by punching in on your footage. You can do this when you have, for instance, a 4K video and you're editing and delivering in a 1080p sequence. You can effectively zoom in on your footage by 50% without any discernible quality loss.
Finding and using music in your edit
Adding some good background music can help us make the jump from rushes to a more coherent edit. There's a great new way to go about this by using the Envato extension for Premiere Pro. It's available in the Adobe Creative Cloud app, and you can just search for Envato in the app section or click the link below:
To launch it in Premiere, go to Window > Extension > Envato. With the extension open, you can enable AI-assisted search, which will find relevant music, sound effects, and stock footage based on the current frame in your Program Monitor.

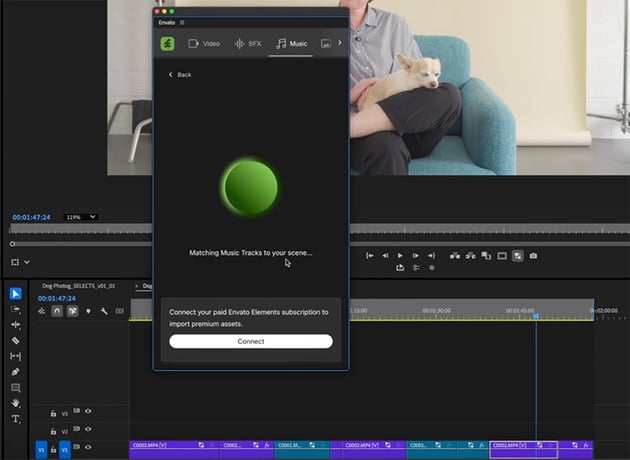

Or you can use a traditional search, which is what we're going to do for some music here. Then you can either download a preview of the files, or if you have your Envato account connected, you can download and license the full file right from the app.
So let's add some jazzy hip-hop music. I'm also going to drop the Gain down to something around -25 dB. I generally find that this is a good starting point for a music bed. Then you can mix the dialog track to sit nicely over the top.
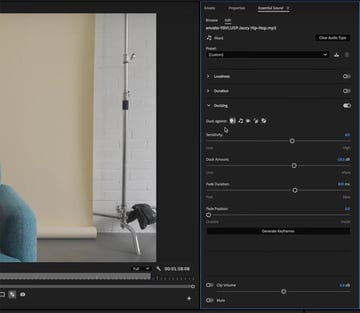
To dive deeper into your audio mixing and effects, you can go to the Audio workspace. However, there are some simple tools that we can use within the Edit workspace too. Go to Window > Essential Sound to make sure that tab is selected. We're going to add a ducker to the music so that it sits behind our dialog.
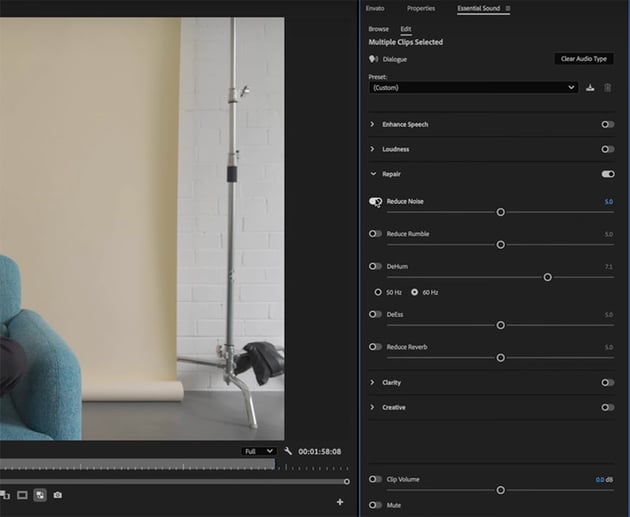
So with the music track highlighted, I want you to tag it as music in the Essential Sound panel and turn everything off except Ducking. In that section, you can tweak the settings to fit the music track you're working with alongside your dialog.


Right now, I'm pretty happy with this dialog, but let's say you had a slightly noisy location and you wanted to do some cleaning up of the background noise. You can do a similar thing in the Essential Sound tab by selecting your clips, tagging them as dialog if they haven't already been, and then turning on the Reduce Noise slider in the Repair menu.

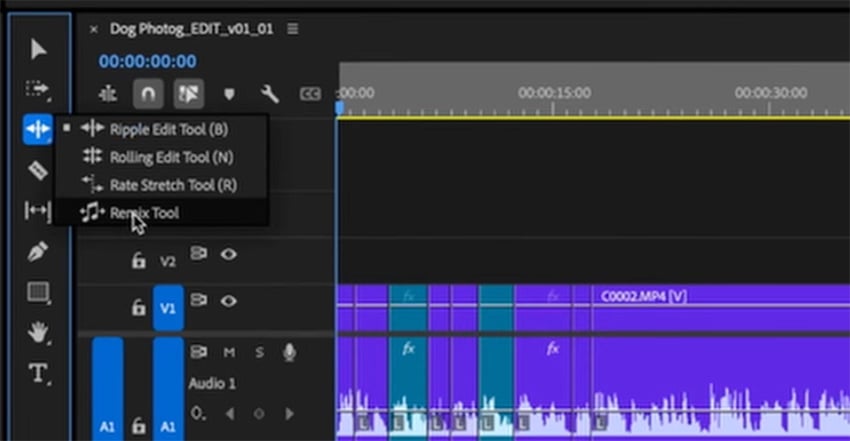
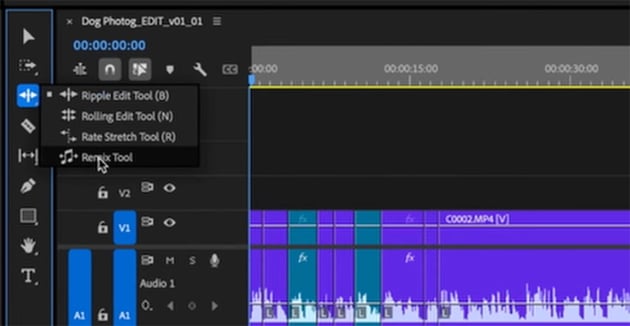
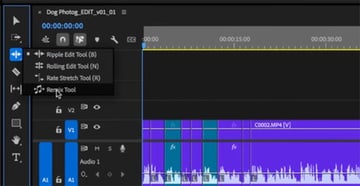
Another quick and handy audio tool available to you in the Edit workspace is the Remix Tool. If your music track is a little too long for your video, you can use the Remix Tool to shorten it, and the program will make beat-specific cuts to make it fit the new length.
Color correction and grading
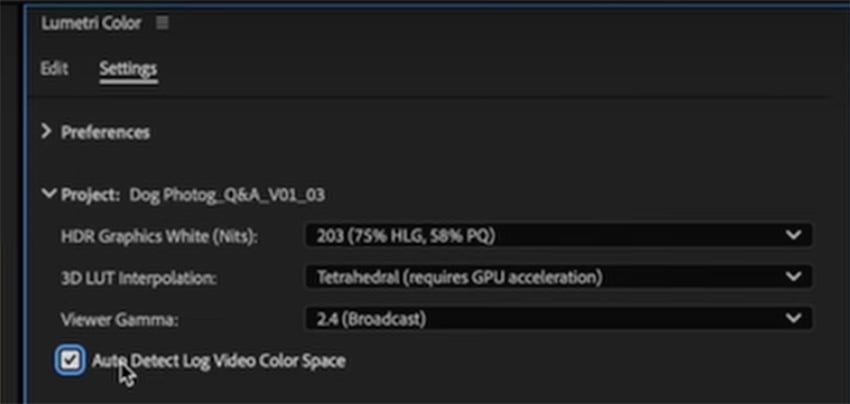
Color correction just got a whole lot easier thanks to a brand new feature in the 2025 version of Premiere Pro. There's a little button that you can check in your color settings that turns on automatic color management. Simply go to the Lumetri Color tab and make sure Auto Detect Log Video Color Space is checked.


That will automatically do a lot of basic color correction for us. It's taking our raw footage and converting it to the Rec 709 color space, which is the right color space for 99% of projects. But we still need to do a color grade.
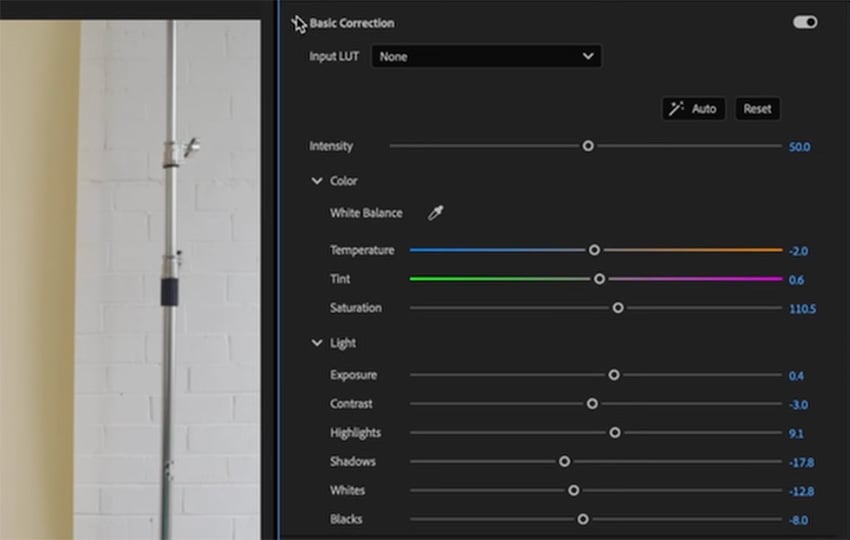
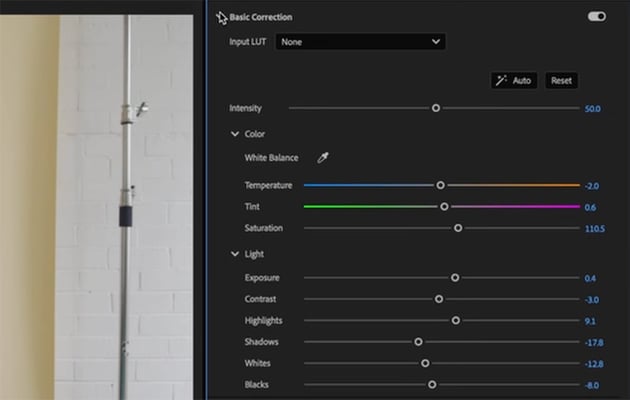
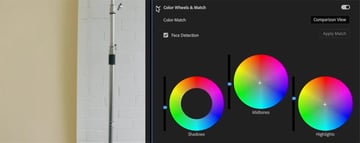
Let's go back to the Edit section in Lumetri Color where we can tweak the correction and then add the creative grade. I'm going to just double-check the color balance by taking the eye dropper tool and clicking on the whitest part of the image. I also like to click the Auto function in Premiere Pro, which gives us a good base starting point for our footage.

Now let's give it a quick creative grade. Open up the Creative section, and you can import a creative look or a LUT. And that's a great opportunity here to try out some of the great LUTs on offer on Envato.
I'm going to choose some retro film LUTs, and I'll apply one called Palm Springs no 4. Now, the good thing about the creative section here in Lumetri is that we can adjust the intensity of our look. So I'm going to bring it down a bit and then play with the Vibrance slider to bring a bit more punch to the color background as well as the couch.
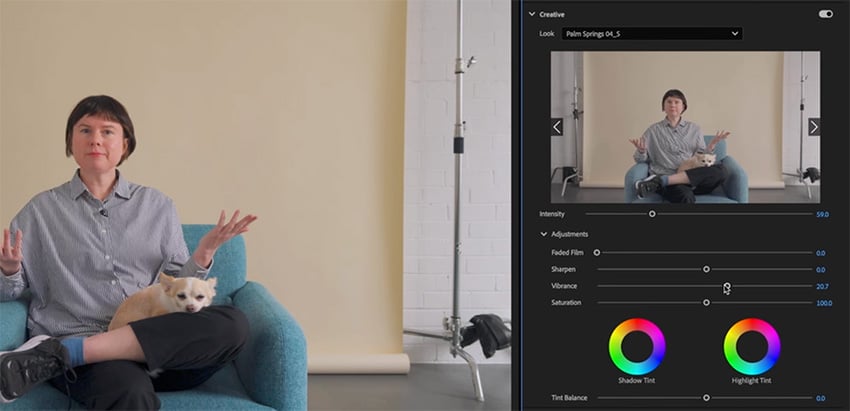

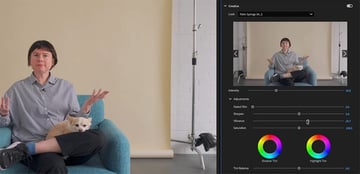
I'll also go down into the color wheels and adjust the luminance levels of my shadows, midtones, and highlights as a way to introduce some contrast in the image. And I'll add a slight vignette on the image just to really draw our attention in on our subjects.


So that's corrected and graded just the one clip on our timeline that we selected, but if we want to apply that to all of our footage, it's really easy to do. Simply right-click on the clip and select Copy or hit Command-C, and then right-click on the clip or clips that you want to paste the grade to and select Paste Attributes. Just make sure that Lumetri Color is selected in the effects that you want to copy and paste. Simple!
If you're copying the grade from one clip over to multiple clips, you'll of course need to go through each clip and make any individual tweaks that will account for things like lighting changes and so on.
Creating animated titles in Premiere Pro
I've made a little intro animation in After Effects, which I'm going to drop in now. But we can add some basic title cards directly in Premiere Pro, where Heather and Dan answer the various questions. I want to keep that same flavor of the opening animation in these titles without having to go back to After Effects.
So first, I'm going to create a space for my titles to sit on. The easiest way to do this is to right-click in the media browser and select New Item > Color Matte. Click OK in the dialog box, and then you'll be able to select a color. That creates a background, and then we can just add some text on top.

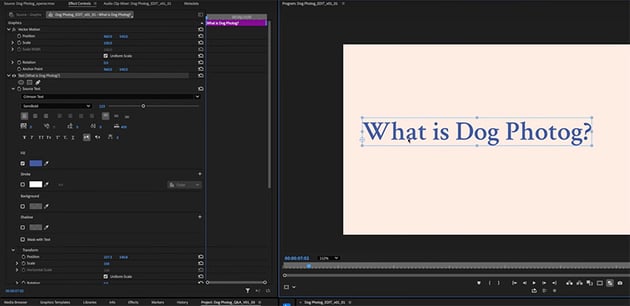
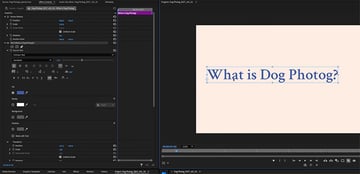
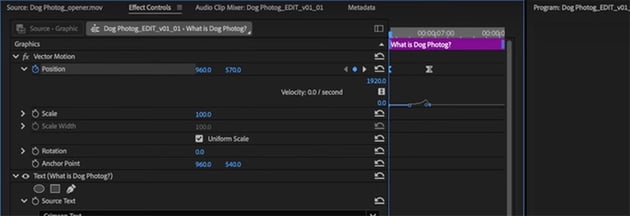
To make it more interesting, let's add some basic animation, and we can do that here in Premiere Pro. I'm going to have that text pop into place with a bit of easing, and I'll do that by setting my final position and making a keyframe at the time I want it to land. And then I'll go back to the start of the clip and pull the position down slightly. I'll highlight both keyframes and right-click > Temporal Interpolation > Ease Out. Then I'll grab the handle of the final keyframe and slide it to create a ramp at the end of the movement so it starts slow and then pops up into place quickly.


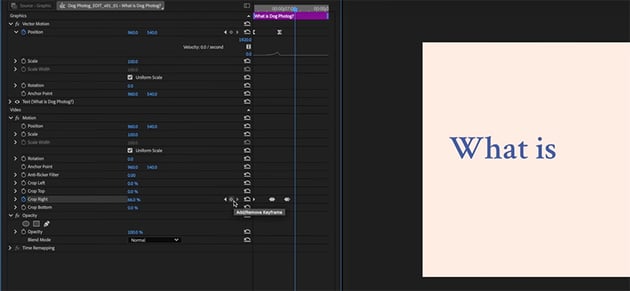
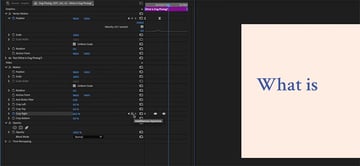
That looks pretty good, but we can go further with some basic tools. I want the words to pop on one by one. We can do this with the crop function. Setting a keyframe for our crop right at the beginning of this clip, I'll set Crop to 100%, removing the entire text. I'll then move to the point I want the first word to pop on and create another keyframe, and I'll drag the Crop amount until just the first word is showing. Then I'll repeat the process for each word in turn, so that they appear gradually.

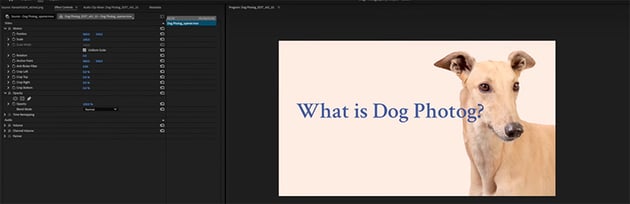
So that's the text, but it's still lacking something. Let's make it more interesting by adding a photo of a dog to reflect the theme of the video. We can use the same techniques to add a simple animation to it, and now we have a professional-looking title card.


Exporting your edit
Our video is completed, and we're ready to send it to the client for feedback, or maybe it's 100% finished and we're ready to upload it to the web. Either way, we need to export our work.
I want to keep this section simple as it can sometimes be a bit complicated. So to start with, let's make sure that we're in our Edit workspace and we've set our in and out points correctly. To do this, I'm going to go to the front of my sequence and hit I on my keyboard and then go to where I want the video to finish and hit O on my keyboard. That has set out in and out points.
Now we're ready to go to our Export page, and for the sake of this beginner guide, we're going to stick to presets. If you're uploading to the web or just want a manageable copy in terms of filesize, we'll export a H.264 MP4 file. And if you're ready to save a master copy for safekeeping, you want to export a Prores copy.
So first, input your file name and location, and select the High Quality 1080p HD preset with H.264 format. You have lots of options you can tweak, but the preset works fine most of the time. At the bottom, make sure that the Range is set to Source In/Out, and then just hit Export.
Next, you can export your master file. Follow the same process, but select the Apple Prores 422 preset with the QuickTime format.
Congratulations, you’re now an editor
So there you go. You now know everything you need to know to get up to speed with Premiere Pro, and you should be able to start making edits of your own.
If you want to continue learning, check out our free Premiere Pro tutorials here on Envato Tuts+. Here are a few to get started with:

 How to Upscale 1080 Video to 4K and Preserve Detail in Premiere Pro


 How to change aspect ratio size in Premiere Pro (complete guide)


 How to quickly add a motion blur effect in Premiere Pro

 How to Install Transitions in Premiere Pro


 10 Free Premiere Pro Courses — Learn Video Editing & More (2025)


 How to Use Premiere Pro Proxy Files for Faster Video Editing
And if you want to watch more Premiere Pro videos, here are some great options: