
 Lessons: 5Length: 39 minutes
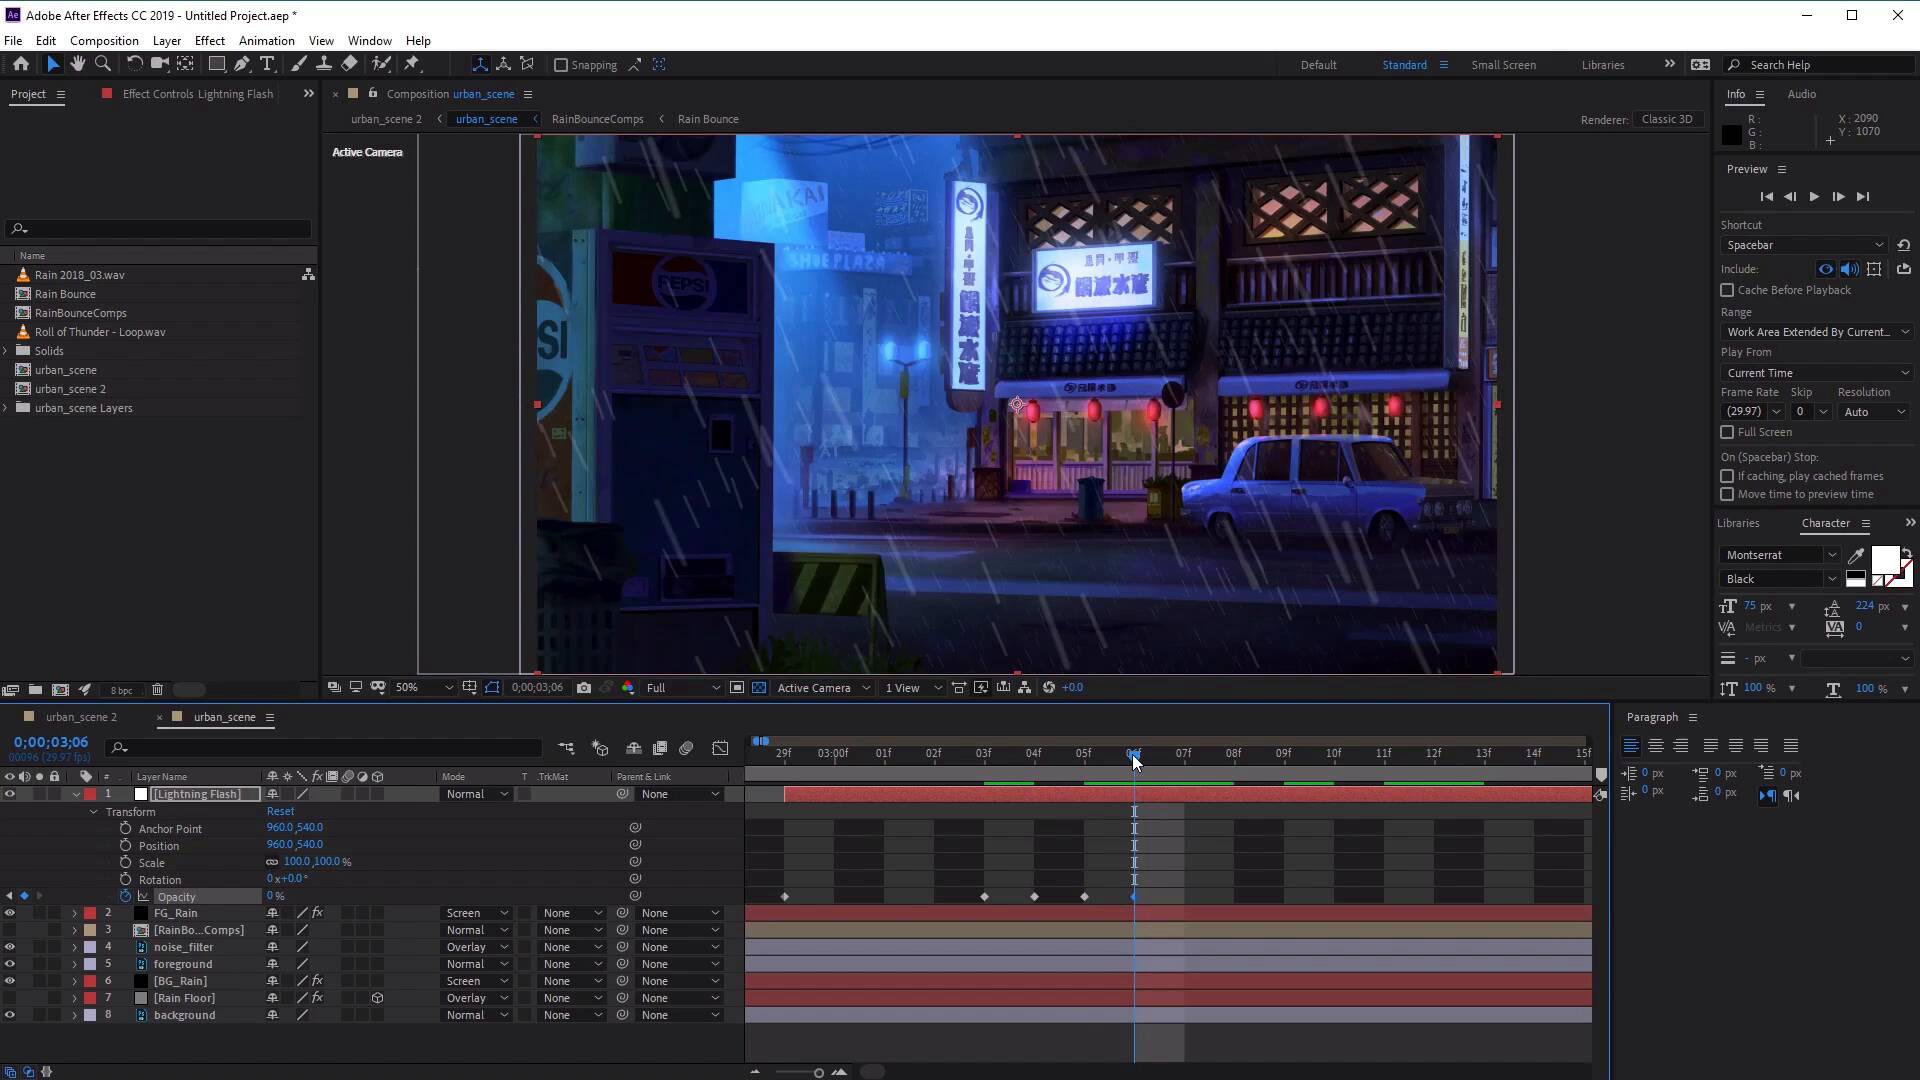
- Overview
- Transcript
2.4 How to Add Lightning and Sound Effects
In this lesson, you’ll learn how to finish off our animation by adding lightning and sound effects with the help of some assets from Envato Elements.
Useful Links
2.4 How to Add Lightning and Sound Effects
Hi everyone, and welcome back to the Urban Reign Animation Course. In this lesson we'll learn how to enhance our animation even further, with the help of Envato Elements, by adding things like lightning flashes and sound effects. So let's begin by heading over to the website, elements.envato.com and from here, we can download these resources that we need to complete our animation. So the first is the sound of rainfall, so to get this, simply go to the search bar and let's type in rain. And then we can also specify our search to include only the sound effects by clicking on the drop down box on the left here, and let's go ahead and select sound effects, and then hit enter. Now in the results page, simply have a listen to the different rain sounds and download the one that you like. We'll do the same for the thunder sound effect. So simply enter thunder in the search bar, hit the search button, and then again, simply listen to the results and download the one that you like. Back in the After Effects, let's add the sounds into our project by clicking and dragging them into the project panel. Like so, excellent. Now once they're in, the next thing that we want to do is we want to add a new solid to create our lightning flash. So let's go ahead and go to layer, and go to new and select solid, and let's name this lightning flash. And we want to change the color of this to pure white like so. Click ok, excellent. Now let's go ahead and open up this layer, and we want to set the opacity all the way down to zero. Let's move the layer, to around where you want the start of your lightning flash to be in your animation, and then we can add a key frame for it. So I'm just going to expand this and zoom in so you can see what we're doing. Let's add a key frame for opacity, like so, by clicking on the stopwatch icon. You can see we've got a keyframe here in our timeline. Excellent, now let's go ahead and move forward a little bit. So we want to move forward to three or four frames, and now we want to add another keyframe. And let's add a keyframe for 75% opacity, like so, and you can see straightaway we've got another keyframe here. Move forward one frame and let's make the opacity go back down to zero. Now for our fourth keyframe, let's go ahead and move forward one frame again, and we're going to make the opacity backup to 75%, like so. And now for our fifth keyframe, let's go ahead and move forward one keyframe again and make the opacity down to zero. And then for our sixth keyframe, let's go ahead and move forwards 1, 2, 3 frames and let's make the opacity up to 75. And for our seventh and final keyframe, we want to move forwards 15 frames. So just count them out here, 1, 2, 3, 4, 5, 6, 7, 8, 9, 10, 11, 12, 13, 14, 15 and on the last frame here, let's go ahead and change the opacity back down to zero, excellent. Now let's zoom out, and we want to trim this layer to the size of our animation. So let's go ahead and move this down all the way, like so. So you can see our last keyframe is over here, something like that. And now we'll have, if we play this, we'll have a nice lightning flash like so, cool. Now we can go ahead and time our lightning flash to the thunder sound effect. So going over to the role of thunder sound effect here, let's go ahead and move this down into our layers. And we can actually go ahead and open up the audio, like so, so you can see when the sound starts. Now this particular sound effect actually contains multiple thunder sounds, so let's go ahead and trim this down as we only need one, and zoom back in again. We're going to move this, slightly back a little bit as the sound travels slower than light. And if we go ahead and play this now by clicking on the play preview button, [SOUND] you can see how that all works together, excellent. Now lastly, we can now add the rainfall sound effects by clicking and dragging it into the scene, like so, awesome. Now the last thing that you may want to be aware of is, if we wanted to extend the sound effect of our rain, all we have to do is select it, press Ctrl D on the keyboard to duplicate, and then just drag it along the timeline so that it fits our entire animation. So you can see how we need to create a couple more. Like so. Now just make sure that all your layers are turned back on, by clicking on the i icon here, and then you're ready to render the final animation. Excellent. So with that we've come to the end of the urban reign animation course. I had a lot of fun creating this course, so thanks for watching, and good luck creating your own animated rainfall paintings, and I'll see you next time, on Tuts Plus.


