
 Lessons: 5Length: 39 minutes
- Overview
- Transcript
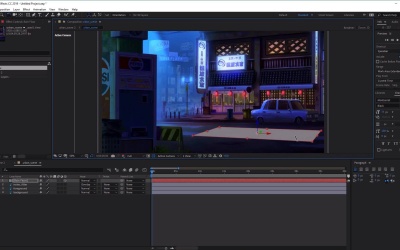
2.1 How to Animate Wet Floor Ripples
The painting we’re using to start with is static, and apparently dry! We need to change that, so in this lesson you will learn how to create a wet floor effect, as well as animating some rain ripple effects for the painting using CC Drizzle.
2.1 How to Animate Wet Floor Ripples
Hi everyone, and welcome back to the Urban Rain Animation course. In this lesson we'll learn how to animate the wet floor surface of our painting and give it some splashes and ripple effects. So, let's get started by first importing our Photoshop file by going to File, Import and then selecting File. And then we need to navigate to the location of our PSD file or image, select it. Make sure to import as Footage and to Create a Composition and then click Import. Once we've done that, we have some new options here. We need to make sure that we're importing as a Composition to Retain it the Layer Sizes if it's a PSD file, as this will make sure that we keep the sizes of our layers, if we have any. And then we want to make sure that Editable Layer Styles is selected in Layer Options, and then click OK. Excellent. Now, once we've done that, you'll see that we've got our image shown here and we've got an urban_scene composition here that we can double-click into. And if we had any layers, you'll see that our layers are all layered and in order down here, excellent. Now, if you're using a painting without any layers, don't worry. This technique taught in this course will remain the same. However, adding layers to your scene can give you more options depending on the image, which you'll see soon. So, let's just go ahead and double check our composition settings here very quickly. So, just right-click on the tab here, and then select Composition Settings. And over here we want to make sure that the duration of our animation is set to however long you want it to last for. So, for this example, we're going to make our animation last for 5 minutes, like so. And then once you've done that, click OK. Excellent. Now, that we've imported our environment, let's go ahead and animate it, starting with the wet floor and ripple effects. Now, to do this, we need to first create a gray solid layer. So, let's go ahead and click Layer, New and select Solid. And over here we can rename our solid layer. So, let's go ahead and name this Rain Floor. And over here we want to choose a color for it. So, we want to choose a mid-gray color. So, something like 7F7D7F and then click OK, then once you've chosen that your color, click OK again. And now, you'll see that we've got this gray solid on top of all our layers, like so. Excellent. Now, once you've done that, let's go ahead and convert the Rain Floor layer into a 3D layer by clicking on the small cube icon here. Now, if you don't see this, just make sure that we have the layers switches pane here at the bottom left, the screen turned on like that. And then you can select the small cube icon. Now, by turning our layer into 3D layer, we now have the option to rotate this layer by using the rotate tool up here. So, now let's go ahead and move it along and rotate it along the y-axis like so, or along the x-axis like so. And then just using these rotational tools, and also a combination of the selection tool, which is V on the keyboard, to move it down. We can go ahead and align this to the bottom of our floor in our image here. So, just going to go ahead and use the rotation tool like so. And then just lowering it down on the z-axis like that, and also rotating it around like so. Excellent. And now let's just move it back in the y to see what it looks like in our image. Just move it further down there again, like so. And this might need a little bit more rotation, On the x. Awesome, so just play about with these two tools here. The rotation tool which is W, on the keyboard and the selection tool which is V, on the keyboard, until you find the perfect spot for your plane alignment to your image. And then once you're happy with the placement of your plane, the next thing that we wants to do is we want to start adding the effects. Now to do this, we want to make sure that the Rain Floor layer is still selected. And then we want to go to Effect Simulation and then we want to add CC Drizzle onto our plane like so. Now straightaway, you will see that it has these cool little ripple effects added to this layer. Now, at this point you may want to change the scale of the floor, so that the size of the ripples are scaled correctly to the painting. So, to do this, just open up the Rain Floor layer here like so. And then we want to go to Transform, open up the transform options. And then we can go over to Scale and just clicking and dragging the values here we can make our plane bigger or smaller. And then you can see how this affects the size of the ripples on the floor, like so. So we just make the size of the ripples a little bit smaller. By making our plane let's say something like 70%, you can also enter the values by clicking on it and then entering a value on your keyboard, like so. Now once you're happy with the scale of your plane here. The next thing we want to do is we want to head over to the effects and Effect Controls panel here. And just play about with the options for CC Drizzle. So here, we want to change the drip rates to 5 just to add a few more drips or ripples. As you can see if I make this a little bit bigger, you can see how that's added some more ripples and drips to our plane like so. And then next we want to open up the light options here. And we want to change the light intensity from 100 all the way up to 1000 just to make our ripples show up a little bit more like so. So, you can see, as we decrease the ripples as we decrease the light insensitive bring it back to 100, you'll see that they're quite faded out. So, if you bring it all the way back to 1000 you'll be able to see them a lot clearer. Now, they might be a little bit too clear for now as you look at it on the gray surface. But once we change the blending mode of our layer, this will push the light back, making it look more natural. Now, once you're happy with the look of this effect, let's go ahead and use a motion tile to cover the rest of the floor. Now, to do this, make sure again, that the Rain Floor layer is selected. And then we want to go to Effect, find Stylize and from here we want to select Motion Tile. Now this will add motion tile to the Rain Floor layer here, and over here in the Effects Control panel. We want to go ahead and make sure that Mirror Edges is selected and then we can increase the Output Width like so. So, if I zoom out here, we can see that we can change the value of the output width to make it longer across our scene. And also the Output Height here, just to make it go all the way to the edge of where the pavement is like so. Excellent. Now, you'll see here in this particular image, more layers to your painting might come in handy. As we can now place our Rain Floor layer below our foreground image here, to make it look like it's blended in more to the painting itself. And now finally to blend the effect to our painting. So first of all, let's go ahead and make sure that the transfer controls pane is opened up like so. And then we can go to the blending mode of our rain floor layer and change it from normal. And let's change it to Overlay, like so. And you'll see as we zoom here, the rain ripple effects and splashes have now blended in to our painting. So we can turn them on and off, like so. Excellent. And now, if we go over to the Preview panel here and click on the Play button, you'll see that we've now added this cool wet floor with some rain ripple effects added to our painting. Excellent. So, that's it for this video. In the next video we'll learn how to animate the rain particles bouncing off of hard surfaces, such as the car here, and also the rain covers at the top here. See you all in the next video.


