
 Lessons: 5Length: 39 minutes
- Overview
- Transcript
2.3 How to Animate Falling Rain
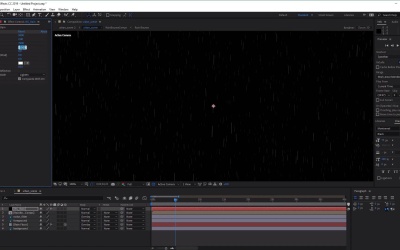
All these effects are perfectly well and good, but we don’t yet have any actual rain! In this lesson, you’ll learn how to animate a stormy rainfall effect using CC Rainfall.
2.3 How to Animate Falling Rain
Hi everyone, and welcome back to the urban rain animation course. In this lesson we'll learn how to create and animate some stormy rain into our scene. So before we do that, first let's go ahead and temporarily hide our bouncing rain animation, and also our ripple effect animation here. So that when we want to preview the rain or the way our rain looks, we don't have to render the other animations as well, which will slow down the process. So let's start by creating a new solid, so go to Layer > New, and let's select Solid. And in the Solid settings, let's go ahead and rename this BG for background rain, like so. Make sure that the color is set to a pure black and then select OK. Now with this layer selected, the next thing we want to do is add the effect. So go to Effect, go to Simulation, and now select CC Rainfall which is over here. Now if we zoom in here, you should be able to see some faint rainfall effects added to the scene, which we can then preview using the Preview button. So they're a little bit too faint here, but not to worry, we'll be able to change the look and feel of our rainfall by going over to the Effects Controls panel. So as our rainfall just looks a little bit too faint, and also a little bit too straight at the moment, we want to add an angle to it, just to suggest some wind. Now let's first change the opacity here a little bit, just so you can see the raindrops in the screen. So changing the opacity to about 50, and then let's just zoom in here like so. Now these settings may need some different settings according to the look and feel of your image. But we'll go through the most important ones, just so that you know what they do and how you can play around with them. So in this panel here, in the Effects Control panel, let's change the size from 3 to 2, and that should reduce the amount of raindrops here. So if we zoom in, you should be able to see how that affects the raindrops, so let's just change this back to 2, like so. And then the next thing we want to do, is we want to change the depth from 5000 to something like 7000. So in order to see how this works, we need to zoom out, and let's change it to 7000 like so, Which just gives the rainfall a little bit more space to animate. And for the speed, we want to change this from 4000 to something like 1500, which should reduce the size of the rainfall lines. Now if I bring this up a little bit, the opacity, you should be able to see how this affects the rainfall lines. So let's go back to this speed again. So originally, they were at 5000 or something like that, and you'll see how the rain lines are quite long. So let's go back and change the speed back down to 1500 to make them a little bit smaller. And for the wind, let's change the wind. So the wind is what will change the angle of our rainfall. So let's give this a value of 700, and you'll see how this gives our rainfall a little bit of an angle. And for this let's lower the opacity down just a little bit, so they will blend a little bit more with our scene, excellent. So then once you're done playing with the rain settings, simply set the BG Rain layer. The blend mode to a Screen, so it changes to a Screen, and you'll be able to see how the rain is now inside our background. Now we want to put this background rain just below our foreground layer, so that it's behind our foreground elements like so, excellent. Now all we need to do is hit the Play Preview button here to see what our animation looks like. So you'll see how the rainfall is now falling down inside our scene, awesome. Now let's give our rainfall even more depth. So to do this, let's go ahead and duplicate our BG Rain layer by pressing Ctrl+D on the keyboard, moving this above, to the top of our layer stack. And let's go ahead and rename this. So right click Rename, and we're going to rename this FG, foreground rain. Now the next thing we want to do is we're going to change some of the settings to give the illusion that the rain is a little bit closer to us. So to do this, let's do the following. So for drops let's change the value from 5000 to 300 to reduce the amount of rain in the foreground. We want to change the size from 2 to 15 to make the raindrops appear bigger. And we want to change the speed from 1500 to 7000, just to increase the size of the lines like so. Now we want to change the wind, so that it matches the angle of the BG rain, so let's go ahead and change that. So this will have to be something like 3000, like so. And we can also change the variation as well, just to make it a little bit more natural. So let's change it from 0 to 14, just to give it a more natural look, awesome. Now if we hit the Play Preview button, should be able to see how the rainfall looks, excellent. So that's how we create stormy rainfall weather in Adobe After Effects. In the next video, we'll be taking a look at how we can enhance our animation even further with the help of Envato elements, by adding some lightning flashes and some sound effects. See you all there.


