Lessons: 6Length: 57 minutes

Next lesson playing in 5 seconds

Cancel
  • Overview
  • Transcript

3.3 Diagonal Transition

To finish our collection of After Effects slideshow techniques, in this lesson you will learn how to create a simple diagonal transition.

1.Introduction
1 lesson, 00:51

1.1
Welcome to the Course
00:51

2.After Effects Slideshow Templates
1 lesson, 08:22

2.1
How to Use After Effects Slideshow Templates
08:22

3.Slideshow Transition Styles
3 lessons, 39:55

3.1
Horizontal Transition
16:04

3.2
Rotating Transition
10:03

3.3
Diagonal Transition
13:48

4.Finishing Touches
1 lesson, 07:46

4.1
How to Add Footage to Your Slideshow Transitions
07:46


3.3 Diagonal Transition

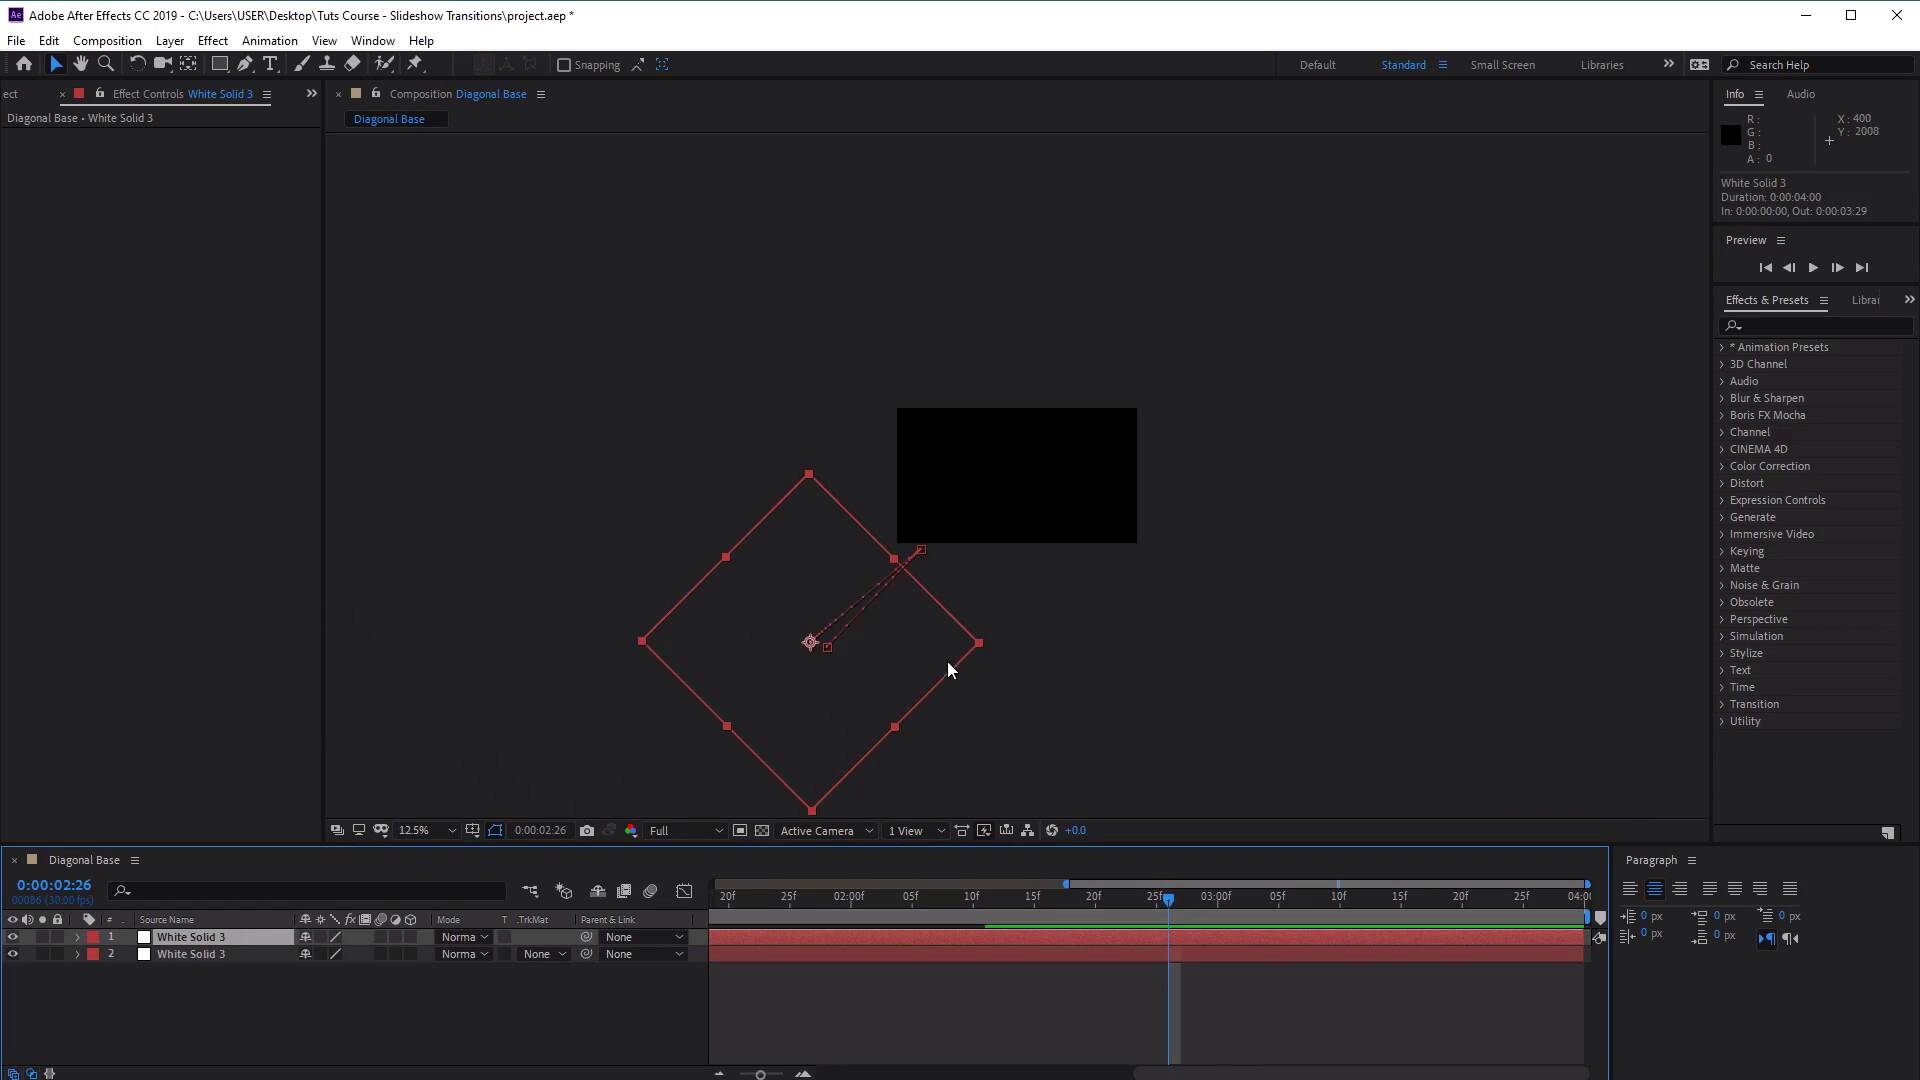
Hi everyone, and welcome back to the modern animated transitions course. In this lesson, we'll learn how to create a diagonal opening slide transition. So now that we've successfully created our rotating slide, we're going to put this composition to the site for now. So let's go ahead and stop this animation. And we can also close this down, like so. And again, let's go ahead and create a new composition. So go to Composition>New Composition and let's name this one Diagonal Face. Again, we want to keep the settings the same as our previous transition, with a size of 1920 by 1080, a frame rate of 30 frames per second. And a duration of four seconds, like so. And then once you're happy with that, let's go ahead and click OK to create our new composition. Now as we did before, we want to start with a new solid, so go to Layer> New and Solid to create a new solid. And then we want to choose a white color. Click OK. And then once you're happy with that, click OK to create our first slide element. Now as this is just the base, we're going to worry about the effects and the colors a little bit later and let's just jump straight into the animation. So let's go ahead and open up our white solid here and open up our transform options. And in the scale values, we want to click on the Constraint proportions button here, so that it releases our values. And we want to enter a value of 175% on the right here. Just to make our square a little bit bigger. Now let's go ahead and rotate this by 45 degrees. Make sure we are at the very beginning of our timeline and let's go ahead and click on the stopwatch next to position, to create a key frame, like so. Now let's go ahead and enter a value in our position here to -563. And let's enter a value of 1909 on the right here. And this will make it so that our white solid is out of the scene here, over on the bottom left, like so. Now let's zoom into our timeline here a little bit. So we can see a little bit more of what we're doing here and we want to move this slider forward to about naught 0.23 seconds. And here we want to enter a positional value of 189 by 1125. And this will make it so that our Solitaire is sliding from the bottom left, up into the middle of our screen here, like so. And then we want to move forward slightly, so let's move forward to about 1.2 seconds, so it's here like so, 1.2 seconds. And then we want to click on the key frame button for our position, to create another keyframe. And then finally, let's move forward a little bit more to 2.11 seconds here, like so. And we want to enter a positional value of -695 by 1869, like so. And this will make it so that our solid here moves into the middle and then back down again. Just like that, cool. Now, let's go ahead and make the animation a little bit smoother. So let's go ahead and right click on our first key frame. So I'm just going to move our timeline up here. Right-click on our key frame. Go to the Key frame assistant. And now let's go ahead and choose Easy Ease Out. And then go to the second key frame, right click that and go to Key frame assistant and we want to choose Easy Ease In. And on the third key frame, let's right click that Key frame assistant and choose Easy Ease Out, like so. Now let's go ahead and highlight the first two key frames, go to our graph editor up here and we want to make sure that we're editing the speed graph. So right click on the space here and then just select Edit speed graph here, like so. And then what we're going to do, is we're going to click on the handle here for the key frame on the right and move it all the way to the left, like so. And then let's go ahead and do the same with the other key frame here. So if we go and select fits all graphs to view, like so. And in fact, let's go back and select both of these key frames here like that, go to Graph Editor. And over here we want to select this last key frame. And move that to the left hill like so. Cool and then once you are done with that, if you click on Fit All Graphs to View, you can see how we've edited all four of our key frames. Click on Graph Editor again to go back to our normal view. And then if we go ahead and let's move this down and fit this up to 100% and click on the Play button here, you'll see how that we've adjusted the speed even more, so the animation speeds up and slows down as it's moving. Giving it a more natural look. Cool, so now let's go ahead and duplicate this white sorted layer here. So I'm just going to stop the preview, select your white solid, press Ctrl+D to duplicate. And over here, we're going to change the position of our second white solid. So let's open this up, go to Transform and over here, let's move all the way back to the very beginning of our timeline and change the position of our key frames here. So making sure that we're at the very beginning, we'll change the first position to 2477 by -715 like so. And you'll see now that's moved to the opposite corner of our screen. Let's move to the second key frame here. Select that and change the position of this one to 1717 by -51, like so. And you'll see now that it's meeting the other solid here in the middle and then we want to do the same for this key frame as well. So let's change this key frame to 1717 by -51 as well. And let's maybe move this timing slightly to about here like so, just so the animation isn't as robotic, so it's slightly off timing. And then we want to move to the very last key frame here and change this key frame to 2589 by -755, like so. Just to move it out of the screen, awesome. And you'll see that our sleeve is just showing a little bit in the corner over here. So let's adjust that slightly. So we can also manually adjust that by moving it like so, using the move tool or the selection tool. And let's go ahead and scrub back and forth in the timeline to check how our animation is looking. Just gonna zoom out here, cool. Now, don't be afraid to adjust the size of the layers as well, if they need adjusting. Now you'll see that we've got this black strip over here. So I'm just going to click and drag this point here and the same with our other solids, just to make sure that they overlap slightly in the middle. So now as they meet, they both overlap and touch in the middle like so, awesome. Now let's go ahead and create a new composition. So click Composition>New Composition and this time, let's name this Diagonal Opening Slide. Cool, again keeping all the values as they were and then click OK. And now with this composition, let's go ahead and place our diagonal base. So if we go to our project, click Diagonal Base and click and drag it into our diagonal opening slide composition, like so. You'll see now we've got our diagonal base as a layer inside our composition. Which is going to be very useful when we are creating our slider, great. Now we can go ahead and add some effects again, so we can have some shadow and color to our slider. So to do this, make sure we've got the Diagonal Base slide selected, go to Effect. Go to Generate and select Fill. And you'll see now that we've got to this red color again, to add to our layer. And now let's go ahead and add the shadow effect as well. So go to Effect, add Perspective and Drop Shadow, excellent. Now again, we need to change the value set and the effects and controls panel. So let's change this to what we had in the other two, so a pasty of 17% 135 degrees. Distance of five and a softness value of 88, cool. Now let's go ahead and duplicate this diagonal base three more times. So press Ctrl+D 123, like so. Now we've got three diagonal bases, each on top of one another. And as we did before, let's go ahead and move these layers further forward in the timeline, to create our effect. So I'm just going to zoom in our timeline here a little bit. And let's move forward to, naught 0.4 seconds and move the second layer forwards like that. Go to naught 0.8 seconds and move the 3rd layer forwards. And then finally, we'll move this 0.12 seconds and move the 4th layer forwards like so. Now let's go ahead and add our colors. So for the first layer here, let's select our Fill and create a new color. And I'm going to choose a color of E19711, like so. This will be a nice orange color. And on the second layer, let's go ahead and put a color code of DFB910. And in the third layer, let's change this color to 279981. And for the last layer, let's change this to 4FBDA6, like so, cool. So now we've got this nice color scheme for our transition, awesome. Now if we go ahead and click Preview, in fact, first of all, let's fit this up to 100% and click on the Preview button here. You'll see that we've got a nice modern diagonal transition, excellent. So that's it for this video. In the next video, we'll learn how to add footage to these transitions. See you all there.

Back to the top