- Overview
- Transcript
3.2 Rotating Transition
Following on from what we’ve just learned about making a slideshow in After Effects, in this lesson you will learn how to create a simple rotating transition using the same color palette.
1.Introduction1 lesson, 00:51
1.1Welcome to the Course00:51
2.After Effects Slideshow Templates1 lesson, 08:22
2.1How to Use After Effects Slideshow Templates08:22
3.Slideshow Transition Styles3 lessons, 39:55
3.1Horizontal Transition16:04
3.2Rotating Transition10:03
3.3Diagonal Transition13:48
4.Finishing Touches1 lesson, 07:46
4.1How to Add Footage to Your Slideshow Transitions07:46
3.2 Rotating Transition
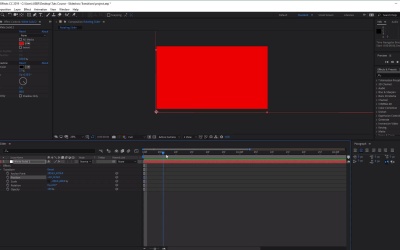
Hi, everyone, and welcome back to the modern animated transitions course. In this lesson, we'll learn how to create a rotating slide transition. So now that we have successfully created our horizontal slide transition, we're gonna put this composition to the side for now. So let's close down and create a new composition. So let's close this here. And let's go ahead and go to Composition > New Composition. And, again, we want to keep these settings the same as our previous transition with a size of 1920 by 1080, frame rate of 30 frames per second, and a duration of 4 seconds again. And then what we're going to do is we're going to call this Rotating Slider, and then click OK. Awesome, and then as we did before, we want to start with a new solid. So go to Layer > New > Solid. And then this will act as our first slide element. So let's go ahead and choose a color of white. Click OK, and then click OK again. And then now let's add some effects to the solid again. So we can have some shadow and add color to it. So to do this, let's go to Effect > Generate > Fill just to add the color effect. Now, again, this defaults to a red color, but we can change this again later. And then the next effects that we want to add is that subtle shadow effect. So we want to go to Effect > Perspective > Drop Shadow. Now, again, this will automatically be added to our selective layer, which is the White Solid 2. And now over here in the Effect Controls panel, we can go ahead and change some of the properties that we've got here. So make sure that we've got Drop Shadow selected. And we want to change the opacity here to 17%, a direction of 135 degrees, a distance of 5, and let's change the softness to 88. And this will give us a nice subtle shadow that will be displayed on top of our footage and the other slider layers. Great, so now let's go ahead and animate our layer. So make sure that we are at the very beginning of our timeline, like so. And now we want to increase the size of our solid to 200%. So let's open this up, go to Transform, and then make the scale from 100% to 200, like so. Excellent, and now we want to place the position of our anchor point here to the bottom left. So let's go ahead and change the values of our anchor point here. So we want to change this to 1916.5, and the other value to 1076, like so. Now if I zoom out here, you'll see that the anchor point is actually on the bottom right of our solid. So in order to change this, let's go ahead and click on the Constraint Proportions button here, which is this chain icon next to Scale. And we want to change the number on the left from 200 to -200, like so. And this will flip our solid so that the anchor point is now on the bottom left corner, which is exactly what we want. Excellent, so now let's go ahead and change the position of our solid. So the corners of our solid and the corner of our viewer over here lines up. So let's go ahead and zoom in here a little bit. And in order to line these up, we need to change the actual position of our solid. So let's change the position values here to -4, and then the value on the right here to 1132. Excellent, and now you'll see that our solid is nicely lined up to the bottom left corner here. And now we're ready to animate. So let's go ahead and zoom into our timeline here a little bit. And we want to move forward to about 0.22 seconds here. And now we want to click on the stopwatch icon next to the rotation value. And this will create a keyframe. Now let's move forward to 0.23 and click on the keyframe button here to create another one. And now let's go ahead and move it to the very start of our timeline. And we want to put in a value in our rotation to -90, like so. And this will create another keyframe. And then, finally, let's move forward. And you can see as I scrub forward here, you can see how our solid is animating. So let's move forward here to about 1.22 seconds. And let's input a rotation value of 90 degrees, like so. Awesome, now, if we scroll back and forth, you'll see that we have this nice little rotating animation, like so. Excellent, let's go ahead and change the timing of our animation just to make it a little bit smoother. So right-click on the second keyframe here, and we want to go ahead, go to Keyframe Assistant here. And let's move this up so you can see what I'm doing. So right-click on the second keyframe. Go to Keyframe Assistant and select Easy Ease. On the third keyframe, let's right-click this, go to Keyframe Assistant. And let's go ahead and choose Easy Ease Out. And on the last keyframe, let's right-click that and go to Keyframe Assistant and go to Easy Ease In. Awesome, now if we go ahead and click on the Preview button here, you'll see that we have a nice, smooth animation. Cool, so all we need to do now is duplicate this layer to add more colors. So let's go ahead and do this now. So I'm just going to close this down. Select the white solid layer here. And let's press Ctrl+D three times to duplicate four layers. Let's do that, Ctrl+D, one, two, three. And now we've got four white solid layers. And now all we need to do is let's go ahead and add some colors to each one. So I'm just going to hide the three layers here and select the first white solid. And over in our Effect Control panel here let's select the color. And let's change this to 347977, like so. And let's show the second one and change this color to 42A7A1. And for the third solid layer, let's change this one to CEE0E0. And on the final solid, let's change this to pure white, and then click OK. And for each one of these layers, we want to move it a little bit further ahead of the timeline so they start a little bit behind one another. So right now, all the layers are on top of each other. So we're only seeing the top solid here. So let's go ahead and change these. So for the second layer, let's move this one. Let's see, let's move this layer to about 0.5 seconds over here, like so. And then for the third one, let's move it to 0.10 over here. And then for the last one, let's make it 0.14, like so. Awesome, so now if I move this down so we can see our animation a little bit clearer and select Fit to 100%. Let's move the timeline all the way to the beginning and click on the Preview button. And here, you'll see that we now have a nice rotating transition animation. Excellent, so that's it for this video. In the next video, we'll learn how to create a diagonal transition. See you all there.