- Overview
- Transcript
5.1 How to Render Your Video
In this lesson you will learn how to render the final video in Adobe After Effects.
1.Introduction1 lesson, 00:44
1.1Welcome to the Course00:44
2.Adobe After Effects Tools2 lessons, 23:30
2.1After Effects Setup07:40
2.2Setting Up the Text15:50
3.Retro Text Animation3 lessons, 39:10
3.1How to Animate Text14:36
3.2How to Add Fractal Noise16:42
3.3How to Add Color and Glow Effects07:52
4.Finishing Touches3 lessons, 27:55
4.1How to Create Different Camera Angles10:38
4.2How to Add a Background Image10:11
4.3How to Add Audio07:06
5.Rendering1 lesson, 02:57
5.1How to Render Your Video02:57
6.Conclusion1 lesson, 00:46
6.1Thanks for Watching!00:46
5.1 How to Render Your Video
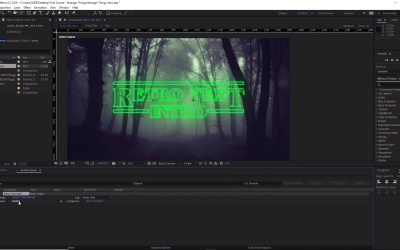
Hi, everyone, and welcome back to The Stranger Things 80s intro course. In this lesson, we'll learn how to render our completed animation. Make sure that the correct composition is selected. In this case, it's called the retro text intro composition. So let's go ahead and select that, and we can go ahead and close the other compositions as well, just so that we don't gets confused. Now, from here, we want to go to the top menu here and click on Composition, and then go down here and then select Add to Render Queue, cool. Here, you can make some adjustments to the render settings. So right now, we want to go ahead and click on best settings here. And over here, you can change things like the resolution if you want it too. So here you can see that we've got a size of 1920 by 1080, and we want the quality here to be best, and we want the resolution here to be full. Now, like I said you can change the resolution here, so you can change it here to half, a third, or a quarter, or custom. Well, let's change it, let's keep it at the full settings here for now. And then the next thing you want to do once we've clicked OK, is you want to now click on the lossless button here, so let's go ahead and click on that. And here you can change the formats of your video. So if we click on the drop down menu box here, you can see that we've got all these options here that we can use for the formats of our video. But we're just going to leave that at AVI here for now, let's click out of that. Now, you can also resize our video here as well. So that if we clicked on this box here to resize, we can now enter some values here to a custom size of our video. Let's click OK, and now, the last thing that we want to do is we want to click on the not yet specified button here. Now, this is where we're going to output our video., so click on this. And from here, we can choose the destination for our video, and all that's left to do now is just rename our file, so we can change it to any file name that we want, and then click on Save. And then all that's left to do here is just click on the Render button here, and wait for the final render to finish. So that's it for this tutorial, in the next lesson, we'll go through the conclusion of the course. See you all there.


