
 Lessons: 7Length: 32 minutes
- Overview
- Transcript
2.1 File Management
In this short lesson, you'll learn how to set yourself up for success with Adobe Premiere transitions by getting your file management sorted. We'll go into detail about creating folders for specific cameras and frame rates and how to import directly into labelled bins within Premiere Pro.
Related Links
1.Introduction
1.1Introduction00:30
2.How to Add Transitions in Premiere Pro
2.1File Management02:53
2.2Downloading Dope Transitions01:29
2.3How to Use Dope Transitions10:37
3.Using Dope Transitions to Elevate Your Instagram Videos
3.1Using Instagram Transitions in Premiere Pro06:21
4.Master Dope Transitions
4.1Master Dope Transitions10:03
5.Conclusion
5.1Conclusion00:32
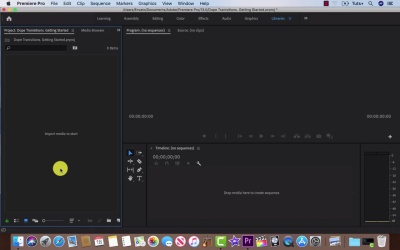
2.1 File Management
I hope you're doing well. Before we jump into file management, I think it would be a good idea to talk about the different types of transitions included in this template pack. There are 12 different styles all with multiple speed variations and control of the direction of the transition, giving you all the options you could need. Most of the categories are pretty common, zoom, spin, and panoramic. On top of those we are offered glitching pixelation. At any computer glitch effect as well as RGB transitions that split the color spectrum. Dope transition goes one step above and combines these transitions for us, giving us options like RGB zoom and pixelation zoom. Let's jump into file management. Something that I like to do is create a folder for each camera. So let's check out demo footage and take a better look. So, you'll see that there's a folder for Mavic Pro 4k, Canon C100 1080, and an iPhone. These are just examples. Whatever camera you're using, if there are multiple sources just go ahead and create a folder for each one. And say you're using Envato elements create a folder that says Envato elements, so you know where your footage is coming from. And now if you have multiple frame rates, something that you can do is go into this folder Canon C100 create a new folder. Slow motion, or 60 frames per second, or 120 frames per second but that camera doesn't do that. So we can go ahead and create another folder 24 frames per second. And then we can go ahead and import all of our footage from those sources into those already existing folders. You can take it a step farther and label and date them. So if we go into Premiere Pro, we can show how to import those directly in. So you would create a bin by right clicking New Bin, or you can go to the bottom right hand side of the screen, Create Bin. And now label this Mavic Pro 4K. You can make another bin, Canon C100, Canon. Slow motion, another bin of Canon C100. 24 frames per second. And then the last one an iPhone. So if we go ahead and click on any one of these, we can now right click Import go into the folder. Demo footage, Mavic Pro 4K, and we can just import all the footage directly into that bin in one go. So there we have it. That's how I would organize my footage. And I recommend you check it out. You may have a better solution or your own way to do things and that's okay. There's multiple ways to go about this.


