
 Lessons: 7Length: 32 minutes
- Overview
- Transcript
2.3 How to Use Dope Transitions
In this lesson, you'll learn how to use the Dope Transitions template and see what it has to offer. We'll also talk about when and how to use Adobe Premiere transitions, and what works for your projects.
Related Links
1.Introduction
1.1Introduction00:30
2.How to Add Transitions in Premiere Pro
2.1File Management02:53
2.2Downloading Dope Transitions01:29
2.3How to Use Dope Transitions10:37
3.Using Dope Transitions to Elevate Your Instagram Videos
3.1Using Instagram Transitions in Premiere Pro06:21
4.Master Dope Transitions
4.1Master Dope Transitions10:03
5.Conclusion
5.1Conclusion00:32
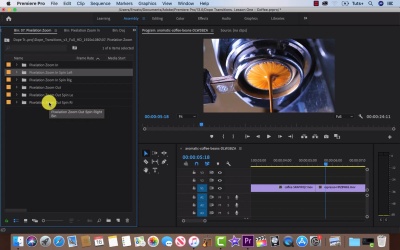
2.3 How to Use Dope Transitions
[MUSIC] All right, so we are in Premier Pro, we have our clips in our timeline and dope transitions loaded up into our NLE. So we have three clips which need two transitions, let's take a look. So we have these coffee beans moving to the right hand side in slow motion, followed by an espresso that's kinda static being pulled. And then finally, a latte being made with the milk going counterclockwise. So our motions are right, static and to the left. So let's go into dope transitions and see what we could use. So one of the most important things to keep in mind when using transitions of any kind is that you want them to be seamless. You don't want them to take your audience out of your project and so using something like an RGB split, in this case when the footage is really smooth and kind of classic looking with any of the VHS effect wouldn't mash up really nicely, but let's check, check it out and see what it would look like. So RGB, we're gonna go to the right, and we're gonna check out the slow version. I just generally like the slows. Each one comes with four variations. So it's regular speed times two times four, and a slow version. [SOUND] See, there we go. It's not too noticeable, but it's definitely there. So this time around, we're gonna try it without the RGB split. So we're just gonna back into dope transitions. Select flat Right, and dry over the slow version on top of our clips, making sure that they line up nicely in one straight line down from one scene to another. All right, I didn't mind that at all. That being said, the difference is very subtle. And if the original clips had an effect on it that split the RGB, giving it that old VHS retro look, then I would definitely think about using the RGB files for each one. But now let's go back and try something else. So we wanna go back and close these just keep things nice and clean. Right click close panel right click close panel, and let's check out panoramic. I generally really enjoy panoramic effects. They're nice and simple and give a nice sweet move to them. So we're gonna go right because of the movement. Right, slow because I didn't enjoy them and let's take a nice look. More importantly than enjoying a slow transition the clip I'm using are slow moving, they're not that exciting. And using something regular speed or times to the speed or times for the speed even would just be able to place and not conducive to what I'm working on. All right, so moving forward, let's close this up and close these panels, closing the panels, closing the panels and for the next transition, I think that we're gonna try it's gonna be the pixellated zoom with the RGB split. Not because I think it's the right one, but just because I think it's worth checking it out and showing the variations of transitions this template pack has to offer. It's sometimes hard to see what you're getting in the preview. And I'd always recommend just dragging it onto your timeline giving it a quick peek. And so you just have a better idea of what you're working with. And it's such an easy thing just by pressing Command Zed or z depending where you are to get just to get rid of it. All right, so let's go back and take a closer look. So you can see there's that pixelated RGB kind of image, and definitely not what we need but still a pretty cool effect. Okay, so let's start this over again with a pixellated zoom without the RGB split. And maybe it's been to it just to see what's up. I'm generally thinking that we're gonna go with zoom in or zoom out just because it seems fitting but you never know. Okay, so you'll notice that I selected a spin to the left when the the footage is actually spin to the right and we're gonna see that clash that comes up with it. Okay, so there it is. Let's check it out again. And this is kind of why this is important to keep movement going in the same direction. [SOUND] Okay, but I did like the effect though. That's kind of cool though, so let's go back pixellated zoom. Spin to the right this time slow dragging it over. Wrong place. Let's start that over again and perfect. Okay, let's check it out. Nice, that's a lot better and a lot more fitting for this. So with the previous example. Of the footage going one way and the template going the other. That's a common problem that happens when we don't take care or consideration of our work and we're just using templates to cover up and make things flashier for whatever reason. Now, it's important to take into consideration when using effects and templates, or cuts of any kind is why are we using them? And do they serve the story? And do they serve that the project or the idea. And of course it didn't really serve the project. It was just kind of disorienting and carelessly thrown on. I really think a panoramic would work with this. So let's go into it and grab one up and throw it onto here, throw it onto the timeline and see what that accomplishes. So panoramic to the right and of course again, slow, And there we go. [SOUND] Sweet I really like that. All right, so for this last transition we are going from a pretty static image with a close up. So two close ups and again that latte is spinning counterclockwise to the left. So I think it'd be kind of cool to try a zoom in or zoom out with a left turn to it. So if we go down to the bottom right hand side and click it and drag over a slow transition on top Let's try that again. And one more time, sorry about that. There we go, perfect. Let's see what that looks like. All right, that was kind of glitchy let's try running that back. Okay? So, that was kind of cute and comical, though, I think it's gonna feel kind of out of place with the first transition. So let's see this nice and smooth one coming up, okay? And there's the nice pour, I like that coffee. Okay, so they do kind of compete and clash. So maybe instead of trying to do something more serious, we can try something a little more whimsical. So let's replace this guy over here, delete, delete. And let's try a zoom in with a spin to the opposite direction, to the right. And maybe that will tie it all together. All right, all right, so let's give it a play. [SOUND] All right, so I do like that. I feel like it fits more together and it's more light hearted instead, but at the same time there is no projects you're gonna be making that doesn't have any kind of audio to it. So let's create a New Bin, just by right clicking a New Bin, or going down to the bottom right-hand side of that panel on the left. Let's make it music, and after that just click on this, and right click. Go down to Import. And I'm gonna be checking out some music I downloaded from Envato elements. That's where I got all this footage from too and they have some great templates and WordPress templates as well. So let's do that Latin cafe music and drag it on to the timeline underneath so it can tie everything together. Let's give it a bit of a play and see what it sounds like. So, already it sounds nicer, but I made a mistake. It's starting a bit late and not the beginning. So let's bring that back and start over. [MUSIC] In the next lesson on dope transitions, we'll be talking about square formats Instagram, from sending your project up, creating engaging content, all the way to exporting your files. See you then. [MUSIC]


