
 Lessons: 7Length: 32 minutes
- Overview
- Transcript
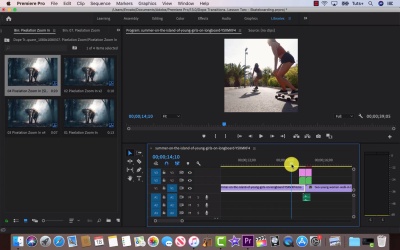
3.1 Using Instagram Transitions in Premiere Pro
In this lesson, you'll learn everything you need to know to begin using transitions in your Instagram videos. You'll find out about length restrictions, changing sequence settings, and the export settings Instagram prefers.
We'll also look at the type of footage that shines with Dope Transitions and cover some helpful tips about shooting video for Instagram.
Related Links
1.Introduction
1.1Introduction00:30
2.How to Add Transitions in Premiere Pro
2.1File Management02:53
2.2Downloading Dope Transitions01:29
2.3How to Use Dope Transitions10:37
3.Using Dope Transitions to Elevate Your Instagram Videos
3.1Using Instagram Transitions in Premiere Pro06:21
4.Master Dope Transitions
4.1Master Dope Transitions10:03
5.Conclusion
5.1Conclusion00:32
3.1 Using Instagram Transitions in Premiere Pro
[MUSIC]. Welcome to lesson two, square format and Instagram stories. It is important to talk about right off the bat some of the parameters that exist within Instagram, one of them being links. So if you are posting directly to your profile, you wanna keep your videos a minute and under. A story is 15 seconds though there are some apps out there that can sequence a story into 15 second clips, so you can play your original video and then there's IGTV that's more suitable for long length videos. Another thing to talk about, that you'll notice here, is that this clip is 1920 by 1080 and we wanna resize this into a square format. So we'll need to go up to sequence to do this. Another thing to consider, is how you shoot your footage and how you process your footage. So if you are shooting, a story for Instagram, I recommend that you originally shoot it in a square format so you don't need to resize or lose anything. In this case, we are dealing with footage that is 1920 by 1080 and we want to resize this to 1080 by 1080s. And so let's go up to sequence and deal with that. So go up to Sequence, Sequence settings and change the 1920 to 1080 on the horizontal, 1080 for the vertical. And then we can just go down, click OK and a pop up will warn us that we are making some big changes that are irreversible. No problem, just go ahead and select OK. So now the footage is resized and we can just go to Play. And I'm thinking that I wanna use pixelation zoom from the Dope Transitions Template. So let's go ahead and import Dope Transitions. We wanna go to 1080x1080. Import and now, we want to import the entire project and we wanna create a folder, for imported the items, okay? So, we'll have to find the missing clips. So just go down to the bottom right hand side of this pop-up and locate your template. In this case is on my desktop. So go Open, Transitions, search and Premiere will take care of the rest. Great, so let's go ahead and open up this template pack and find pixelation zoom. Perfect, open it up. And I'm gonna use slow, the footage is in slow motion. Drag it right out and let's see how this fits. Oops, all right, let's try that again. Perfect and let's check it out. Right, see, all of these templates really work well for this kind of footage. Footage shot is clean, fun and vibrant, not dirty, there's no noise to it. It's just well exposed bright material. Let's get over to selecting a new transition. So, again, pixelation zoom and this time I'm feeling a zoom out. And again, let's grab slow, drag it in, great. Now I know I've said this before, but one of the best things you can do with a template of this size is to go through, have fun and not take it too seriously just put some footage in your timeline and go through them one by one, make notes of which ones you like. And thankfully, they're already so well organized that half the job is done there for you. With that being said, I would like to see another transition in this so let's go back to dough transitions and I would like to see an RGB spin. So let's go down to that and find the placement. Open it up, center spin is what I would like. Sweet, okay. Let's go ahead to our last transition and place that up. Sorry, I'm just thinking about which one I want to use and, okay, there we go another RGB spin from the center. That's what's great about this template pack. It shines in footage like this so you can have fun trying out all the different transitions to figure out what you like all of them work. And what's so nice about it is that you're not fighting yourself. Let's go ahead and drop some music in to round out this project and give it a view. [MUSIC] Lastly, let's talk about exporting for Instagram. Let's go up to File, down to Export and Media. And you'll see the default will be Quick Time, but we want to change that over to H264, that's preferred for Instagram. And all you have to do from here is Export. In the next lesson of Dope Transitions, we'll be talking about creative ways to work with clients and using dope transitions to facilitate that.


