- Overview
- Transcript
3.3 How to Animate Atmospheric Particles
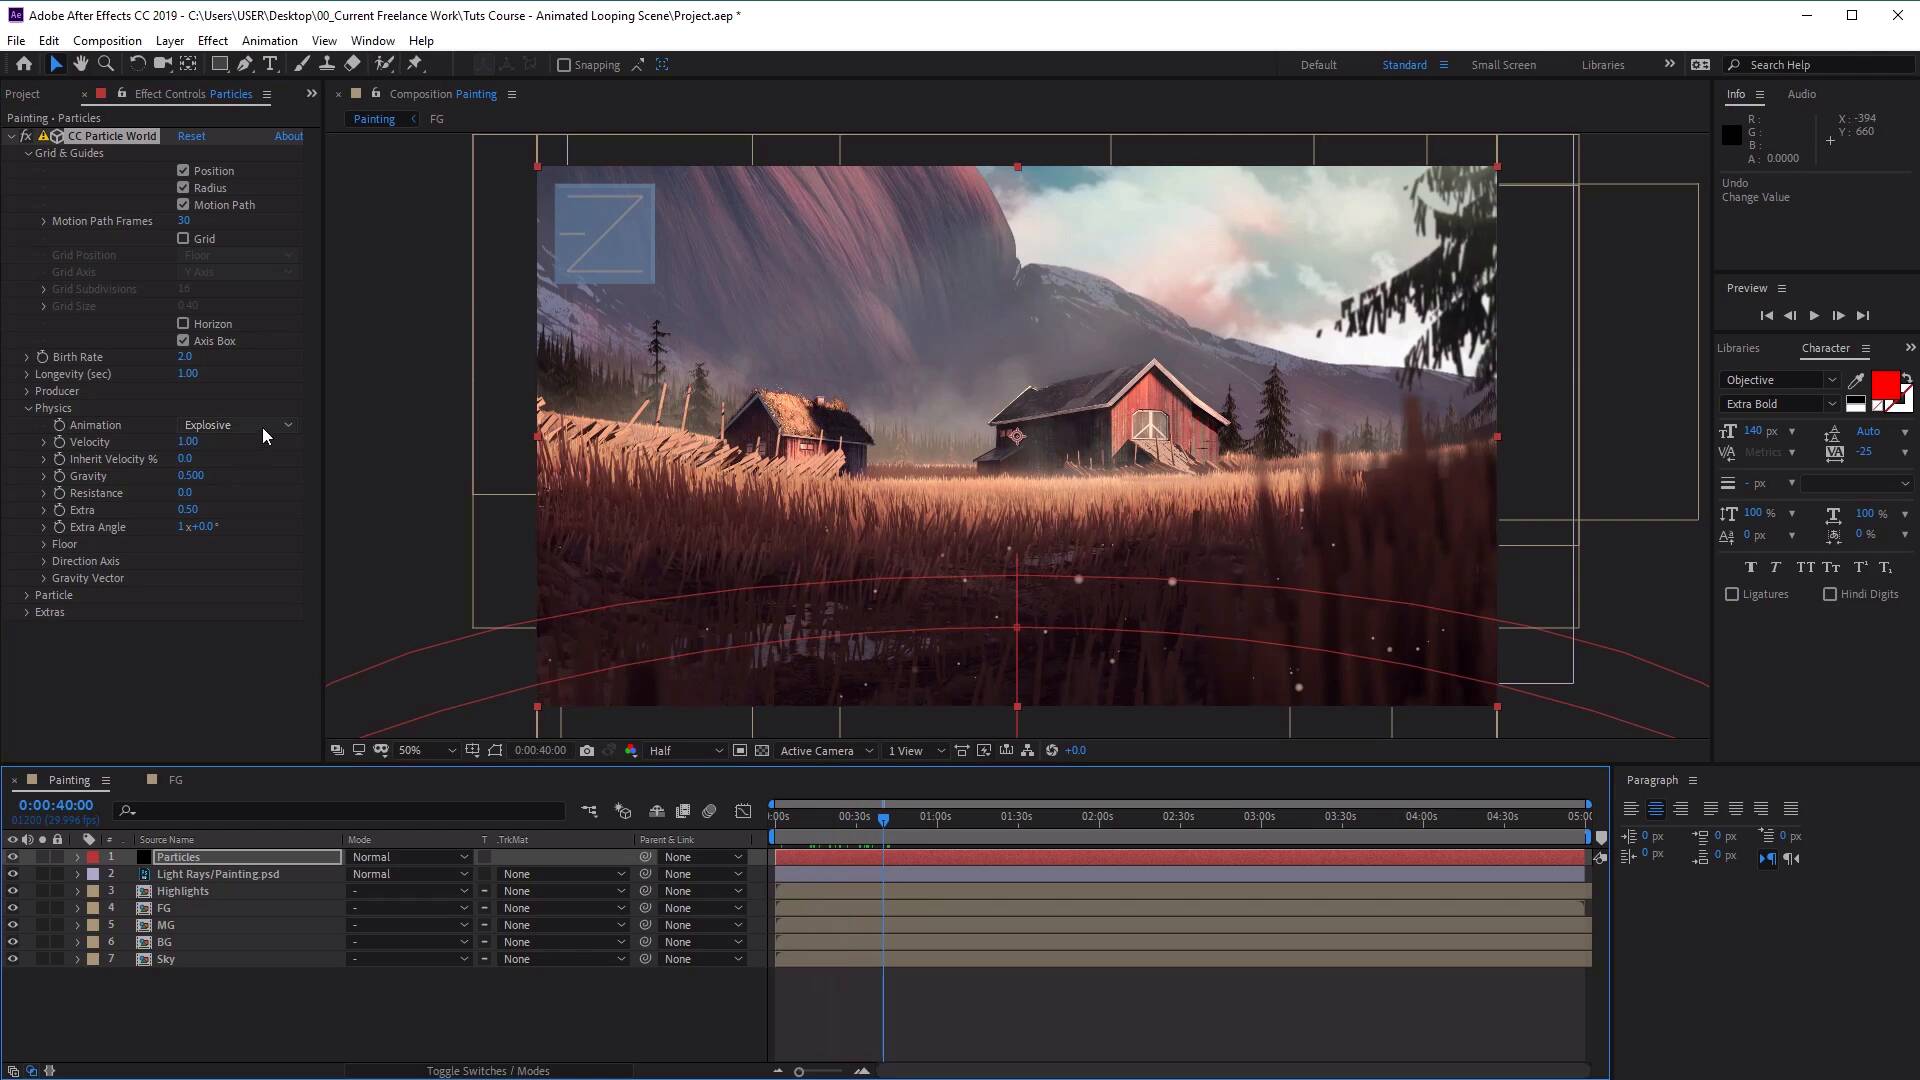
Atmospheric particles are a non-specific but highly effective way to add a touch of magic to your landscape scene. In this lesson, we’ll add particles like this without external plugins. You will learn how to use CC Particle World to achieve this effect.
1.Introduction1 lesson, 00:45
1.1Welcome to the Course00:45
2.How to Prepare Your Digital Painting1 lesson, 04:02
2.1Prepare Your Painting in Adobe Photoshop04:02
3.How to Animate a Painting in Adobe After Effects5 lessons, 29:19
3.1How to Animate Grass09:50
3.2How to Animate Sunlight03:34
3.3How to Animate Atmospheric Particles09:27
3.4How to Animate the Sky and Clouds03:49
3.5How to Add a Music Track02:39
3.3 How to Animate Atmospheric Particles
Hi everyone, and welcome back to the animated landscape painting course. In this lesson we'll learn how to animate some particles for some additional atmosphere. So to add particles, we'll first need to create a new layer by going to Layer, New, Solid. Let's rename this particles. And then make sure that the color of the background is black. And then click OK, excellent. Now let's go ahead and make sure that this layer is at the very top of our layer stack. And then with this layer selected, let's go to Effect, And then try and find Simulation and then go to CC Particle World. Click on that and this will apply the CC Particle World to the layer. Now, let's go ahead and bring our attention to the Effects Controls panel. So make sure that the Effects Controls panel is opened up. And we want to open up Grids and Guides. And straightaway let's go ahead and uncheck Grids, like so. And then also uncheck Horizon and the Axis Box. Then we want to go to the Particle options. So open up the Particle options here. And then from here, we want to change the particle type from Line to a Faded a Sphere. And you'll see how that affects our look of the particles straightaway. And let's change the color of our particles. So let's go over to Birth Color. Click on the color box here, and let's change this color to FFD5C7. And we want to change the Death Color as well. So just sort of choosing the same color as our Birth Color, and then just making it slightly darker like that, excellent. So that means that when our particles are born there'll be a lighter color and then slowly fade into a darker color as they disappear, excellent. So now let's go ahead and change some other options. So we want the Birth Size of our particles to be a value of 0.1 and then the Death Size, let's change that to a value of 0.01. The Size Variation, we'll have it at 50% and the Max Opacity at 75%. Cool, so now once we've got that done, let's go ahead and close Particle. And now let's head over to the Producer tab, and open that up. And we want to change some of these settings. This is where our particles are going to, sort of emanate from. This is where they're going to travel from. So let's go to the X radius here and increase that, and we want to increase that to a value of around 0.8, like so. And then let's go to the y radius, and let's increase that to a value of around 1. And then we want to increase the z radius here as well to a value of let's say something like 1 as well. Cool, so just playing around with these values here. Then we can also move the position of our producer. So let's move this down here, like so. So this is where our particles are gonna sort of rise up from. Let's move that down. And then from here, what we want to do now is we want to animate our Particles. So let's go ahead and close down the Producer tab. And let's go ahead and go over to the Physics tab, which is how our particles are going to animate. So let's move forward in our timeline here, so we can see where our Particles are gonna look like. And let's go ahead and change the Animation type from Explosive to Twirly. And then, we wanna change the Gravity here to -0.01. And then from here let's go over to Velocity. And we want to change this to 0.3. And then we want to go over to the Resistance and change this to 0.5, like so. Excellent, now that we've got our Particles moving, let's go back to the Producer here, just to adjust where our Particles are going to be seen in our painting. So let's change the position to 0.3. Change the x radius to 0.8. Change the y radius to 0.4 and the z radius, let's round that to 1, so. And now you'll see our Particles are a little bit more spread out in our composition, excellent. Now let's go over to the Longevity and change that from 1 to 5. Just so that our Particles last a little bit longer, and you'll see how this affects our composition. We've got a lot more Particles populating our painting now. And now let's go over to the Birth Rate and change that from 2 to 0.2, like so. Just to reduce that back down a little bit. Excellent, now if we sort of scrub backwards and forwards, you can see how our Particles are animating in our timeline. Excellent, now let's add a glow to our Particles. So with the Particles there still selected, let's go to Effect, go to Stylize, and now find Glow. So click on that to add that here. And here we want to change a few of these settings. So let's go ahead and make sure the glow threshold is at 60 and the radius is at 15, Intensity is at 1. And from here, let's change the color a little bit. So let's change the color to a nice sort of yellow color, like so. And then we can see how that sort of affects our Particles if we zoom in here. So if we sort of zoom in to one of these Particles, we can remove the effects and bring it back on. And you can see how that gives our Particles a nice subtle glow effect, like so, excellent. Let's go ahead and fit this to the screen again. Now to ensure that the animation is looping, let's go ahead and add a fade in and fade out for our particles layer. So let's move all the way back to the beginning of our timeline. Open up the transform options, create a key frame for opacity, move forwards a little bit. In fact, make sure the opacity for the first key frame is set at 0. Move forwards a little bit and then bring it up to 100. And then the same for our ending keyframe. So you can see here as we zoom in how we've got a opacity of 0, moving up to 100. And then the very last keyframe, let's change that from 100. So add a keyframe for 100, and then a keyframe at the very end for 0. So now our particles slowly fade out. And then at the beginning of the animation, they will fade back in again. So that's how we loop them, excellent. And there you have it, some atmospheric Particles for your environment. In the next video, we'll learn how to animate the sky and the clouds, see you all there.


