
 Lessons: 7Length: 34 minutes
- Overview
- Transcript
3.2 How to Animate Sunlight
In this lesson, you'll learn how to animate the sun's rays to subtly light up the scene using keyframes.
1.Introduction
1.1Welcome to the Course00:45
2.How to Prepare Your Digital Painting
2.1Prepare Your Painting in Adobe Photoshop04:02
3.How to Animate a Painting in Adobe After Effects
3.1How to Animate Grass09:50
3.2How to Animate Sunlight03:34
3.3How to Animate Atmospheric Particles09:27
3.4How to Animate the Sky and Clouds03:49
3.5How to Add a Music Track02:39
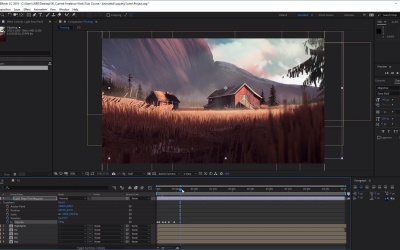
3.2 How to Animate Sunlight
Hi, everyone and welcome back to the animated landscape painting course. In this lesson, you'll learn how to animate the sunrays to light up the scene using keyframes. Now, to animate the light rays, let's go back to our original PSD comp here, and then just select the light rays layer. Now the aim of this is to create a subtle change in opacity throughout the animation to give a feeling of passing clouds overhead. So let's go ahead and make sure that we're at the very beginning of our timeline. And also, just as before, let's go ahead and change the duration of our composition to five minutes. So let's change this, like so. I then click OK. And now we want to open up the light rays until we can see our opacity options, like so, excellent. Now, all we have to do is create a key frame for opacity and then just move forward a little bit and then change the opacity either up or down. So in this case, I'm moving it up to 80% and then move forward slightly again, and then moving back down again. So let's change this down to 55 and then move forward a little bit and then move it up. And then just sort of repeating the process going up and then back down, alternating between increasing and decreasing like so with each key frame, excellent. Now keep in mind that when we do this, we want to randomize the opacity values and the distance a little bit, just to keep things looking as natural as possible. Now once you've got enough key frames, simply click and drag to highlight these key frames like so. Press Ctrl + C to copy them move forwards The timeline and then press Ctrl + V to paste them like so. Just filling up the timeline like that. And then once we go towards the end of our animation. We want to create a key frame right at the end which matches the same value as our first key frame. So for this example, our value for our first frame is 60%. So that will be the same value for our last key frame, like so. Excellent. Now let's go ahead and highlight all of these key frames like sub, press Ctrl + C to copy them. Now open up the highlights layer here and we want to do the same for the opacity over here as well. So go ahead and press Ctrl + V to paste the exact same key frames. And now you'll notice that the highlights of our animation will also follow the same opacity values as our sun rays, excellent. So that's it for this lesson and the next lesson, we'll learn how to animate atmospheric particles, see you all there.


