
 Lessons: 9Length: 50 minutes
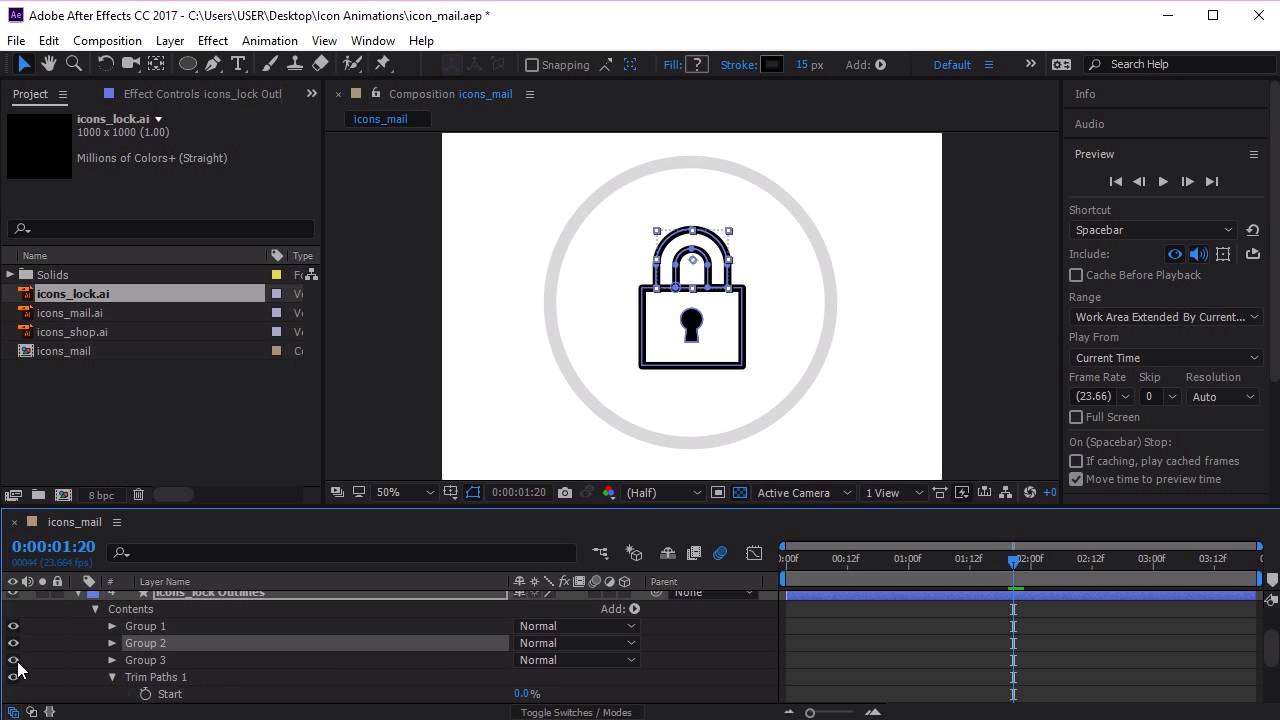

- Overview
- Transcript
3.3 Animate the Lock Icon
In this lesson you will learn how to animate the lock icon in Adobe After Effects. Again, we’ll be using the Trim Paths Tool and keyframes.
1.Introduction
1.1Welcome00:31
2.Icon Design
2.1Illustrator Setup06:55
2.2Designing the Icons10:42
3.Animate the Buttons
3.1Importing Into After Effects03:50
3.2Animate the Mail Icon11:50
3.3Animate the Lock Icon05:31
3.4Animate the Shop Icon04:31
3.5Exporting the Buttons04:34
4.Conclusion
4.1Conclusion01:11
3.3 Animate the Lock Icon
Hi, everyone and welcome back to the animated icon course. Now that we've completed the animation for our mail icon, let's continue to animate our other icons starting with the lock icon. So let's begin by selecting the mail icon layer and turning off the visibility. And we want to drag our lock icon from here, from our project, into our composition, like so. So now that we've got our lock icon in, let's go ahead and right click, go to Create Shapes from Vector Layer. And then let's delete our original Illustrator file, and let's open this lock icon. Now you can see, let's go ahead and add the trim paths first. And now you can see that instead of having one group, this icon is made up of three groups. So, originally, our mail icon, if you remember, was created from one single line whereas this lock icon is created from three shapes. So, I've got a lock here. We've got our top lock and we've got our body of the lock here, this square shape. Now if we go to Trim Path, if we start to test the animation, you can can see that the animation animates all three elements at the same time. Which is kind of nice, but what I want to do for this particular animation, and what I think looks better is if we animate each of these individual elements individually. So the way that we do this is we go over here, so trim multiple shapes, instead of clicking simultaneously, let's go and select individually. So now when we test our animation, you can see it animates the top lock first, then the body of the lock, and then in fact it animates the middle lock first, then the top lock, and then the body. So when it spawns, it will spawn like this. Now, I actually want the order of the animation to be slightly different. So I want the lock, the top lock to be animated last. When, it's currently animating in the middle of the three elements. So, let's go ahead, and find out where the top lock is. So the top lock is group two. And, the body animates first. Let's go and have a look, here. So, let's swap group two with group one. So now, Hopefully when we test the animation, it will animate the lock last. So it animates the body first, then the middle lock, and now the top lock. Perfect, so that's exactly what we want. Now let's go ahead and animate the lock. So go ahead and make sure that the frame that we're working in is the first frame. We're going to select the key frame and making sure the start is at 100%. Then let's go ahead and go to about point 19. And make sure that the animation goes to just about before the top lick starts animating. In about 1.2 or 1.3 seconds we can animate the last part of the lock. So we'll go like this. Perfect, now let's go ahead and select these key frames. Right click, go to key frame assistant, and click easy ease. Now let's animate the rotation. So go to transform. Go to rotation, making sure that we're in the first frame. Click on the key frame. And again, we want the rotation to finish just about here. So if 360, so that means that the animation will rotate. And just before the top lock is about to animate, the rotation stops to allow the top part of the animation freely like so. Excellent, now let's go ahead and select these key frames, right click, key frame assistant, ez-ease. And we want this icon to also have motion blur. So enable motion blur here. And also let's enable this to be parented to the null. So that when the button clicks starts clicking, it will also animate at the same time. So let's go ahead and test this animation. Perfect, so now we have our mail icon, and our lock icon animated. In the next lesson, we're going to go ahead and animate our final icon, which is the shock icon, see you there.


