
 Lessons: 9Length: 50 minutes
- Overview
- Transcript
3.4 Animate the Shop Icon
Lastly, in this lesson you will learn how to animate the shop icon in Adobe After Effects. The process will be very similar to the previous two icons, so we’ll be building on skills you’ve already practiced.
1.Introduction
1.1Welcome00:31
2.Icon Design
2.1Illustrator Setup06:55
2.2Designing the Icons10:42
3.Animate the Buttons
3.1Importing Into After Effects03:50
3.2Animate the Mail Icon11:50
3.3Animate the Lock Icon05:31
3.4Animate the Shop Icon04:31
3.5Exporting the Buttons04:34
4.Conclusion
4.1Conclusion01:11
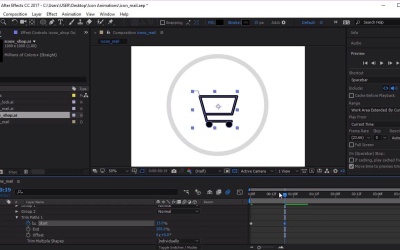
3.4 Animate the Shop Icon
Hi everyone and welcome back to the animated icon course. Now we've completed two out of our three icons. Let's go ahead and finish the shop icon. So selecting the lock icon here and clicking on the visibility icon. Let's go ahead and click on the shop icon dragging it into our composition. From here, lets go and right click, select create shapes from vector layer. Again delete the original Illustrator file. Just opening up this icon here. Add, let's see, trim parts. And again, you can see that this item is made up of three different groups. Which is the line here and the two wheels here. So opening up trim parts, lets see how this animates. So you can see again, it's animating simultaneously, but what we want, is we want it to animate individually. So let's test this out, so you can see here that it animates the line first and then the two wheels. Now what I want is I want it to animate the wheels first. So, lets go ahead and find out which group is the line, which is group three. We want to move this to the beginning of our queue. So now when we test the animation, it will animate the wheels first, and then the line of the basket, perfect. So let's go ahead and animate this icon. Moving to the first frame, let's click on key frame here. And at about 19 frames again, let's Create an animation. Whoops, in fact, for the first frame, we want the animation to start at 100%, so that it appears from nothing. Now, let's go ahead to 19 frames, and we want the animation to stop just before the handle starts animating. So at about here, and let's see, that's about here. And now let's go to about 1.3 seconds and let's finish off the animation, like so, perfect. Now let's highlight all of these key frames. Right click, go to Key frame assistant and Easy ease. Now let's go to Transform. We wanted to create the circular animation, the rotation. So let's go to the first frame. Click on the key frame for rotation. And let's go to 19 frames, I think it was, just before the handle gets animated. And we want the rotation to stop at about there, so 360 degrees. Again, highlighting these key frames, right click, Key Frame Assistant, and click Easy Ease or F9 in the keyboard. And you can see the animation starts here, finishes there, and then the handle animates, excellent. Now, let's close these down and we want to enable Outward motion blur. And we also want to parent this to the null. So now when we test this animation, you can see that it animates as the button is pressed as well, perfect. So we can also test out all the rest of our animations. So this is what our trolley looks like. Let's go ahead and select our lock. We can test our lock icon and we can also go ahead and test our first icon which was the mail icon. Pressing the play button, excellent. So now that we've finished our animations for all of our icons, the next step will be to export our animations using Adobe Media Encoder. See you all there.


