
 Lessons: 9Length: 50 minutes
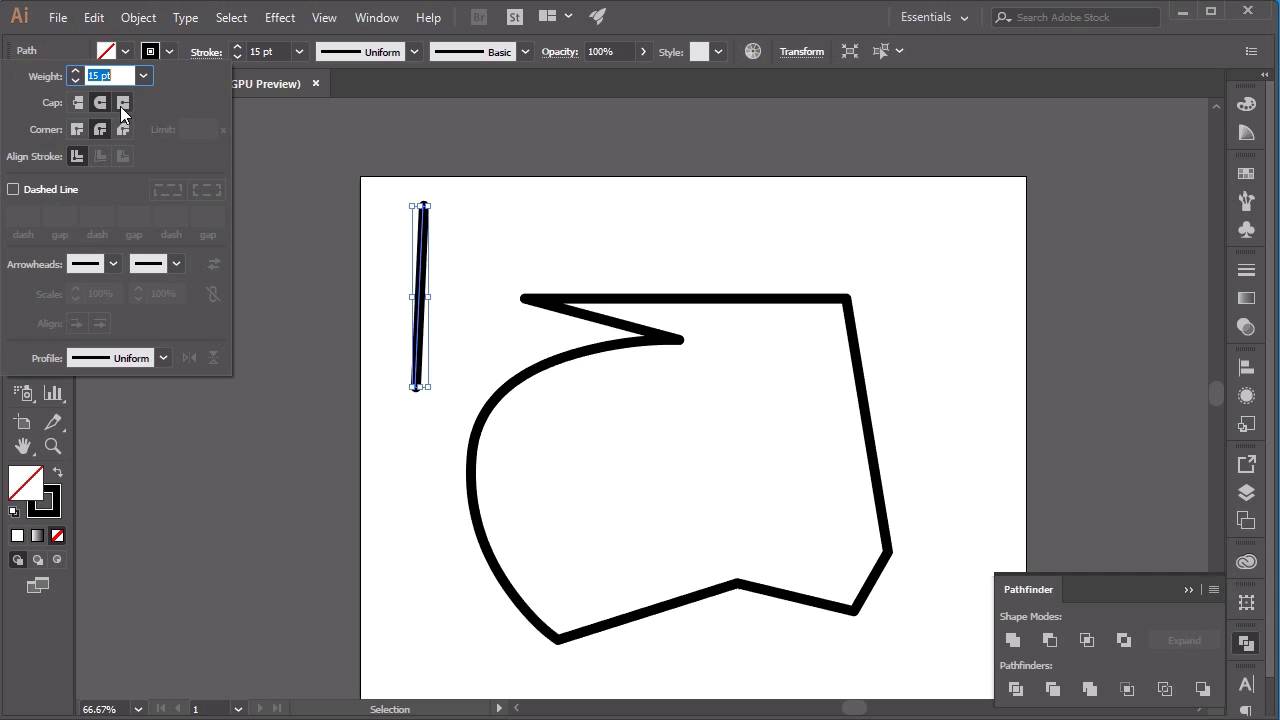
- Overview
- Transcript
2.1 Illustrator Setup
In this lesson we will go through my setup and a brief explanation of the tools you will need to complete the course. The tools we will be using include Adobe Illustrator’s Pen Tool, Add Anchor Point Tool, and Align Tool.
1.Introduction
1.1Welcome00:31
2.Icon Design
2.1Illustrator Setup06:55
2.2Designing the Icons10:42
3.Animate the Buttons
3.1Importing Into After Effects03:50
3.2Animate the Mail Icon11:50
3.3Animate the Lock Icon05:31
3.4Animate the Shop Icon04:31
3.5Exporting the Buttons04:34
4.Conclusion
4.1Conclusion01:11
2.1 Illustrator Setup
Hi, everyone, and welcome back to the animated icon course. In this lesson, we'll be starting off in Adobe Illustrator, which is where we'll be creating our three icons. So let's begin by creating a new document by going into File > New. And for this particular icon, I'm going to create a square document, which is 1,000 pixels by 1,000 pixels. But you can easily change the size of the document here. So I'm just going to click Create. And if I just zoom out a little bit, you can see a square canvas that we'll be working in. So before we start designing our icons, you want to check that the Fill is set to None. So at the moment, the Fill is set to white here. But if we go up here and click on the dropdown menu, we can select None. So that'll mean that any shape that we create, it will be transparent. And we can also change the color of our stroke here. So you can choose whatever color you want, but I'm just going to stick to black, as that's the easiest color to work with when I'm creating some icons. So the next tool that we're going to go through is the Pen Tool which is over here. So you can either click on the Pen Tool on the side menu or press P on the keyboard. And the way that you use this tool is just simply clicking and moving your mouse along and clicking again. And you can see here that it's created a small line, which you can increase in size if you go over to Stroke, and you can pick what size stroke we want the line to be. So by clicking on the up arrow here, I can increase the weight. And for this icon, I think about 15 points is okay. And by clicking on the Pen Tool again, we can continue our shape by clicking on the anchor point. So let me just show you the anchor point here. So you can see that this is an anchor point here, let's delete that. But if I click on our stroke and zoom in here, you can see the little square anchor that we can click on, that will help us continue our shape. Another cool trick that we can use with the Pen Tool is by clicking, holding the mouse button down, and dragging it along, which will create a curve for our line. And then we can finish the shape by clicking on the end anchor point like so. One other cool trick that we can use for the Pen Tool and for the strokes is to click on the actual Stroke text here, which will give us a new menu. And you can see that the edges here, or the corners here, are very, very sharp. So to remove those edges, we can just go to Corner and click Round Join, which will make those corners smooth. And you can also do the same with Cap. So when we create a line here, if we've got a capped line, you can see the caps are very smooth. But if we created a Stroke which was with a Projecting Cap, you can see that the line, again, becomes very, very cornered and very sharp. Okay, so that is the Pen Tool. The next tool that we'll be going through is the Add Anchor Point Tool, which is actually part of the Pen Tool here. So if you click on the corner of the down arrow corner here, click and hold with your mouse button, you'll bring up a new menu where you can select the Anchor Point Tool here. And on your line, you can use this tool to click anywhere on the line to make new anchor points. So if I zoom in here, you can see that by clicking on this line, I can create a new anchor point. And then by using the Direct Selection Tool here, you can click on an anchor point and just sort of manipulate it in any way that you want, like so. Another sort of technique that we'll be using in this course will be deleting anchor points. So if you click on this anchor point here, you can click Delete, remove that anchor point, and then use the Pen Tool again to join it back up. Cool, so the next tool that we'll be using is the Shapes Tool. So let's go ahead and remove these lines here and go over to the Shapes Tool here. So you can see that this is a Rectangle Tool, so you can press M on the keyboard as a shortcut to do that, and just create lots of rectangles by clicking and dragging on the canvas. If you wanted to create a perfect square, however, just click and hold the Shift key on the keyboard and then drag using your mouse to create a perfect square. The other shapes that are available, if you click and hold on this tool here, you can see you've got a Rounded Rectangle Tool, an Ellipse Tool, a Polygon Tool, and a Star Tool. So I'm just going to select the Star Tool here. And if you click and drag to create the star, you can see you can create a star. Or if you wanted to create a star with more points, all you have to do is click up on the keyboard to create more points in the star. If you wanted to create less points, just click down on the keyboard and you can go all the way down to create a triangle. The next thing I wanna show you, that we'll be using in this course for creating our icons, is the Alignment Tool. So you can find them on this side of your screen here, so this is the Align Tool. So if you wanted to create a star, so create a star here, and we wanted to place it in the middle of our art board, all you have to do is select your star and select the Horizontal Alignment and the Vertical Alignment. And that will make it so that it's right in the center of our canvas. So that's it for this lesson. In the next lesson, we'll be going through how to create our icons using the tools that we've just described in this lesson. See you all there.


