- Overview
- Transcript
2.3 Customizing After Effects Title Templates
In this lesson we will continue to go through how to customize and use After Effects title templates. We'll start with the liquid animation After Effects template we downloaded from Envato Elements in the previous lesson, and use it to make some cool titles in After Effects.
Useful Resources
- Liquid Animation Titles available for download on Envato Elements
1.Introduction1 lesson, 00:56
1.1Welcome to the Course00:56
2.After Effects Title Animation Tools3 lessons, 28:52
2.1Adobe After Effects Setup07:56
2.2Downloading After Effects Title Templates14:43
2.3Customizing After Effects Title Templates06:13
3.Liquid Swirl Animations3 lessons, 23:57
3.1How to Use Splines06:03
3.2How to Use Particle Effects07:56
3.3How to Add Color09:58
4.Liquid Splash Animations3 lessons, 33:17
4.1How to Create a Ripple Effect11:17
4.2How to Create an Impact Splash07:44
4.3Completing the Impact Splash14:16
5.Final Touches3 lessons, 20:51
5.1How to Add and Animate Text in After Effects09:47
5.2How to Add Your Footage05:00
5.3How to Render Your Video06:04
6.Conclusion1 lesson, 00:48
6.1Thanks for Watching00:48
2.3 Customizing After Effects Title Templates
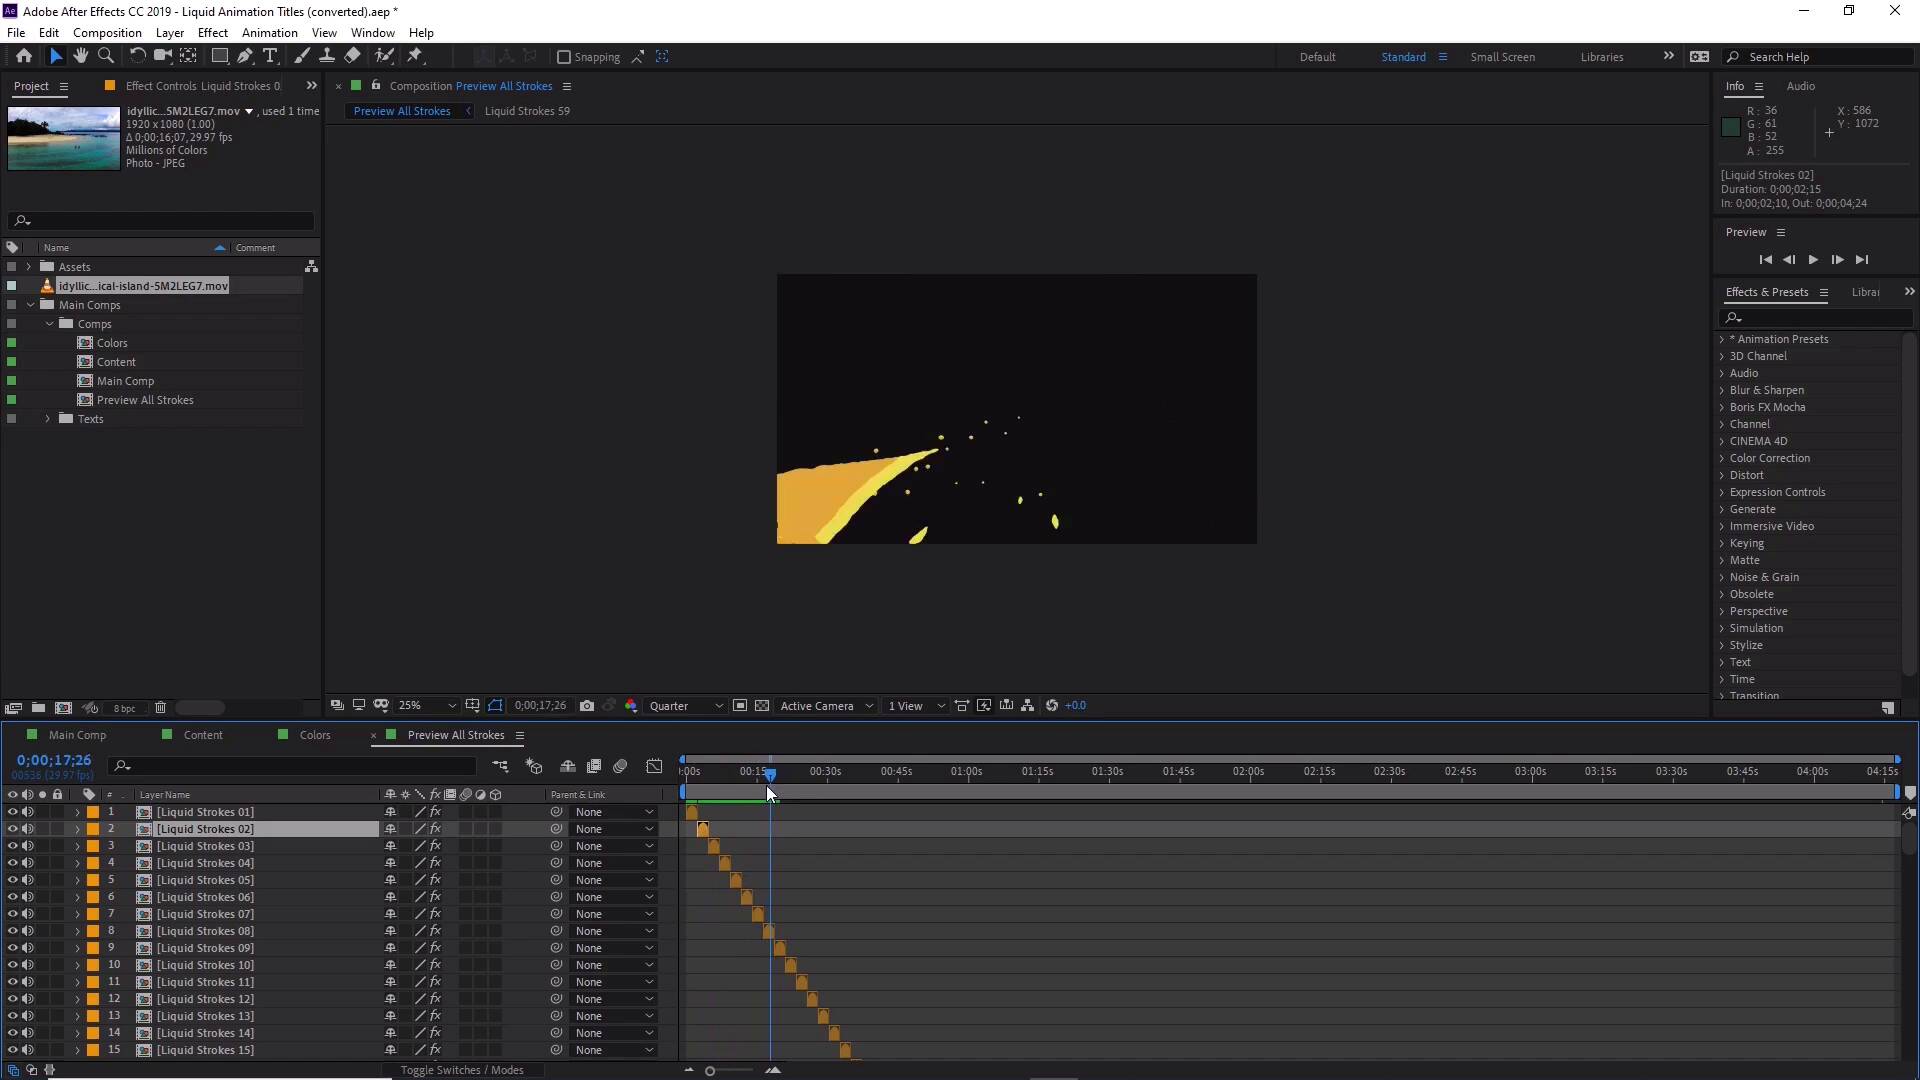
Hey everyone, and welcome back to the liquid animation course. Cool, now that we know how to change the colors of the strokes, let's go ahead and add our footage to the project here. So you can do this by going to File > Imports, and click on File again. Select the video file here, and click Import. And then once it's been imported, it will appear in the project panel, like so. Now all we have to do is click and drag, and drop the file into our content composition, like so. And we want to move this to the bottom layers. So let's go ahead and click and drag this, and move this all the way down to the bottom of our layers. Just so that any other liquid strokes that we wanted to use in our animation will appear on top of our chosen footage. So let's go ahead and move this here, like so. And you'll see that our footage has also appeared in our composition preview at the top here. Awesome, now all we need to do from here is move the animation strokes around the appropriate place in our timeline. Just so that we can see our liquid animations on top of the composition. So let's go ahead and include the liquid strokes here, like so. So I've chosen liquid strokes for 17 and also number 5. Cool, and now, if we go ahead and scrub backwards and forwards in our timeline, you'll see now we've got our liquid strokes playing on top of our chosen footage. Awesome, now, if we wanted to add more liquid strokes, like say stroke number 17. Let's go ahead and add stroke number 17 here, just moving it along the timeline, like so. We can now go ahead and click on the Preview button here. And you can see all the liquid strokes playing as our footage is playing. Awesome. Cool, now, if you ever wanted to grab more strokes, we can also use the preview or strokes contents composition panel here. And we can preview each of these strokes individually. So if you liked the look of number one, that's the first one playing. Then number two is a second one playing, and they're all sort of organized in a nice way where you can preview them one at a time. So this could be useful if you're looking for a particular animation. So I quite liked the look of this yellow one here. So let's go ahead and grab this liquid stroke 8. So we can go ahead and highlight that one. Press Ctrl+C on the keyboard. Go back to the content panel here. And we can go ahead and press Ctrl+V to paste liquid stroke 8. Let's go ahead and find liquid stroke 8 on our timeline, and let's drag this at around the four second mark. And now you'll see, as we go ahead and play at the four second mark, our yellow liquid stroke is playing, the one that we chose in the preview all strokes. Cool, so now that's just a quick way to find some strokes that you can use for your animation or your footage. Now just a quick note on the text layers that we've hidden, let's go ahead and unhide the text number nine here and bring this forward in our timeline, so we can see it. Now if you wanted to use these text layers, just find the one that you like, like this one. And let's go ahead and double click to open them. Now, all you have to do is to change the text is use the text tool at the top here, and click on it, and then just simply change the text, like so. Excellent, now, they each come with their own unique animation. So if you want to use them, just find the one that you like, and then see how it's animated, like so. Cool, now let's go ahead and head back into our content. Our content composition, and you'll see how the text has been changed. Awesome, now, this is exactly the same process for the liquid effects pack as well. So if you're looking for a massive variety of liquid animations including strokes, splashes, and transitions, I really recommend downloading both of these packs as they complement each other perfectly. Not only will you have an absolutely massive library of liquid animations to use, but you'll also have access to all the core text animations as well. So there you have it, how to use the liquid animation templates from Envato Elements. Now that you're familiar with the animations, why not create custom animations of your own? This has the advantage of creating exactly the type of animation that you want with having the full control over the path, size, speed, and shape of the liquid animation. In the rest of the course we'll explore how to do this and more. Starting with how to use splines to determine the path of our animation. See you all there.