- Overview
- Transcript
2.2 Downloading After Effects Title Templates
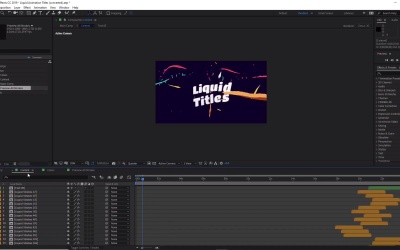
In this lesson we will go through how to download, set up and use the liquid animation After Effects title templates available from Envato Elements.
This will act as an introduction to the liquid animation effect which (should you choose to) you can then learn how to create from scratch in later lessons.
Useful Resources
- Liquid Animation Titles available for download on Envato Elements
1.Introduction1 lesson, 00:56
1.1Welcome to the Course00:56
2.After Effects Title Animation Tools3 lessons, 28:52
2.1Adobe After Effects Setup07:56
2.2Downloading After Effects Title Templates14:43
2.3Customizing After Effects Title Templates06:13
3.Liquid Swirl Animations3 lessons, 23:57
3.1How to Use Splines06:03
3.2How to Use Particle Effects07:56
3.3How to Add Color09:58
4.Liquid Splash Animations3 lessons, 33:17
4.1How to Create a Ripple Effect11:17
4.2How to Create an Impact Splash07:44
4.3Completing the Impact Splash14:16
5.Final Touches3 lessons, 20:51
5.1How to Add and Animate Text in After Effects09:47
5.2How to Add Your Footage05:00
5.3How to Render Your Video06:04
6.Conclusion1 lesson, 00:48
6.1Thanks for Watching00:48
2.2 Downloading After Effects Title Templates
Hi everyone, and welcome back to the liquid animation course. In this lesson we'll go through how to download, setup and use the liquid animation templates available in Envato Elements. So these templates that you see here are very quick and a very easy way to add these popular animations to your videos. So to get them first you need to sign up to invite elements and create an account. So let's go ahead and go to the front page of the website by typing elements.envato.com. So you can see here elements.envato.com. And upon entering the websites, you'll be greeted with some examples of digital assets that we can use an access and to choose from. So we've got graphics, video, audio, presentation templates, and all sorts of other all sorts of other assets that you can use for your projects. So you can see the full list at the top menu here. So if you go to browse, you can see all the options here that we can browse from. Or if you have anything specific that you want to look at, you can always type it in the search box here. So signing up is a fairly straight forward process which can stat by clicking on the top right of the website here. So if you already have an account click on the sign in button on the top right here or if you don't click on the create a free account button here, and this will take you to the signup page where all you have to do is fill in the form and create an account. Excellent. So let's go back to the front page of Envato elements. And then what we want to do from here is we want to click on the drop down menu next to the search bar here. And then we want to select video templates. So let's go ahead and select video templates so we can search just within the video templates, options. And then in the search bar we want to type in liquid animation and then hit the search button. Now you should be able to see and find two templates that I'm looking for in the results screen here. So the ones that we're looking for is liquid titles, which is the first result. And also we can also download liquid FX animation pack, which is also another similar, template with more animations that we can use. So to use these and download these, all we have to do from here is click on the download button on the bottom right of the thumbnail. Or, if we want to go ahead and view more details of these templates, just click on the the icon there. We can actually go ahead and play what the template looks like so we can have a preview of what it looks like here. Cool. So once you've downloaded them, we can head back into After Effects where we can begin to work on them. So when you have downloaded the template, you'll be presented with four different folders. So we've got Assets, Help Files, Text Preset, and Work Files. So as we're mainly interested in the liquid animations and how to use them, we want to head into the after effects file, which is located in the Work Files folder. So you can see here, we've got the Liquid Animations Titles After Effects files here. Another folder that may interest you is the assets folder. So if you go back and head into the assets folder, you'll find it all the different inks splash animations as video files, which may be useful to more advanced users of the course. So quick note before we begin, you must have QuickTime installed in order for these templates to work correctly. Without QuickTime you make it something like a converting ratio the nominations era which will prevent you from using the template properly. So now with that out of the way, let's go ahead and look at what's inside the Liquid Animations Title Templates. So going into Adobe After Effects, let's go ahead and open up the file. So go to File, Open Project, and open up the Liquid Animation Titles file like so. And you'll get a window pop-up here to make sure that you've got the right version of After Effects. So if you've got the latest version of After Effects you should be fine. So just click OK. And then, once the project has loaded, you'll be greeted with the main comp. Now this is where we will render our final video footage. So you can see here in our timeline we've got the main animation composition here which is the animation. And if we look at the layers here it consists of four layers. Now the first three layers are adjustment layers here, so we've got the turbulent overlay, the content and the texture. And then the fourth layer here is the most interesting one, as this the layer which is our composition and contains all the content of the project. So let's go ahead and double click the contents layer to open it up. And you'll see here, we've got all the different liquid strokes that is available inside this composition. Now another way to view what’s inside the content’s composition is by clicking on the Contents tab, which is over here. Now this is usually only appears once it’s been opened using the Project panel at the top here. Which is where you'll find the most important comps main comp contents and colors and previous strokes. So like here, if you click on Main compare, you can open up the comp. And you can see here we've got the colors content, main comp and preview or strokes comps. Which is exactly the same as what you see in the tabs here so you've got main comp which is this one, the content which is this one. Colors which is that one and preview or strokes. So they're all the same. So if you ever accidentally close one of these tabs, so let's close all these tabs here, you can always double click on these comps here to open them up again. So let's go ahead and open all of these like so Excellent. Now once we’re inside here, you’ll see, let’s go back to the Content tab and move it along here so we can make it back to what it was before. And we can go ahead and scroll down the list of layers. That is absolutely all of the liquid animations available for you to use straight away. So let's go ahead and hide the text layers here. So if we order these by name. Hopefully we can. Let's go ahead and find all the text layers here. So we're not going to use the text layers for now. So we can click on the I icon here to hide all the text as we're not going to be using them. Just go through the whole composition. Now you can see as we scroll down this composition, the absolute number of strokes that is available for you to use. Now, I understand that seeing all of these layers can be a little bit overwhelming to some people, especially when there's over 100 strokes included in the template. So what I would recommend in this case is to simply delete most of the layers here except maybe the few that you like the look of. Now you can ensure that we select the right stroke animation by clicking on the I icon. So let's say we're interested in stroke number 17, so let's move to the very beginning of our timeline so that we can see exactly what we're doing, and we move the animation to the beginning of our timeline here like so. Now if we move our animation here, suddenly we're greeted by all these strokes which may make it a little bit difficult to find which stroke Is the one we've selected. So if you go ahead and click on the I icon here. Hopefully, you can see which stroke is the one that we've selected so you can see here. Let's go ahead and zoom in to composition. Now, if we hide this stroke number 17, the one that disappears, is that pink stroke in the middle here. So that's the one that we've selected. So now we know that we've selected this pink one as we move them up and down the time here you can see that's the one that's been animating. Cool, so now if we just focus on stroke number 17 for now, so let's go ahead and hide the rest of the strokes here like so. So lets go ahead, scroll down and hide all of these like so. Just so that we can make it a little bit easier to focus on what we've selected. Cool. Now, if you want we can also select a few more strokes. So let's go ahead and select liquid and then 15. Move this along here, and let's show that. So that's this nice looking red colored one. And let's go ahead and use stroke number 25 as well. So number 25 doesn't appear untill two second mark. So you'll see that it's the white stroke here. This one here, like so, cool. Now we can focus on just these few liquid stroke animations and how to change their color. Now there are two ways to change the color of liquid stroke. The first is to select one of these strokes, so let's go ahead and select number 25. So I'm just going to hide the number 17 and 15 from there just so you can concentrate on this one. Let's find a nice And I stroke so we can see. So we can see the bulk of the stroke st the bottom. So now that we’ve selected this one, we want go over and click on the Effects and Controls panel which is usually located here. Now if it’s not like it is in my example, all we have to do is go to window, and we want to scroll down until we see effects and controls at the bottom here. So let's click on that. And now you'll see we've got the effects controls at the top here, like so. Now, this is where we can change and edit the color of the selected stroke. So we've got the matte black and matte white colors. So we can have the shallow color and the main color. So let's go ahead and click on the color box here. So matte black is the shallow color. And we can change the shallow color like so. So you can see as I change the color it automatically changes on our strokes. If I wanted to make it a red color, I could do so like so. The matte white is the highlight. So I want to make the color the highlight little bit lighter, and that black is the main color of the stroke. Cool so now if we go ahead and play our stroke, you'll see now that it has changed into this red color instead of the white color that we had before, awesome. Now the second and easier way to change the colors of the stroke is by making use of the colors composition, which can be found in this tab here. Now once you open it up, you'll see that we have this whole rainbow of carefully selected colors to choose from ready to be applied to the stroke. So simply click on the number of the color that you'd like to use. So you can see they've been numbered 1 to 18. So if I wanted to change our stroke to a nice purple stroke, let's go ahead and click on number 10. And you'll see, you'll notice on the Effects and Control panel that has changed to the colors which we see in our composition here. Now, all we have to do here is click on the tint so let's go ahead and click on tint here. And we can go ahead and, let's click on this and press control C on our keyboard to copy it. And now if we go back to our content composition, and let's say we wanted to change color of this stroke against this, move the stroke here like so. So we can see the stroke again. We can select the tenth of this liquid stroke and then press Ctrl V to past the colors. Excellent, and now we've got a new color for our stroke which is the purple one that we've selected. Cool, so that's it for this video. In the next video, we'll learn how to add footage. See you all there.