
 Lessons: 9Length: 42 minutes
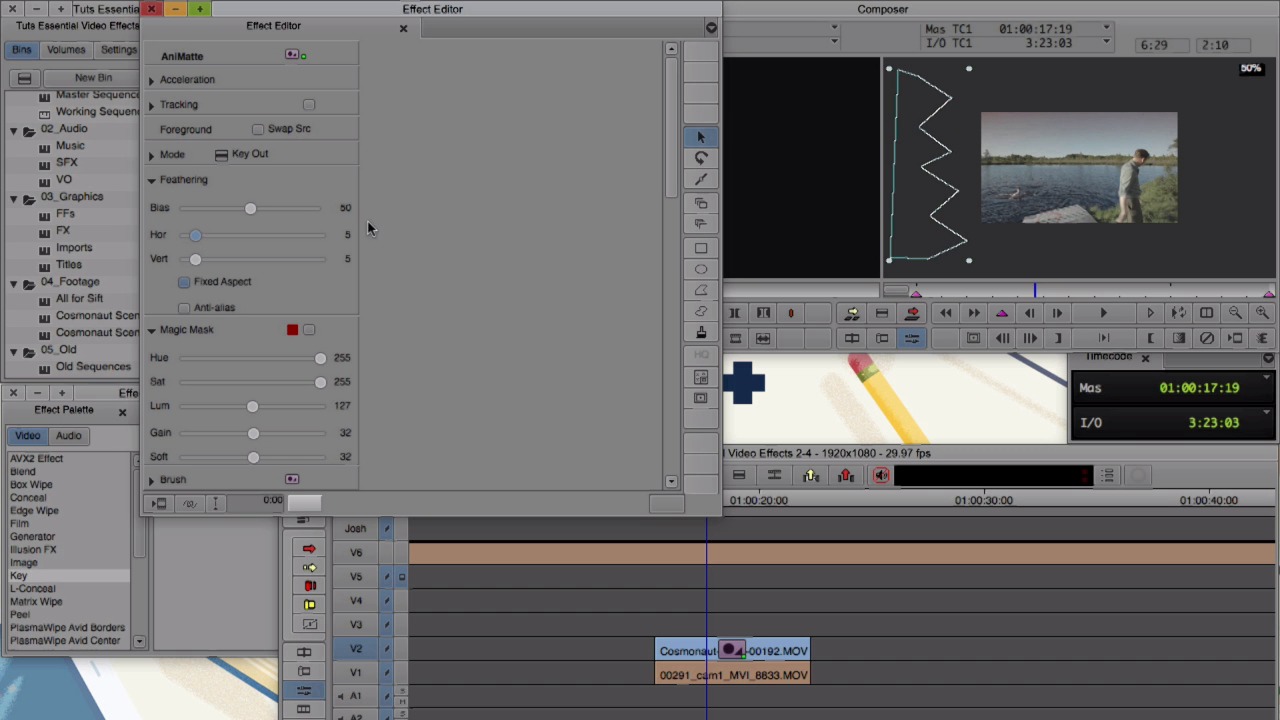
- Overview
- Transcript
2.4 Animatte
In this lesson you'll learn how to key in or key out parts of clips using the Animatte effect.
1.Introduction
1.1Introduction00:32
1.2What You Need02:05
2.Essential Video Effects
2.1Get Familiar With Effects05:59
2.23D Warp and Keyframing11:19
2.3Paint Effect05:57
2.4Animatte04:13
2.5Transitions06:03
2.6Timewarp05:05
3.Conclusion
3.1Conclusion00:55
2.4 Animatte
Our next effect is the Animatte. And the Animatte, I'd like to compare it to masking in After Effects. You can use it to cut out the parts you want to see or don't wanna see in the Effect Palette, find the Key folder. And in there you'll find AnManc and let's take that and drop it onto a clip. And I have two clips here I have this one on V2 and I have one underneath on V1. Animate in the effect editor looks very similar to the paint effect. And we want to focus on the mode again, which is we have two different options we have key in and key out and we have all the same tools over here again. So if we draw a rectangle and the mode is set to key in, it'll get rid of everything else outside of the box. And this is just the portion left keyed in. And if we change the mode to keyed out it does the opposite. So this rectangle is the portion that is keyed out. And this is the original video left over. And just like the pain effect what we did with blur in the other modes. We can add a feathering to it. What I like about animate is that you can create your own custom transitions with it. So I'm going to show you how to do that. I'm going to close the Effect Editor. And just going to remove this effect just to reset it and reapply it so we can start fresh. So let's zoom out a bit so we can see. And I'm gonna use this poly tool to make the shape here. And we want to change it to key out. And let's give it a slight feather and you'll see this in a moment. So we want to select this icon here. And what this does it allows us to reshape our shape that we made. And if you remember key framing from before. We just want to affect the last key frame. So I'm going to select that and we're not going to affect it from the beginning. And this will make the transition for us. So now, we can take the boxes and create my own shape on this side. And when we close out of the effect editor. Let's give it a quick render and let's take a look. And if we like that effect we can save it for later on. I've been in all of my projects called F x, which is short for Effects. And when i go into effect mood there's always an icon here. And we can take that icon and drag and drop it into a bin. And that saves what we created with that So if I was to remove this effect from this clip and add the AniMatte effect back on. It's there, and if we want we can add it to some other clips too. And I'm describing some footage and throwing it in here. I recommend diving into Animat. Create a couple of transitions that you like. They don't have to be a wipe like this. I mean you can get creative do anything that you want. Save it to a bin and you always have this effect already preset ready to go and able to use in your project. In the next lesson we'll cover some other transitions.


