
 Lessons: 9Length: 42 minutes
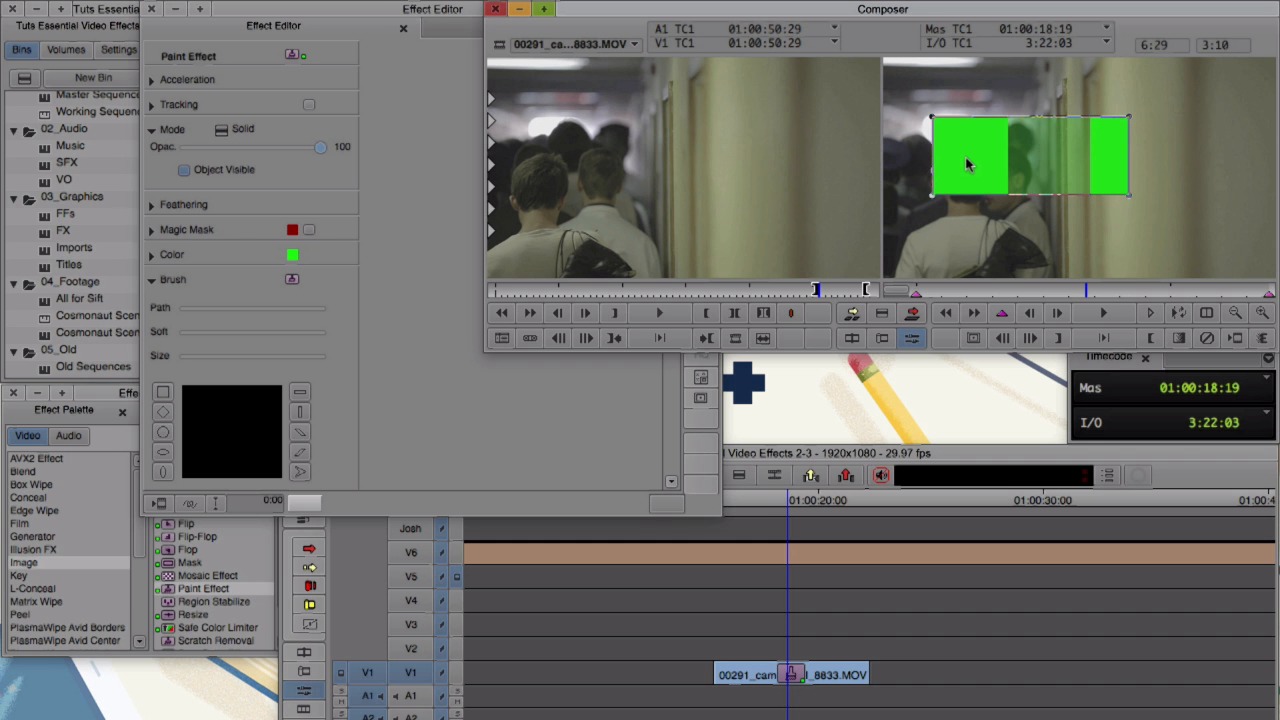
- Overview
- Transcript
2.3 Paint Effect
In this lesson we'll explore the possibilities of the Paint Effect. You'll learn how to perform a Clone, how to blur, and how to draw shapes.
1.Introduction
1.1Introduction00:32
1.2What You Need02:05
2.Essential Video Effects
2.1Get Familiar With Effects05:59
2.23D Warp and Keyframing11:19
2.3Paint Effect05:57
2.4Animatte04:13
2.5Transitions06:03
2.6Timewarp05:05
3.Conclusion
3.1Conclusion00:55
2.3 Paint Effect
The paint effect is way more than the name of it makes it sound. To start off, let's find the paint effect and apply it to a clip. Under the image folder, find paint effect, and take it and drop it onto a clip. When we go to the effect editor, this effect looks a bit different than 3D warp. There are three places we're going to focus on the most with this effect. And that is mode, feathering, and these tools over on the right side. For the paint effect to do anything, we need to draw something first. We use these tools on the right to do that. So we have a couple different tools to draw with. We have the rectangle tool, the oval tool, the polygon tool, and the curve tool. And if we select the rectangle tool, it will draw us a rectangle. The oval will draw a circle. The polygon tool, what we do for it is we click, and then click again, click again, click again, to draw the shape that we want. And then we go back to the beginning, and that'll close it. And the last one is the curve tool. So what we do with this, click and hold and then draw. And then go back to the beginning and let go. What we did was draw a solid, what we draw is determined by the mode. So over here, under mode, that's a solid. So we have the shape that we drew with the curved tool selected, and we can choose a different mode for it if we want. I'm just gonna erase these guys, so I just select it and hit Delete or Backspace. All right, actually, I wanna draw one more shape. And just so you know, you can change the color by double clicking this box over here and giving it a new color. Okay, I'm gonna select the rectangle tool one more time to draw another shape, but first, I wanna change its mode. I'm gonna change that to erase. And now, when I draw my rectangle, it erases the shape underneath of it. And if we want, we can change the opacity. And later on, I'll show you how we can key frame and move something over time. With the paint effect, the stacking order for some of these plays an important role. So to change the stacking order, we have these two icons here. The top one will move the shape forward. It'll bring it all the way to the front. And the other one will bring it all the way to the back. So we have a solid and an array shape. The array shape is sitting on top of the solid. If we were to send it to the back, the array shape isn't going to do anything because the array shape only affects what is below it. So if we move it to the front, now it'll affect the solid underneath of it. Let's get rid of these guys. This time, I wanna show you clone. So the clone tool works similar to how the stamp clone tool works in Photoshop. Let's zoom out just a bit by clicking this magnifying glass. And I'm gonna select this area here. And if I slide it over, it takes that portion and copies it over top here. And what we can do, we can feather this, so it blends in together. And if I toggle this on and off, you can see the difference. So this is off, this is on. Let's erase this and zoom back in, and I'm gonna show you one last mode in the paint effect, and that is blur. So let's go here, and go all the way down to blur. And let's just select this guy's face. And we can change the blur amount, make it more blurry, make it less blurry on both the horizontal. So let's say horizontal is all the way up. Or vertical's all the way up. We can also key frame in the paint effect. And we don't have our graph over here, so the key frame's a little different. So we're going to depend on this key frame icon and the two key frames that are already on the effect. I just want to change the first key frame. So I'm going to select it, and we see the other one is deselected. And let's just set a position for it. Let's go over here and see it a little better. And we can see that the other key frame still had the original point. And we can just select that and change it. And just move it around. And we can see that changes over time. And if we want to, let's add another key frame by clicking this icon, and drag it over here. In the next lesson, we'll take this key framing approach a step further and we'll use the animate effect to create our own custom transition.


