
 Lessons: 9Length: 42 minutes
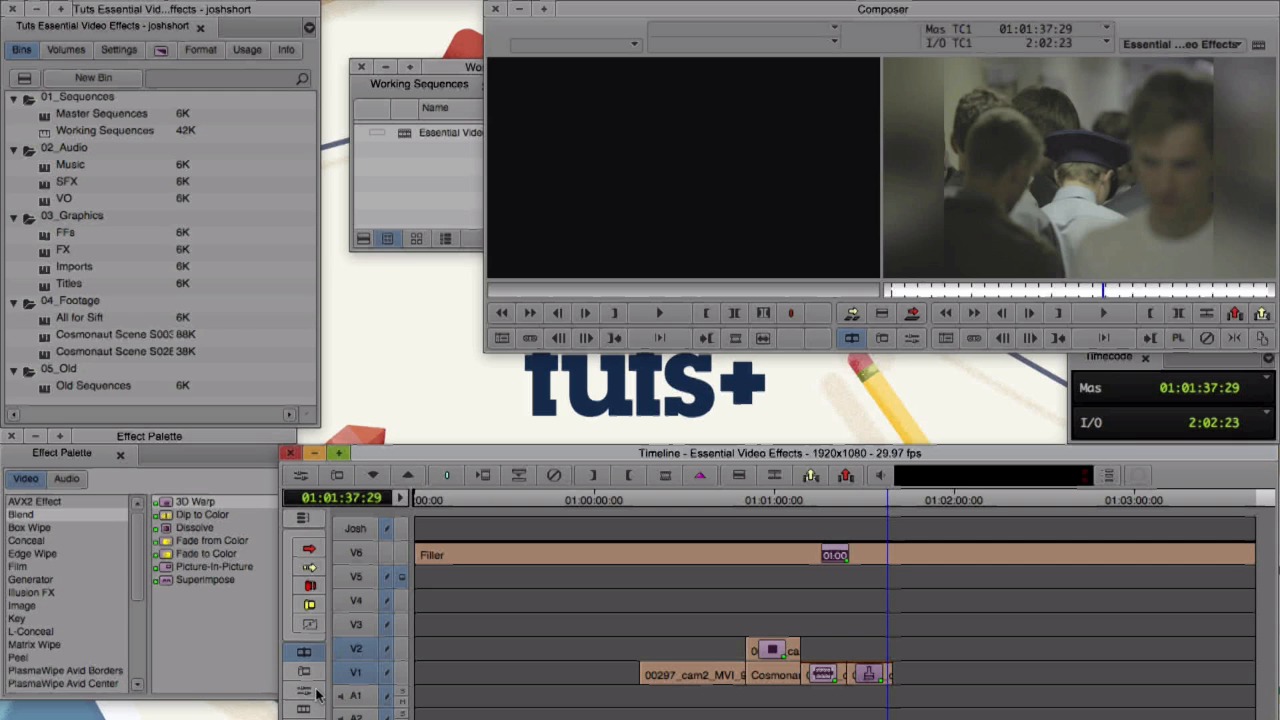
- Overview
- Transcript
2.1 Get Familiar With Effects
In this lesson you'll learn how effects work, how to find the Effect Palette, what Effect Mode is, how to apply effects to clips, and how to save effects to Bins.
1.Introduction
1.1Introduction00:32
1.2What You Need02:05
2.Essential Video Effects
2.1Get Familiar With Effects05:59
2.23D Warp and Keyframing11:19
2.3Paint Effect05:57
2.4Animatte04:13
2.5Transitions06:03
2.6Timewarp05:05
3.Conclusion
3.1Conclusion00:55
2.1 Get Familiar With Effects
This lesson will be the foundation of video effects. In it, I'll describe how they work, where to find them, what Effect Mode is, and more. An effect will give you a set of options to change an existing clip or blank space. For example, the 3D Warp effect will let you change the scale and position of the clip. While the Blur effect blurs a portion of the clip. Some of these options end up overlapping between effects. For example, you can also perform a blur with the Paint effect. I recommend early on on finding the handful of effects that work best for you and sticking with them. The ones that'll be covered in this course will be a strong backbone for all your video effect needs. You can find effects in the Effect Palette. The Effect Palette is located in two places. First, over in the project window there's this purple rectangle. If you click it, the project window now shows the Effect Palette. I tend to like to keep the project window on the Bins tab and access the Effect Palette another way. Go up to the menu bar and find Tools and select Effect Palette. You can also open up the Effect Palette by hitting Cmd+8 if you are on a Mac like me or Ctrl+8 if you are on a PC. Let's find a place to put our Effect Palette on the screen. When I'm on a larger display, instead of a laptop which I'm on right now, I leave the Effect Palette up all the time since I'm always jumping in there to grab an effect. And since we don't have a ton of screen real estate on a laptop, I tend to only bring up the Effect Palette when it's needed. But for this lesson I'm just gonna throw it over here in the corner so we can see it. Media Composer uses different modes. Modes change what you can and can't do in your sequence. For the most part when you're editing, you live in Source-Record Mode. That's what we're in right now. There's also Trim Mode and Color Correction Mode. And we also have Effect Mode. And in this course, we're gonna be switching between Source-Record and Effect Mode for the most part. You can find all of your modes over here on the left side of your Timeline. This top one is Source-Record Mode. The next one is Trim Mode. And the one below that is Effect Mode. And, pretty obvious, Effect Mode allows you to use effects. When we first enter Effect Mode, the Effect Editor should pop up. When the Effect Editor opens up, it shows the effect that's in the top activated track at the time position indicator, the blue bar. If there is no effect, then the Effect Editor is blank. If there is an effect, then all the parameters for the effect show up in the Effect Editor. I already have some clips in the Timeline with a couple effects added to some of them. So right now we're seeing the 3D Warp effect on this clip. And for this clip I have already adjusted the Scaling and the Position. So it is scaled down to 54, so that's why it's small. And on the x axis, it's moved over 170. And on the y, moved up 140. That's right here. All the parameters for 3D Warp are in our Effect Editor. And we can go ahead and change them and do a whole bunch of stuff with the Effect Editor open. In Effect Mode with the Effect Editor open, if I want to see a different effect on another clip, all I do is go over and click on that clip and the Effect Editor will change to the effect that's on that clip. So in this clip we have the Blur effect. And on this clip we have the Paint effect which I'm using to blur. And just so you know, throughout this course if I don't go up and click this X, I'm hitting Cmd+W on my Mac that closes the window. And if I'm not going over here and clicking on the Effect Mode icon, I have the Effect Mode hot-keyed on my computer, and I'm hitting that key. Which is F7, if you're interested. The last part of this lesson, I'm going to show you how to apply effects on the clips. So let's just close out of the Effect Editor. In our Effect Palette we have all these different, let's call them folders. And in each folder there's a whole bunch of different effects. Let's go up to Blend, and in Blend we can find 3D Warp. And to apply it to a clip all we do, click and holding down, drag it onto the clip that we want to place the effect on and then let go. All right, let's jump into Effect Mode, and we can see that the 3D Warp has been applied and we haven't changed anything to it yet. In the next lesson, we'll cover the 3D Warp and I'll show you why it's my favorite effect in Media Composer. And also, how to use key frames to use 3D Warp and effects to their fullest potential.


