
 Lessons: 9Length: 42 minutes
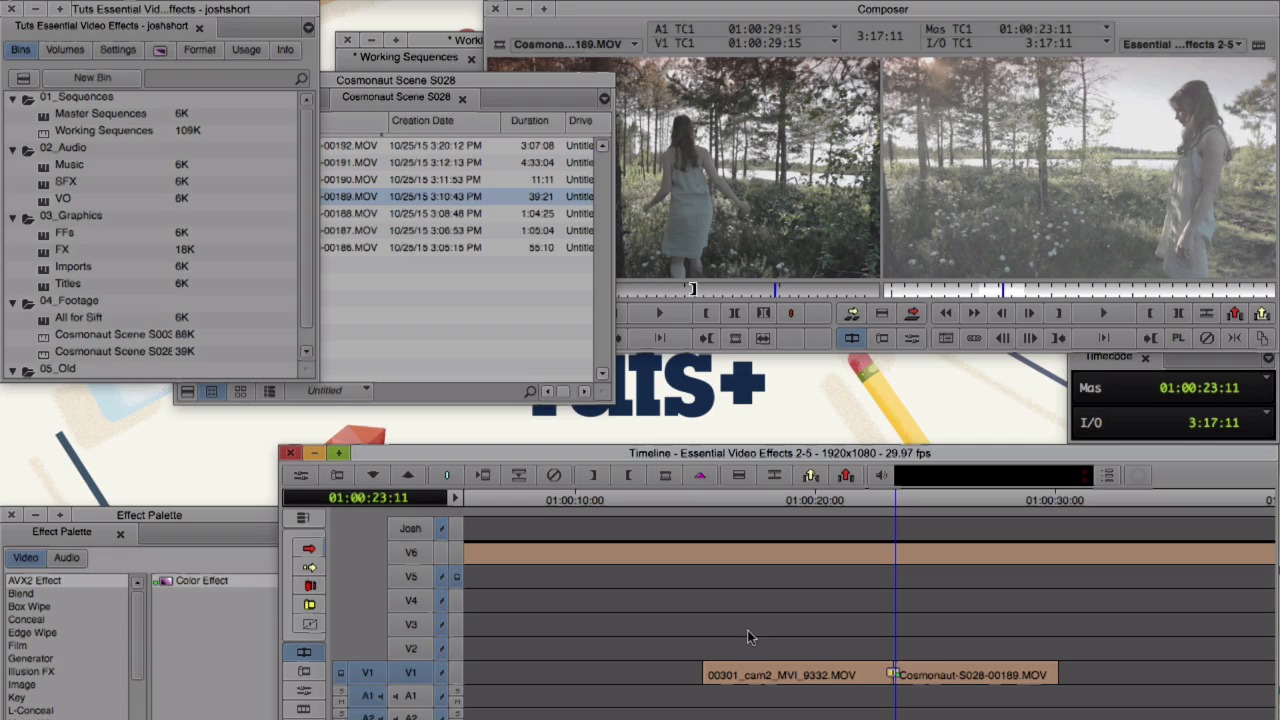
- Overview
- Transcript
2.5 Transitions
Quick Transitions are a powerful (and subtle, if done right) way to add style to your edit. In this lesson you'll learn how to apply different wipes from the Effect Palette and how to adjust them in Effect Mode.
1.Introduction
1.1Introduction00:32
1.2What You Need02:05
2.Essential Video Effects
2.1Get Familiar With Effects05:59
2.23D Warp and Keyframing11:19
2.3Paint Effect05:57
2.4Animatte04:13
2.5Transitions06:03
2.6Timewarp05:05
3.Conclusion
3.1Conclusion00:55
2.5 Transitions
In this lesson we're going to talk about transitions. And we have two ways to get to our transitions. One way is through the Effect Palette and we can apply them to clips which we'll get to in a minute. But first there is a whole set of preset transitions already ready for you to go in MIDI composers. These are called Quick Transitions. If we look in the Timeline I already have two clips here and let's add a couple of these quick transitions. Make sure you have the tracks selected and have the Time Position Indicator near an edit point. Hit the backslash key that's the one above return or Enter. And you get the Quick Transition dialog box. And from this box, we can select a number of different transitions and customize them to fit our needs. At the top, there's a drop down and from this drop down we select the type of transition that we want. I'm going to cover a couple of these with you right now. So first, let's start with a Dissolve, that one's already checked by default. The next drop down decides where the transition takes place. We can choose from Ending on the Cut, Center on the Cut, Starting on the Cut and Custom. To change the duration of it we can type in a duration here and change that to 20 and we can determine where it starts, that's also what this does here. So if you want it to start in the middle, I can change this to ten. Or I can click this icon here or go back up and click Centered on Cut. Since we only had track of V1 selected, the transition will only apply to V1. This is shown over here. The last thing we need to do is select our Target Drive and I want this one here. And when we're ready, we click Add. And if we preview it, we see the two scenes fading together over 20 frames. And we can go back, hit the backslash key, we can change that to 40 frames. Click Add. And we see the transition takes a little bit longer. The other quick transition I find myself using most often is Dip to Color. But select that. And I'm gonna change the Duration to let's say eight frames. Click Add. And when we watch it, we see it dip down to black and come back. But sometimes we might not want black, we might want to change the color. So we move the Time Position Indicator close to the transition. We go into our Effect Editor, and we can change the color. Double-click it and select the new color. Let's take a look. In our Effect Palette there is also a whole bunch of other transitions. Find the Effect Palette. And if we search through there's Box Wipes, there's Edge Wipes, there's Matrix Wipes, and plenty more. One that I really like is the Horizontal Wipe. So under Edge Wipe find Horizontal, click it and drop it on. Let's take a look. Okay we can make that look a little nicer and customize it a bit. So if we go to our Effect Editor again we can change the duration. We can do that down here let's make this 30 frames. And we can also do a couple other things as well. I'm going to twirl down Border. And instead of having this hard, rigid edge, let's go ahead and soften that up a bit. Let's take a look. There are a ton of these different effects already in Media Composer. So just go and search through the Effect Palette, experiment for yourself, and figure out what you like. Once you do find one that you like, there's a trick to get it into our quick transitions from earlier. Let me show you. What we want to do is we're gonna create a new bin. Label it exactly, Quick Transitions. Go into Effect Mode. And when you're in Effect Mode there's always an icon up here in the top left in the Effect Editor. We can take that, click it and drop it into our Quick Transitions bin. Go ahead and save the bin. Close out of the Effect Editor. I'm going to remove this effect. And when I go back into Quick Transitions under Add, we can see that Horizontal wipe from earlier is here. I can click it and click Add. There it is. And we can go ahead and label this Horizontal Soft Wipe. And we can create other ones also. So drop this in here and let's call this Hard Wipe. And when I go back to my Quick Transitions I can see I have the Hard Wipe and the Soft Wipe. And you can add in all sorts of different transitions in here that you create and customize and you want to save. So you can come back for easy access later on.


