
 Lessons: 15Length: 1.4 hours
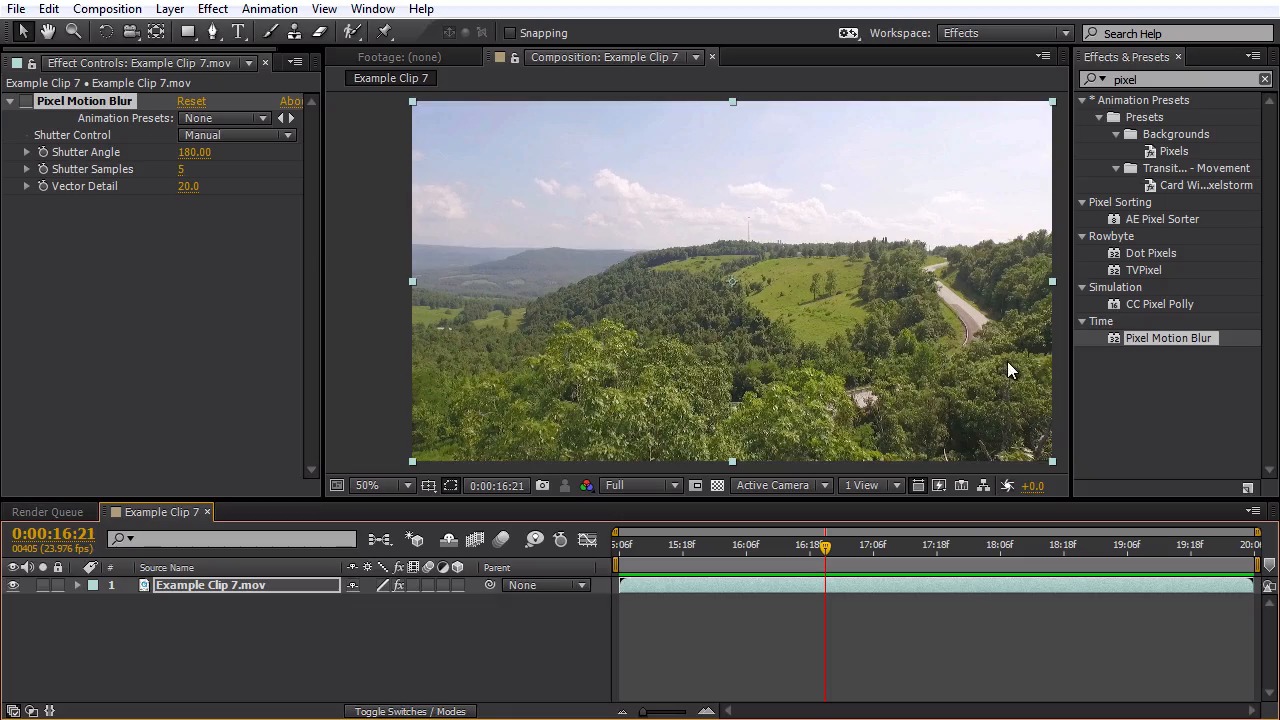
- Overview
- Transcript
5.4 Adding Motion Blur
You will learn how to add more motion blur to an aerial shot in order to avoid common strobing problems.
1.Introduction
1.1Introduction01:28
2.Preparation
2.1Camera Settings05:49
2.2UAV Preparations04:24
3.Optical Fixes
3.1Reducing 'Jello' Effects in Post08:28
3.2Lens Distortion Removal05:17
4.Color Correcting Aerial Footage
4.1Basic Color Correction07:04
5.Footage Speed
5.1Slow Motion02:23
5.2Speed Ramping08:32
5.3Faux Slow Motion03:48
5.4Adding Motion Blur03:36
6.Stabilization
6.1Stabilizing a Shot10:41
7.Zooming in Post
7.1How to add a Faux Zoom to a Shot04:45
8.Color Grading Aerial Footage
8.1Color Grading11:26
9.3D Camera Tracking Aerial Footage
9.13D Camera Tracking07:43
10.Conclusion
10.1Conclusion00:59
5.4 Adding Motion Blur
In this lesson we're gonna learn how we can add some motion blur to our shot in post in order to prevent strobing effects on our footage. I'm gonna be working with example clip number seven. So I'm gonna drag this clip down here to create a new composition. All right, I'm gonna start out doing a ran preview of this shot, we can see what's going on here. We have this drone flying close over the tree tops here, basically to reveal the terrain, so I'm gonna do ran preview. There we go, it's looking very nice. But one thing you might notice here is it's common with drones, to film at a higher shutter speed, I think in this case it was filming at probably around 160th or 200th of a second. And it's not uncommon for a goPro to film at 1 1000th of a second. So I'll zoom in here so you can see what's going on, so when it flies past these trees here since we're flying very close to the footage, we almost get this kind of shuttery looking step right there, of the footage. So you can see it, it's just, it's very tact sharp. There's no motion bar on it. So it's basically creating what's called the strobing effect there. So what we want to do is take that away. Basically blur this a little bit, so it's not distracting to the viewer. I'm gonna do another ran preview zoomed in on this so you can see it a little bit closer up. This is really easy to get rid of, though, in After Effects. What we're gonna need to do, I'm gonna bring up the Effects panel here, under Window. And I'm gonna add the effect pixel motion blur, It's under the Time effect, there. I'm gonna drag this effect onto the footage. Basically what this is gonna do you can already see it's starting to add some motion blur too so I'm gonna turn this off just for a second. I'm gonna zoom in here. Basically on these branches here anything that's closer to the camera moving at a faster rate of speed is gonna be affected by this. So what it's doing is basically looking at each frame and it's gonna determine which pixels are moving the most and in our case it's gonna be the trees here, cuz they're really close to the camera. It's gonna add basically synthetic motion blur to these areas of the shot. And it's very effective. So I'm gonna pull back here onto the trees here, and I'm gonna check the effect on and off here for pixel motion blur. And you can see what it's done here, it's added this awesome looking motion blur right there, just on the trees it's not affecting anything in the background, it's not moving. And we can scroll through here and kinda see what's happening. Now this kind of a render heavy effect, so we'll take a little bit of extra time to render this, but you can also fine tune and adjust some of the settings. So if you don't want the blur to be as long you can adjust your shutter angle here so you can set it at 100. You can see that's gonna shorten up the blur a little bit there. I typically leave it at just 180, what it is normally. I feel like that looks the most natural. What I typically do is increase the shutter samples here. So this is how many instances it's creating right here of the motion blur. So if I zoom in here, you can see kinda some of the shutter samples here. We've got about five of these little lines here. So I usually increase this to about at least eight. You can see that helps blur those away so we're not getting any stuttering with the motion blur. And for vector detail, I typically leave that around 20, but you can increase this if you're needing more detail in the blur, or you can decrease it. You might need to adjust that, because sometimes with this faux motion blur, you may get some weird squiggly artifacts. So you might want to play with the vector details to fine-tune those out. In this case, I'm just going to leave it 20. Now I'm gonna go ahead and do a RAM preview this week and kind of see the difference between without motion blur and with motion blur. So again, here's without. Very shuttery, very stroby. And here's with. This'll take just a second to run through the RAM preview, I'll go ahead and speed this part up for the lesson. And there we go. We've created a very nice looking organic motion blur onto our shot. We've taken away that strobing effect. So it's not gonna distract the viewer. It was very easy to do in After Effects. In the next lesson we're gonna look at some different methods you can use to stabilize an aerial shot.


