
 Lessons: 15Length: 1.4 hours
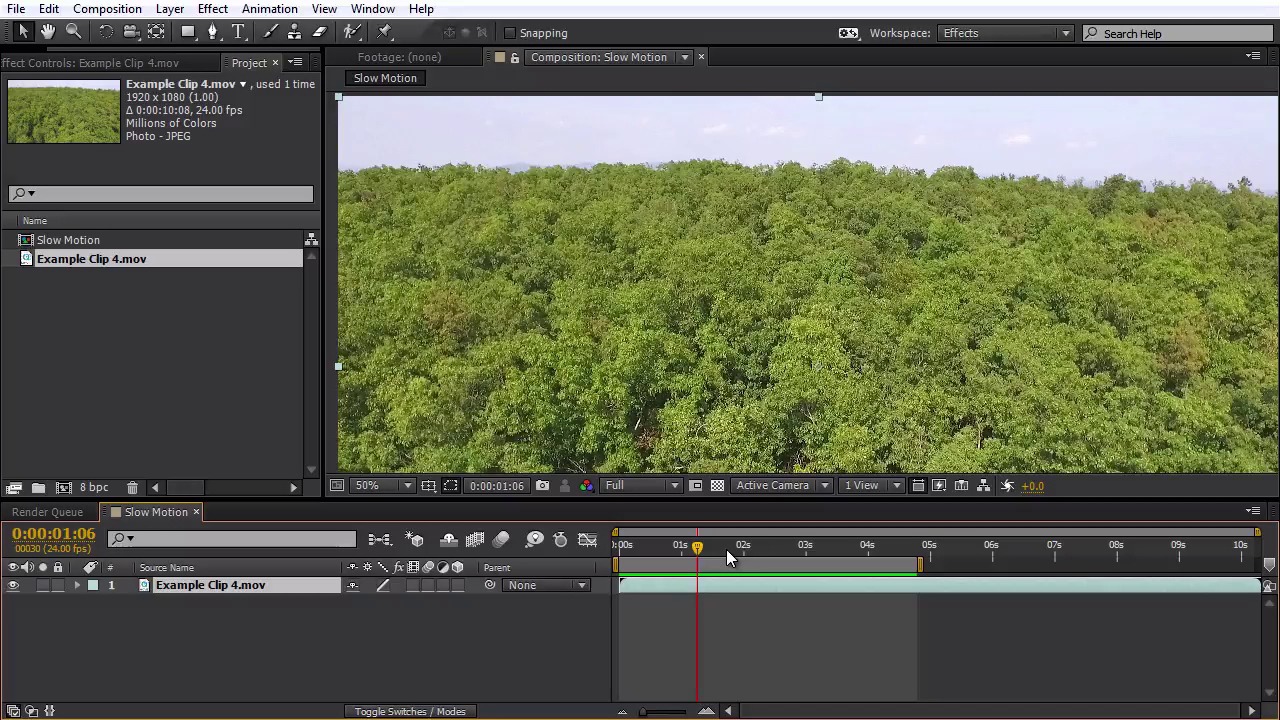
- Overview
- Transcript
5.1 Slow Motion
You will learn how to properly interpret footage shot at a higher frame rate in order to gain a true slow motion look.
1.Introduction
1.1Introduction01:28
2.Preparation
2.1Camera Settings05:49
2.2UAV Preparations04:24
3.Optical Fixes
3.1Reducing 'Jello' Effects in Post08:28
3.2Lens Distortion Removal05:17
4.Color Correcting Aerial Footage
4.1Basic Color Correction07:04
5.Footage Speed
5.1Slow Motion02:23
5.2Speed Ramping08:32
5.3Faux Slow Motion03:48
5.4Adding Motion Blur03:36
6.Stabilization
6.1Stabilizing a Shot10:41
7.Zooming in Post
7.1How to add a Faux Zoom to a Shot04:45
8.Color Grading Aerial Footage
8.1Color Grading11:26
9.3D Camera Tracking Aerial Footage
9.13D Camera Tracking07:43
10.Conclusion
10.1Conclusion00:59
5.1 Slow Motion
Right now let's take a look at how we can interpret footage shot at a higher frame rate in order to gain a true slow motion look. This is great for shots that are filmed at 60 frames per second or 30 frames per second, and you want to interpret them down to 24 frames per second. So you can get a slow motion look on your shot. So, what I've got here, I'm gonna be working with example clip four from the project files. This clip was shot in 1920 by 1080 at 60 frames per second. So what I wanna do is make this be a 1920 by 1080 composition, but at 24 frames per second. So I'm gonna click on the Create Composition button down here. I'm gonna name my composition Slow Motion. The width is 1920, height 1080. I'm gonna set the frame rate to 24. Duration about 10 seconds long, and we'll click okay. All right, now I'm gonna bring in my example clip and we can look at what's going on here. Pull this up so we can see it a little bit more. And so our shot was filmed at 60 frames per second. So, I'm gonna go do a RAM preview this, so we can see what this looks like. And so right off the bat we can tell something that doesn't look quite right, we can see that the shot it's smooth, but it's kind of got a little bit of jumping on and that's because it was filmed at 60 frames per second but our composition is at 24 frames per second. So what's happening right now is we're only seeing 24 of the 60 frames per second that were shot. So basically what we've got more frames than we're actually seeing. So what we can do here in our project panel, we can right click on our example clip, go down to interpret footage and select main. That's going to pop up the interpret footage options. And under frame rate down here, I'm going to select, conform to frame rate. And we can see it's currently set at 60. I'm going to set this to be 24. Click OK. Now we can see in our composition the clip's gotten quite a bit longer. And it actually is getting cut off right here. So I'm actually going to pull this out to be the full length of the clip. And now go ahead and do a RAM preview of this. And now we can see we're getting a full true slow motion shot. Cuz what we're doing, we've got 60 frames per second that we shot, but now we're playing it back at only 24 frames per second, it's actually doing one frame per frame because we interpreted the footage down to 24 frames per second. And as you can see, we're getting the proper slow motion result that we want. It's a very smooth and cinematic slow motion look. And again, you can do this with shots that have been filmed at 48 or 30 frames per second as well. You can also bring those down to 24 frames per second and it'll give a little bit of a subtle slow motion effect to your footage. It can help accent it quite nicely. In the next lesson, we're gonna examine how we can add some speed ramping effects to our aerial footage.


