
 Lessons: 13Length: 1.6 hours
- Overview
- Transcript
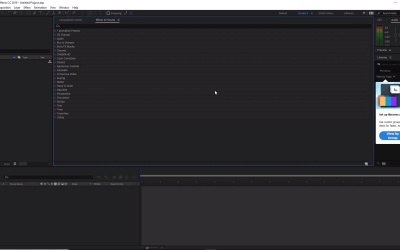
2.1 After Effects Setup
In this lesson, we will go through my setup and a brief explanation of the tools you will need to complete the course. You will also learn how to import the necessary files (such as texture files) into your composition.
1.Introduction
1.1Welcome to the Course00:48
2.After Effects Tools
2.1After Effects Setup06:04
2.2Importing Files05:54
3.Ice Text Animation
3.1How to Add a Blur Effect07:33
3.2How to Animate the Text05:22
4.Creating Translucent Ice
4.1How to Displace Text07:09
4.2How to Create an Ice Layer11:07
4.3How to Create Depth13:09
5.Final Touches
5.1How to Create Snow15:01
5.2How to Create Camera Angles11:59
5.3How to Compile the Animation and Change Text07:51
5.4How to Render Your Video02:04
6.Conclusion
6.1Conclusion00:42
2.1 After Effects Setup
Hi everyone, and welcome back to the Cool Ice Effects course. In this lesson, we'll go through our initial setup and familiarize ourselves with the tools we'll be using throughout the course. If you're already familiar with using Adobe After Effects, you can skip to the next video now to get started on preparing the Cool Ice animation. So we'll get started by taking a look at how to load a workspace. To do this, just go to Window, workspace, and then select standard from the menu here. This will hopefully make it so that you are seeing the same options on screen as while I'm showing you in this course. Otherwise, we can learn how to edit the way your workspace can look like in this lesson. You'll also notice that there are some other options here that you can have a look at and experiment with. These will usually be named after the task that they are most suited to, such as animation and motion tracking. But for now, let's just stick with the standard layout, especially if you're just starting out, as this will have all the tools we'll need to use in the course. So now that we have our workspace loaded, let's go to a quick introduction of what we're looking at here. The workspace in After Effects is made out of mainly two things, called panels and frames. Now if you take a look at the tabs around our workspace here, these are named things such as projects, composition, info, audio, preview, effects and presets, and so on. All these are called panels. Now each panel is placed within a usually rectangular space called a frame. So you can see here in the effects and presets panel, you can see that if I click on this now, there's a blue border around the frame that it's in, and a slightly smaller blue border, which contains the info and audio. Now this blue frame is what is containing these things here. And then we can easily adjust the size of the frame by moving our mouse over the edge of the panel, and then clicking and dragging the mouse to make it larger or smaller. Now this could be useful if you want to see more options within your panel. So if you want to see more effects and presets here, you can just simply click and drag so we can see the whole thing, like so. Now we can also move the panels to different areas of the workspace. Now to do this, simply grab one of the named panels with the mouse, so effects and presets, for example. Click and then drag the mouse over to a different area. Now you'll notice now, as I hover over the screen, that there are different drop zones that are highlighted. Now release the mouse button and you'll have a new placement for your panel. Now this placement of the panel depends on the drop zone area. So for example, if you place this panel on the outer edges of a frame like so, it will appear on top of the frame or below the frame. So we can put this below the frame like so. Or we can put this on the side of the frame. However if you wanted the tab within the frame, you'll have to drop it inside the center drop zone area, like so. Then that will give you two tabs to choose between. So I'm just going to bring it back into its original space, cool. Now another trick that you might find useful, is to make a panel floats. Now this is mainly useful for those of you with two or more monitors. So say if you wanted to use the effects and presets button, let's use this for an example again, on your second monitor. Just simply click and drag the panel to move it as you would normally. Then whilst holding the mouse button, press and hold the Ctrl key on the keyboards, or the Cmd key, if you're using a Mac. Now this will change the look of the panel, like so. So simply release the mouse and keyboard to create your new floating panel. Awesome. Now if you wanted to reset the workspace, just go to Window, workspace, and then select the reset standard to save layout option. Cool. Alternatively, if you wanted to save your new workspace, just go to Window, workspace. And you should have some save options here. Awesome. Now, in the standard workspace, you'll mainly be focused on four different areas. The left area here will be the project panel. This is where that you'll find all the resources of your project, such as imported logos and compositions that you've created. In the bottom area, this is where you'll see your layers and the timeline of your composition here. The center area will be how you can preview your animation video. And to the right here is where you'll find your effects and presets that we'll use for the animation and also the preview control options here as well. So feel free to experiment with different workspace layouts to come up with something that you like. Remember you can always reset the layouts to its original form if you don't like it, or save the layout if you do like it. So that's it for your introduction to After Effects. In the next video, we'll start preparing the animation. See you all there.


