
 Lessons: 13Length: 1.6 hours
- Overview
- Transcript
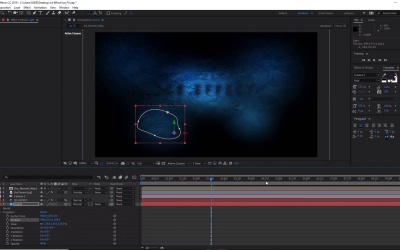
4.3 How to Create Depth
In this lesson, you will learn how to give a sense of depth to the ice. You will also learn how to sharpen the text to make it more readable.
1.Introduction
1.1Welcome to the Course00:48
2.After Effects Tools
2.1After Effects Setup06:04
2.2Importing Files05:54
3.Ice Text Animation
3.1How to Add a Blur Effect07:33
3.2How to Animate the Text05:22
4.Creating Translucent Ice
4.1How to Displace Text07:09
4.2How to Create an Ice Layer11:07
4.3How to Create Depth13:09
5.Final Touches
5.1How to Create Snow15:01
5.2How to Create Camera Angles11:59
5.3How to Compile the Animation and Change Text07:51
5.4How to Render Your Video02:04
6.Conclusion
6.1Conclusion00:42
4.3 How to Create Depth
Hi, everyone, and welcome back to the cool ice effect course. In this lesson we'll learn how to create more depth to look of our animation. All right, so now that you can see how our animation is really starting to take shape and to come together, we have our text fully animated with a diffuse effect to make it appear like it's looking like it's behind the ice. Now in order for us to create a more depth, we need to create more elements behind our ice layer. So to do this we need to first create a black layer. So go to layer, new, and let's go ahead and create a new solid. And let's go ahead and make sure that the color here is set to black, like so. And we can name this Black Solid. And then click OK. And then from here, we want to go ahead and bring this layer to the bottom of all our layers so that it's behind everything. Now you'll find that because of our layer effects that we've set up here, everything has sort of disappeared into this black solid. And we want to use this to our advantage. And we'll go ahead and create some fake lights to give this animation a little more depth. Now to do this, we need to create another solid. So go to layer and create another solid. And let's go ahead and name this light. And this time, we want to choose a brighter color. So something like this. Let's say once you're happy with the bright blue color, you can click OK. And click OK again. And now we want to use the ellipse tool here. And we want to create a sort of random, round shape that can represent some light sources. So now I'm going to go ahead and change this ellipse so that it's not so perfectly round. Now because it's going to be behind a thick wall of ice, we can't really make out what the light really is. So it's good to make these shapes as interesting as possible. So I'm just going to use these handles here to, Make this shape a little bit more random, like so. So it's better for it not to be perfectly round, which is going to give it just that extra level of realism. Cool, now let's go ahead and increase the feather here. So go ahead and inside the mask here we can increase the feather, like so. And then once you're happy with the look of this, let's go ahead and put this light layer just above the black solids and below our text layer. And once you've done that you will see, now that it helps give the look of the source of light. Now if we make it a 3D layer, so if we click on the 3D layer button here, we can go ahead and move it backwards and forwards into the composition. So let's go into the transform here. And we can use the position here to move it further back into the scene. And perhaps we can go ahead and scale this up a little bit more like so. And by doing this, it means that we can use the camera tool. So if we use the camera tool now, you can see that it helps sell the illusion of depth in the animation. Now we might want to move the position even further back. You can see now how it's giving that depth effect, like so. So let's bring it back forwards, just a little bit. Cool, let's bring this back like so. All right, from there we can create some more hot spots of lights just by duplicating this. So let's go ahead and collapse this menu to make it neater. I'm going to select the light layer. Press Ctrl+D to duplicate it. And you can see it sort of brightens up this section here which we can use to our advantage if we want a create a brighter spot. But I just wanted to create some other sections of light here. And you can also change the shape of the light, like so. And make some further adjustments to the feather. So you can make it a little bit darker or a little bit lighter. And we can also play with the opacity as well. So if we don't want it to be bright, if we don't want that section to be bright, we can bring the opacity down. And from there we can create some more, Hot spots of lights, like so. So we can move these around, create some more. Like so. Maybe scale this one down a little bit. Like so. And add a little bit of variety to the shape. Let's go ahead and add one more here. And we can also move the layers further backwards or forwards by going to the transform menu, so we can move it backwards or forwards like this. Just to help randomize the sources of light, and to help with that depth effect. So let's go into some of these and randomize the depth a little bit. So I'm just going to the transform menu and moving these backwards or forwards. And if I go into the camera here, you'll see how that helps sell the depth effect here like so. So each of these new light sources we can play about with all of these settings making some of lights lower opacity or further backwards or further forwards, The ice. Cool, and maybe even, let's go ahead and increase the brightness of the middle one. So if we duplicate middle one, you'll see now that by increasing the brightness of here, it sort of brings the focus back to the middle which is where our text is. Excellent, so you can see how the animation could look like by using this camera tool and pivoting around. And you can go ahead and add some more light sources to see what sort of look you can get. Okay, once you're happy with your light sources and the composition of your light sources, the next thing that we want to do is to add even more depth and to duplicate the texture layer by selecting this, and pressing Ctrl+D on the keyboard. And this time, we want to put this duplicate layer below the text, like so. And then we want to press p on the keyboard, for position. And then we want to move its position further back, Behind all of the layers, like so. And because we can start seeing some of the edges here, we can go ahead and let's transform these scales slightly. So we wanted to make it stretch so that it's covering the whole of our scene, like so. And we can also go ahead and rotate it a little bit. So let's go ahead and, woop, not that way. So let's go ahead and rotate and flip it around by 180 degrees. So that it looks more natural, and it doesn't look like we've sort of copied and pasted the same texture on top of one another. All right, now, what we want to do, is we want to add a blur effect to this layer. So let's go to Layer, > Effect > Blur. And we want to go to Fast Box Blur. And we also want to add a displacement map onto this, so Effect > Distort. And let's add a displacement map. And then with this we want to go ahead and make sure that our displacement layer is using the ice normal map. And we want to go ahead and increase the blur radius slightly, like so. So, let's go ahead and increase it to 30. And we want to repeat edge pixels, so let's click on that. And now with the displacement settings, let's go ahead and increase the displacement, so let's increase this to 50 like so. And if we zoom in to our composition, we can start to see some slight subtle effects here with our displacement map. So you can see without it we don't have as much details, and then with it you can start to see some details coming through. So let's put this both to 150. And let's zoom back out again. And also if we start to pivot the camera now as well, you can see that it's hopefully, you can start to see a little bit more depth. You can really start to feel the effect it has on the animation. Cool, and finally the last thing that we can do to help solve the depth of the animation is to push the text layer back. So what we want to do now is we want to go ahead and go to the position. And we just want to push this back slightly so that it always appears like it is behind or inside the ice. So if we zoom in and use the camera you can sort of see that it's behind the ice. So let's bring this even more back, like so, so just 250. So even when it is all the way in, even once our animation is complete and it's right in front, it always appears like it is behind or inside the layer of ice. Excellent. Let's Ctrl+Z so that we can go back to our original view. We're just going to bring this position back to 250. Cool, so that's it for this lesson. In the next lesson, we'll look at how to create the final touches to our animation by creating some snow. See you all there.


