
 Lessons: 13Length: 1.6 hours
- Overview
- Transcript
3.2 How to Animate the Text
In this lesson, you will learn how to animate your text in 3D space.
1.Introduction
1.1Welcome to the Course00:48
2.After Effects Tools
2.1After Effects Setup06:04
2.2Importing Files05:54
3.Ice Text Animation
3.1How to Add a Blur Effect07:33
3.2How to Animate the Text05:22
4.Creating Translucent Ice
4.1How to Displace Text07:09
4.2How to Create an Ice Layer11:07
4.3How to Create Depth13:09
5.Final Touches
5.1How to Create Snow15:01
5.2How to Create Camera Angles11:59
5.3How to Compile the Animation and Change Text07:51
5.4How to Render Your Video02:04
6.Conclusion
6.1Conclusion00:42
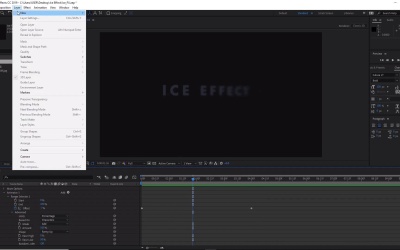
3.2 How to Animate the Text
Hi everyone, and welcome back to the cool ice effect course. In this lesson, we'll learn how to animate the text in 3D space. So now that we've got our cool blur animation for our text here, the next thing we want to do is we want to animate the position of the text so that it animates forward in 3D space. So to do this, we need to go into our ice effect layer. Open up text, go to the animator, go to the Add menu, select Property and select Enable per-character 3D. Once you've done that, the next thing we want to do is we wanted to go back to the Animate menu here And we want to select Position from the menu, and this will add the Position options in our menu here. Okay, from there, we wanted to move the timeline into the middle of our timeline for about two seconds. And we want to adjust the position of our text in the z-axis. So to do this we can go to the values here, now the first value is the first number is going to be for the x axis. The second value is for the y, and the third value is for the z. So let's push the text, so let's increase the value here. And you can see as we increase this value, the text goes further and further back in 3D space. So let's go ahead and put this value to about 800, like so. And now you'll see as we scroll backwards and forwards, the text is now moving forwards in 3D space like so, which is exactly what we want. Cool, next we wanted to adjust the animation slightly, so let's go into Range selector, go to Advance, and now let's go and make the ease low to about 50%. And this will make the animation appear a little bit smoother. Cool, so let's go ahead and test that out. Great, now let's go ahead and place a camera into the scene. So let's go to Layer> New and select Camera. And let's select the preset at 28 millimeters, select OK. And now, if we go ahead and select the Orbit tool here, we can orbit around the scene. And you can see, by doing that you can see how the text is in 3D space, like so. Now this will be useful when showing the 3D appearance of the animation later on. All right, now, the next thing that we want to animate is the opacity. So let's go ahead and undo that here, so press Ctrl+Z. Now let's go to the Animate menu, and let's go ahead and select Opacity which will add the opacity options here. And let's bring the opacity down to 0% and this will make our text disappear. And we want to make the text reappear again. So let's go ahead and create a key frame for this. And at about let's say two seconds, we want the opacity to increase by a 100. So now, as we scroll forward, you'll see that the text appears from 0% opacity, and then slowly comes into vision like so. As we've created a second key frame here at two seconds which then brings the opacity of the text to 100%. Great, so now let's go ahead and test this animation. Excellent, now if this animation is slightly too slow, what we can do here is we can go ahead and bring this key frame forward to maybe three seconds. And that key frame is for the offset. So that should animate that quicker. So now let's go ahead and preview that and you can see the text animates a lot quicker. Excellent, so that's it for this lesson. In the next lesson, we'll go through how to displace the appearance of the text, see you all there.


