
 Lessons: 13Length: 1.6 hours
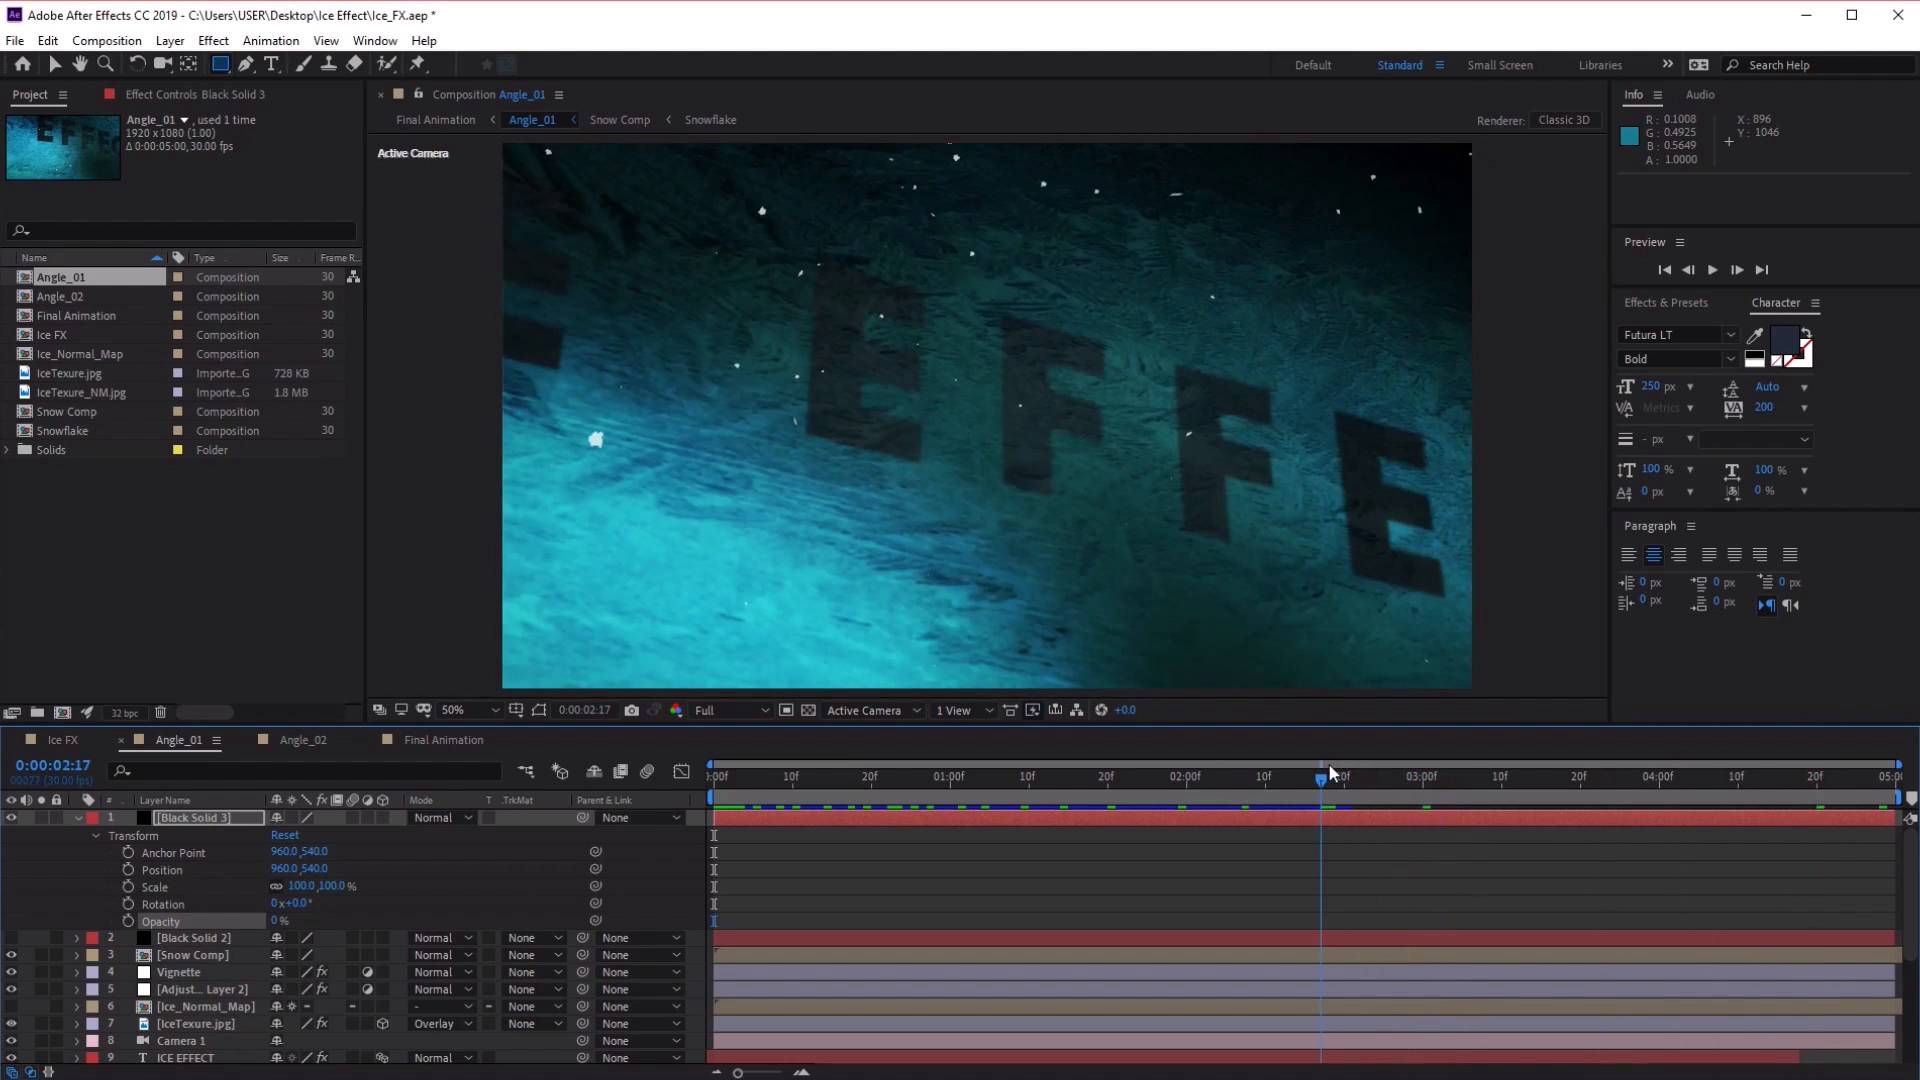
- Overview
- Transcript
5.3 How to Compile the Animation and Change Text
In this lesson, you will learn how to replace the text in your animation.
1.Introduction
1.1Welcome to the Course00:48
2.After Effects Tools
2.1After Effects Setup06:04
2.2Importing Files05:54
3.Ice Text Animation
3.1How to Add a Blur Effect07:33
3.2How to Animate the Text05:22
4.Creating Translucent Ice
4.1How to Displace Text07:09
4.2How to Create an Ice Layer11:07
4.3How to Create Depth13:09
5.Final Touches
5.1How to Create Snow15:01
5.2How to Create Camera Angles11:59
5.3How to Compile the Animation and Change Text07:51
5.4How to Render Your Video02:04
6.Conclusion
6.1Conclusion00:42
5.3 How to Compile the Animation and Change Text
Hi everyone, and welcome back to the cool ice effects course. In this lesson we'll learn how to compile our different comps into one animation and also how to change the text. So now that we have three different compositions finished, let's go ahead and compile them all into one animation. Now, to do this, we need to create one final composition and let's go ahead and name this Final Animation. And let's put the duration of this animation to about ten seconds like so. Cool. And now let's go ahead and add the three compositions one at a time by clicking and dragging them into our new composition. Let's go to the ice effects, excellent. And now we can use the timeline here to drag the animations into the correct time slots. So we'll leave angle 01 where it is, so that's what we're going to start with, and then we'll drag angle 02 just after the ending of our first animation and then we'll do the same for our ice fix animation. Now in fact let's go ahead and trim this to three seconds, so let's trim this to three seconds like so. And so we can put this at three seconds. And we'll trim this down to five seconds. Like so. So three seconds, five seconds and then we'll put our final animation here that it will end with. Ten seconds, cool. So now you can see our animation as follows. So it starts with angle one. Within with angles two in the middle and then angle three the final animation over here. In fact, let's go ahead and increase angle two to about six seconds, just so that it gives it a little bit more space so it's a little bit more equal now. So three seconds for the first animation, three seconds for the second. And then the final four seconds for our final reveal. Excellent. So now we can preview this animation by clicking on the Preview button. So you'll see it starts with the first animation, and then the second. And now the final animation at the end. Cool. Next we can add some simple fade transitions to the end of the comps. Now, to do this, let's go back to our individual comps here. So we've got to go back to the angle one. And let's go ahead and create a new black solid. Make sure that it's full black. And click OK. Put this to the top of our layers. Like so, and from here, let's set the opacity to 0%. And then we want to go to the end of our animation, and at around the end let's say that's around, so we have three seconds here. So let's put it at about 2.18. We can add a key frame here. And then when we go to three seconds here we can now increase that to 100%. So now that will create a nice little fade to black for our first animation. Then let's go to our second angle here. And we want to do the same, except now, we wanted to create a sort of fade in solid, so let's create a new solid again. So layer. New solid. Click OK. And now, we wanna start at full black. And in fact, let's put this to the very top again. And go into the opacity options. Click the key frame button here. And let's go to about 0.2 seconds here, and then put the opacity to zero. So now we've got a sort of fade in, like so. And from here, we wanted to do the same thing. So we want it to put a fade to black now. So let's create another key frame. And in that three seconds, bring it all the way back to 100%. If you find the timing is slightly off we can always adjust the key frame slightly like this. So we can bring this close together. We'll put this further away, depending on your preference. So cool, we have this fade in and then fade out. Excellent, and now we'll do the same for our ice effects composition. So we need to create a fade in for this one. So let's create another new solid, like so. And let's go back into here, go into the transform options. Click a key frame for opacity then around this place here we'll put the opacity back to zero so it'll fade in. Excellent. Now what we want to do is if we head over to our final animation comp here, you'll find that we've got some cool fade animations in place for our animation. Let's go ahead and view this in. So fades out here. And it fades in here. Excellent. Now, the last thing that you can do before rendering is change the text of our animation and you can do this simply by going into each of the compositions and changing the text. So let's go ahead and do that. So if we go into the ice effects animation and let's go into our text layer here, and let's go ahead and change the text, so from ice effect, we can double click this and change the text to something else. So we can change it to, let's say WINTER. And again, we can also change the size of the text, so we can make it bigger. Here we go, so we can make it bigger, like so. Or we can make it smaller, excellent! Great, so that's it for this lesson, in the next lesson we'll go through how to render your video in After Effects. See you all there.


