
 Lessons: 13Length: 1.6 hours
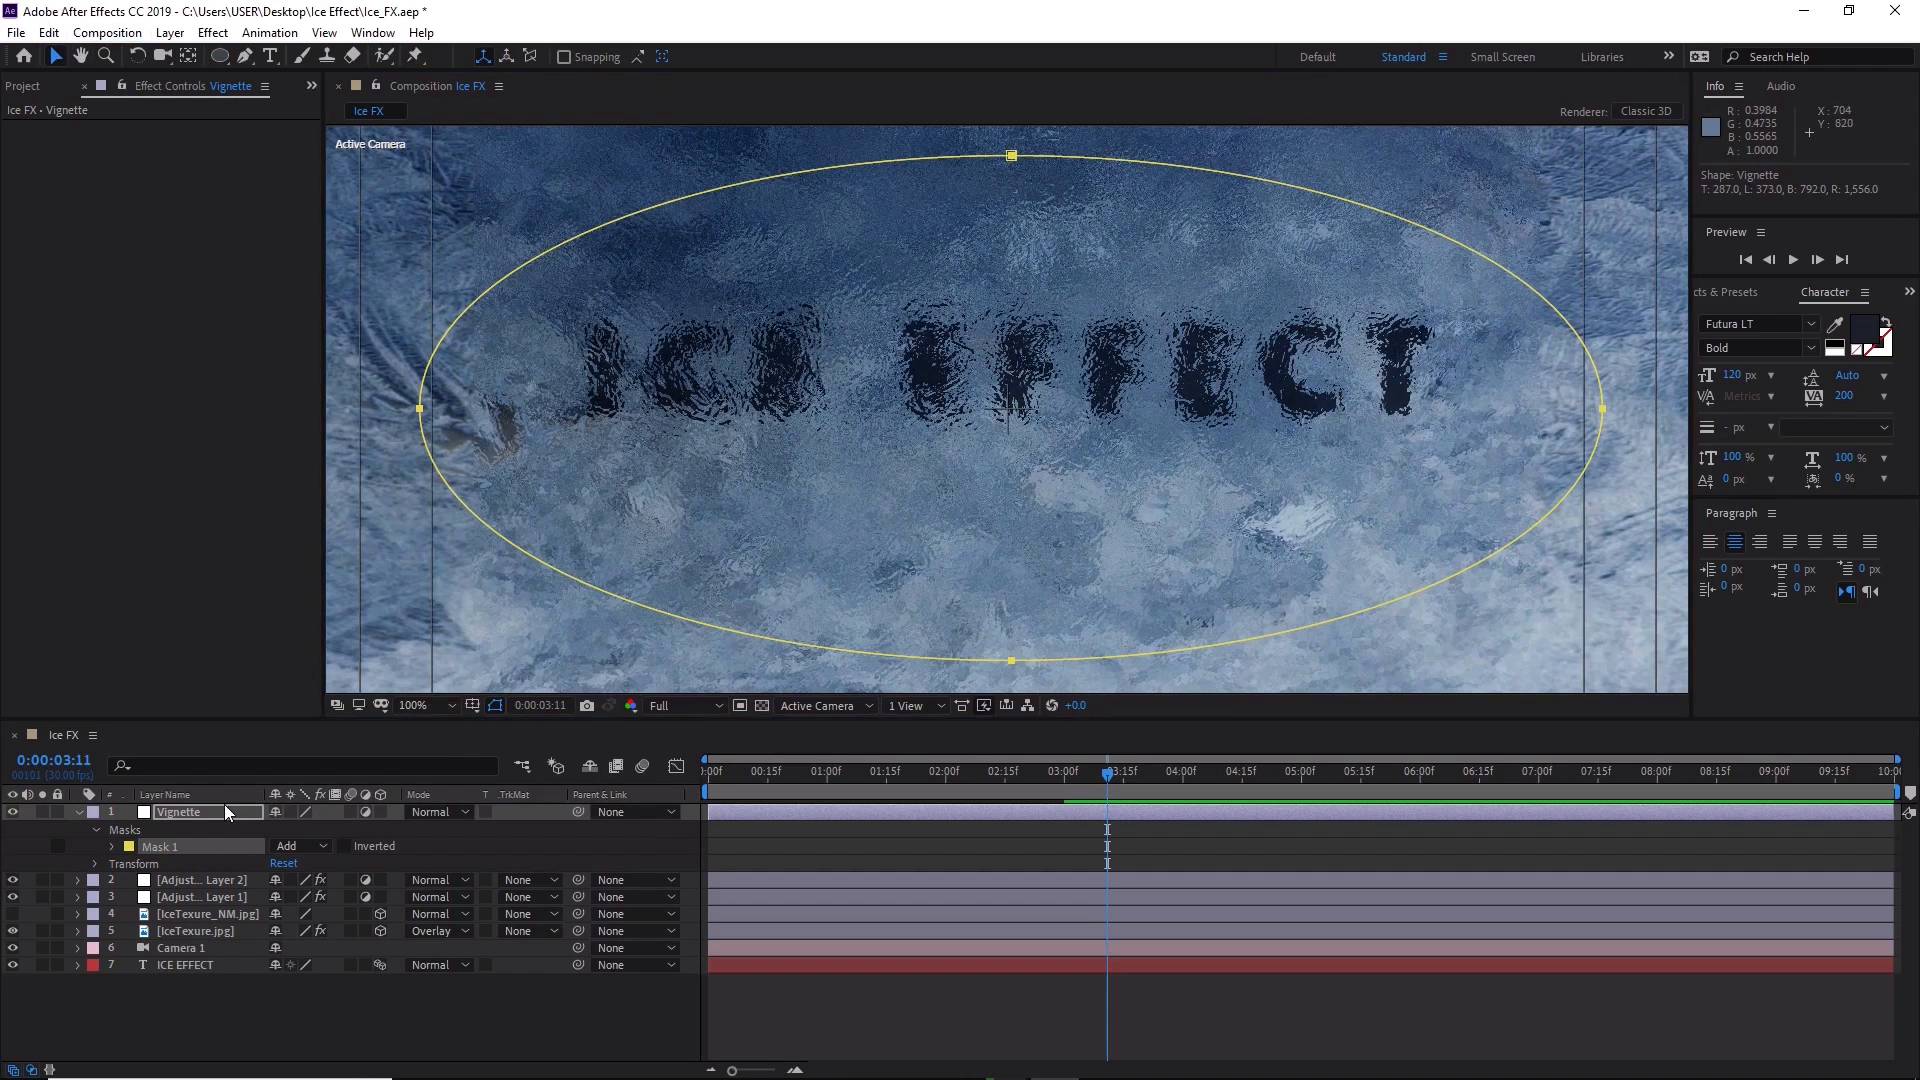
- Overview
- Transcript
4.2 How to Create an Ice Layer
In this lesson, you will learn how to colour the ice. You will also learn how to link the displaced text to the ice layer so that they are animated at the same time.
1.Introduction
1.1Welcome to the Course00:48
2.After Effects Tools
2.1After Effects Setup06:04
2.2Importing Files05:54
3.Ice Text Animation
3.1How to Add a Blur Effect07:33
3.2How to Animate the Text05:22
4.Creating Translucent Ice
4.1How to Displace Text07:09
4.2How to Create an Ice Layer11:07
4.3How to Create Depth13:09
5.Final Touches
5.1How to Create Snow15:01
5.2How to Create Camera Angles11:59
5.3How to Compile the Animation and Change Text07:51
5.4How to Render Your Video02:04
6.Conclusion
6.1Conclusion00:42
4.2 How to Create an Ice Layer
Hi, everyone, and welcome back to the Cool Ice Effect course. In this lesson we'll learn how to create the ice layer in front of the animated text here, using the ice textures that we imported into our project. We'll also learn how to add some color to the ice. All right, so now that we have our text animation here fully completed with some cool effects such as the blur effect, the diffusion, and some 3D movements here, we can now focus on the ice itself. So let's start by turning on the ice texture layer that we have here by clicking on the eye button. And then in the drop-down box next to the ice texture here we can choose overlay. So let's find overlay from the menu here, click on that. And this will allow us to see the text layers underneath. Now just looking at how this looks we want to make our text stand out a little bit more so that we can read it clearly. So let's go ahead and select the text layer at the bottom here. Then over in our character panel we can double click on this character box. And then we can change and adjust the color of the text. So you can choose whatever color you want from here. So let's go ahead and make this color a little bit darker, so a darker blue like so. And then click OK. Another trick that we can do to make our text stand out even more, is to invert this ice layer, this ice texture that we have here. So to do that let's go ahead and go to effect, channel, and then invert. And then straight away you'll see that this creates more contrast with the text, although now it has this weird color that doesn't look like ice at all. So in order to fix this we need to go inside the invert settings at the top here, and you'll see in the Channel menu here we can select the drop-down menu. And it's inverting the color data. So let's change this just to the lightness, so let's select lightness here. And now you see the color has been fixed and looks like ice again, great. So now we can adjust the ice texture further by adding a curves adjustment, by going to Effect, and Color Correction. And let's find Curves. And then just play about with the curves here to get a look that you like. So I'm just going to make it slightly darker here, and make the brightness slightly brighter here, like so. And we can also go into the colors here. So we can go into the Color Channels here, and we can choose the Blue Channel, for example. And then just slightly make the color a little bit bluer, like so. Cool, now if you want you can also add an adjustment layer on top of all the layers here. So let's add another adjustment layer here, so go to Effect, New, and Adjustment Layer. And this way we can control the look of the whole composition. So let's go ahead and create a new curves option here, so go to Effect, go to Channel, in fact it's not in Channel. Go to Effect, Color Correction, and then go to Curves. And here let's go ahead and let's maybe reduce the red colors a little bit, like so. And then just make some adjustments. Let's go ahead and make ice slightly darker again, like that. And then once you're happy with the way that your ice is looking, we can also add a vignette to the animation. Now to do this we need to create yet another adjustment layer. So let's go ahead and create that. And this time let's go ahead and rename this, so right click, Rename, and let's rename this Vignette. Like so. Let's close that. And then we want to select the Ellipse Tool by going to the Rectangle Tool here. Clicking on that and holding with the mouse button, and then we can select the Ellipse Tool. And then just simply create the shape by clicking and holding down on the mouse, like so, cool. Now lets put this shape in the middle of our composition. So lets go back to choose Grid and Guide options and select Title Action Safe. And then using the Move Tool here, so lets go ahead and select the Selection Tool. We can go ahead and move this vignette, or this shape. So that it is close to the middle, like so. Cool, now from here let's go to Masks. And then set this, from Add, set this to Subtract. And then let's go into the Mask menu here. And then let's go ahead and turn up the feather, like so, to something like, let's say, 400. Cool. And next let's go ahead and select the Curves again. So let's go to Effects and Color Correction, go to Curves. And then use the graph here to drop the brightness down, like so. And there you have it, a simple vignette. And we can adjust the, lets go ahead and adjust the opacity of this here. So lets go to Transform, in here, and adjust the opacity just a little bit, so just bring that down, like so. So maybe about 30%. And you can also adjust the shape, as well. So let's make this a little bit bigger, like so. Cool. Now on this adjustment layer here we can also, we've also got the displacement map. So let's go back to the displacement map adjustment there. But what we actually want is to have this applied to the text directly. So let's go ahead and delete this adjustment layer. So just click delete on the keyboard. And then we want to select the text here. And now we can apply the effects again. So let's go to Effect, Distort, and let's go to Displacement Map. And then from here let's, again we wanna select the Ice Texture Normal Map again. And also adjust the Horizontal Displacement. And the Vertical Displacement, as we did previously. So let's bring this to about 50, or 40, maybe that's a little bit too much. So let's bring that down to 30 and 30, like so. Next we want to add the blur, so let's go to Effect, and Blur & Sharpen. And we want to add a fast blur so here we go, Fast Box Blur. And let's move this above the Displacement Map. And let's increase this to, let's say, let's increase this to 15, see what that looks like. Let's increase this to 10. Now you can see the text looks diffused, underneath the ice. Now, in order for the animation to work correctly, we need to make a few adjustments to the composition. Otherwise, the fused text won't work. So let's turn on our normal map. So let's go ahead and turn this on. Make sure it's selected, and then go to Layer, and we want to find Precompose. And let's call this Ice Normal Map, like so. And then make sure that we move all the attributes here. So make sure Move all attributes into the new composition is selected. So what this will do is it will create new composition containing our normal map and all the effects that we added to it, such as the 3D Layer that we selected here. So click OK. Now what we want to do is we want to click on Collapse Transformations here. Now if you don't have the switches turned on, you can switch it on by clicking on this little button here, on the bottom left. With this switched on, the texture will now move along with the camera. So let's go ahead and hide this now. And if we select the Camera Tool, you'll see that the texture should now move with whatever camera angle that we have selected, excellent. So you'll see now that we've got the 3D Displacement Effect, which is exactly the look that we're going for. All right, so that's it for this lesson. In the next lesson, we'll look at creating more depth to the look of our animation. See you all there.


