
 Lessons: 18Length: 1.3 hours
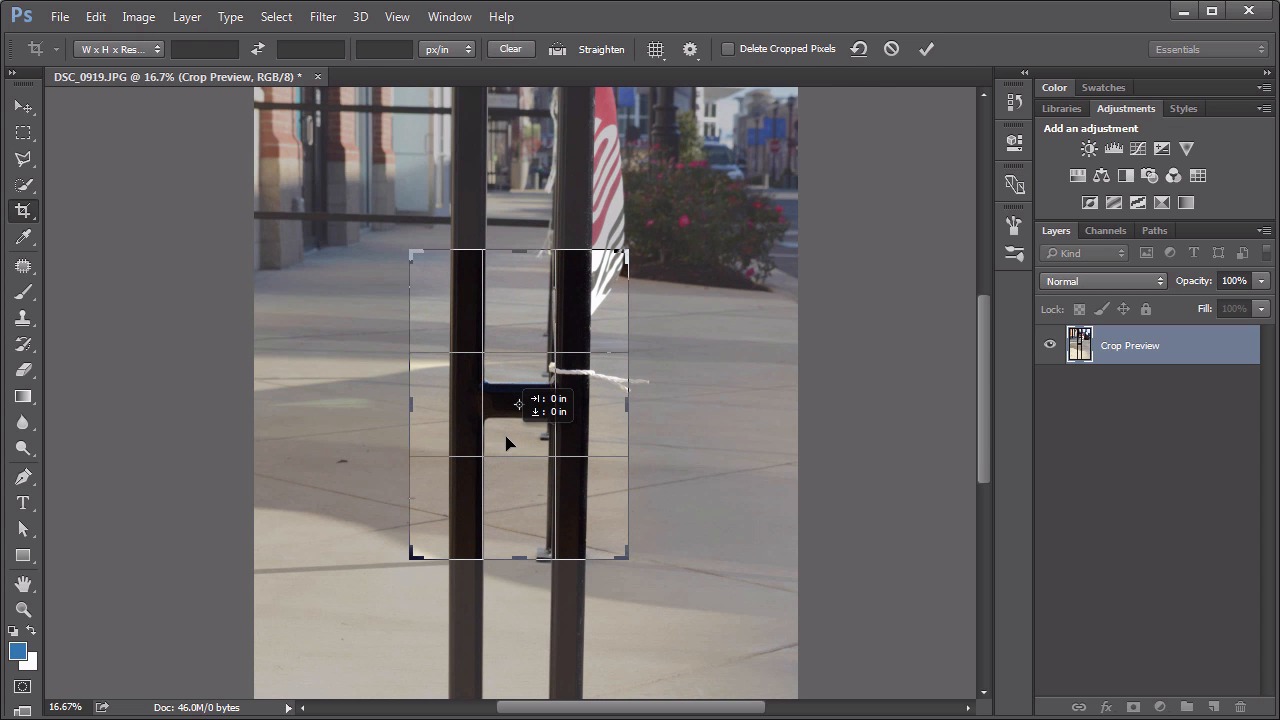
- Overview
- Transcript
3.4 Shape Photo Evaluation
See how to evaluate your photos from the assignment and possibly use some post-processing to improve them.
1.Introduction
1.1Introduction02:46
2.Lines
2.1Lines in Design03:07
2.2Lines in Photography05:00
2.3Photo Assignment for Line02:45
2.4Lines Photo Evaluation09:20
3.Shape
3.1Shape in Design03:02
3.2Shape in Photography04:15
3.3Photo Assignment for Shape01:37
3.4Shape Photo Evaluation07:48
4.Color Theory
4.1Color Theory in Design03:37
4.2Color Theory in Photography04:27
4.3Photo Assignment for Color01:52
4.4Color Photo Evaluation06:53
5.Visual Weight
5.1Visual Weight in Design05:05
5.2Visual Weight in Photography04:30
5.3Photo Assignment for Visual Weight01:40
5.4Visual Weight Photo Evaluation07:23
6.Conclusion
6.1Conclusion01:17
3.4 Shape Photo Evaluation
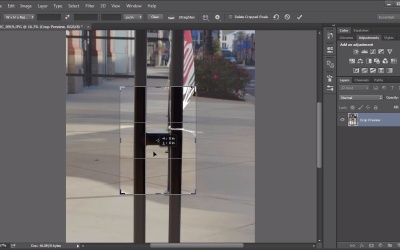
Hello everybody, welcome back to Basic Design Concepts for Photographers. This is lesson 3.4 where we evaluate the photos from the shapes photo assignment. The first photo of the assignment was to find a shot where the subject is communicated purely through shape so that it needs no other visible information to determine what the subject is. I have a couple of shots that I wanted to share with you and discuss. The first one I captured was this. I really like the way that this metal chair created a shadow on a sidewalk. It's clearly a chair and I really like the way that the areas that are traditionally solid, that is the seat part and the back, were just a metal mesh and allowed a lot of light to show through them but you could still tell that it's a somewhat solid surface so that you could sit on it. And while I think this is a somewhat strong photo, I really like the idea of that shadow being cast there and we can tell what it is. I think it could be improved by a little bit of cropping. So I'm gonna use the crop tool and I wanna pull down enough to get rid of this top shadow on the top right. I feel that that kinda pulls focus a little bit. So even if I crop in a little bit from the edges of the chair, cuz I don't want them to be tangent to it. It would be best if it had a little bit of breathing room, but if I can't afford that because of that top shadow, I wanna get that out, having those corners in there isn't necessarily critical. And likewise, there's this little leg of the chair here too. I feel that's almost like it's kind of cheating, so I'll pull that out as well. So that's a new cropping of the photo, and I kind of like that one. It's a little bit stronger. It's clear what the subject is, and we've removed those other distracting shadows from there, too. Now I do think it could use a little bit more contrast. So I'm going to add a levels adjustment layer, and pull on these outside handles to meet the edges of the histogram, so we get a nice rich shadow in there. The other shot that I wanted to share was this one, and I really love the way this one came out. It's clear this ferris wheel is a ferris wheel. But we don't see any of the visual detail of it. We see only its shape, and having that silhouette with the setting sun behind it, I think, creates a very striking shot. But, unfortunately, I was holding the camera crooked, so let's clear that up with the crop tool. And there's a straighten feature to the crop tool, so we'll grab that. And trace right along that horizon to help straighten that up. I also think that there's a lot of dead space down here that doesn't really add anything to the photo, so I'm gonna pull in quite a bit on that corner to crop that in some. I think I wanna keep the sun right about that upper third line there. But I do think that's a much stronger composition, but still satisfies the assignment of communicating the subject through shape. The second part of the assignment was to find letters through found objects and to create a word using those letters. I chose the word shapes because it As it fits with the theme of this chapter. So I had to find the letters s, h, a, p, e and then another s. I started out with an easy one. Now, I'm not going to count this one as cheating, even though it is part of a sign, but it's a free, stand alone s. And, honestly, finding an s through found objects is a little more difficult than I anticipated it being. So I do have another one for the end of the word, but I wanted to start out the word with a very strong resemblance. And this S, I thought, was a really good way to do that. Now, again, I wanna keep these cropped in nice and tight, so I'm gonna pull it in nice and close to the letter. And in looking at this, this other letter that's next to it here is really kind of distracting. And if I'm going to want to spell something out with it i want to have that removed. So I will start by creating a copy of this background layer and then a very quick selection using this polygonal selection tool just around that edge there. And then the patch tool, make sure it's set to content to where, and just pull that over just enough to remove that outside area. And that will serve as our first S. For the letter H I found this edge of a handrail. And you can clearly see the capital H in there and it's also cropped out way too large. So cropping it in nice and tight is going to be the way to go with this one too. Notice by cropping it I don't have the delete crop pixels enabled, so If I wanted to go and retrieve those later on, I still can. I'm actually not gonna worry about this piece of string on here. I think it adds a nice little element to it. And it's still very clearly an H. For the A, Well I'm going to use this planter here. Can you see it? It kinda looks like a capital A at least to me it did. And once more I'm gonna crop it down so we don't see any of that vegetation on the top because I think that's somewhat distracting. I'm also gonna create another copy of this layer because I wanna distort it a little bit, just to enhance that A shape. So with this copy of the layer selected, I'm gonna go to Edit > Transform > Perspective and actually increase the angles of that letter just to sort of force the image of that capital A in there, and there's our letter A. For the letter P, I found this fantastic hand rail here. You can see that. That one's pretty easy. That one was basically a gift. I just was walking past there and said, hey, there it is. There's the letter p. The letter e can be formed by pretty much anything that makes a solid grid. But this one in particular, I felt, worked really, really well, because I actually really like the way that corner is cut off. I think it adds a little bit more interest to it. Just give it a little bit more character, but it's still very clearly a capital letter e and then the last s. And here we go. I actually found one with this path. You see it here the way this double curve works out? It's not very clear though. So it will take a little bit of adjustment here just to make sure that it's crystal clear when we assemble it into our word. Once again, I'm gonna make a copy of this background. First of all, I want to rotate it a little bit, so I'm gonna go to Edit > Free Transform this time. Cuz I wanna do some other transformations with it as well before I apply the rotation I'm gonna right-click and say Warp. And I get this warp transformation cage where I can start dragging things around and really clear up this shape. Make it look a lot more S like. And then I can use that crop tool again to pull it in and really make sure that, that letter is visible the way I want it to be. I'm also a little bit concerned that there's not enough contrast between the road and the grass color. So I'm going to add a hue saturation adjustment layer, and use the on-screen adjustment tool to grab those greens and reduce the lightness of them. It's only grabbing a certain tone of those greens and we can increase the tone by using this little eyedropper with the plus icon. And that just helps increase the contrast to make that S all that much more obvious. So then I created a very long document and placed each of these letter files in here. I used a very quick layer mask to make sure that they all aligned perfectly on both the top and the bottom and did the best I could to space them evenly apart. And the word is starting to come to together here, but there's a couple other adjustments that I like to do to really pull this together. The first, is to add a black and white adjustment layer, cuz I feel like the colors tend to detract from what I am trying to do here. So I want it as fully gray scale as I can get it, and the black and white adjustment layer is the best way to do that. Then I want to increase the contrast quite a bit, and I'll do that with a curves adjustment layer and add a very subtle S shape to this curve. And finally, there's something I'd like to do to add a bit of sharpness to this, and that first involves creating the emerged layer of all the layers. So, I'm gonna hold down the alt key while I go to Layer > MergeVisible. And that creates a merged layer at the very top of the stack. And on this layer I'm gonna run the Camera Raw Filter. That's found under filter. Right there, Camera Raw Filter. In Camera Raw, I'm really going to increase only one slider, and that's the clarity. Now, on a colored image the clarity intensifies the colors while sharpening this. But because this is black and white it just adds a bit of sharpening while intensifying the grey tones. And there we have our arrangement of found letter photography. So that brings chapter three to a close on working with shapes and design. Next chapter, chapter four, we start digging into some basic color theory.


