
 Lessons: 12Length: 1.2 hours
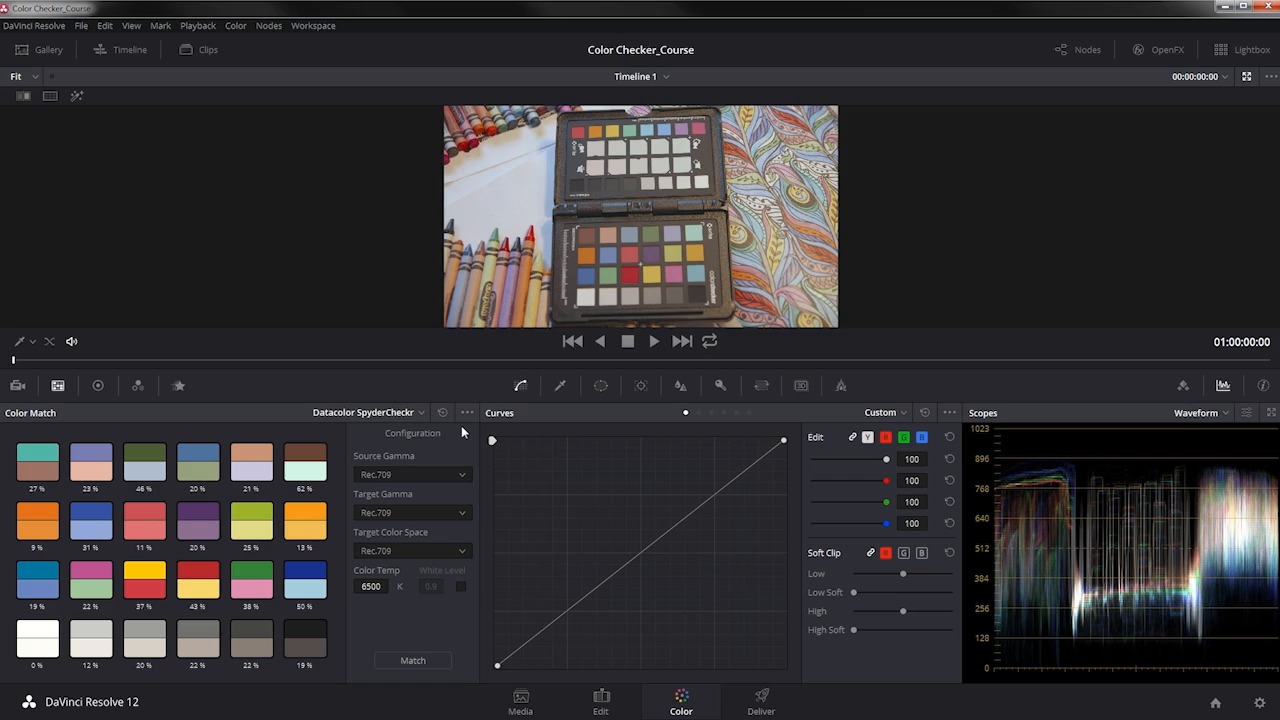
- Overview
- Transcript
5.1 Conclusion
In this lesson you will get some final tips and tricks to make all your editing projects a success!
1.Introduction
1.1Introduction01:12
1.2What You Need05:05
2.Getting Started
2.1What Is Color Correction?06:14
2.2When to Correct06:02
3.The Process
3.1Resolve Interface05:53
3.2Scope Basics07:01
3.3Import08:47
4.Color Correction
4.1Match Color06:37
4.2Copy the Adjustment and Apply02:59
4.3Tweak Individual Clips05:46
4.4Export08:12
5.Conclusion
5.1Conclusion06:26
5.1 Conclusion
In this lesson, you will get some final tips and tricks to make all of your color correction batch processing a success. So I wanted to share a few final thoughts with you about using this color checker or some other kind of the color target, to do this some more automated color correction process. Now again, like I mentioned earlier this process is not perfect but it does work very, very well and it is quite fast depending on your skill level in color correction. I want to consider that time is money. Now I know you've heard that before, everyone's heard that before, and the reason why I mention that is because this X-Rite ColorChecker and the other color targets are not free, right, they cost money. I think I paid around 90 or $100 USD for this X-Rite ColorChecker, and it works fantastically for this process and it also works really well if you do photography, it can be a really great tool for both. This DSC Labs SMPTE One Shot, that is a mouthful, is $287 or $288 USD. This Datacolor SpyderCHECKR runs around $50. And this DSC Labs ChromaDuMonde 24 plus 4 chart cost between, around $1100 USD to $3400 USD. Now, I want you to consider that against the time on the back end to color match your shots. Now obviously, these more expensive charts like this 24 plus 4, the One Shot chart here, and even X-Rite ColorChecker are on the more expensive side but consider how much time that will save you especially in tricky lighting conditions. Using a color reference target like this, takes so little time in post production that if it was used, maybe once or even twice, you might consider that it would pay for itself in the time that it took you to balance the shot by. I also consider this, if you're shooting with multiple cameras your work in color correction can essentially double especially if they are not the same camera. If you're shooting with two of the same cameras, it's likely that the color corrections will be very, very similar. But if you're shooting with two different cameras and two different lenses, those lenses are going to bend the light differently and that may have an effect on the color and the contrast but more to the point, two different cameras are definitely going to give you two different color renditions. So using one of these color targets to match up two separate cameras can save you a ton of time as good as these targets are, there are going to be some variables in the way that these cameras interpret colors so it's likely that the shots are not going to match perfectly, but it's going to get them so close that it's still gonna save you a huge amount of time. Are you still gonna need to know how to make some adjustments by hand, the old fashioned manual way by pushing bangs around until it looks right? Sure. Are you still gonna need to know how to look at these scopes interpret what they're saying and use that as some kind of basis to make your adjustments to your picture? Absolutely. But these color targets can save you a tremendous amount of time and that is very, very valuable. Now, you may have noticed that when I imported the footage into resolve, it asked me if I wanted to set my project settings to the settings for the source clips here, if I go under Project Settings, you can see that my Master Project Setting is set to 1920 by 1080 at 23.976 frames a second. Now, if you're dealing with mixed media, maybe you have some footage that was shot in 1080, some that was shot in 4K, some that was shot in 2.7K, you want to make sure that over here on the deliver page that you consider this option right here render at source resolution. This way, if you wanted to preserve those resolutions so that you can manipulate them you can punch in and crop in your editor, you have that option, otherwise, it's going to render all the clips in 1920 by 1080. Now in terms of the frame rate, if you're working with different frame rates you may have to handle those in separate batches because there's no option here to change the frame rate to something like 60p or really anything else, no matter what the resolution is all the footage is going to be exported at 23.976 frames a second. So that's another thing that you wanna consider. If you have some stuff that was shot 30 frames a second, 60 frames a second, 120 frames a second, 240 frames a second, whatever it is, you may want to do those in batches to make sure that you are exporting your clips with the proper frame rate if that's something that you need to preserve. And finally, I wanted to reiterate that the things that I talked about in this course just barely scratched the surface of what's possible in Davinci resolve. This is an incredibly powerful application with a lot of very complex and very useful color correction and color grading features it's also a very capable editor. But just in terms of color correction, there's a lot more than what I talked about here. So if you want to explore that further, make sure you keep your eye out for more training right here on Invodo because Resolve is an incredible application, it's very, very powerful for color manipulation and it's a real top notch professional application. So that about wraps it up for this course. We'll be found this interesting and I hope you can use the skills that you learned in this course to take your color reference targets, pull your footage into Resolve, color match it very, very quickly, and export it back out to your editor, so that you are getting accurate color corrections faster than you ever did before. Again, thanks so much for watching. My name is Dave Bodie for Invado. And I'll see you around.


