
 Lessons: 12Length: 1.2 hours
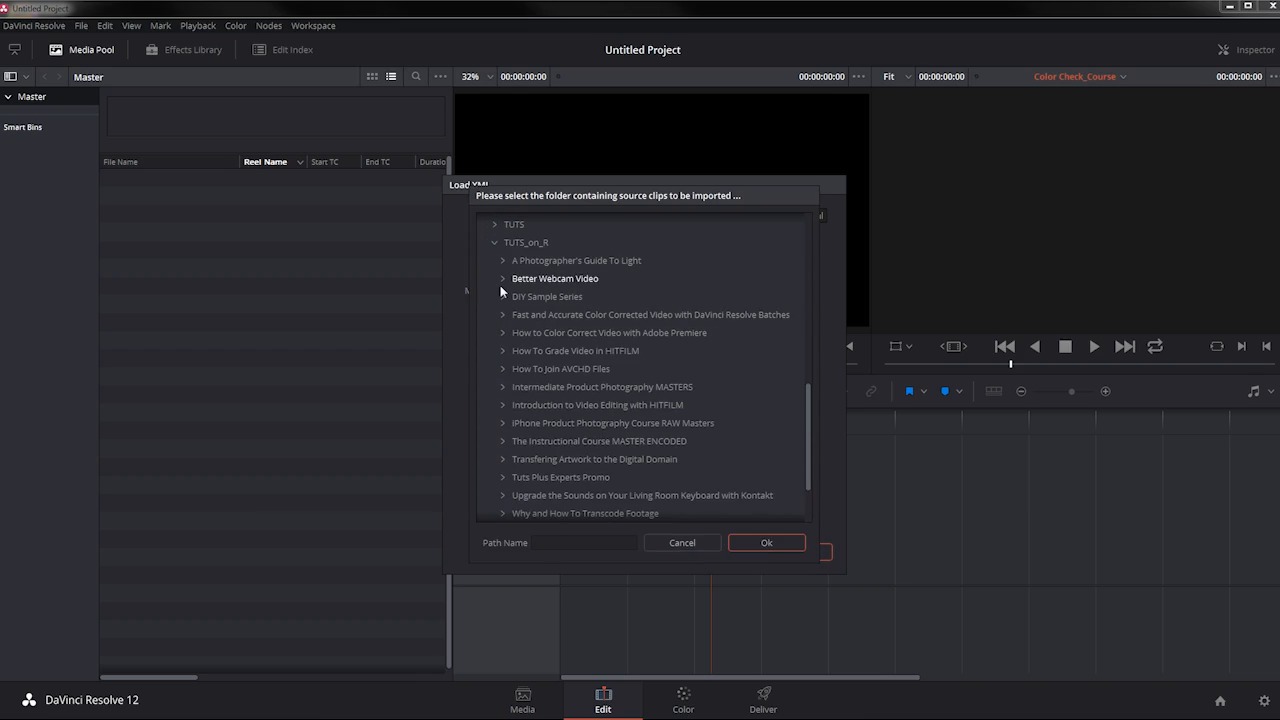
- Overview
- Transcript
3.3 Import
In this lesson you will learn how to import your clips with and without an XML file.
1.Introduction
1.1Introduction01:12
1.2What You Need05:05
2.Getting Started
2.1What Is Color Correction?06:14
2.2When to Correct06:02
3.The Process
3.1Resolve Interface05:53
3.2Scope Basics07:01
3.3Import08:47
4.Color Correction
4.1Match Color06:37
4.2Copy the Adjustment and Apply02:59
4.3Tweak Individual Clips05:46
4.4Export08:12
5.Conclusion
5.1Conclusion06:26
3.3 Import
Resolve makes it easy to work with other applications like Adobe's Premier Pro, Apple's Final Cut Pro X, Avid's Media Composer, and many others because it supports XML, AAF, and EDL import and export workflows. So, let's show you two ways that you can import your footage depending on what application you're using, what video codecs you are working with. The easiest thing to do would be to export an XML file if you're on Premiere or final cut. And if you're using media composer, you can do the same thing using AAF. For other applications you may not have the option to export in a format that will let you import directly. If you're using something else like HitFilm or Lightworks you may not have the option to export an XML, so you may have to do something a little bit different. First, I want to show you how to import a project from Premiere. This process should be very similar if you are importing from Final Cut and Avid as well, so want to come over here to file import AAF, EDL, XML.. And I'm going to choose my XML file that I exported from Premier. Now, you can see that there are a few versions of MyXML file and that's because this process is not always straightforward. You may have issues exporting if you're using any kind of effects, if you're modifying the speed of any of your clips. And certain codecs do not work very well when you're trying to export your project from premiere and import it to resolve. For example, my Canon C100 files work just fine in resolve and they work just fine and Premier want to export an XML using those MT's files they do not import directly into resolve. This is because there is some kind of strangeness in the AVC HD timecode for the individual files and they don't work exactly. There are some workarounds where you can import the clips directly and then force conform inside of Resolve. But I want to show you a project that uses ProRes files because it's much more straightforward. So, I'm going to select this XML file right here, then it brings up a dialog box with a bunch of options. Primarily you want to be looking for automatic set project settings automatically import source clips into the media pool and you can pretty much leave all the rest of the options at their defaults. The timeline is the only time on that I have in Premier. So, I'm just going to click OK, and there you go. This is the project in its entirety it's five clips and that's pretty much it. Now in Premiere, I left a few seconds of these reference clips in here you can see there's one right here with me holding this color checker and then there's another one right here just a second or so. And in an upcoming lesson, I'm going to show you how to use these reference clips to color correct the other clips that don't have those reference targets in them. It's very fast and it's very easy. These files import just fine, there are several other cameras that have the right kind of time code that works just fine. This is something that you're gonna wanna investigate before you get involved in a super huge project and try this workflow. You're gonna want to set something up in Premiere, just a small little project, export an XML file, and see if it imports into Resolve before you get involved in a super big project and find out that you need to do a lot of work to make it work in Resolve. So, that's one way it's very quick, it's very easy this is exactly how this timeline looks in Premiere and I can get to work coloring this and then exploiting it and re-importing into Premier should be no problem. I'm going to select all of these and get rid of them here. And I'll show you what happens if I try in import one of those other files. So, this guy right here, the same process. I'm gonna leave the settings at their default and when I click OK, it says 15 of 15 clips were not found yet. Well, there's actually only five clips, so already there's a little bit of a red flag here. I want to tell it to search and point it in the right folder. And it says five clips were found, those are the right five clips, but it's still looking for another 10 clips. I'm going to say no and then I get this big fat error dialog box here that says something's wrong with the time code here in the real names. None of the clips work and if I come over here you can see none of these clips are working quite right. So, there is a little bit of a workaround for this. I'm just going to get rid of this stuff right here I'm gonna navigate to the folder where I have these clips located, right here, I'm gonna import these into the media pool then I'm going to import my project again, and this time I'm going to not automatically import source clips. Alright, so, I get the same problem again. The time code doesn't match with the clips in the media pool. So, what I can do here and this is a little bit labor intensive but it is one workaround is I'm gonna select the clip in the timeline here. You can see this is 00000. I'm gonna select the clip in the media pool. Right click here on the clip in the timeline and say force conform. It's just off the screen here. So, right here force conform with selected media pool clip and that didn't work because I had it selected on the wrong clip. So, let me try that again. Force conform with selected media pool clip. And now, I have that lined up there. Now you have to do this individually to all of your clips, so again, when I do it to this clip right here. Now this is only a partial workaround because I have the right clip duration and the right clip is now in the timeline. Unfortunately, it doesn't have the right in and out point. It defaults to the very beginning of the clip which is not right. You can see I deliberately trimmed this part out here where I'm sticking my tongue out for no apparent reason. And so, this clip you'd have to go back and manually adjust all of these clips which is kind of a pain. So, if this doesn't work for you and the time code is still goofed up. You're going to have to go about this in a different way. I'm gonna delete all of this stuff here. Remove. And I'm just going to jump back to the media pool and import these clips. Just like I did before, going to navigate to them. And these are the only clips that I'm dealing with in my project. So, pretend for a second that these are the only clips that you're dealing with for your project. I import them all. By just dragging them down into the media pool. I can just right click up here and say add in to media pool. And then, what I wanna do is select all of the files. Right click and then choose create timeline using selected clips. Just leave it at the default. And what this is going to do is create a timeline with all of these clips here in their full duration and that's not going to match up at all with what I had in Premiere but what I can do with this workflow is make the color corrections. In here, and then when I export this project I want to transpose these clips which are currently in ABC HD format the files are going to get really big but there's not going to be any perceivable loss of quality and so, back in Premiere I can just reeling all of these files and everything should work just fine. The easiest thing to do is export an XML file from your editor, import it into Resolve, get to work color correcting your files. If that doesn't work what you're going to have to do is import all of your files, which means you're going to be transcoding more material because you won't be transcoding just the parts of the clips that you need that have been nicely trimmed you're going to be transcoding everything. So, it's going to take up more space but it's definitely a usable workflow to import all of your clips color correct them then re-import them in a real link In your project in Premiere or Final Cut or Avid, and then you can go from there. In the next lesson, you're going to learn how to neutralize the color using these color targets. So, check that out coming up next.


