
 Lessons: 12Length: 1.2 hours
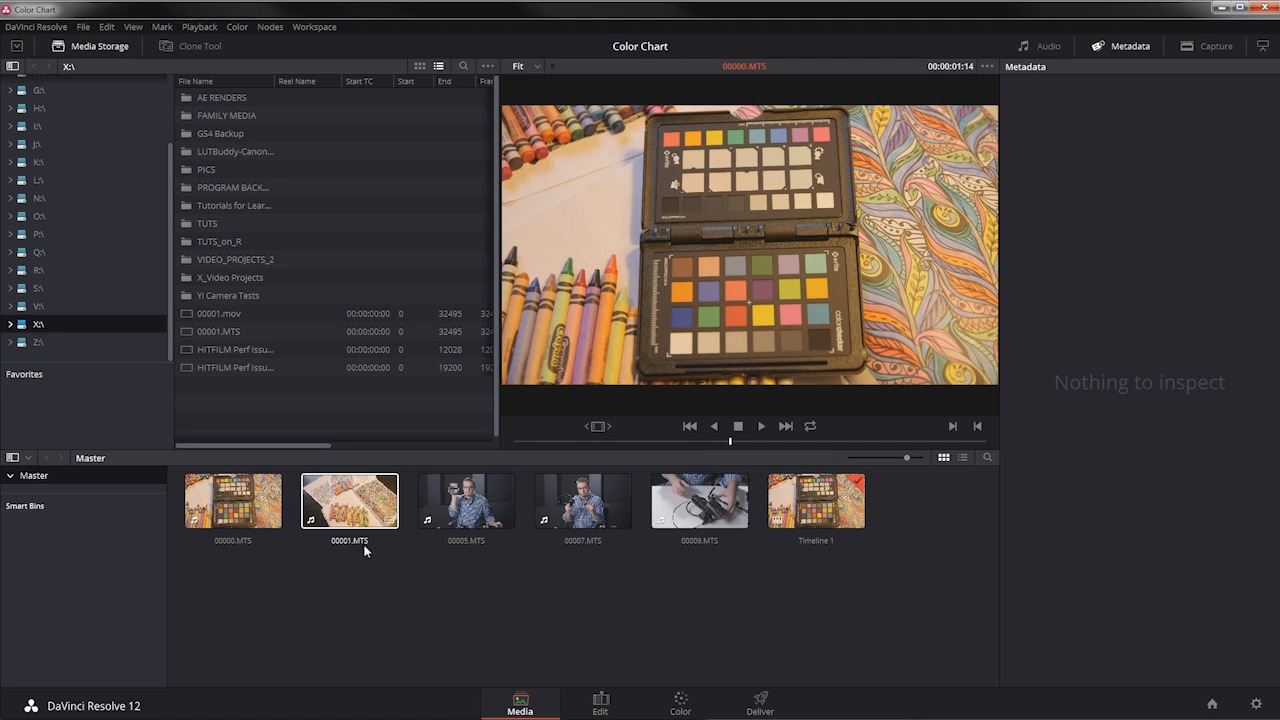
- Overview
- Transcript
3.1 Resolve Interface
In this lesson, you will get a short overview of the Resolve interface to help you follow along in the next few lessons.
1.Introduction
1.1Introduction01:12
1.2What You Need05:05
2.Getting Started
2.1What Is Color Correction?06:14
2.2When to Correct06:02
3.The Process
3.1Resolve Interface05:53
3.2Scope Basics07:01
3.3Import08:47
4.Color Correction
4.1Match Color06:37
4.2Copy the Adjustment and Apply02:59
4.3Tweak Individual Clips05:46
4.4Export08:12
5.Conclusion
5.1Conclusion06:26
3.1 Resolve Interface
In this lesson, you will get a short overview of the Resolve interface. This will help you follow along as you go through the rest of the course. So I'm in Resolve here and I've already imported some footage so you can see what this looks like when it's populated with some media. Now, this is not going to be a complete overview of the entire interface in Resolve, because Resolve is an incredibly complex piece of software. What you are going to learn is basically just what you need to know in order to process your footage, to color match your footage using these color reference targets here and to trans-code your footage for your editor. Now, you actually could use Resolve to edit your projects, Resolve has a very nice editor right here with many, many functions that you'll find in other editors like Premiere and Final Cut and Avid. It's not as fully featured but for basic cutting together of footage, this is a great option. But that's not what we're here to talk about. I want to walk through really quickly the four main pages and what you'll find in Resolve. So, you can see right down here there are four buttons and these take you to four separate pages of the Resolve interface. Right here, you're looking at the media page, and in here, you have your media browser, this is where you can browse using this little inspector or on windows you would call an explorer type interface where you can look at your different drives, you can see that I have quite a few drives on my computer here, but this is where you would go to navigate and look for your footage to import it. Now you can also just navigate to a folder and drag footage in as well Just like that. I'm gonna undo that because I already have that clip in here. And unlike some other free options, Resolve works very nicely with AVCHD footage and other cameras that organize the files in kind of a weird way or maybe the camera does some file spanning or file splitting. In this case, these particular files came off a Canon C100 which does do file splitting. This means that every two gigabytes or about every 11 to 12 minutes, the C100 will create a new file, that's not a new start stop of a recording, it's just a new file. And the nice thing is that Resolve will interpret that, so if you have a long 40 minute recording, you won't get individual spanned clips, Resolve is smart enough to know that those go together and everything works seamlessly. So it's very, very easy. You're gonna learn more about the import process coming up in another lesson so we don't have to worry about that right now. Right here, you have the viewer, this is where you can scrub your clips and mark your in and out points. That's not something that I'm going to be doing in this course because I'm gonna be showing you how to get all your video in color correct it in and get all your video out, so you're not gonna have to do any marking of in and out in this course. Over here is the edit page and this is where you will find your timeline where you placed all your clips. Now in Resolve, in order to color correct your video you're going to have all of your clips in a timeline, otherwise they won't show up in the color page which is right here. That means that you may have to insert some of these reference clips into your edit, but that's something that you're going to learn down the road. Now, this edit page is very similar to what you'll find in other video editing applications. It's got all the standard trim tools in here and some very basic effects. Again, in this course, that's not something that I'm going to be getting into, because I'm going to be focusing on color correcting footage, and that's going to happen over here in the color page, now the color page has just a boatload of options in tools and various ways that you can manage your color. I'm gonna be show you this in more detail coming up later in the course, but really quickly again you have a viewer up here, you have a Nodes area over here, where you can create different nodes so you can stack different levels of color correction and color grading. You have very standard color correction tools like color wheels, you also have YRGB primaries, there's an area to manage raw footage, there's a color match panel here, that's something that I'm gonna show you in more detail. And then, there's a whole section over here, where there are a lot of tools that deal with curves, and qualifiers, and windows, and trackers, and blurs, and keys sizing. Almost all of these are outside the scope of this course because I'm gonna show you a really quick way to use these reference targets to basically neutralize your footage very, very quickly, but it's good to know these other tools are there if you need them. Over here, you have some scopes, again I'm gonna be showing you that in an upcoming lesson. And finally, you have the deliver page, this is where you're going to go once you've done your color corrections and you have your footage all dialed in, you need to export it back out so that you can get it in your editor and finish up your project. This is where you're gonna go and in an upcoming lesson, I'm going to show you exactly how to batch process or trans-code all of your footage at once. It's very, very easy and it should be pretty seamless to relink all your media in your editor. So that's essentially all you need to know in order to follow along with the rest of this course. Coming up in the next lesson, you're going to get a brief overview of the scopes in Resolve. So, check that out coming up next.


