
 Lessons: 12Length: 1.2 hours
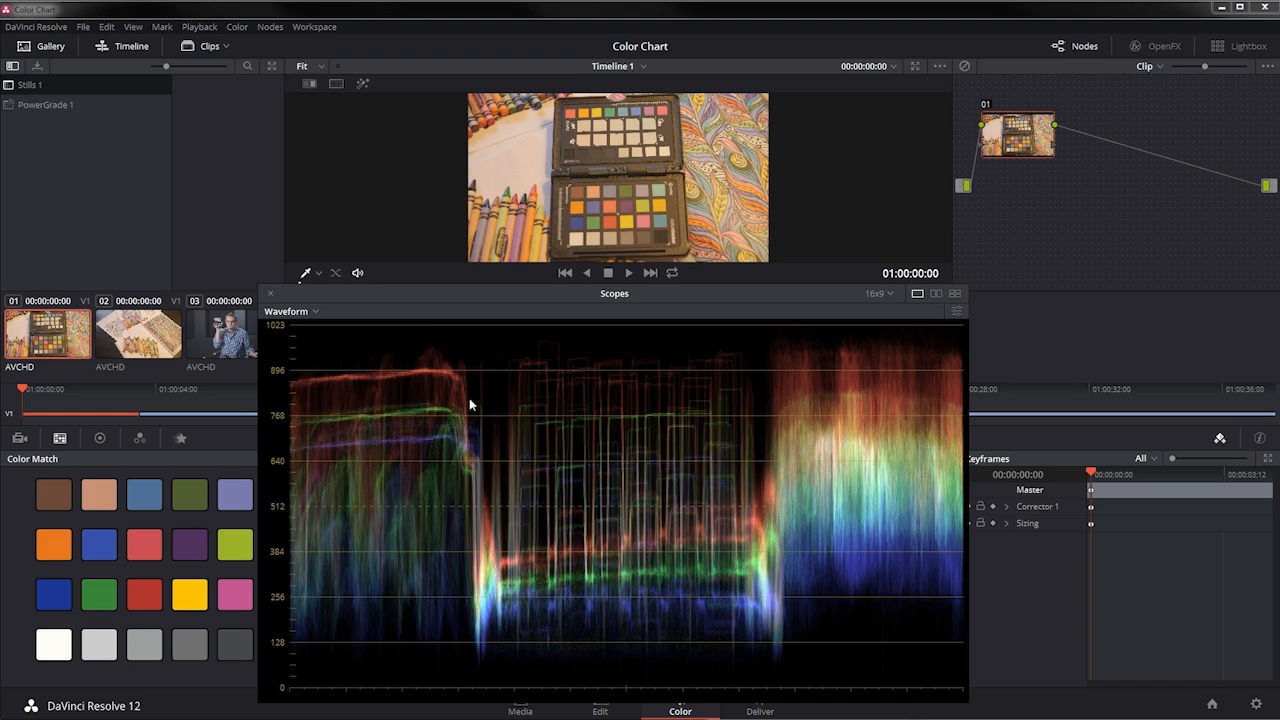
- Overview
- Transcript
3.2 Scope Basics
Your eyes are good at telling you what is going on with your picture, but scopes are even better! In this lesson you will learn about the scopes that can help your color correction process, including the vectorscope, RGB parade, and the waveform monitors.
1.Introduction
1.1Introduction01:12
1.2What You Need05:05
2.Getting Started
2.1What Is Color Correction?06:14
2.2When to Correct06:02
3.The Process
3.1Resolve Interface05:53
3.2Scope Basics07:01
3.3Import08:47
4.Color Correction
4.1Match Color06:37
4.2Copy the Adjustment and Apply02:59
4.3Tweak Individual Clips05:46
4.4Export08:12
5.Conclusion
5.1Conclusion06:26
3.2 Scope Basics
All the top video editing and image manipulation applications have scopes to assist you in finding out what is actually going on in your picture. Because sometimes your eyes are not the best judge of what's going on. So it's good to have video scopes at your disposal, and Resolve is no different. In this lesson, you will learn about the scopes available in Resolve and how they can help you in your color correction process. So over here in the color page, there is an option right here for scopes. And if, for whatever reason, you don't see this, let's just get rid of it here, you can click this button right here it says Scopes. Now right now these scopes are a little small because I have this window kind of crunched down to fit this recording. You can pop these out and put these on a separate monitor and that may be helpful for you. But I'll make them a little bit bigger here, so that you can see what's going on. You might have picked up that there's an option here to set this to 4x3 or 16x9. This will help you to better fit a second monitor. And you have some options up here on how many scopes you want to see. You can have just one up, or two up, or four up, and that can be helpful depending on your style and what you like to see. Let's take a look at these one at a time. This scope right here is the waveform monitor, sometimes abbreviated as WFM. This overlays the red, green and blue channels over one another so that you can see how they all align. Now right now, this scope is showing me red, blue and green. I go over under the little settings button right here. I can turn on Y, which is luma, or I can look at individual channels here, I can just look at red, red and green, red and blue. Now you can see that this scope here has a scale from 0 to 1023. Now technically that's 10-bit values. In 8-bit you have from 0 to 255, but in 10-bit you have values from 0 to 1023. Now my footage is actually in 8-bit, but I believe Resolve is working in 10-bit mode here, which will give me maybe finer adjustments. But just so that's what this range is here, 1023 is the very, very brightest we can have and 0 is the very, very darkest. So in your individual channels here, if we had red, blue, and green all the way up here, that would be full white. And if it was all the way down at 0, that would be complete black. Now the waveform monitor is very similar to the parade monitor. This is essentially the same exact thing, but instead of red, green and blue being overlaid, they're on three separate columns here. Now this corresponds to the image here in the viewer from left to right or from right to left, if you will. Let's jump back to the waveform really quick here and I'll make this slightly smaller. So you can see there's a light part of the image up here and that is corresponding to this portion right here, you can see that it's kind of an orange. So orange is red and green, and you can see that we have red and green right there. And over here we have lots of colors, but this whole image is kind of tinted orange. So you're probably going to see more red and if you look at this scope, you are, the red channel is brighter than the green and the blue channel. Now if I jump over to the parade scope, you're gonna see the same exact thing. There's just more red overall in this image. And that right there should give you an indication of what may need to happen to fix this image. This is supposed to be white and so white would be an even mix of red, green and blue. Right now it is not, so that's something that can help you judge the colors of your video. Now, you also have a vector scope. The vector scope measures the overall range of hue and saturation within an image. These targets here line up roughly with this color wheel, so you can see you have red, magenta, blue, cyan, green, yellow. And this kind of squiggly blob here is showing you the distribution of the colors and saturation of your image. As things move away from the center point, they are more saturated. And as they are closer to the middle, they are less saturated. Let me show you here. I'll just desaturate this image and you can see what's going to happen on this scope. As I resaturate this image and push it way up, you're going to see where things are falling. You can see right here it looks like we're clipping, we're kind of hitting a wall. Now if I change the hue, you're going to see where the colors fall in different directions as we push this to blue and cyan and back around the other way to green. This is showing you where the colors are falling and this can be useful to get an idea of what's happening to the colors. Because sometimes it's not easy to see what's happening in the red, blue and green channels. Because you may not know exactly what color that is. But looking at this vector scope, it's pretty easy to see that there's a lot of color in this direction right here. And that is kind of this orange area right here. This is also useful in checking skin tones because if you have skin tones, they should be right along this orange line right here. Finally you have a histogram. This shows you how the pixels are mapped across the luminous range. So up here you have the brightest, down here you have the darkest. And this is showing you basically where the pixels are following in this range. This is not a scope that I usually ever use, most of the time I use the waveform or the parade or the vector scope. Now because I'm gonna be showing you how to use these reference targets here, you're not going to have to do so much kind of eyeballing with your image and the scope here, to dial in your colors. Because this is kind of an automated process. But these scopes are going to be useful to basically check your work, to make sure that if you see something that's white, that you can look over here and it should be making a white color with red, green and blue. And that's something that you're going to see coming up in another lesson. So that's the basics of the video scopes here in Resolve. I'm gonna talk about them more in some upcoming lessons but for now, it's time to move on to the next lesson. Where you're gonna learn how to import your clips with and without an XML file.


